Crispy Pan Fried Fish Fingers

This post may contain affiliate links. Read my full disclosure policy.
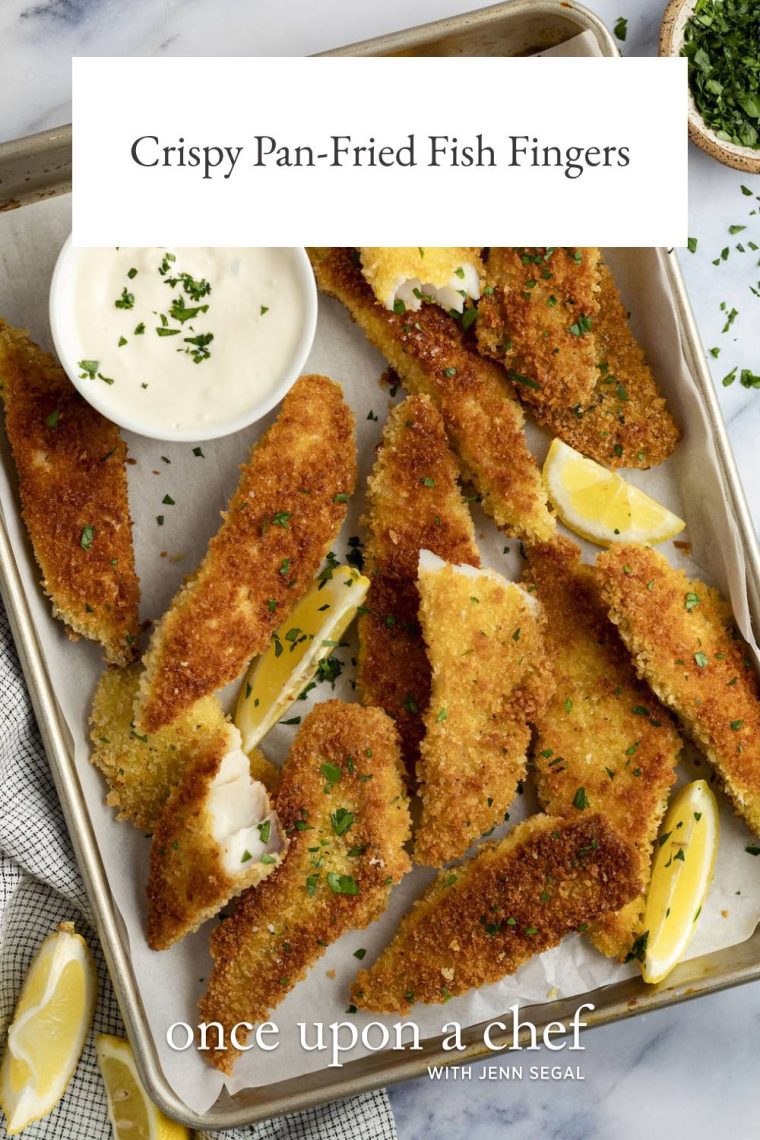
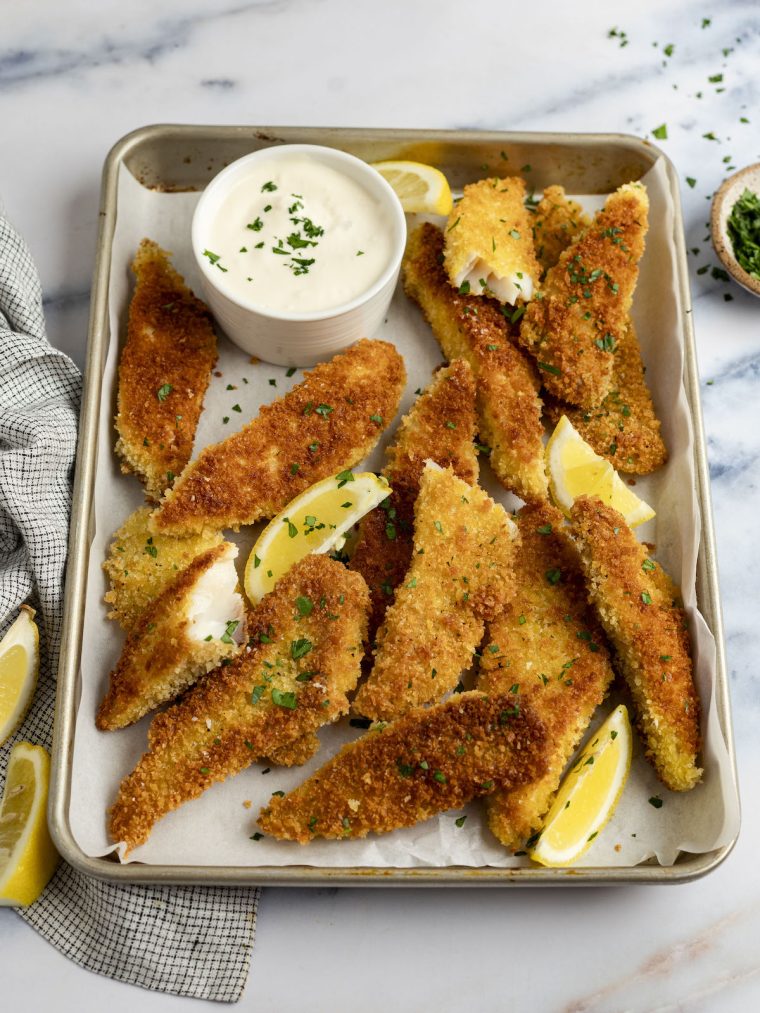
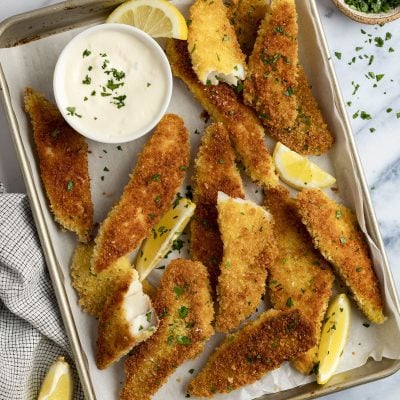
Prepare a fun hands-on weeknight dinner with these pan fried fish fingers — juicy on the inside, golden and crusty outside, with delicious lemon-garlic mayo for dipping.
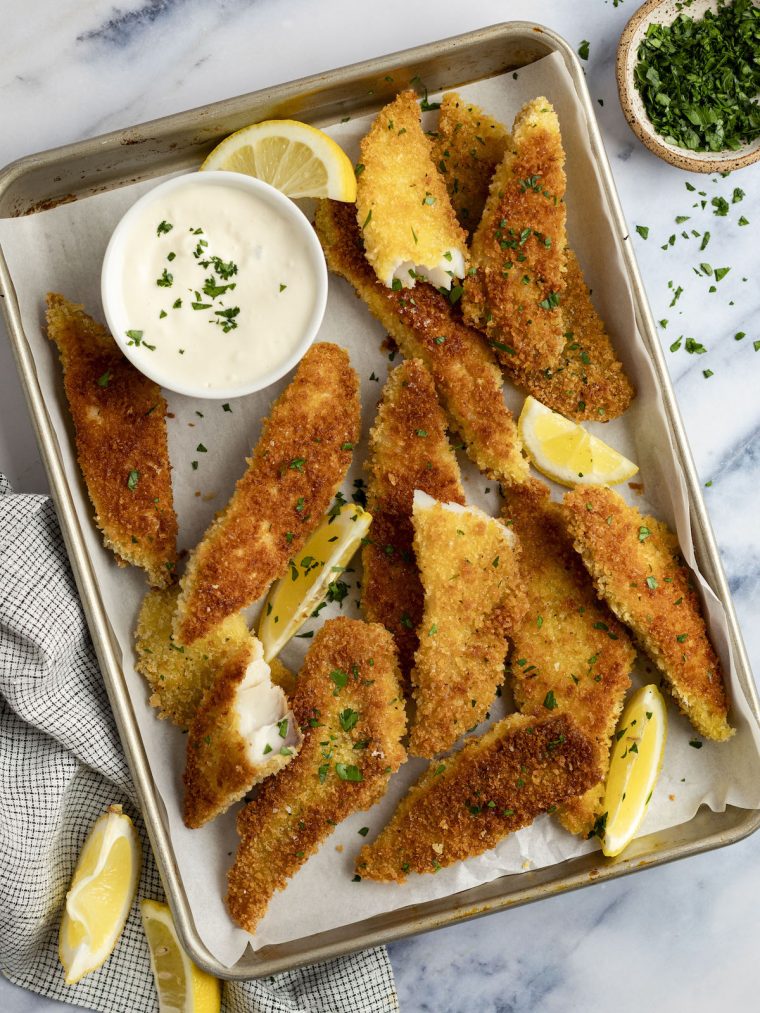
If you’re looking for a way to introduce your kids to fish, these pan fried fish fingers might just be the trick. They’ve got all the hallmarks of kid-friendly fare—crunchy and easy to eat with your hands—yet they appeal to grown-ups too. The fish fillets are lightly breaded with panko, pan-fried until golden-crisp, and paired with a tangy garlic and lemon mayonnaise. It’s my go-to recipe for turning ordinary tilapia into something special.
If tilapia isn’t your preference, cod or haddock also work nicely, so feel free to use whatever you have on hand. And for more crispy fish recipes, don’t miss my panko-crusted baked salmon, tortilla-crusted tilapia, and panko-coated fresh salmon cakes.
“My family LOVES this meal! My pickiest eater requests it weekly and that’s fine by me as I also love it and it’s easy to prep ahead of time. The lemon-garlic mayo really elevates the dish.”
What You’ll Need To Make Crispy Pan Fried Fish Fingers
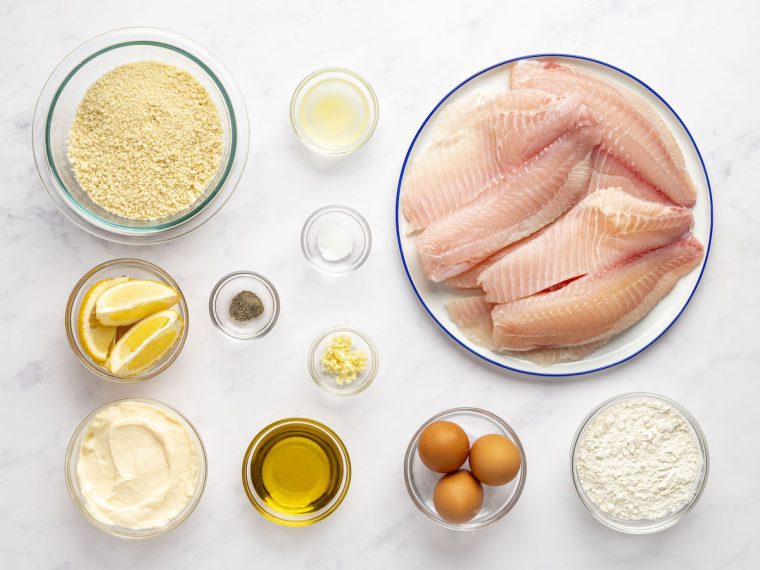
- Tilapia fillets: A mild, versatile, and readily-available fish, perfect for breading and frying.
- All-purpose flour: The first step in the breading process, it helps the egg wash adhere to the fish.
- Eggs: Act as a binding agent between the flour and panko, ensuring the breading sticks to the fish.
- Panko: Provides the outer layer, giving the fish sticks their signature crunchy texture.
- Olive oil: Used for pan-frying, it gives the fish sticks a golden color and crispy texture.
- Lemon: Brightens the flavor of the fish when squeezed over just before eating; also brightens the flavor of the dipping sauce.
- Mayonnaise, best quality such as Hellmann’s or Duke’s: Serves as the creamy base for the dipping sauce.
- Garlic: Infuses the dipping sauce with a pungent, aromatic flavor.
- Jump to the printable recipe for precise measurements
Step-by-Step Instructions
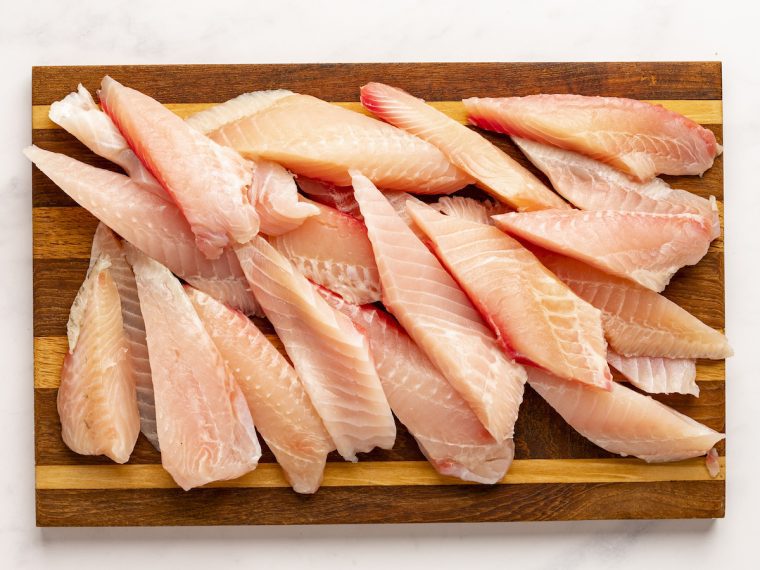
Cut the tilapia into “fingers” by first cutting the fillets in half. Leave the thin sides long, then cut the thicker sides in half on a diagonal so they appear longer.
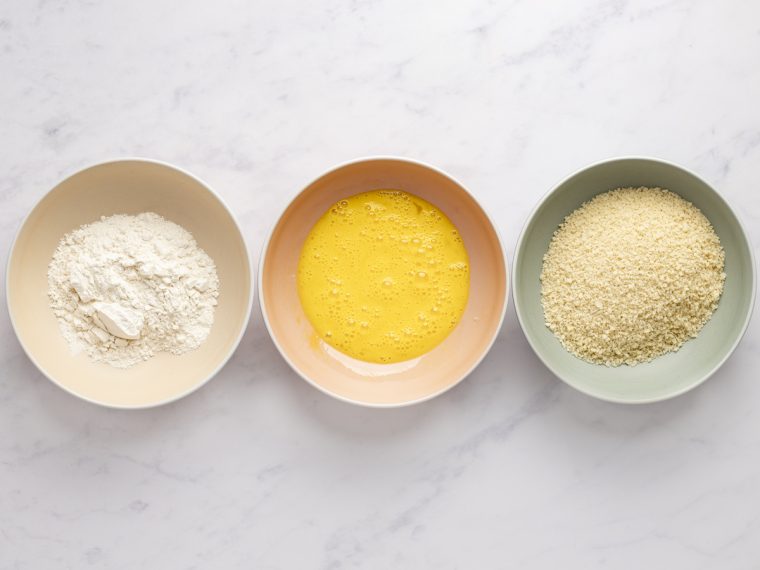
Set up three large shallow bowls in an assembly line. Put the flour in the first bowl; the beaten eggs in the second; and the panko in the third.
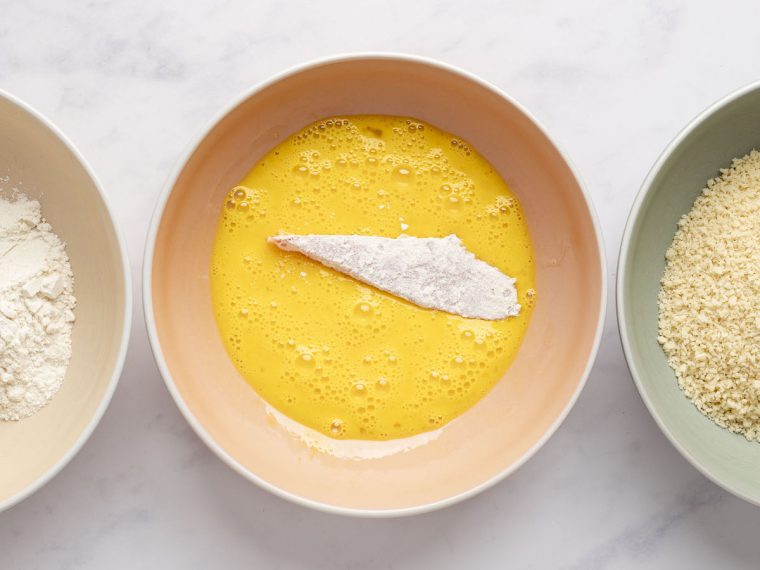
Line a baking sheet with aluminum foil. Dredge the fish fingers in the flour mixture, shaking excess into the bowl so just a light coating remains; then dip in the eggs and turn to coat evenly.
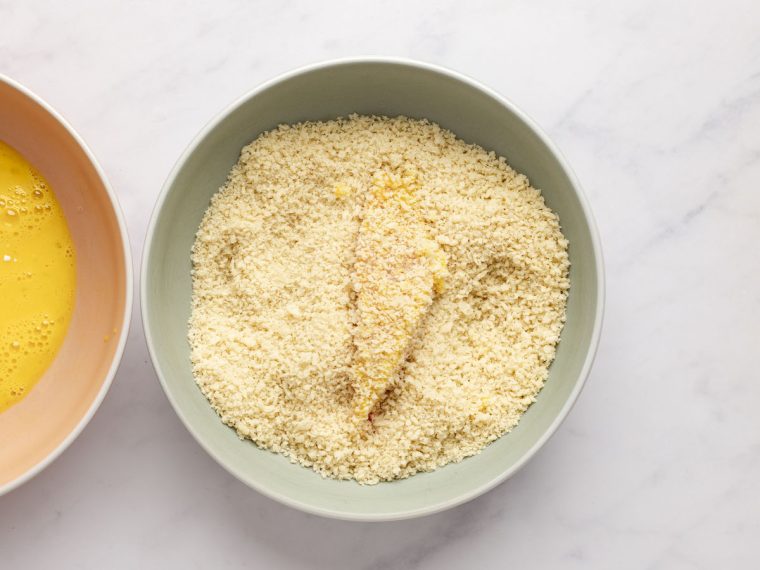
Finally, dredge in the panko, turning several times to coat evenly.
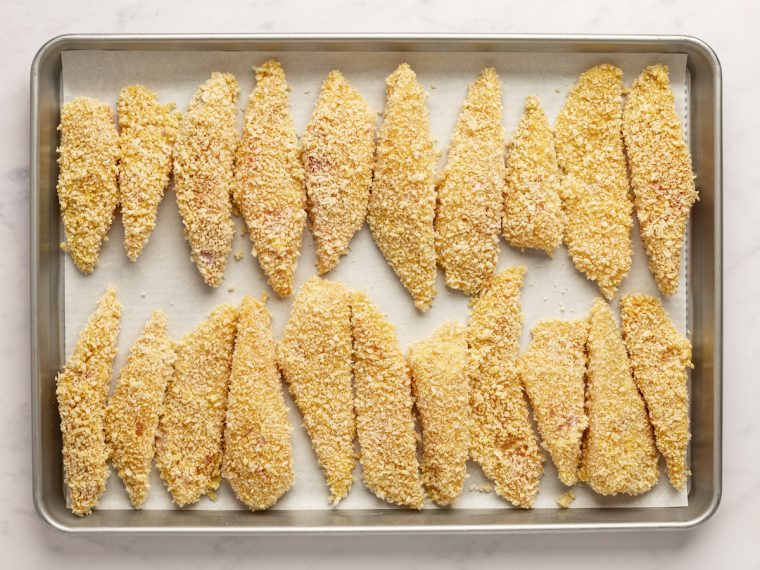
Set the breaded tilapia fingers on the prepared baking sheet and season generously with salt and pepper. Cover and refrigerate until ready to cook (this can be done several hours ahead of time).
Line a plate with 3 paper towels and set by the stove. Coat a large non-stick skillet generously with olive oil and place over medium heat. When the pan is hot, place the first batch of tilapia fingers in the pan, without crowding, and cook until the first side is golden brown, 2 to 3 minutes. Flip and continue cooking until done, about 2 minutes more.
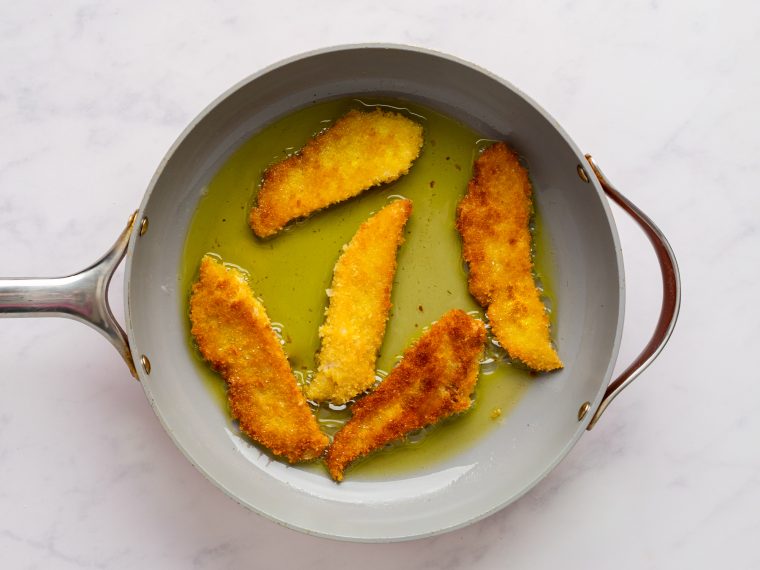
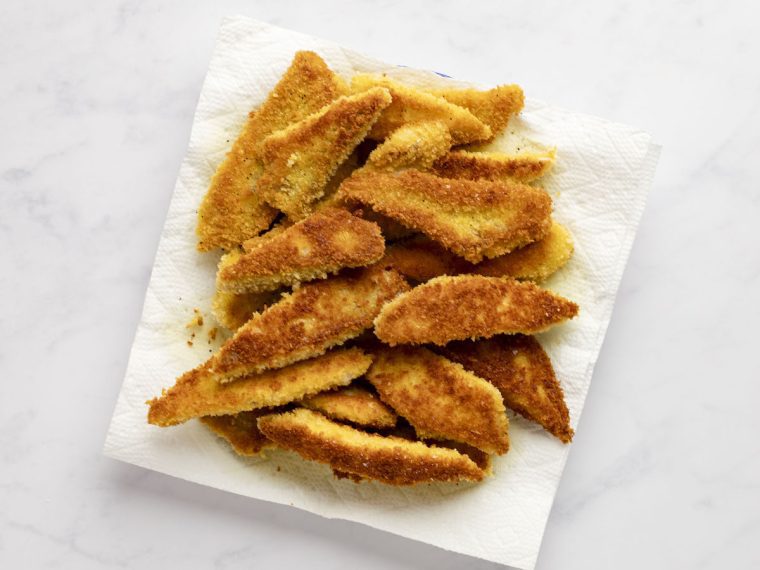
Transfer the fish fingers to the plate with paper towels and let sit for a minute to drain any excess oil. Remove any brown bits out of the pan, add more oil if necessary and continue to cook the fish in batches until done. Season the cooked tilapia fingers with more salt if desired.
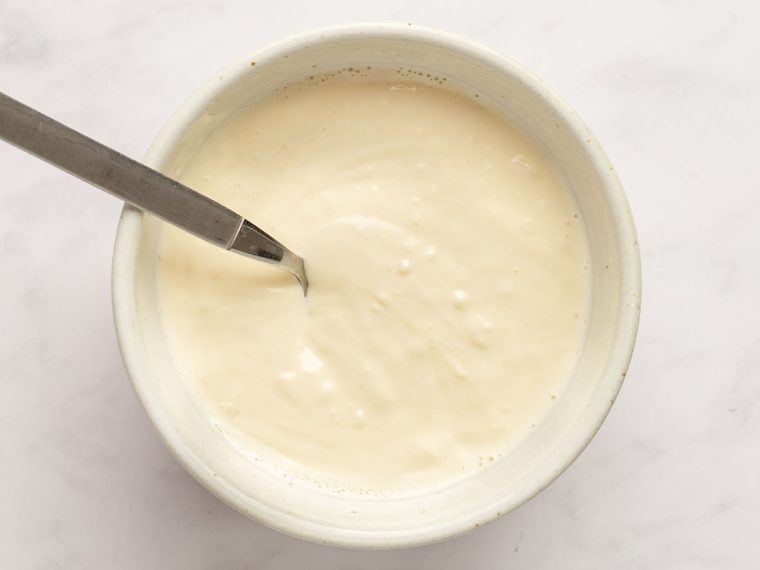
To make the sauce, combine the mayonnaise, lemon, and garlic in a small bowl.
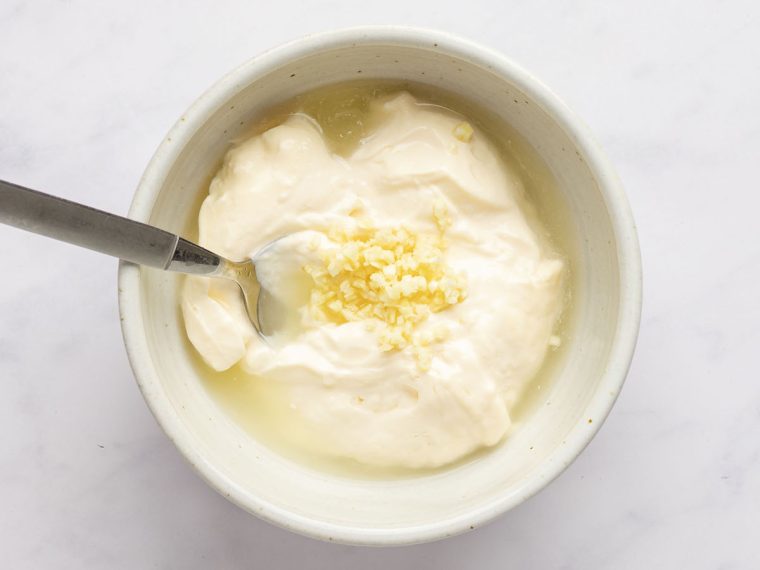
Stir to combine and season to taste with salt and pepper.
Serve the fried fish fingers with the sauce and lemon wedges.
Frequently Asked Questions
The fish sticks can be breaded and refrigerated up to 3 hours ahead of time. However, it’s important to pan-fry just before serving for best results.
Yes, you can freeze the fish sticks before frying for convenient future meals. After breading the fish sticks with flour, eggs, and panko, lay them on a baking sheet lined with parchment paper. Freeze them on the baking sheet until they’re solid, then transfer to a freezer-safe bag or container. They can be stored for up to 3 months. When you’re ready to cook, allow them to defrost slightly so they’ll lay flat in the pan, then follow the cooking instructions.
Yes, after frying, let the fish sticks cool completely. Then, freeze them in a single layer on a baking sheet before transferring to a freezer bag or container, preventing them from sticking together. Reheat in an oven preheated to 350°F until they are hot and crispy again.
You May Also Like


Crispy Pan Fried Fish Fingers
Ingredients
For the Fish
- 2 pounds tilapia fillets (cod or haddock may be substituted)
- 1 cup all-purpose flour
- 3 eggs, beaten
- 2 cups panko
- Salt
- Freshly ground black pepper
- Olive oil
- 1 lemon, cut into wedges
For the Lemon-Garlic Mayonnaise
- 1 cup mayonnaise, best quality such as Hellmann's or Duke's
- 1 clove garlic, minced
- 2 tablespoons freshly squeezed lemon juice, from 1 lemon
- Salt and freshly ground black pepper to taste
Instructions
For the Tilapia Fingers
- Cut the tilapia into "fingers" by first cutting the fillets in half. Leave the thin sides long, then cut the thicker sides in half on a diagonal so they appear longer.
- Set up three large shallow bowls in an assembly line. Put the flour in the first bowl; the beaten eggs in the second; and the panko in the third.
- Line a baking sheet with aluminum foil. Dredge the fish fingers in the flour mixture, shaking excess into the bowl so just a light coating remains; dip in the eggs and turn to coat evenly; then dredge in the panko, turning several times to coat evenly. (This can be a messy job...it's best to use one hand for the flour and eggs and the other for the panko.) Set the breaded tilapia fingers on the prepared baking sheet and season with salt and pepper. Cover and refrigerate until ready to cook (this can be done several hours ahead of time).
- Line a plate with 3 paper towels and set by the stove. Coat a large non-stick sauté pan generously with olive oil and place over medium heat. When the pan is hot, place the first batch of tilapia fingers in the pan (do not crowd) and cook until the first side is golden brown, 2 to 3 minutes. Flip and continue cooking until done, about 2 minutes more. Transfer the fish fingers to the plate with paper towels and let sit for a minute to drain any excess oil. Remove any brown bits out of the pan, add more oil if necessary and continue to cook the fish in batches until done. Season the cooked tilapia fingers with more salt if desired. Serve with lemon wedges and Lemon-Garlic Mayonnaise.
For the Lemon-Garlic Mayonnaise
- Mix the mayonnaise, garlic and lemon juice in a small bowl. Add salt and pepper to taste.
Notes

This website is written and produced for informational purposes only. I am not a certified nutritionist and the nutritional data on this site has not been evaluated or approved by a nutritionist or the Food and Drug Administration. Nutritional information is offered as a courtesy and should not be construed as a guarantee. The data is calculated through an online nutritional calculator, Edamam.com. Although I do my best to provide accurate nutritional information, these figures should be considered estimates only. Varying factors such as product types or brands purchased, natural fluctuations in fresh produce, and the way ingredients are processed change the effective nutritional information in any given recipe. Furthermore, different online calculators provide different results depending on their own nutrition fact sources and algorithms. To obtain the most accurate nutritional information in a given recipe, you should calculate the nutritional information with the actual ingredients used in your recipe, using your preferred nutrition calculator.
I may have said something about this recipe before , but it bears repeating. This is an absolute winner. My good friend-a 30 year, opinionated chef-was ecstatic tonight. My only recommendation is to make those Italian garlicky breadcrumbs. Fabulous!
Be aware of your source for Tilapia. China provies much of this fish from their fish farms. I know from a friend of mine from Malawi that the Chinese have built a fish food processing plant in Malawi for feed fish that they are harvesting from their large lake that borders Malawi. The fishing boats and processing plant provide much needed jobs for Malawi locals. The more urgent downside is that this harvest of feed fish is killing off the fish higher in the food chain, which is an important protein source for the Malawi People. My recommendation is to stop purchasing Chinese fish farm Tilapia. I can provide you with contact information from my Malawi friend if you email me personally.
This is really really good. Second time making this. Bonus tip: use pangrattato—seasoned / gently toasted bread crumbs with garlic, parsley, salt and pepper. Divine!
This is a great recipe. More work than my typical tilapia prep, but so good. My toddlers actually ate almost an entire filet each. I used the panko from Costco, which comes preseasoned with parmesan, parsley, and garlic. We’re heating up leftovers in the airfryer. I especially appreciate your tip to cut through the bigger portion of the filet at the diagonal–so smart.
This was a hit for the kids as well as the adults. Thank you for the “prep ahead of time” suggestion, which made this a quick and easy meal. Don’t ignore the dipping sauce, it is well worth it and super easy! Thanks as always Jenn.
I know you mention haddock as a substitute, but can I use Mahi? It’s what I have on hand.
Sure – enjoy!