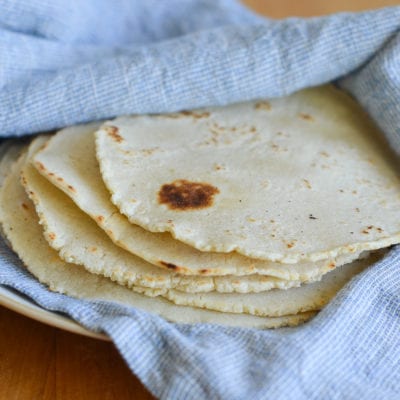
Homemade Corn Tortillas

This post may contain affiliate links. Read my full disclosure policy.
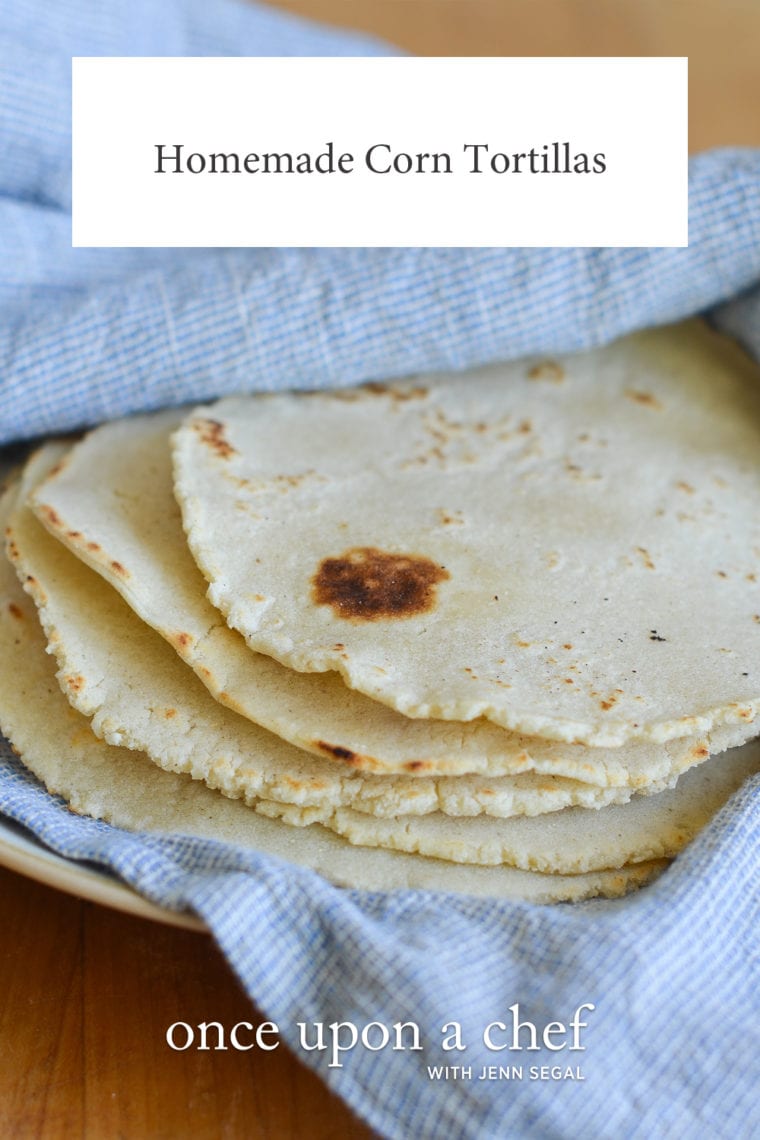
Say goodbye to store-bought and hello to the irresistible flavor of fresh homemade corn tortillas. Whether it’s taco Tuesday or an enchilada feast, your Mexican-themed dinners are about to get a delicious upgrade!
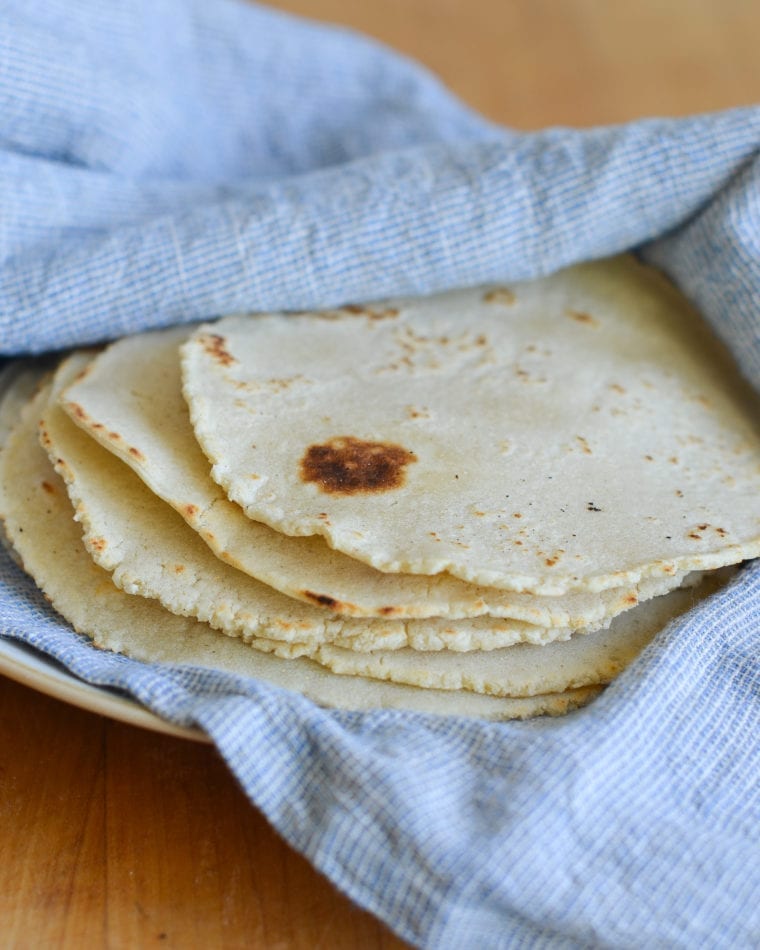
With their slightly chewy texture and crispy edges, fresh homemade corn tortillas will turn your average taco night from good to great. Not only are they super easy to make—with just three ingredients, one of which is water—but they’re also a fun DIY cooking project. I use an old-fashioned tortilla press to shape my corn tortillas. It’s a relatively inexpensive and fun kitchen tool that makes the process quick and easy. But, if you don’t have one, no worries—a glass baking dish or pie plate and a little elbow grease work just as well.
And let’s not stop at taco night—there are endless ways to use homemade corn tortillas! Enjoy them stuffed and rolled into hearty chicken enchiladas or beef enchiladas, crisped up for tostadas topped with a heap of savory goodies, or layered in a casserole dish for stacked enchiladas. They’re also wonderful in chicken tortilla soup or for making homemade tortilla chips.
“Best and fastest recipe for easy tortillas that taste much better than anything store bought.rnrn”
What You’ll Need To Make Homemade Corn Tortillas
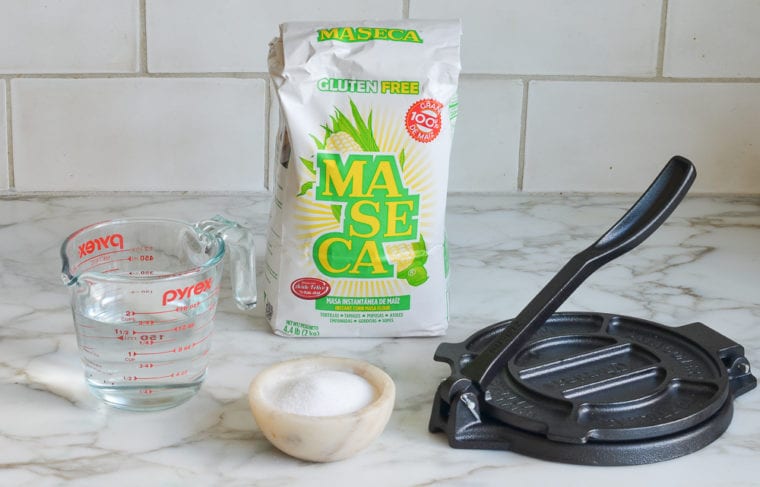
- Masa Harina: A finely ground flour made from corn, masa harina translates to “dough flour.” The corn has been dried, soaked in a solution that makes it easier to digest, dried again, and ground into flour. It can usually be found in the Latin section of most large supermarkets. (Note that masa harina is not the same as cornmeal or instant polenta, and they are not interchangeable in this recipe.)
- Salt: Seasons the dough, enhancing the flavor of the tortillas. Without salt, the tortillas will taste bland.
- Warm Water: Hydrates the masa harina, turning it into a pliable dough.
- Jump to the printable recipe for precise measurements
Step-by-Step Instructions
Step 1: Make the Dough
In a medium bowl, combine the masa harina and salt.
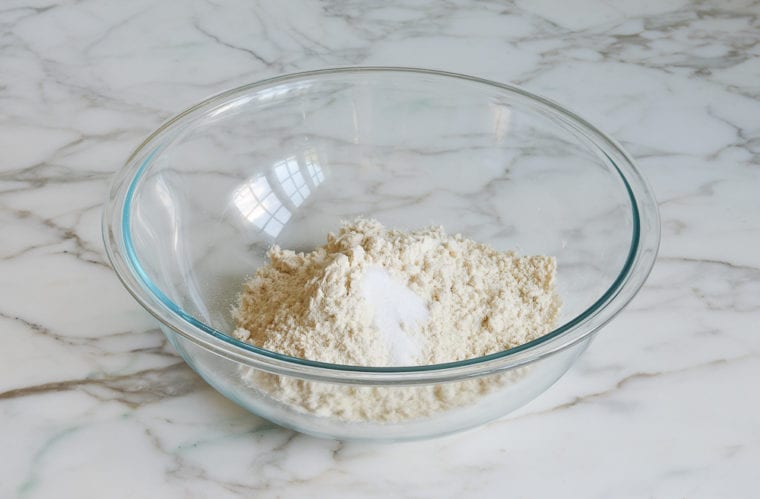
Add 1-1/2 cups of the warm water.
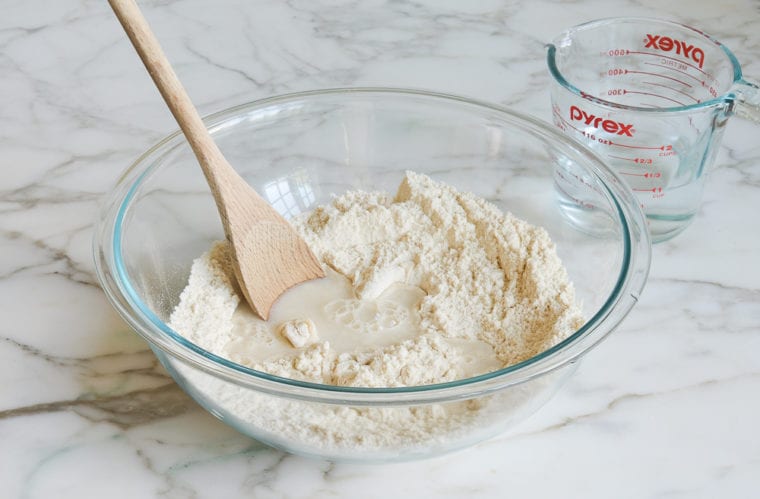
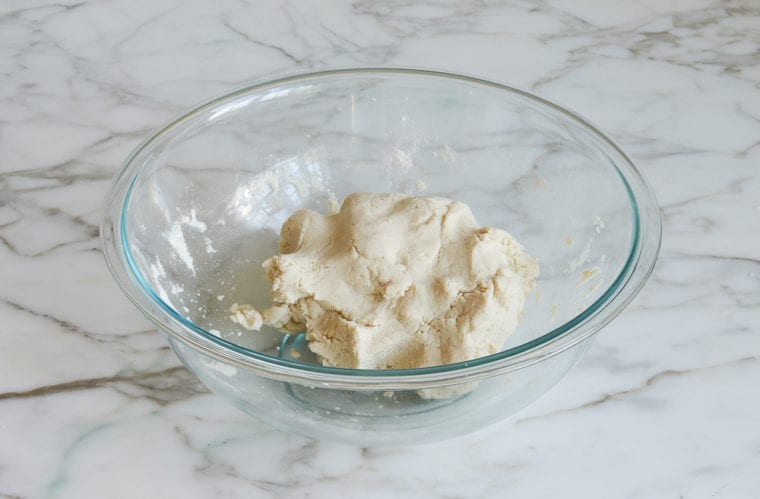
Stir with a wooden spoon until all of the water is absorbed, then work the mixture with your hands, adding up to 1/2 cup more water, a few tablespoons at a time. Your goal is to add enough water so that the mixture starts to form a cohesive dough. If the dough starts to stick to your hands, add a pinch or two more masa harina. The texture you’re aiming for is soft but not sticky (similar to Play-Doh or sugar cookie dough).
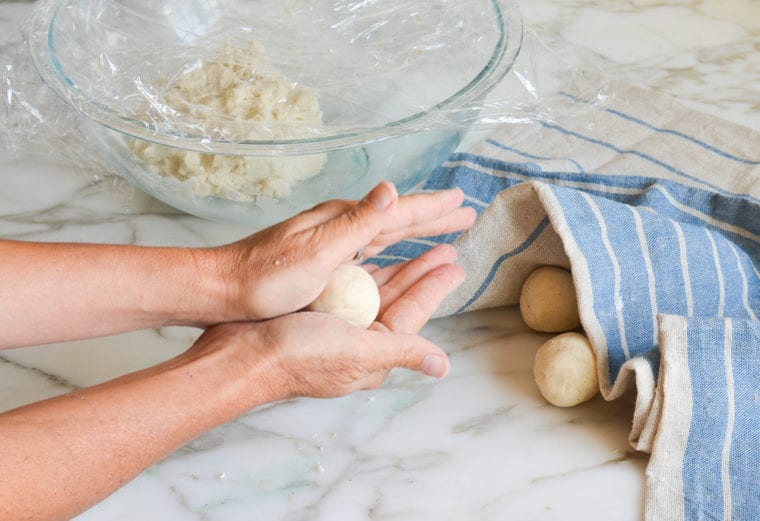
Step 2: Roll the Dough Into Balls
Roll the dough into smooth, golf ball-sized balls (about 1-1/2 ounces each). You should have enough dough to divide make about 15 tortillas that are 5 to 6 inches in diameter. Cover the dough balls with a clean, damp kitchen towel so they don’t dry out while you work.
Step 3: Press the Tortillas
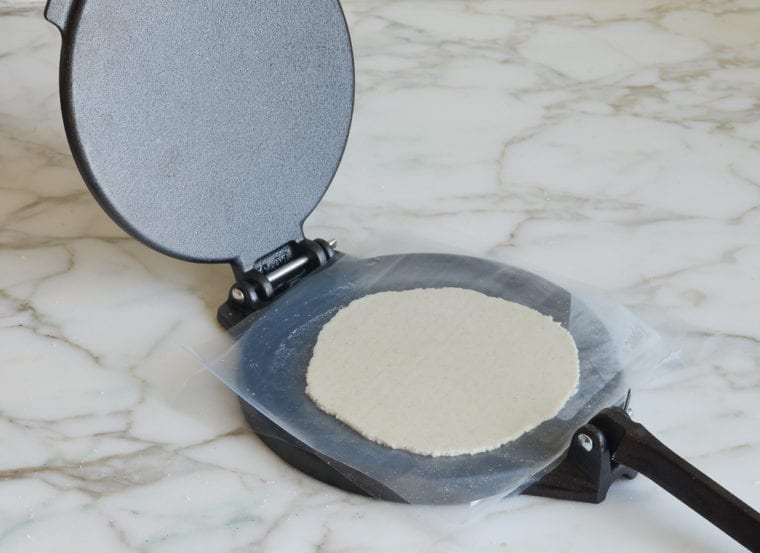
If you’re using a tortilla press, cut a gallon-size ziplock bag in half along the side and bottom seams. You should be left with two pieces with which to cover each side of the press. Trim each of the two pieces so each piece is just large enough to cover the top and bottom of the press without too much excess plastic. This keeps the dough balls from sticking to the press when you flatten them, and it also makes it easy to transfer the flattened dough to the baking sheet.
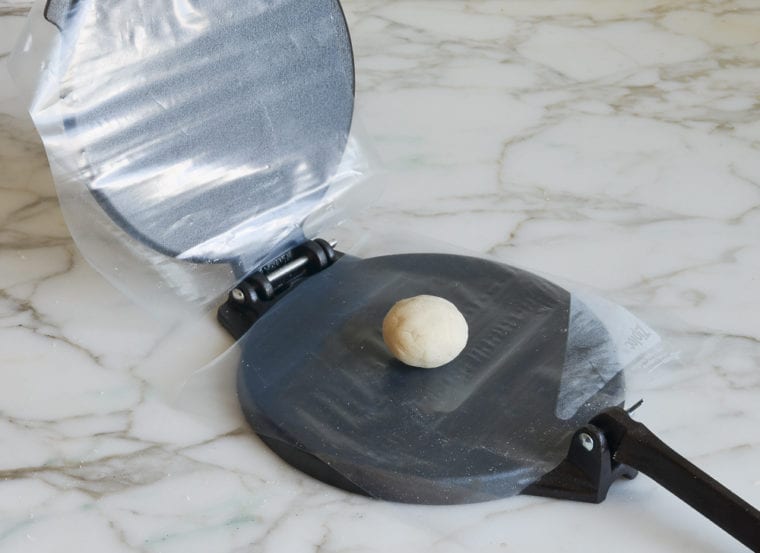
One at a time, place each ball of dough in the center of the press. Close the press and slowly push it down, holding the handle and applying firm pressure. Be careful not to apply too much pressure or the tortillas will be too thin. You may need to make a few test tortillas to get a sense of how much pressure to apply.
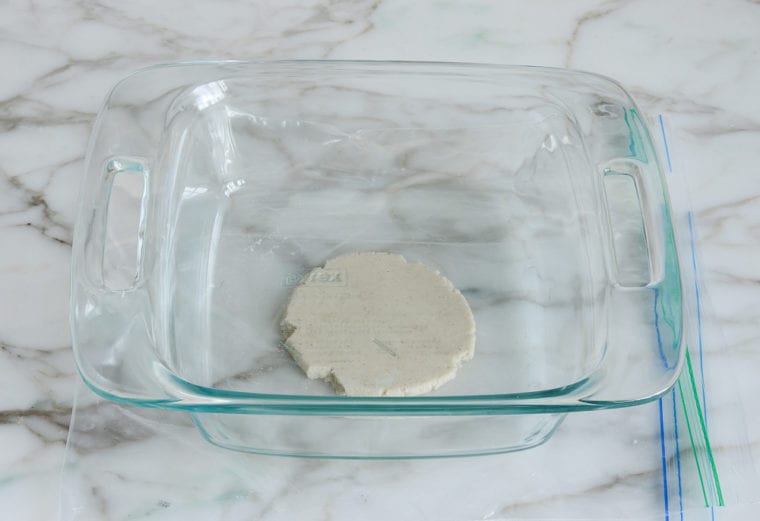
If you don’t have a tortilla press, you can use a glass baking dish or pie plate to press the tortillas. Cut a gallon-size ziplock bag in half along the side and bottom seams so that you’re left with two pieces with which to cover each side of the dough. One at a time, place each ball of dough between the plastic sheets and use the baking dish to press the dough into thin, flat circles. It helps to shimmy the dish back and forth as you press.
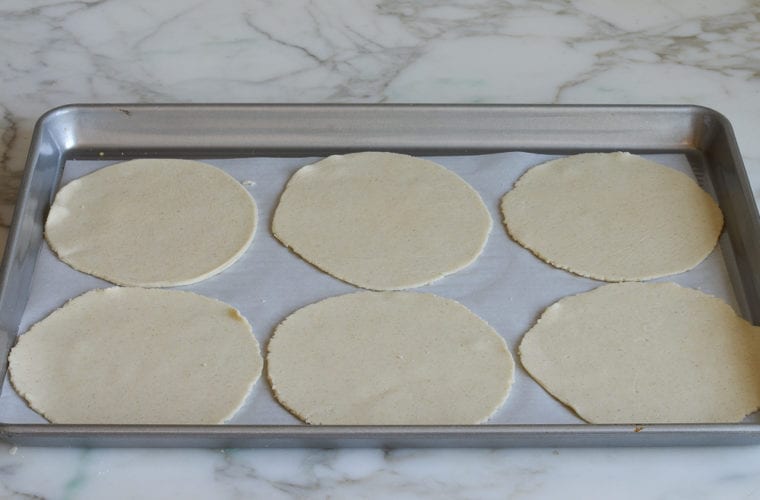
After you flatten each dough ball into a tortilla, carefully transfer it to a baking sheet covered with parchment paper. Arrange them so they are in a single layer on the baking sheet. Lay a second piece of parchment paper down to cover the first layer of tortillas and continue to arrange them this way until you’ve flattened all the dough balls. To keep the flattened tortillas from drying out as you work, lay a damp kitchen towel over the uncovered flattened tortillas. (Alternatively, you can skip this step and just cook the tortillas as you press them.)
Step 4: Cook the Tortillas
Heat a medium griddle or cast-iron skillet over medium-high high heat. When it’s hot, place 1 to 2 tortillas (depending on how large your skillet is) into the dry skillet and cook for 60 to 90 seconds.
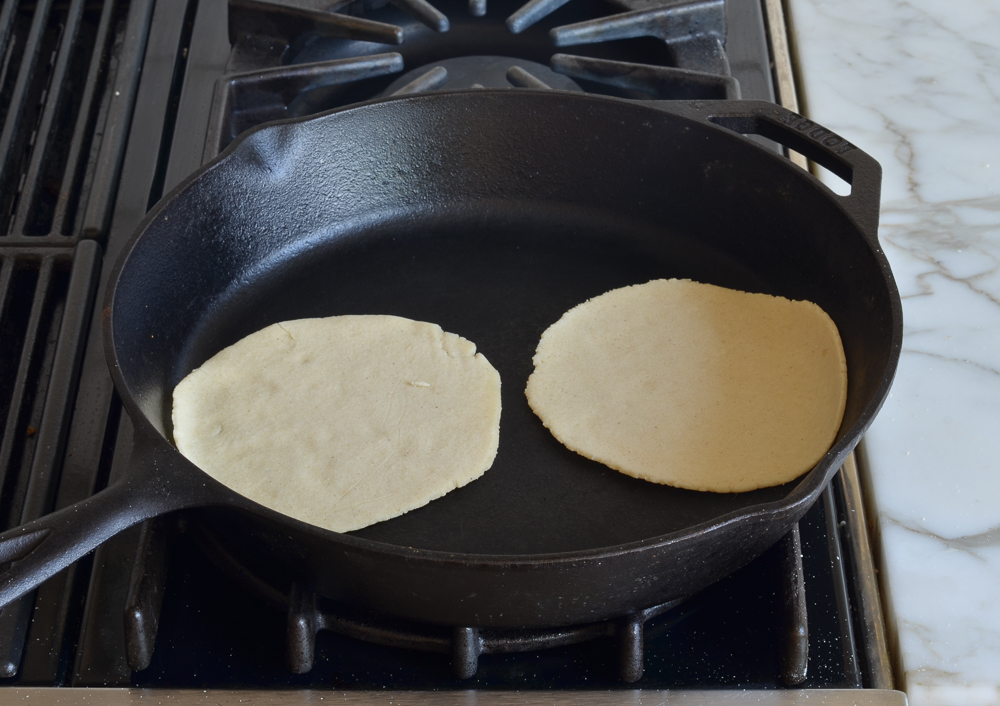
Using a spatula, flip the tortilla(s) and cook for an additional 60 to 90 seconds or until they’re a nice golden color and you see some cracks on the surface. (You can use your fingers to turn the tortillas over, but be really careful not to burn yourself!)

The tortillas may form some air pockets as they cook – don’t worry, they will deflate as they cool. Transfer the cooked tortillas to a plate, and wrap them with a kitchen towel until the remaining tortillas are cooked. Wrapping the tortillas with a towel allows them to steam, which helps soften their texture.
Frequently Asked Questions
Yes, the dough can be prepared and stored, covered, on the counter up to a day ahead of time. While the cooked corn tortillas are best eaten right after they’re cooked, they can be refrigerated in an airtight container for up to 4 days. Warm the tortillas briefly in a skillet before using.
Yes, the dough can be prepared, wrapped securely in plastic wrap and placed in a sealable bag, and frozen for up to 3 months. Remove the dough from the freezer several hours before you plan to use it, and let it thaw on the counter. The cooked tortillas can be individually wrapped in plastic wrap and frozen for up to 3 months.
Absolutely! While a tortilla press can make the process quicker and help you achieve uniformly thin tortillas, it’s not necessary. As shown above, you can place the dough balls between plastic and press down using a glass baking dish or pie plate. The key is to apply even pressure to get them as thin as possible.
You shouldn’t have much of an issue with homemade tortillas, but corn tortillas are generally prone to tearing. To avoid this when rolling or bending corn tortillas for enchiladas and tacos, it helps to make them pliable first. My go-to technique is to lightly brush each tortilla with oil on both sides. Stack the oiled tortillas on a plate, cover them with a damp paper towel, and warm them in the microwave for 60 to 90 seconds, or until they become soft and flexible.
You May Also Like


Homemade Corn Tortillas
Ingredients
- 2 cups masa harina (usually found in the Latin section of most large supermarkets)
- ½ teaspoon salt
- 1½ to 2 cups warm water
Instructions
- In a medium bowl, combine the masa harina and salt. Add 1½ cups (360 ml) of the warm water and stir with a wooden spoon until all of the water is absorbed.
- Start working the mixture using your hands, adding up to ½ cup (120 ml) more water, a few tablespoons at a time. Your goal is to add enough water so that the mixture starts to form a cohesive dough. If it starts to stick to your hands, add a pinch or two more masa harina. The texture you’re aiming for is soft but not sticky (similar to Play-Doh or sugar cookie dough).
- Divide the dough into golf ball-sized chunks (about 1½ oz/43 g each). You should have enough dough to divide it into about 15 pieces. Roll each piece between your palms to form smooth balls. (This will make tortillas that are 5 to 6 in/13 to 15 cm in diameter.) Cover the dough balls with a clean, damp kitchen towel so they don’t dry out while you work.
- If you’re using a tortilla press, cut a gallon-size ziplock bag in half along the side and bottom seams so that you’re left with two pieces with which to cover each side of the press. Then trim each of the two pieces so each piece is just large enough to cover the top and bottom of the press without too much excess plastic. This keeps the dough balls from sticking to the press when you flatten them and makes it easy to transfer the flattened dough to the baking sheet.
- One at a time, place each ball of dough in the center of the press. Close the press and slowly push it down, holding the handle and applying firm pressure. Be careful not to apply too much pressure or the tortillas will be too thin. You may need to make a few test tortillas to get a sense of how much pressure to apply.
- If you’re using a glass baking dish, cut a gallon-size ziplock bag in half along the side and bottom seams so that you’re left with two pieces with which to cover each side of the dough. One at a time, place each ball of dough between the plastic sheets and use the baking dish to press the dough into thin, flat circles. It helps to shimmy the dish back and forth as you press.
- After you flatten each dough ball into a tortilla, carefully transfer it, either with your fingers or using the bottom half of the plastic bag, to a baking sheet covered with parchment paper. Arrange them so they are in a single layer on the baking sheet. Lay a second piece of parchment paper down to cover the first layer of tortillas and continue to arrange them this way until you’ve flattened all the dough balls. To keep the flattened tortillas from drying out as you work, lay a damp kitchen towel over the uncovered flattened tortillas. (Alternatively, you can skip this step and just cook the tortillas as you press them.)
- Heat a medium griddle or cast iron skillet over medium-high high heat. When it’s hot, place 1 to 2 tortillas (depending on how large your skillet is) into the dry skillet and cook for 60 to 90 seconds. Using a spatula, flip the tortilla(s) and cook for an additional 60 to 90 seconds or until they’re a nice golden color and you see some cracks on the surface. (You can use your fingers to turn the tortillas over, but be really careful not to burn yourself!) The tortillas may form some air pockets as they cook – don’t worry, they will deflate as they cool.
- Transfer the cooked tortillas to a plate and wrap them with a kitchen towel until the remaining tortillas are cooked and ready to serve. Wrapping them with the towel is an important step because it allows the hot tortillas to continue to steam, which softens their texture.
- The tortillas are best eaten right after they’re cooked, but they can be refrigerated in an airtight container for up to 4 days. Warm the tortillas briefly in a skillet before using.
Notes
Nutrition Information
This website is written and produced for informational purposes only. I am not a certified nutritionist and the nutritional data on this site has not been evaluated or approved by a nutritionist or the Food and Drug Administration. Nutritional information is offered as a courtesy and should not be construed as a guarantee. The data is calculated through an online nutritional calculator, Edamam.com. Although I do my best to provide accurate nutritional information, these figures should be considered estimates only. Varying factors such as product types or brands purchased, natural fluctuations in fresh produce, and the way ingredients are processed change the effective nutritional information in any given recipe. Furthermore, different online calculators provide different results depending on their own nutrition fact sources and algorithms. To obtain the most accurate nutritional information in a given recipe, you should calculate the nutritional information with the actual ingredients used in your recipe, using your preferred nutrition calculator.
Gluten-Free Adaptable Note
To the best of my knowledge, all of the ingredients used in this recipe are gluten-free or widely available in gluten-free versions. There is hidden gluten in many foods; if you're following a gluten-free diet or cooking for someone with gluten allergies, always read the labels of your ingredients to verify that they are gluten-free.
Could we make flour tortillas by swapping the masa for flour? If so, would the method and measurements be the same?
Hi Shannon, If you want to make flour tortillas, for the most predictable results, I’d look for a recipe specifically for them. Sorry!
I love corn tortillas and thought fresh and homemade is best. Love your recipe and they taste fantastic. I have only one small issue and I am sure it is something I did wrong. Unlike crepes where the first ones are always horrible and a sacrifice to the pan gods the first of these on the griddle are perfect! Light and they fluff up when you tap them in the middle after a couple flips. The issue is about halfway through a batch they start sticking. No idea why, they seem the same but they stick in spots and don’t fluff up as much. What did I do wrong?
Hi Rick, Glad you like these but sorry you were having a problem with some of them. The only thing that comes to mind is that maybe some residue started to accumulate in the pan while you were cooking. About halfway through, I’d try to wipe clean the bottom of the pan. (Just be careful not to burn yourself!)