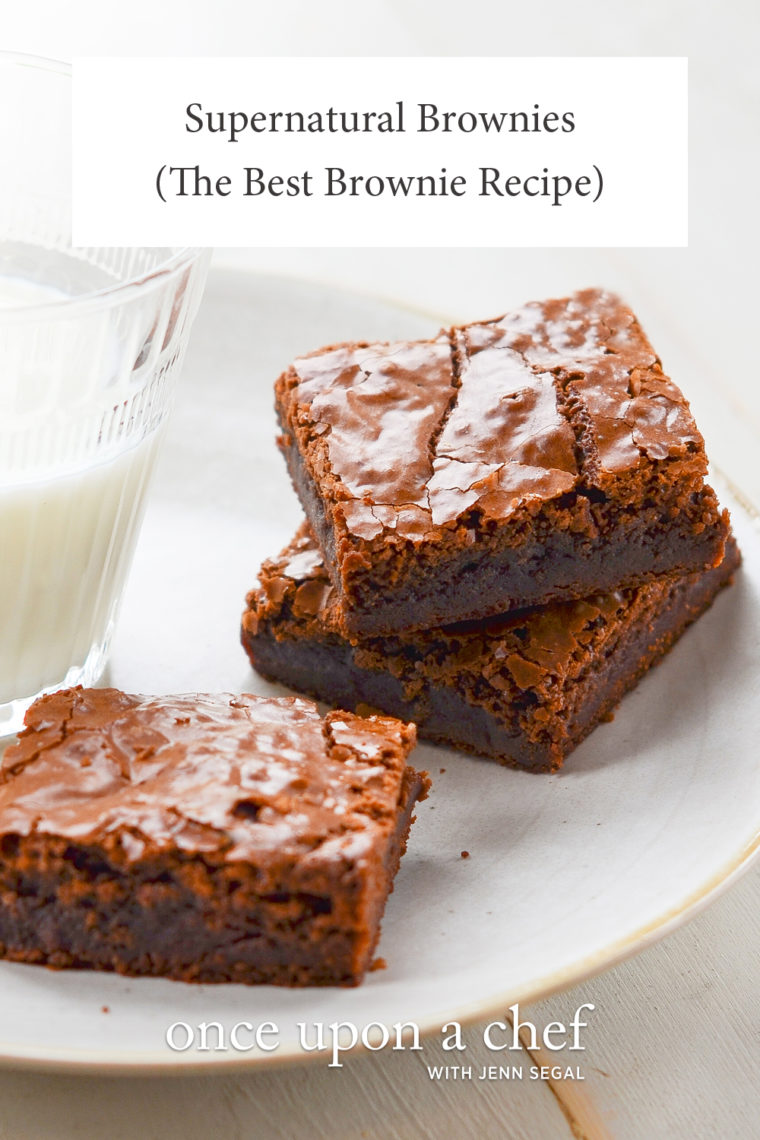
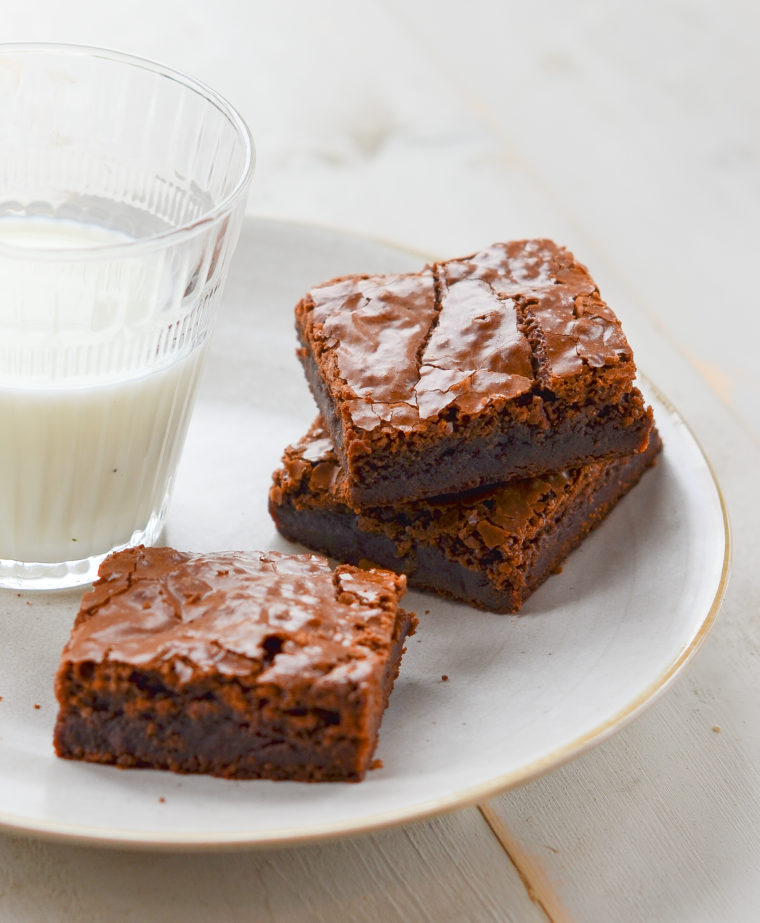
Ultimate Fudgy Brownie Recipe

This post may contain affiliate links. Read my full disclosure policy.
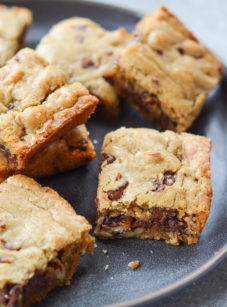
If you’ve been searching for the ultimate homemade brownie recipe, look no further—this is it! Made with melted chocolate, the brownies are fudgy in the center, crackly and cakey on the surface, and just plain out of this world.
The best brownies start with real melted chocolate, which is why store-bought brownie mixes made from cocoa powder lack the rich, fudgy flavor of homemade brownies. My all-time favorite brownie recipe comes from pastry chef Nick Malgieri’s cookbook Chocolate: From Simple Cookies to Extravagant Showstoppers.
The recipe has been around for decades and praised by top cooking publications such as The New York Times, Saveur, and The Splendid Table, to name just a few, so you don’t have to take my word for it—try for yourself and see!
“The name does not lie!! These are hands-down the BEST brownies I have made!!! My entire family devoured them.”
Video
What You’ll Need To Make Homemade Brownies
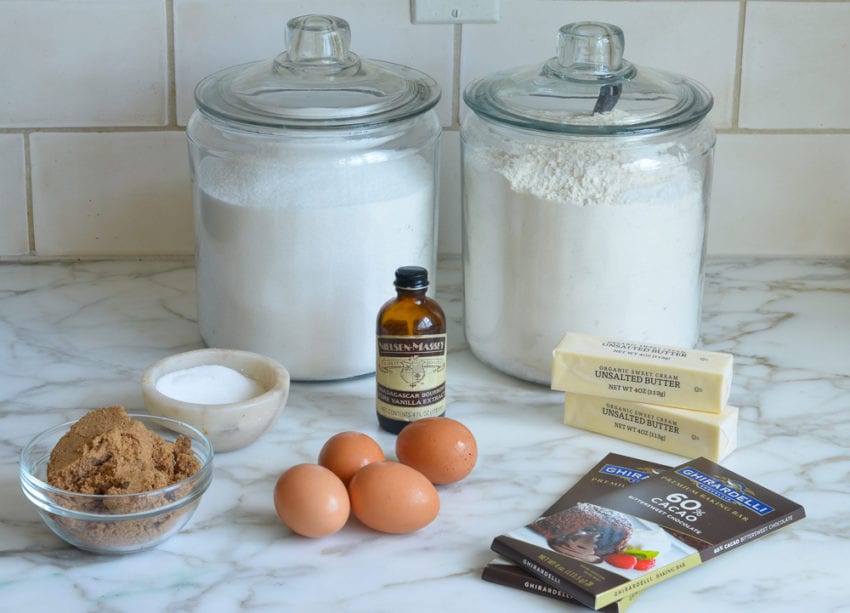
- All-Purpose Flour: The base of the brownies; measure using the spoon and level method for accuracy.
- Sugar and Brown Sugar: White sugar adds sweetness and a light texture, while brown sugar contributes to moisture and a deeper flavor due to its molasses content.
- Eggs: Bind the ingredients together, add moisture, and help create a rich texture in the brownies.
- Unsalted Butter: Adds richness and flavor.
- Vanilla Extract: Complements the chocolate and adds depth of flavor.
- Salt: Balances the sweetness and enhances the flavor of the chocolate.
- Semi-Sweet or Bittersweet Chocolate: Use good quality chocolate, like Ghirardelli or Guittard, and opt for real chocolate bars instead of chocolate chips. Chocolate chips contain stabilizers and are designed to retain their shape when baked, making them less suitable for recipes that require melted chocolate.
- Jump to the printable recipe for precise measurements
Step-by-Step Instructions
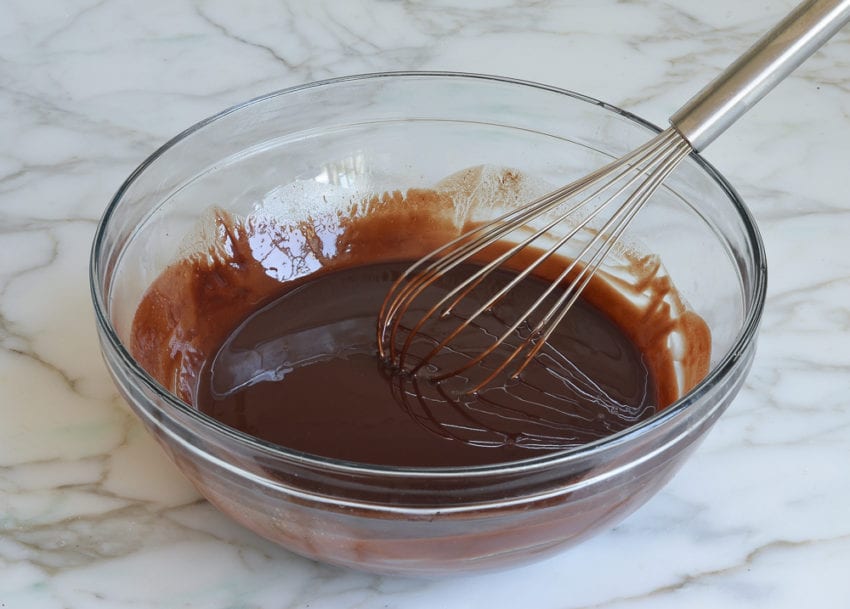
Begin by melting the butter in a microwave-safe bowl. Add the chopped chocolate. (You can just break it apart with your hands; no need to dirty a cutting board.)
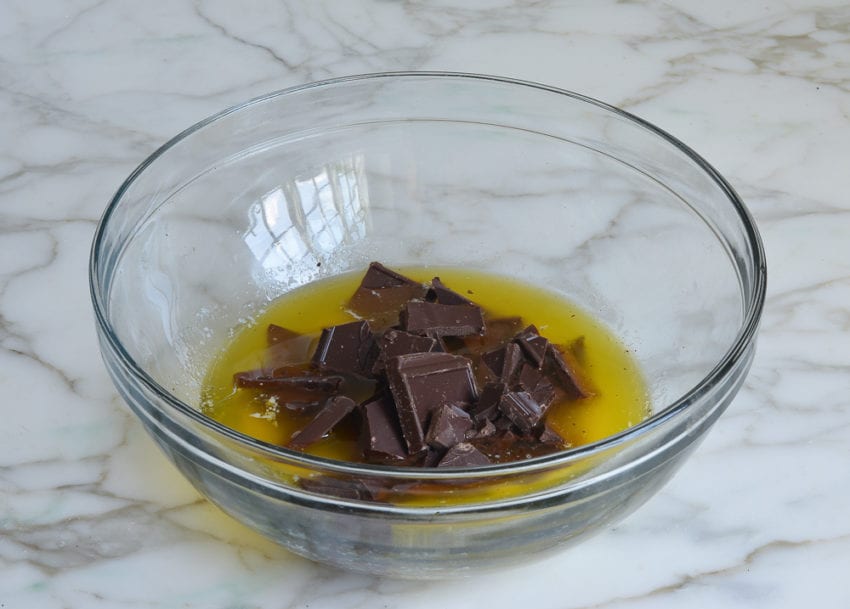
Whisk until the chocolate is melted. The heat of the butter should be enough to melt the chocolate completely, but if not, heat the mixture in the microwave for 20 seconds or so and whisk again.
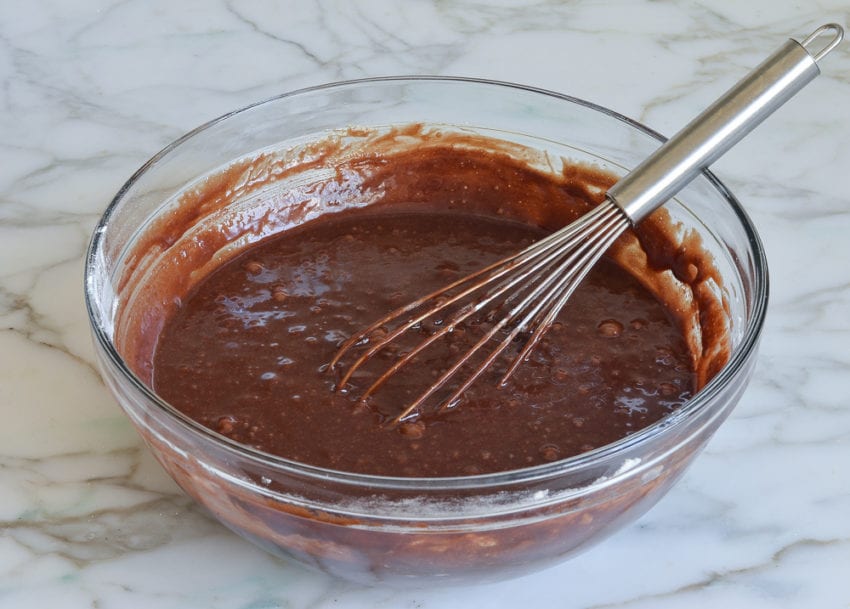
Meanwhile, whisk the eggs in a large bowl, then add the sugars, salt and vanilla.
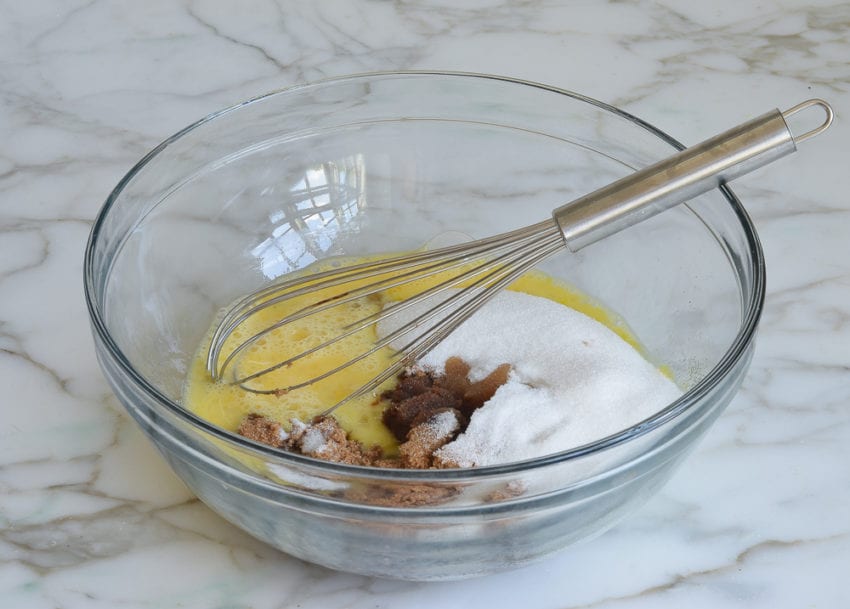
Whisk to combine, making sure no lumps of brown sugar remain.
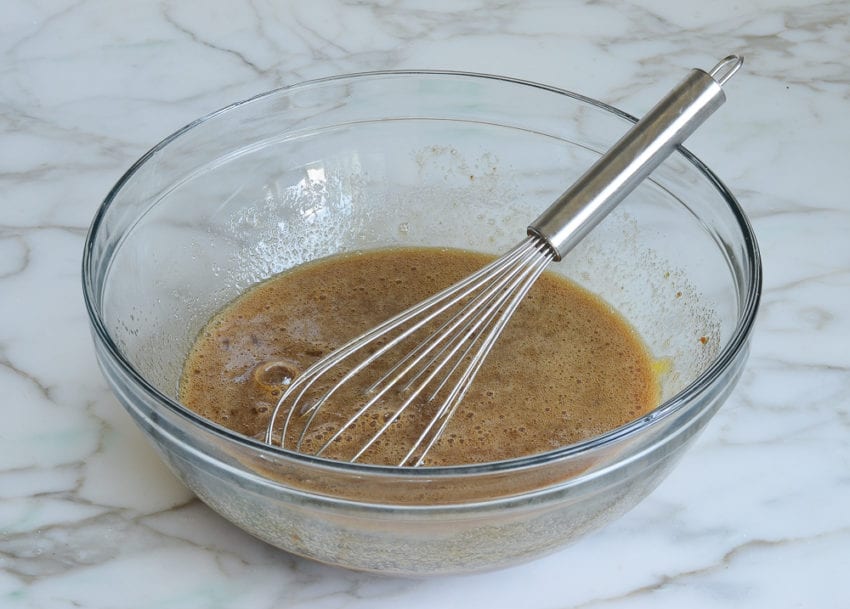
Whisk in the chocolate-butter mixture, then add the flour.
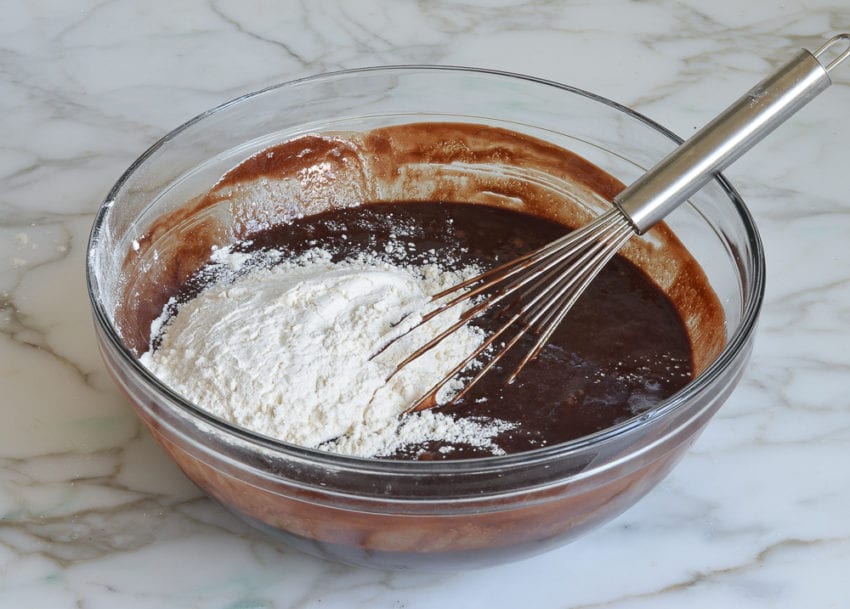
Whisk the mixture until just combined and no lumps of flour remain.
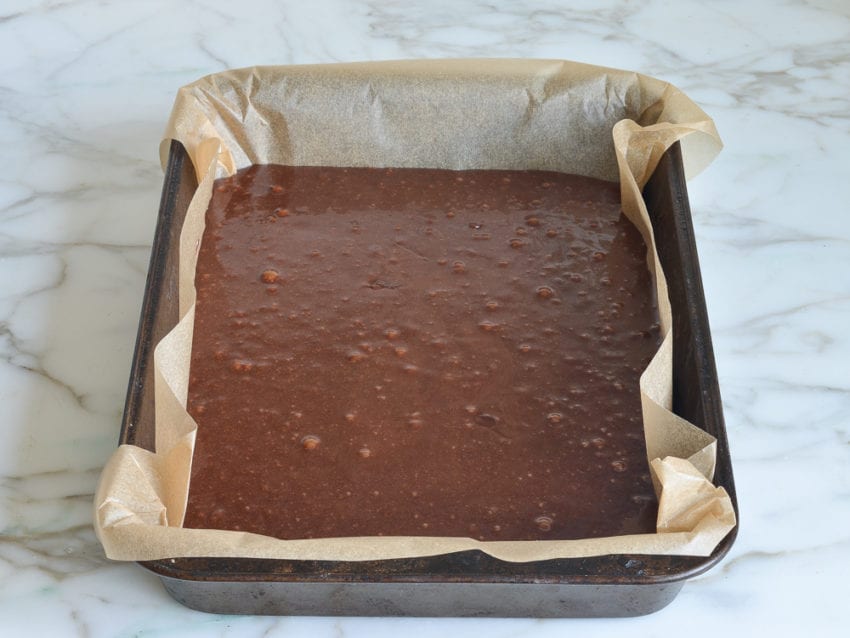
Line a 9×13-in baking pan with parchment paper, then either spray the paper with non-stick cooking spray or grease with butter. Be sure to leave an overhang; this makes it easy to lift brownies out of the pan before cutting. Pour the brownie batter into the prepared pan.
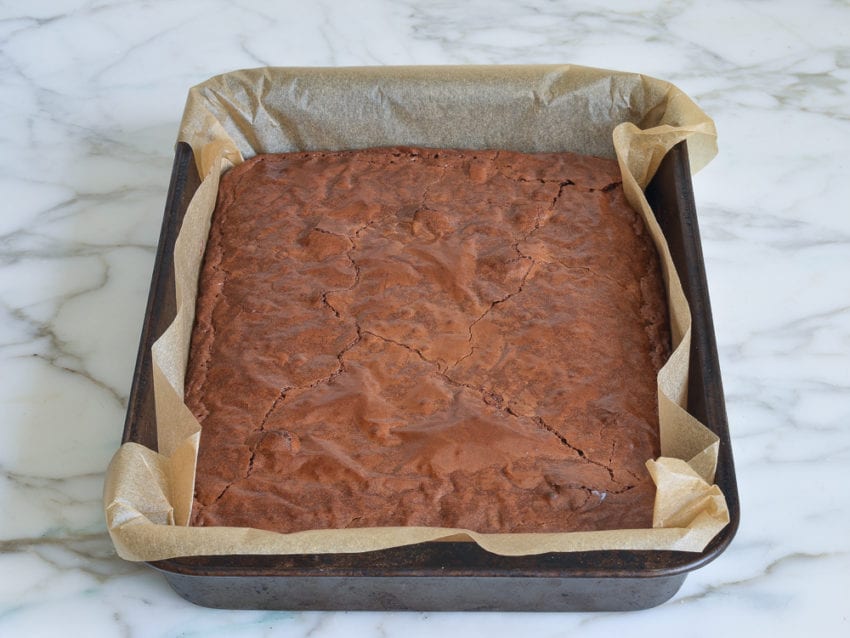
Bake for about 45 minutes, or until the top has formed a shiny crust and the batter is moderately firm.
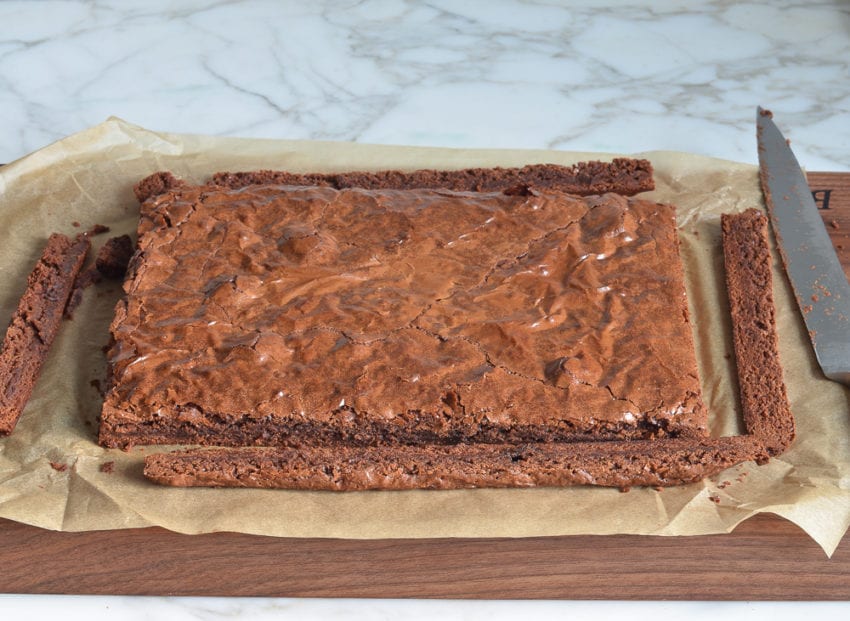
Cool completely on a rack, then use the parchment overhang to transfer the un-cut brownies to a cutting board. Use a sharp knife to trim the hard edges (those are for the cook!). Cut the brownies into squares and enjoy! The brownies will keep well in an airtight container for up to 4 days; freeze for longer storage.
You May Also Like
Ultimate Fudgy Brownies

These homemade brownies are perfectly balanced with a fudgy center and crackly top—irresistibly delicious!
Ingredients
- 2 sticks (½ pound) unsalted butter
- 8 ounces bittersweet or semisweet chocolate, roughly chopped (I use Ghirardelli bars)
- 4 large eggs
- ½ teaspoon salt
- 1 cup granulated sugar
- 1 cup firmly packed dark brown sugar
- 2 teaspoons vanilla extract
- 1 cup all-purpose flour, spooned into measuring cup and leveled off with knife
Instructions
- Set the rack in the middle of the oven and preheat to 350°F. Line a 13 x 9 x 2-inch pan with parchment paper (bring parchment up sides of pan so there is a slight overhang) and grease with butter or nonstick cooking spray.
- Place the butter in a medium microwave-safe bowl and melt in the microwave until bubbling. Add the chocolate and whisk until the chocolate is completely melted. The heat from the butter should be enough to melt the chocolate completely, but if not, place the chocolate-butter mixture in the microwave and heat for 20 seconds or so, then whisk again. (Alternatively, combine the butter and chocolate in a heat proof bowl and set over a pan of simmering water. Stir occasionally until melted.)
- Whisk the eggs in a large bowl. Add the salt, granulated sugar, brown sugar, and vanilla; whisk until smooth (be sure no lumps of brown sugar remain). Whisk in the chocolate-butter mixture, then add the flour and whisk until the batter is uniform.
- Pour the batter into the prepared pan and spread evenly. Bake for about 45 minutes, until the top has formed a shiny crust and the batter is moderately firm. Cool completely in the pan on a rack. If not serving right away, store them at room temperature, for 3 to 4 days. To extend their shelf life for a day or two, you can refrigerate them.
- To cut brownies, first lift them out of the pan using the parchment overhang and transfer them to a cutting board. Separate the parchment from the edges. Using a sharp knife, trim away the edges and cut the brownies into 2-in squares.
- Freezer-Friendly Instructions: The brownies can be frozen for up to 3 months. After they are completely cooled, cut them into squares, wrap tightly in foil, and then place them in an airtight container or sealable plastic bag. Thaw overnight on the countertop before serving.
Nutrition Information
Powered by ![]()
- Serving size: 1 brownie
- Calories: 212
- Fat: 11g
- Saturated fat: 7g
- Carbohydrates: 27g
- Sugar: 22g
- Fiber: 1g
- Protein: 2g
- Sodium: 66mg
- Cholesterol: 51mg
This website is written and produced for informational purposes only. I am not a certified nutritionist and the nutritional data on this site has not been evaluated or approved by a nutritionist or the Food and Drug Administration. Nutritional information is offered as a courtesy and should not be construed as a guarantee. The data is calculated through an online nutritional calculator, Edamam.com. Although I do my best to provide accurate nutritional information, these figures should be considered estimates only. Varying factors such as product types or brands purchased, natural fluctuations in fresh produce, and the way ingredients are processed change the effective nutritional information in any given recipe. Furthermore, different online calculators provide different results depending on their own nutrition fact sources and algorithms. To obtain the most accurate nutritional information in a given recipe, you should calculate the nutritional information with the actual ingredients used in your recipe, using your preferred nutrition calculator.
Very VERY yummy. I’d never buy box brownies after this. Super easy with stuff you probably have on hand. I used bittersweet chocolate and I’m glad I did. It’s not the perfect brownie recipe for me, however. It’s number 2. Number one was in Newton, MA at Baker’s Best. They closed years ago and I’m still trying to replicate. This is sooo close. Definitely wouldn’t use any other brownie recipe.
Amazing! This recipe is solid – but the fact that you understand that the crusty edges are to be set aside for the cook – truly- exceptional ! 🙂
Has anyone tried these in a cast iron skillet? That’s what I have on hand.
I have been in search of a brownie recipe from scratch for awhile and have tried many recipes with no success. I was starting to believe I would have to settle for boxed brownies. That is until I made these brownies. They are amazing! The texture is perfection! Fudgy and chocolately with the perfect shiny, thin crackly top. Yum!! The only change I made was slightly reducing the sugar and making the full recipe in a 7×11 baking dish for thicker brownies. I will be making these brownies again and again. Thanks so much for making me a believer that brownies from scratch can taste better than boxed.
hi Jenn,
I forgot to ask you. Can I 1/2 the recipe in an 8×8 pan. do you prefer metal or glass? What do you think? Less cooking time? thanks so much!
Hi Carol, Yes, halving the recipe and using an 8 x 8 should be fine. The bake time will be about the same. If you have both metal and glass as options, I’d go with the metal. Enjoy!
Morning Jenn, wondering if I can scoop the dough into mini muffin pan to make bite size brownies instead of cutting into squares (making these for bridal shower). I guess cook time would be less?
Hi Sara, ’ve never made these in a mini muffin pan so I can’t say from experience, but one reader commented that she baked them that way and that they were done after about 13 to 14 minutes so you may want to start checking at that time. Hope everyone enjoys!
Hello I have made these browns now for pass few years. WILL NOT make a box mix ever again. These brownies are Killer they come out perfect ever time the only thing I do differently is I use semi sweet chocolate (I have a sweet tooth 🦷) And when you have them with vanilla ice cream and fudge sauce. Oh ya.
I would like to make these brownies for my dairy-free friend. Will substituting the butter with a good quality olive oil spread (or any other alternative) work?
Hi Kelly, I haven’t tried these with a non-dairy alternative to the butter but one reader commented that she had a problem with the brownies and the one change she had made was using a non-dairy butter so I’m a bit hesitant to suggest it. Sorry!
Thanks for your reply Jenn! I went ahead anyway and attempted these using a standard gluten free flour and a vegan butter alternative called Naturli’ Organic Vegan Block and the result was insane!
Came out of the oven looking just like your pictures and the flavour and texture were gorgeous – chocolatey, fudgey, with a lovely slightly crispy outer. My friend loved it. Thanks for the recipe. It’s a keeper!
Kelly, I’m so glad you forged ahead and the result was good — thanks for taking the time to follow-up! 🙂
Holy moly these are good! I only had semi-sweet chocolate chips and some dark, so I did 3/4 cup semi-sweet and 1/4 cup dark chocolate chips and it turned out amazing. At first I thought the 2 cups of sugar would be a little too much, but went for it anyways and it was just perfect. I also added 1 teaspoon of instant espresso powder and put in some walnuts on 1/4 of it. These do come out thin-ish, but fudgy, with an ohhh soo good crunchy outside. Definitely not as thick and cake-like, like the ones I’m used to. However, this is definitely one recipe I will continue to make again and again.
Is this a recipe that could be done gluten-free? If so, any suggestions for what kind of gluten free flour? Thanks!
Hi Shelly, I haven’t made them with gluten-free flour but a number of readers have commented that they have and have been happy with the results. I know a lot of readers have had great luck with Cup4Cup and King Arthur’s all-purpose gluten-free flours. Please LMK how it turns out if you try it!
I made the brownies with gluten free flour and they tasted like they always do, delicious.
Glad they came out well – thanks for reporting back!
Hey Jen,
I’ve been making these for awhile and they are delicious. I want to try some instant espresso, cinnamon in the batter and flaked salt garnish. What amounts do you recommend before I try it? Thanks!
Glad you like these! I’d recommend a teaspoon of espresso powder and about 1/2 teaspoon of cinnamon. I’d love to hear how they come out with these additions!
I have made these several times and they are perfect! Just the right amount of fudge-they freeze beautifully and do not get stale quickly. Love love love!