Brownie Pie

This post may contain affiliate links. Read my full disclosure policy.
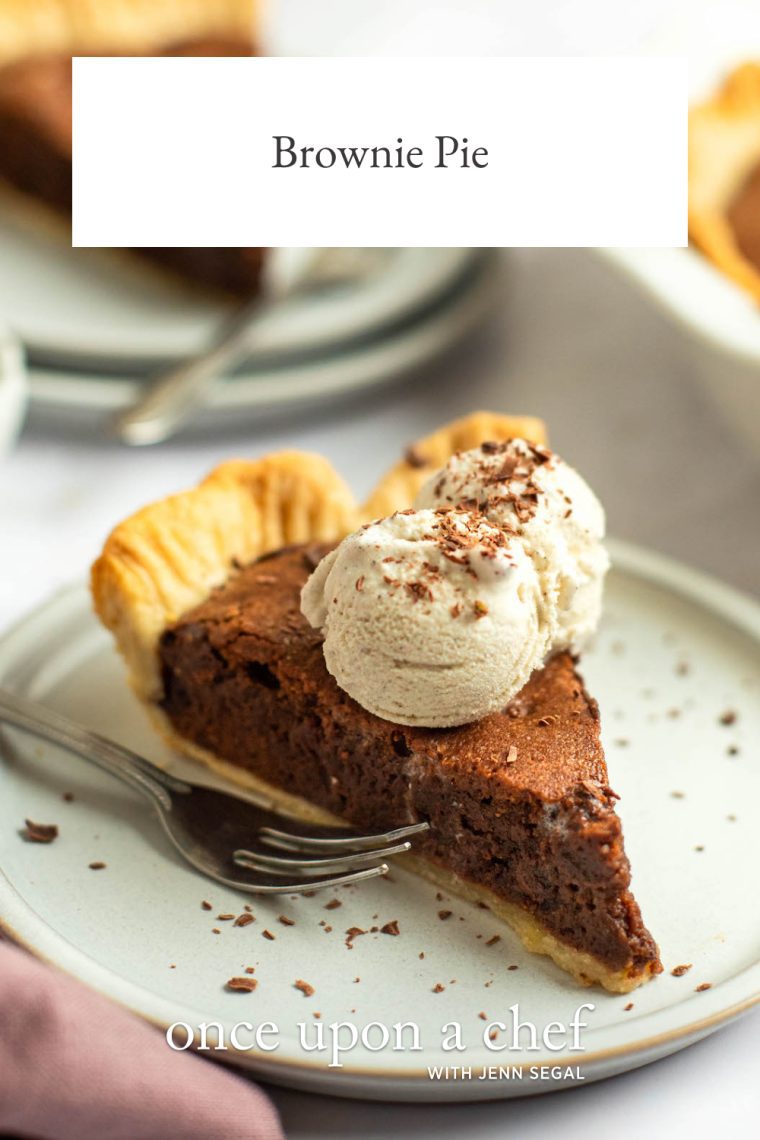
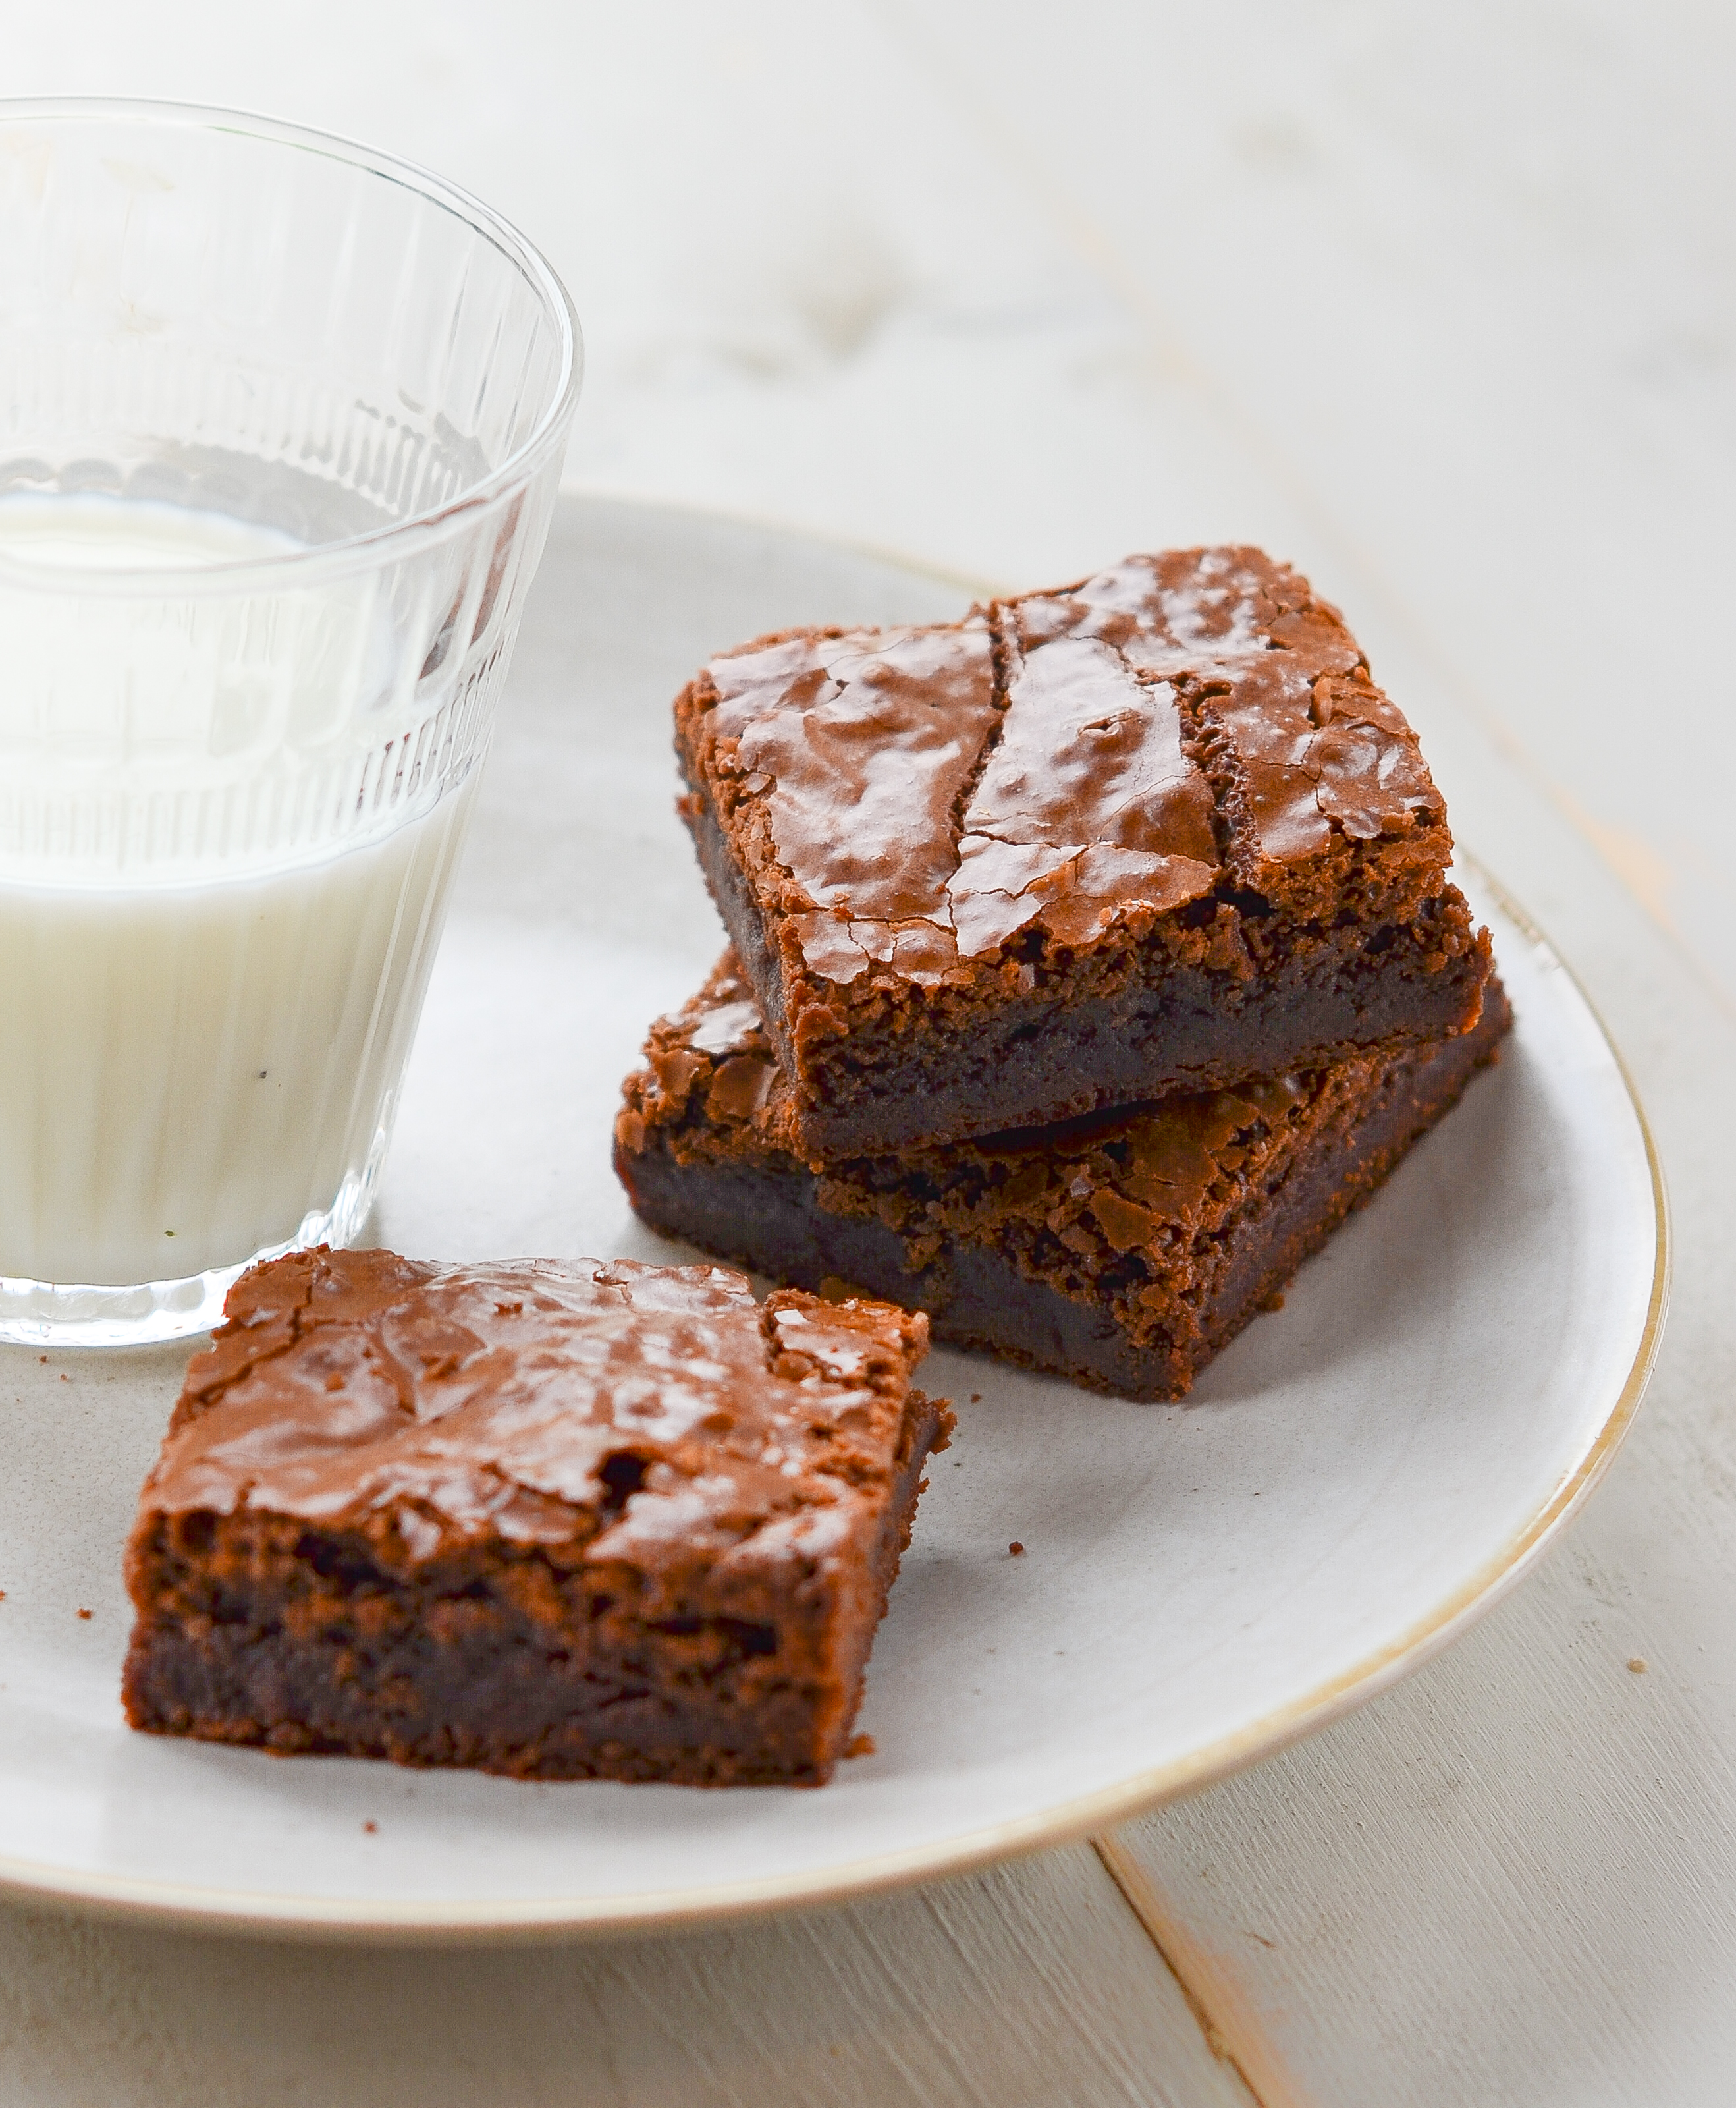
Part brownie, part pie, and completely irresistible—this brownie pie recipe is as easy as it is decadent.
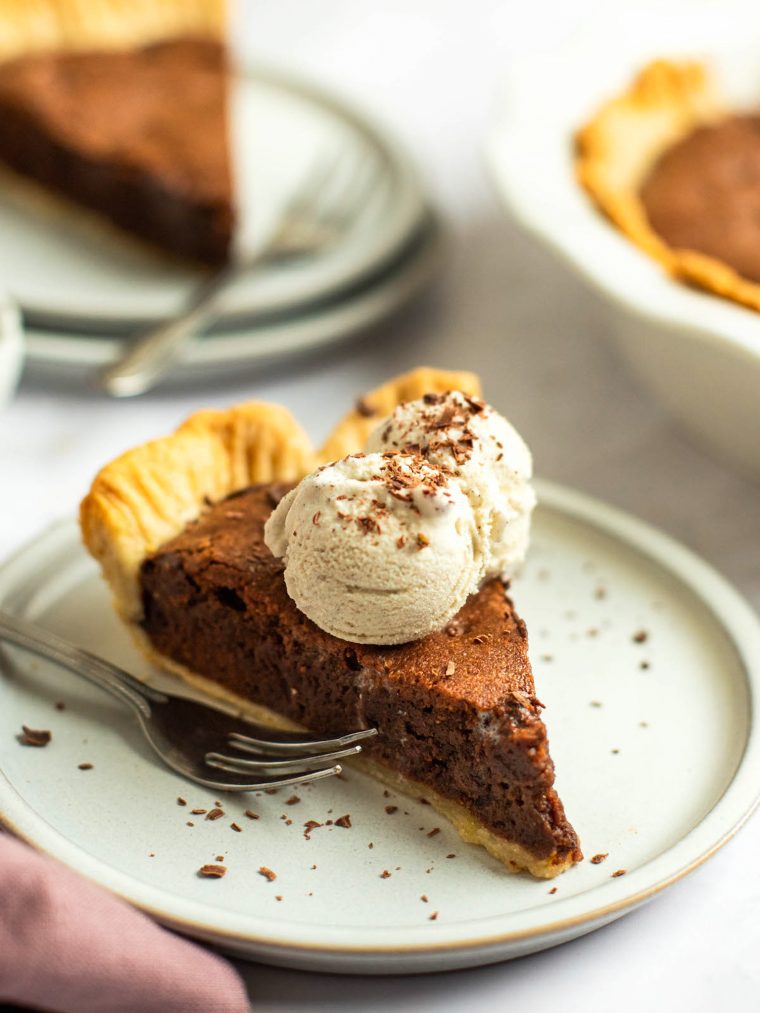
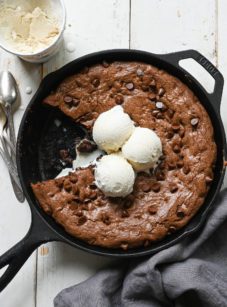
Combine the richness of a fudgy brownie with the nostalgic charm of homemade pie, and you get one irresistible dessert: brownie pie. Adapted from Magnolia Table by Joanna Gaines, this brownie pie recipe is made with simple pantry staples and couldn’t be easier. Just line a pie pan with a buttery, flaky pie crust (store-bought works perfectly), fill it with fuss-free brownie batter, and bake until the edges are crisp, the center is fudgy, and the top develops that signature crackly crust. Serve warm with a scoop of vanilla or coffee ice cream—and if you’re feeling extra indulgent, drizzle a little hot fudge sauce over the top.
The beauty of this recipe is how easy it is to make your own. For a grown-up twist, add a touch of espresso powder or some toasted nuts. Baking for kids? Stir in peanut butter chips, M&M’s, or toffee bits for extra fun. You can even skip the crust altogether and bake the filling right in a pie dish—just cut the baking time down to about 40 minutes.
“I made this for my family on the weekend. It was easy and delicious and was gobbled up quickly!”
What You’ll Need To Make Brownie Pie
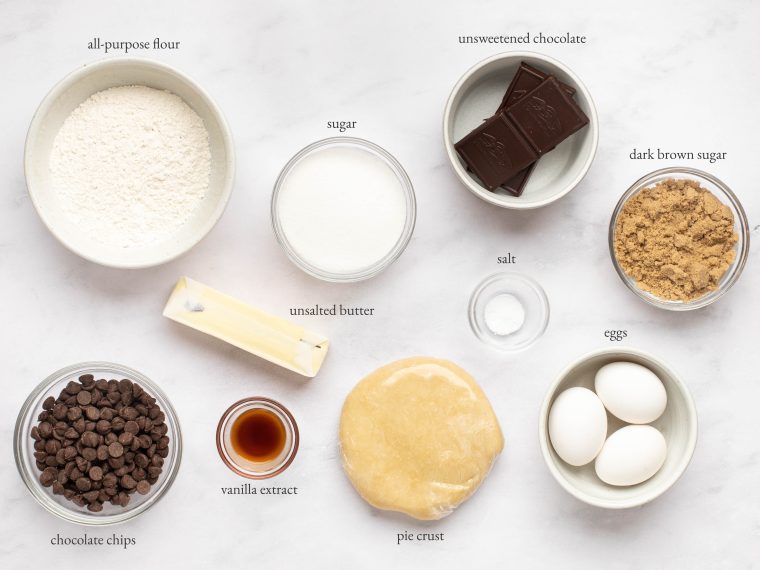
- Pie Crust: Serves as the base of your brownie pie; there’s no need to pre-bake (blind bake) the crust for this recipe.
- Unsalted Butter: Adds richness and depth to the brownie filling.
- Unsweetened Chocolate: Provides a deep chocolate flavor to the pie. It’s important to use good quality chocolate for the best taste.
- Vanilla Extract: Complements the chocolate flavor.
- Granulated Sugar and Dark Brown Sugar: Adds sweetness and depth.
- Large Eggs: Provide structure and stability to the filling.
- Salt: Balances the sweetness and intensifies the chocolate flavor.
- All-Purpose Flour: Gives the brownie filling its structure.
- Semi-Sweet Chocolate Chips: Add bits of melted chocolate throughout the pie, creating gooey pockets of chocolatey goodness.
- Jump to the printable recipe for precise measurements
Step-by-Step Instructions
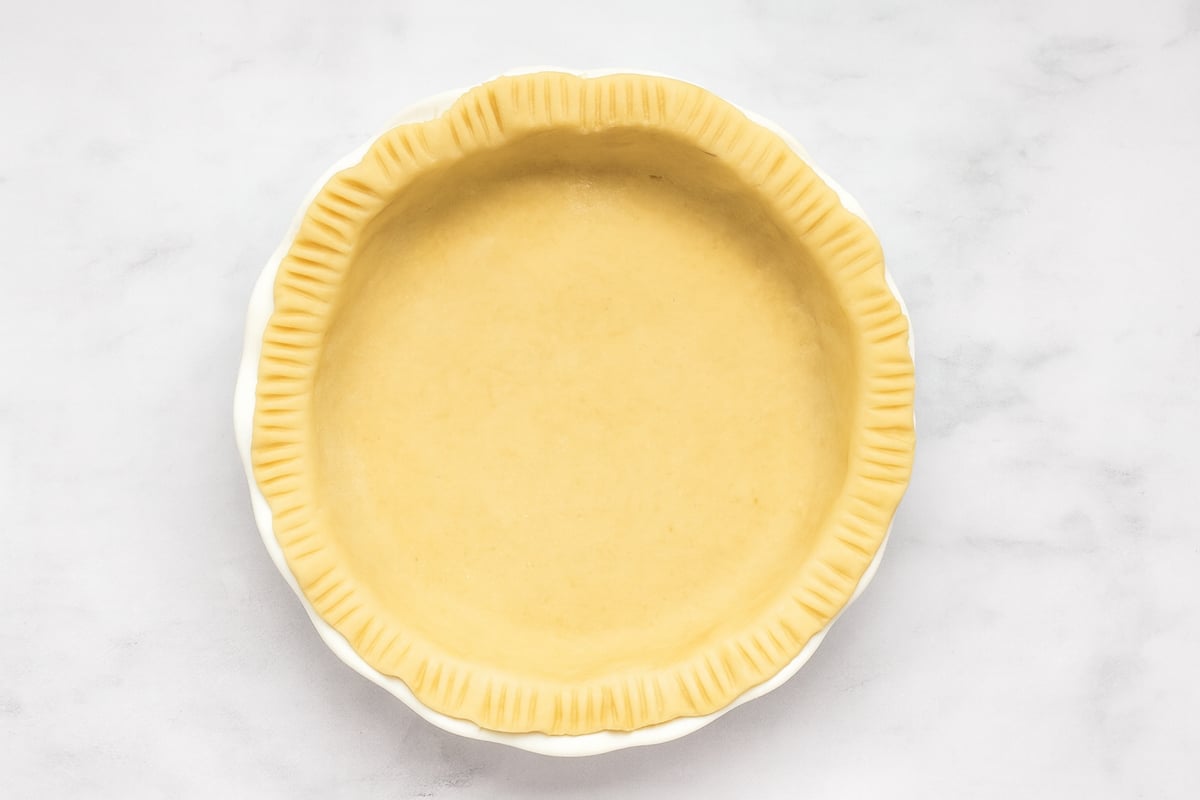
Step 1: Prepare the crust. Preheat the oven to 350°F and set a rack in the middle position. If your pie dough isn’t already in a pan, roll it out and fit it into a 9-inch deep-dish pie plate, crimping the edges as you like. (If you’re using a store-bought crust in an aluminum pan, you can skip this part.) Set the crust aside while you make the filling.
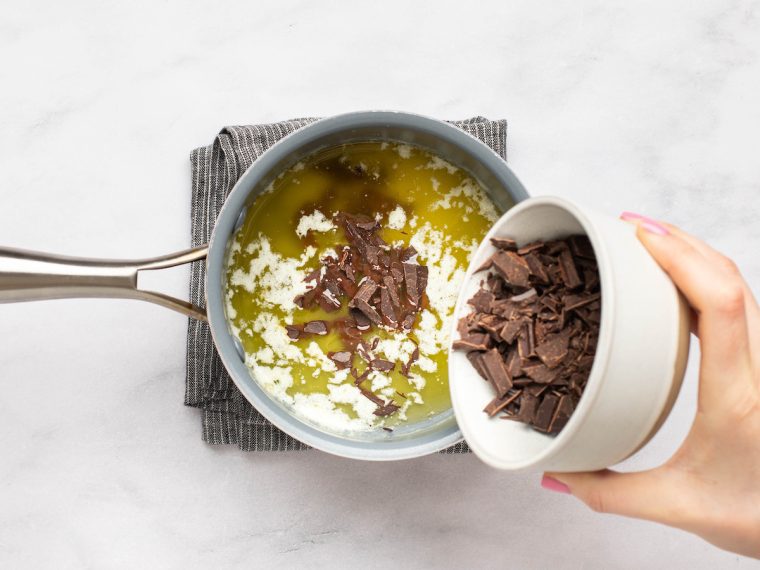
Step 2: Melt the chocolate. In a small saucepan, melt the butter over medium heat. Remove from the heat, add the chocolate, and stir until smooth and fully melted.
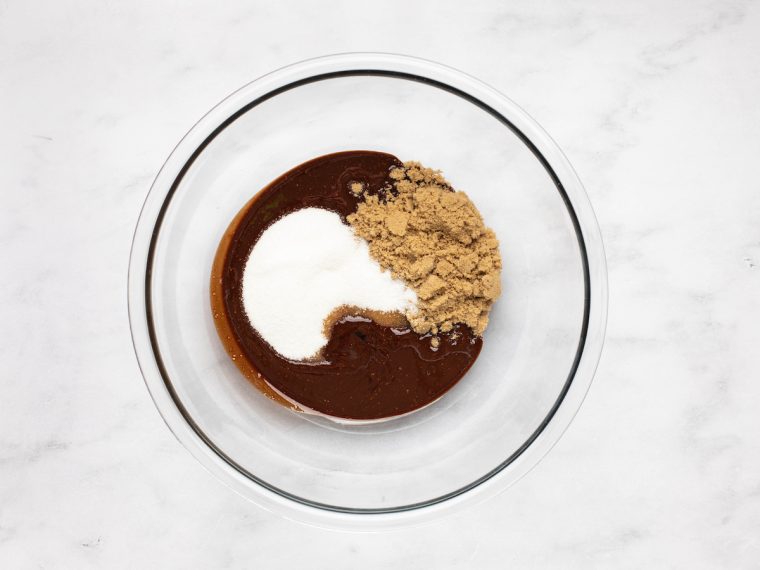
Step 3: Mix in the sugars. Transfer the chocolate mixture to a large bowl, then whisk in the vanilla, granulated sugar, and brown sugar until smooth and well combined.
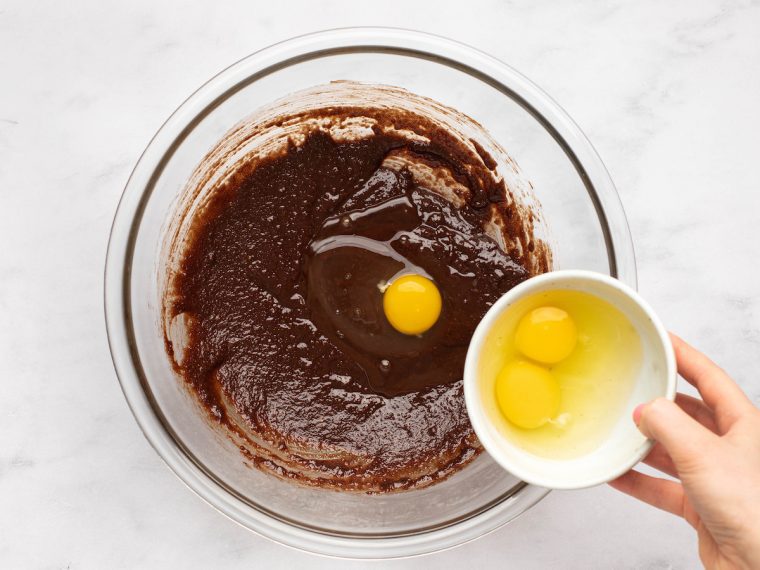
Step 4: Add the eggs. Whisk in the eggs one at a time, mixing well after each addition until the batter is smooth and glossy.
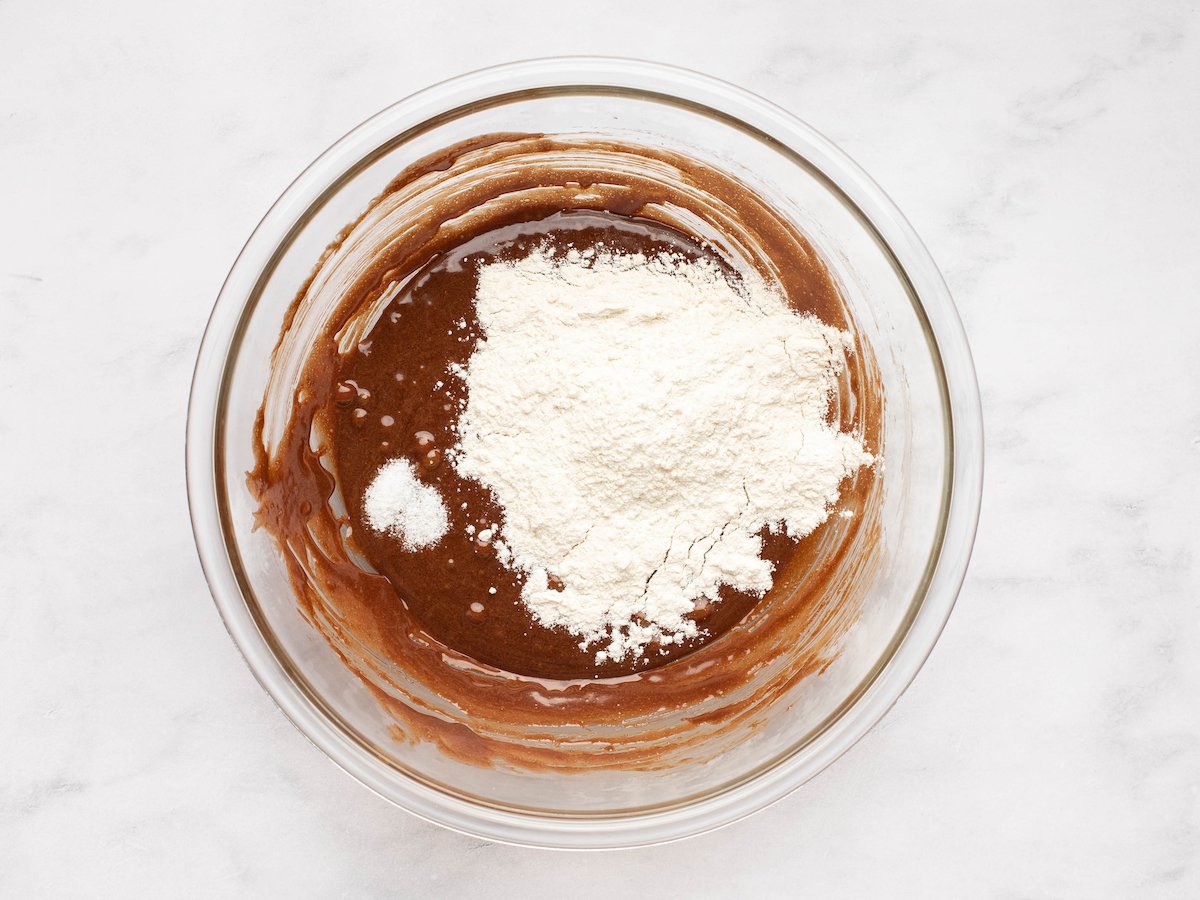
Step 5: Add the dry ingredients. Whisk in the salt and flour until the batter is smooth and evenly combined—don’t overmix.
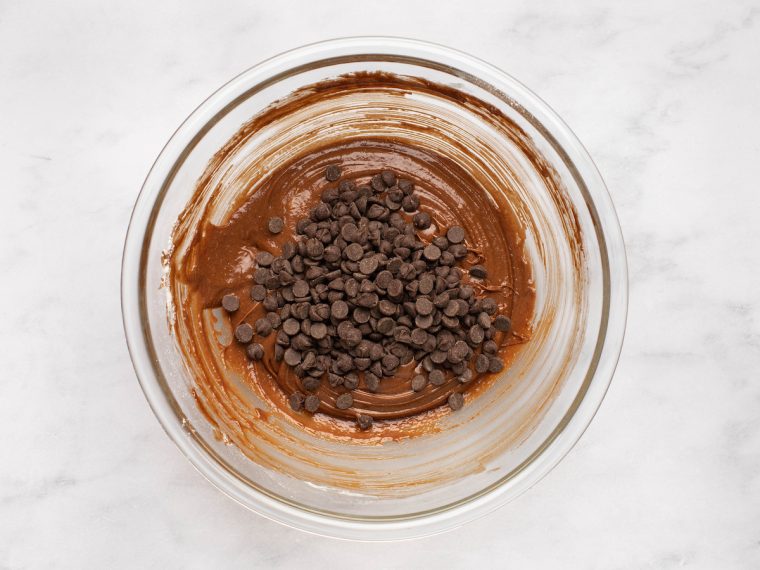
Step 6: Add the chips. Stir in the chocolate chips until they’re evenly distributed throughout the batter.
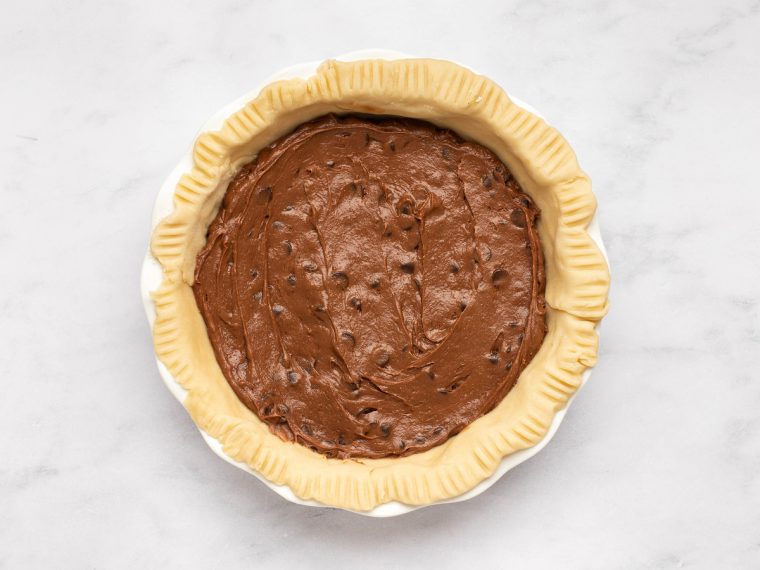
Step 7: Assemble the pie. Pour the chocolate mixture into the pie crust and smooth the top.
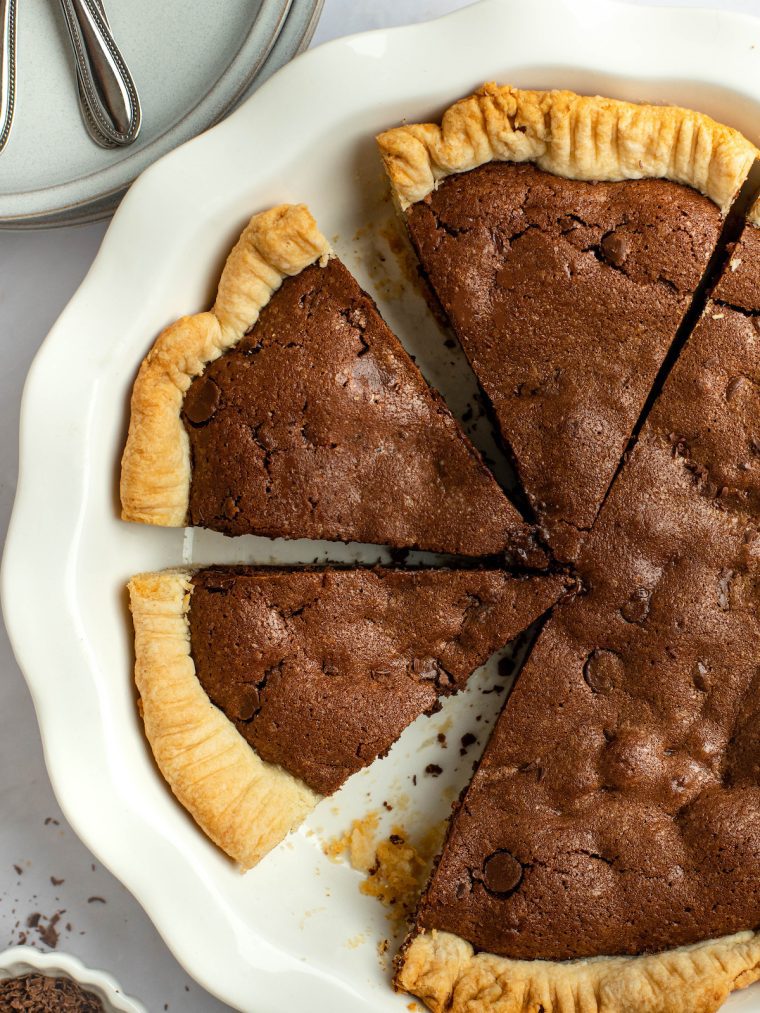
Step 8: Bake. Bake until the filling is set and a shiny, crackly crust forms on top, 45 to 50 minutes. If the edges of the crust start to brown too quickly, cover them with strips of aluminum foil. Let the pie cool on a wire rack for at least 1 hour before slicing and serving.
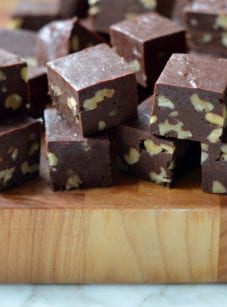
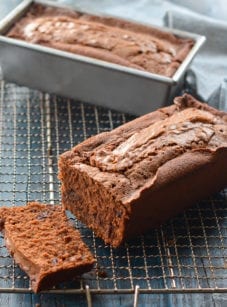
More Rich Chocolate Desserts You May Like

Brownie Pie

Ingredients
- 1 unbaked homemade or store-bought 9-in (23-cm) deep-dish pie crust
- ½ cup (1 stick) unsalted butter
- 2 ounces unsweetened chocolate, coarsely chopped
- 1½ teaspoons vanilla extract
- ½ cup granulated sugar
- ½ cup (packed) dark brown sugar
- 3 large eggs
- ¼ teaspoon salt
- ⅔ cup all-purpose flour, spooned into measuring cup and leveled-off
- ¾ cup semi-sweet chocolate chips
- Vanilla or coffee ice cream optional, for serving
Instructions
- Preheat the oven to 350°F (175°C) and set an oven rack in the middle position. Roll out the crust, if necessary, and place in a 9-inch (23-cm) deep-dish pie pan. (Skip this step if using a store-bought pie crust in an aluminum pan.) Set aside.
- Melt the butter in a small saucepan over medium heat. Off the heat, add the chocolate and stir until melted. Transfer the mixture to a large bowl and add the vanilla, granulated sugar, and brown sugar; whisk until evenly combined. Add the eggs one at a time, whisking until well combined after each addition. Add the salt and flour and whisk until evenly combined. Stir in the chocolate chips.
- Pour the chocolate mixture into the pie crust. Bake until the filling is set and a crust forms on top, 45 to 50 minutes. (If the edges of the crust start to get too brown towards the end of the baking time, cover it with strips of aluminum foil.) Let cool on a wire rack for at least 1 hour before serving.
Notes
Nutrition Information
This website is written and produced for informational purposes only. I am not a certified nutritionist and the nutritional data on this site has not been evaluated or approved by a nutritionist or the Food and Drug Administration. Nutritional information is offered as a courtesy and should not be construed as a guarantee. The data is calculated through an online nutritional calculator, Edamam.com. Although I do my best to provide accurate nutritional information, these figures should be considered estimates only. Varying factors such as product types or brands purchased, natural fluctuations in fresh produce, and the way ingredients are processed change the effective nutritional information in any given recipe. Furthermore, different online calculators provide different results depending on their own nutrition fact sources and algorithms. To obtain the most accurate nutritional information in a given recipe, you should calculate the nutritional information with the actual ingredients used in your recipe, using your preferred nutrition calculator.
I love this recipe and have made it several times. The brownie with pie crust topped with ice cream or whipped cream is delicious! I happen to have a few bars of bittersweet chocolate (60% cacao) in my pantry. Can I substitute that for the unsweetened chocolate?
So glad you like it! Yes, that substitute should be fine.
This is by far the BEST chocolate pie recipe i’ve ever made!!!! I like to double the recipe and use a 10 in pie tin so that the middle is nice and gooey!! plus it gives me a little extra batter so eat 🙂
Pie is delicious ! My family loved it and I loved how easy it was to make . Only issue I had was a nice size crack in filling. I actually underbaked a little because it looked ready to remove from oven. Yours is lovely and for presentation, I would like to have mine with no cracks too. Did not affect the taste….still yummy!
Hi Jennie, Glad to hear your family enjoyed the pie! Regarding the crack, I haven’t experienced that in all the times I’ve made the pie. Did you make any adjustments to the recipe or ingredient substitutions? If not, it could be that you slightly over-mixed the batter. Please LMK if I can help in any other way. 😊
I made this for my family on the weekend. It was easy and delicious and was gobbled up quickly! Thank you!
Hello, do you think by not adding the choc. chips it would make much of adifference in the finished product.
Hi Sidney, You can get away with skipping the chocolate chips — it will still be good!
Would I substitute the peanut butter chips during the chocolate chip step?
Hi Kimberly, I would add a handful in addition to the chocolate chips. I’d love to know how it turns out!
The peanut butter chips were a hit. Family said it reminded them of mud pie. I served with vanilla ice cream. Crust (store bought) was a nice touch. Thinking to try a graham cracker crust next time.
This pie sounds sooooo yummy but before I make it, can you please clarify if the homemade pie crust is parbaked prior to adding the brownie filling.
Thanks, Jenn. I LOVE your recipes for which many of my friends have tried and request the recipes from me.
Hi Fran, There is no need to parbake the crust. Please LMK how it turns out if you try it. 🙂
Love the look of this! (5 stars in advance) Should the pie case be blind baked first?
Hi Ainsley, No it’s not necessary to blind bake the crust. Hope you enjoy!