Marble Cake

This post may contain affiliate links. Read my full disclosure policy.
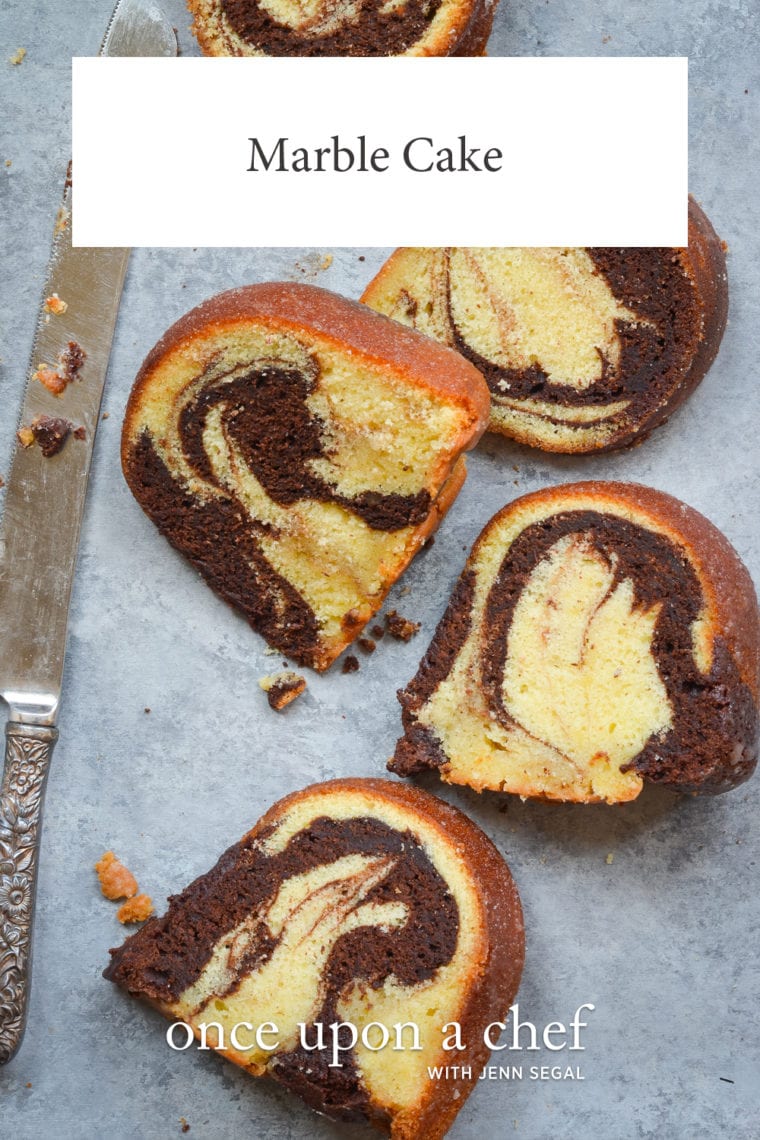
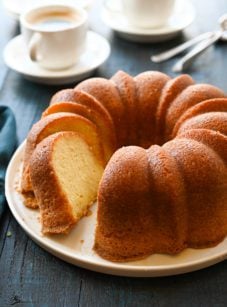
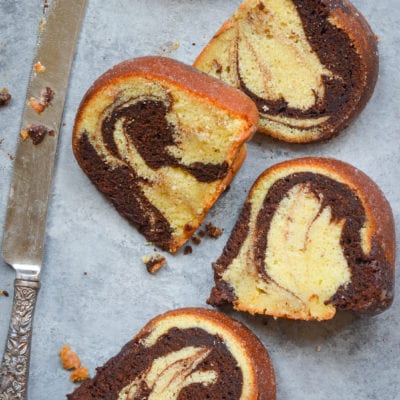
Marble cake is the best of both worlds—swirls of tender vanilla and rich chocolate cake baked together in one beautiful Bundt. It looks impressive but comes together easily with just a few pantry staples. Perfect for birthdays, brunches, or just because.
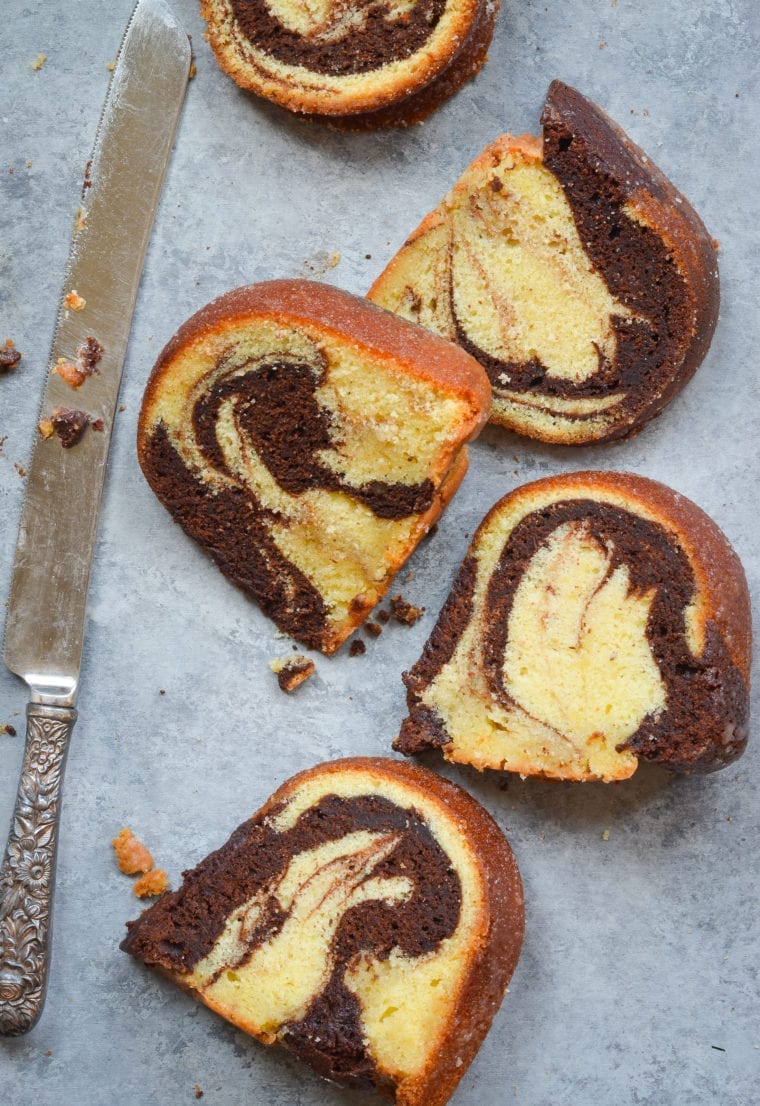
Marble cake is the answer to “Why choose one when you can have both?” With swirls of fudgy chocolate and buttery vanilla cake, it’s got that old-fashioned charm and the kind of flavor that makes you sneak an extra slice. Bonus: it’s super easy to pull off!
This chocolate marble pound cake is basically a marbled version of the iconic Kentucky butter cake. You’ll be happy to know that there’s no need for two completely different batters—just mix a portion of the vanilla batter with melted chocolate and cocoa powder, and voilà, you’ve got your chocolate batter!
Like my classic pound cake and chocolate Bundt cake, this chocolate swirl cake is a crowd-pleaser for all ages!
“One of best cakes I’ve ever baked!”
What You’ll Need To Make Marble Cake
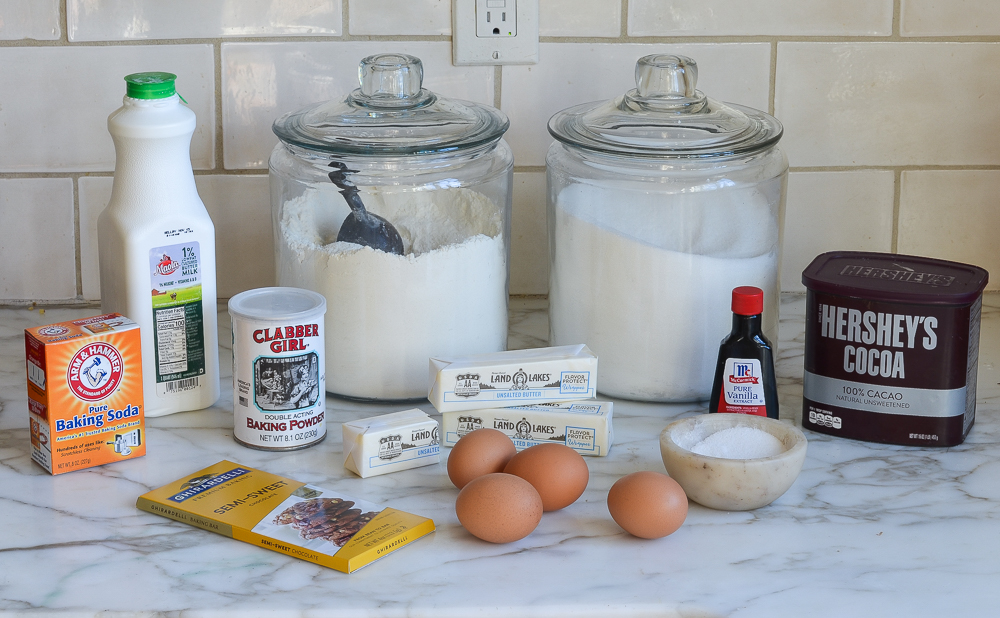
- Chocolate: I use a mix of natural cocoa powder and semisweet chocolate to create the chocolate swirl. The cocoa powder brings rich, intense flavor, while the semisweet chocolate makes the ribbons even deeper and more chocolatey.
- Sugar: Sweetens both the cake and the glaze and contributes to the tender texture of the crumb.
- Buttermilk: Adds moisture and gives the cake a soft, tender crumb. Its acidity is what makes it different from regular milk. No buttermilk? Just add 1 tablespoon of lemon juice or vinegar to a 1-cup measuring cup, fill it the rest of the way with milk, and let it sit for 5 minutes before using.
- Eggs and Flour: Our baking basics which provide structure for the cake.
- Vanilla Extract: Brings warmth and depth to both the cake and glaze.
- Baking Powder & Baking Soda: Work together to give the cake lift and ensure a light texture.
- Unsalted Butter: Adds richness and flavor to both the cake and the glaze.
- Jump to the printable recipe for precise measurements
How to Make homemade Marble cake
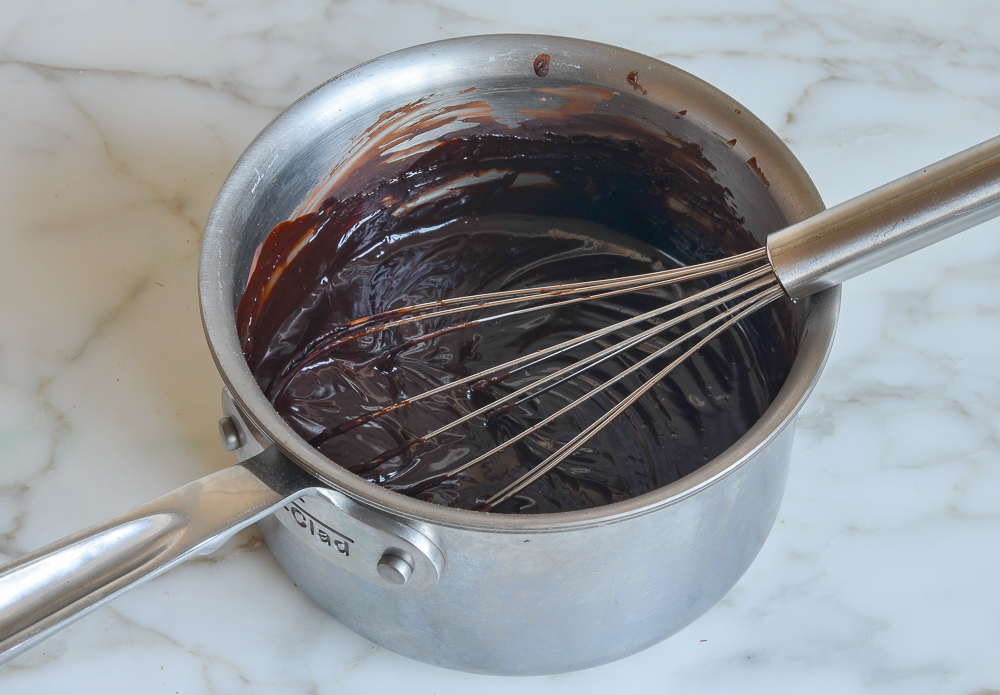
Step 1: Prep the pan and make the Chocolate Base. Spray your Bundt pan generously with cooking spray with flour. Combine the cocoa powder, a half cup of the sugar, and the water in a small saucepan. Bring to a simmer over high heat, whisking it together until the mixture is smooth. Remove the cocoa mixture from the heat and immediately add the chocolate. Whisk the mixture until the chocolate is melted and it’s smooth.
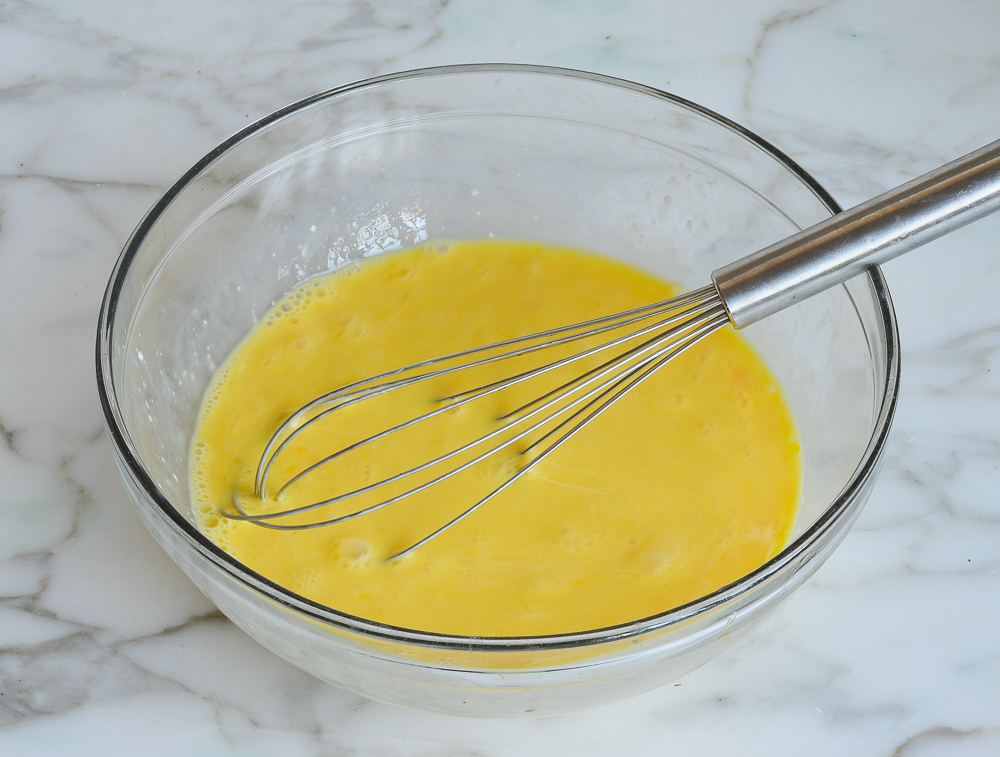
Step 2: Combine the wet ingredients. Whisk together the buttermilk, eggs, and vanilla in a medium bowl.
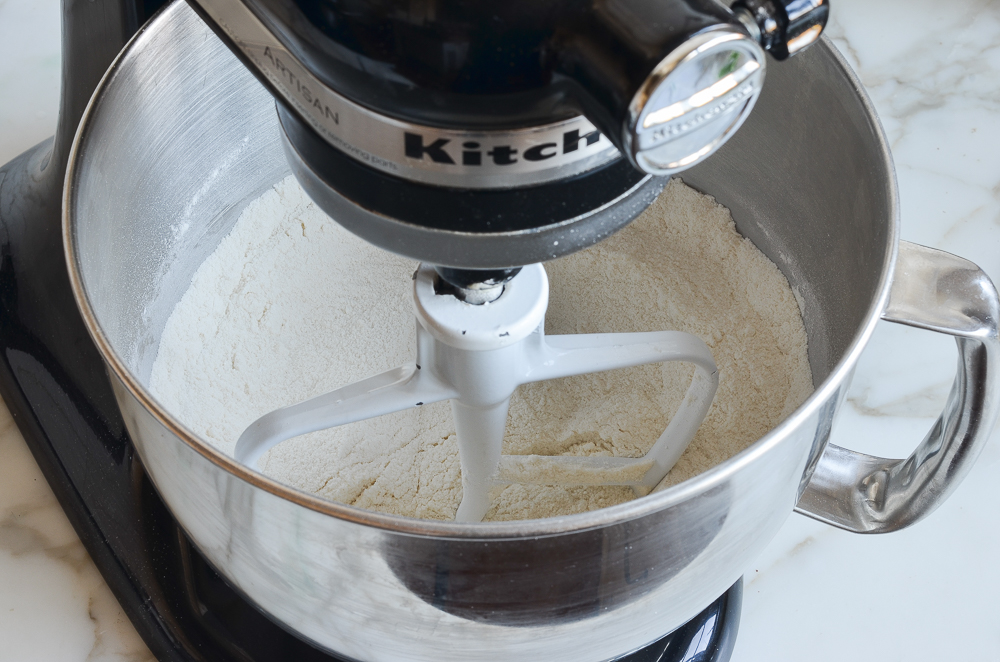
Step 3: Combine the dry ingredients. Mix the flour, baking powder, baking soda, and remaining 2 cups of sugar together. You can do this in a large mixing bowl with an electric mixer or use a stand mixer fitted with the paddle attachment or beaters.
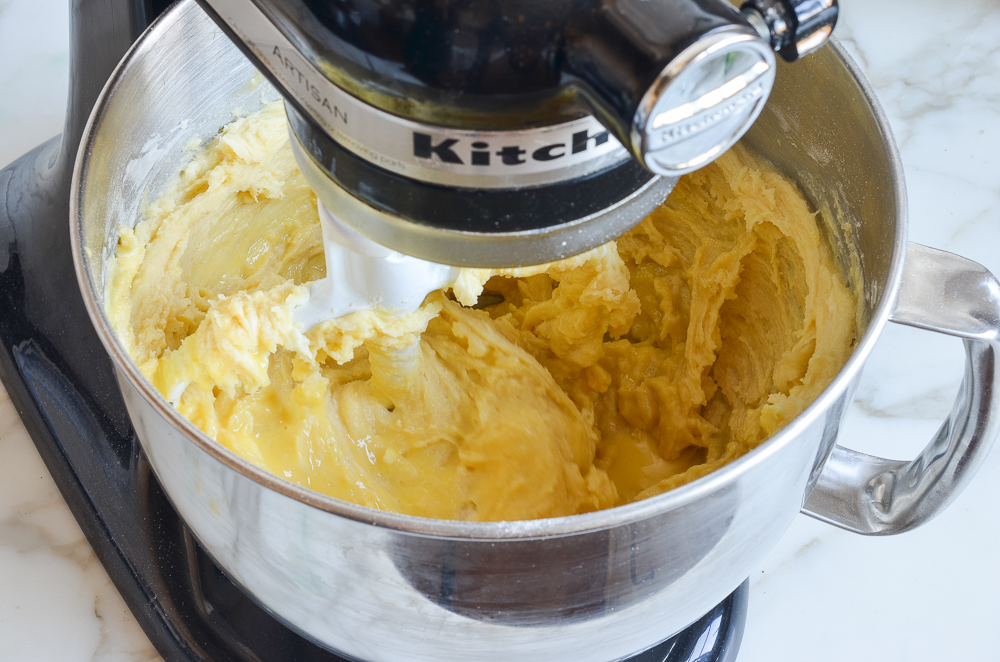
Step 4: Combine mixtures. Add the softened butter and half of the buttermilk mixture to your flour mixture. Mix on low speed just until moistened but still a little crumbly, about 1 minute. Gradually add the remaining buttermilk mixture with the mixer running on low.
Pro Tip: Stop once or twice to scrape underneath the paddle. Dry flour often hides at the very bottom and can streak your cake if it’s not caught early.
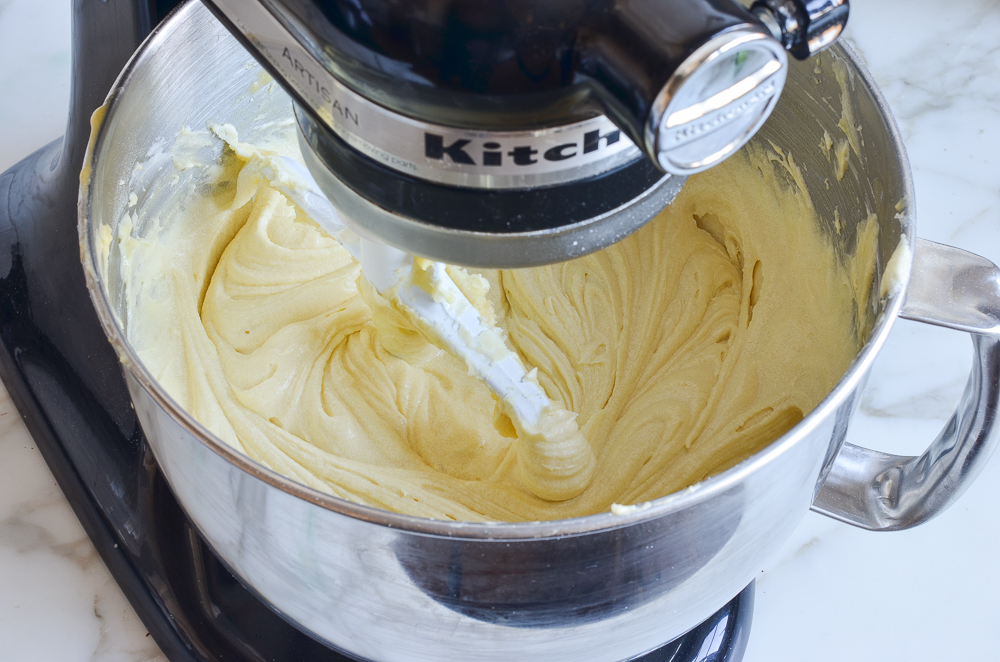
Step 5: Beat the Batter. Increase the speed to medium and mix for three minutes.
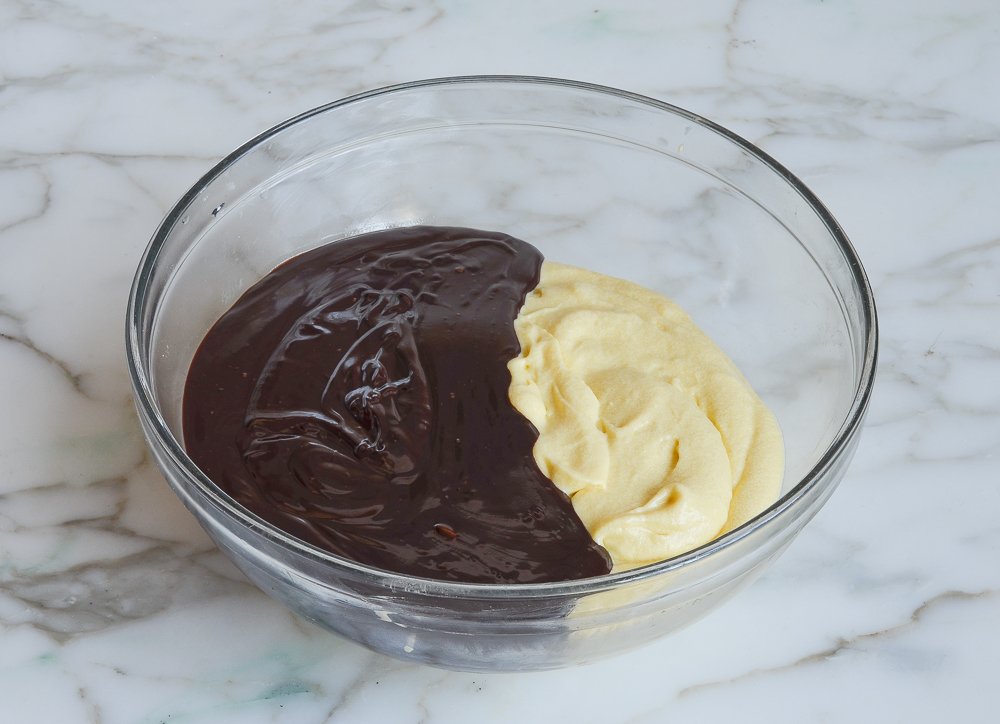
Step 6: Make the Chocolate Batter. Transfer about two-thirds of the marble cake batter to a medium bowl and add the chocolate base you made earlier. Whisk until smooth—that’s your chocolate batter.
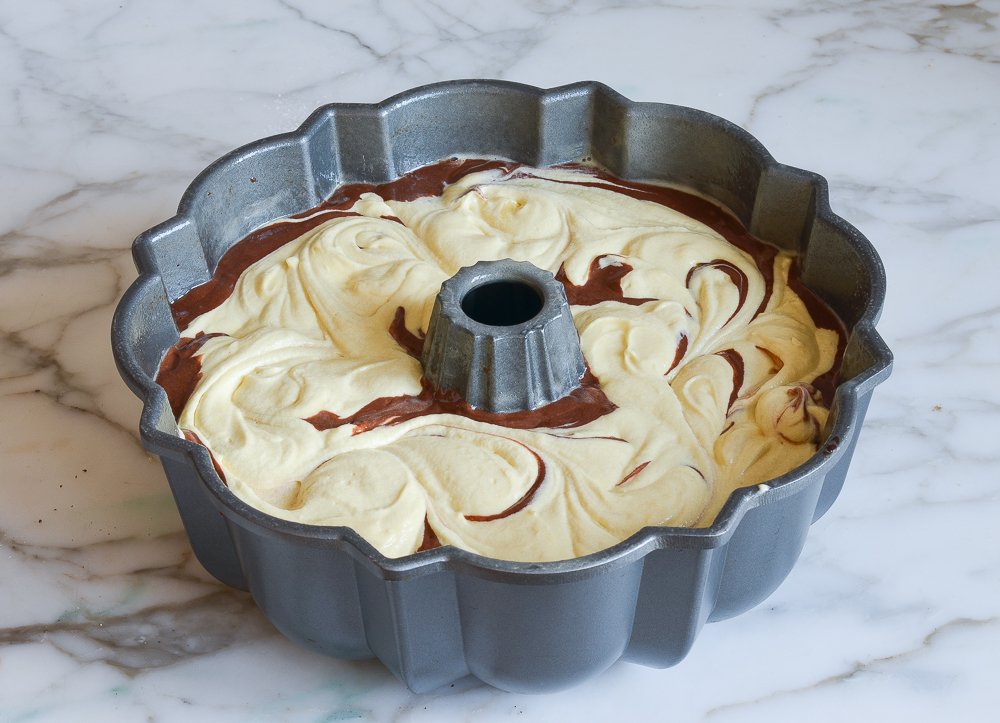
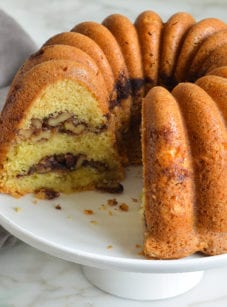
Step 7: Assemble and swirl the cake layers. Spoon half of the vanilla batter into a greased Bundt pan. Pour the chocolate batter over the top. Spoon the remaining vanilla batter over the top of the chocolate. Use a butter knife or skewer to swirl the batters together with a zig-zag motion, going three times around the pan. Bake in a 325°F oven for 60 to 70 minutes, until a cake tester comes out clean.
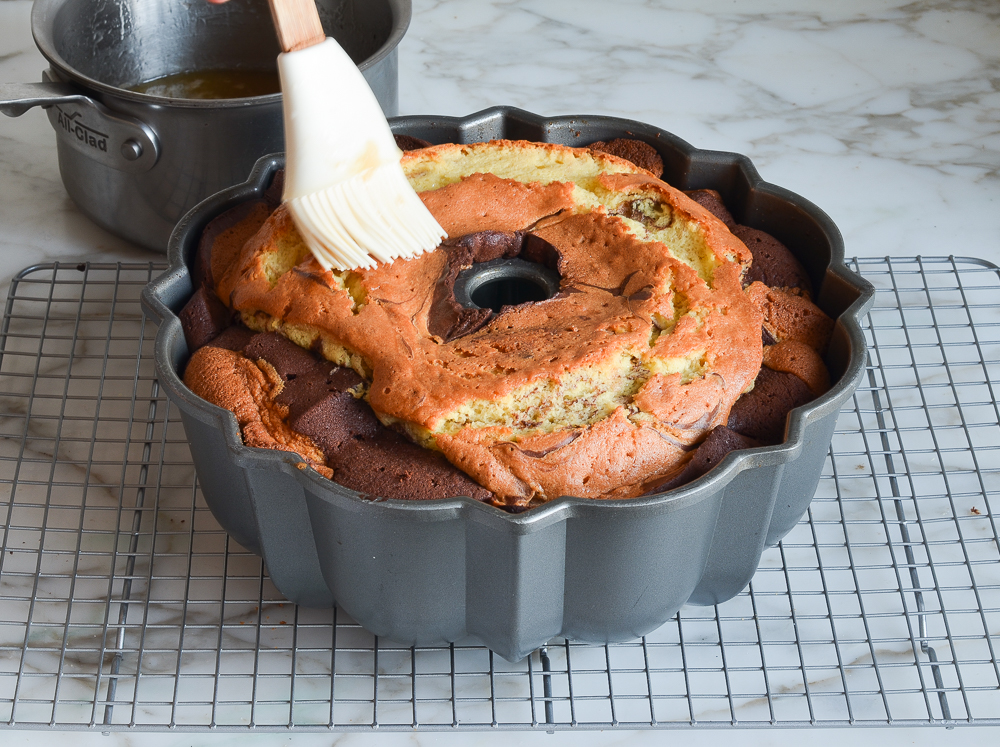
Step 8: Make the glaze. While the cake bakes, make the glaze by boiling butter, sugar, water, and vanilla, then simmering until the sugar dissolves.

Step 9: Glaze the cake and cool. Remove the cake from the oven when it’s ready. Use a skewer or toothpick to poke about 40 holes in the bottom of the cake. Brush half of the glaze evenly over the bottom of the cake. Leave the cake on the rack to cool for 30 minutes.
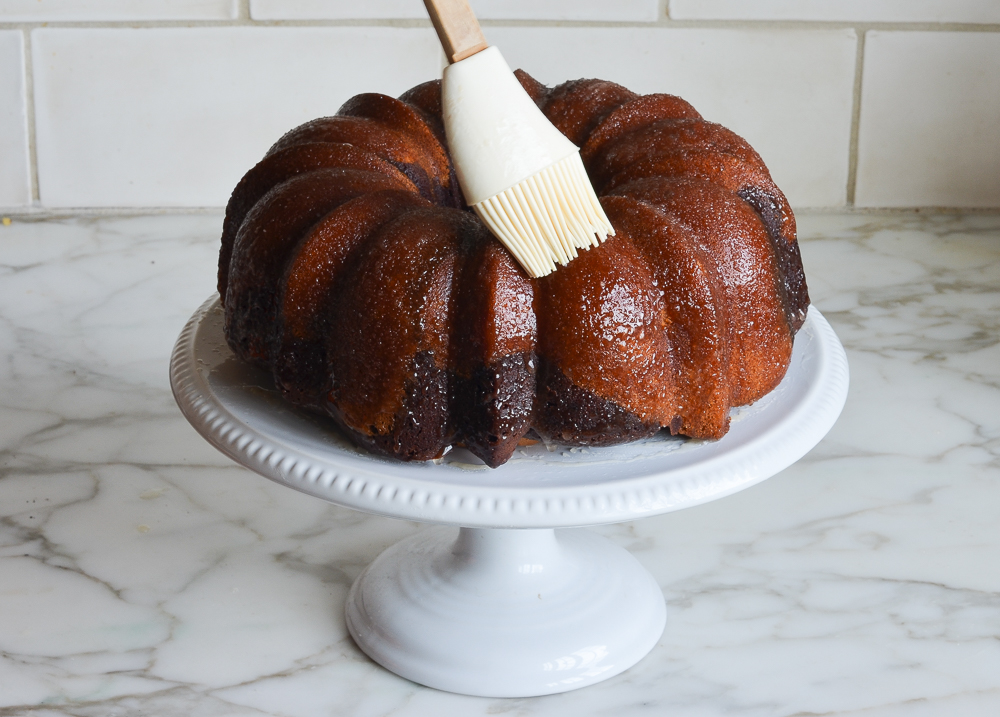
Step 10: Finish the marble cake. Invert the cake onto a serving platter. Brush the remaining glaze evenly over the top and sides of the cake. Let the cake cool before serving. Store your homemade marble cake in a cake dome at room temperature for up to 3 days or freeze it for longer storage.
Jenn’s Pro Tips for the best marble cake
- Making the Swirls. Be careful not to over-swirl the batters or the flavors will get muddled. All it takes is a few turns around the pan with a knife to do the trick.
- Greasing Your Pan. Make sure to fully grease your bundt pan, including all the cracks and crevices. Baking spray makes this really easy to do!
- Do Not Over-Bake. Your bundt marble cake is done when you insert a toothpick or other cake tester into the center of the cake and it comes out clean.
More Homemade Cakes You’ll Love
Marble Cake
Ingredients
For the Cake
- ½ cup natural unsweetened cocoa powder, such as Hershey's
- 2½ cups sugar, divided
- ½ cup water
- 4 oz semi-sweet chocolate, best quality such as Ghirardelli, broken into 1-in pieces
- 1 cup buttermilk (see note)
- 4 large eggs
- 2 teaspoons vanilla extract
- 3 cups all-purpose flour, spooned into measuring cup and leveled-off
- 1 teaspoon baking powder
- ½ teaspoon baking soda
- ¾ teaspoon salt
- 1 cup (2 sticks) unsalted butter, softened
For the Glaze
- 5 tablespoons unsalted butter
- ¾ cup sugar
- ¼ cup water
- 2 teaspoons vanilla extract
Instructions
For the Cake
- Preheat the oven to 325°F (165°C) and set an oven rack in the middle position. Spray a 10-in/25-cm (12-cup) Bundt pan generously with nonstick cooking spray with flour, such as Baker's Joy or Pam with Flour.
- In a small saucepan, combine the cocoa powder, ½ cup (100 g) of the sugar, and the water. Bring to a simmer over high heat, whisking until smooth. Off the heat, immediately add the chocolate; whisk until the chocolate is melted and the mixture is smooth. Set aside.
- In a medium bowl, whisk together the buttermilk, eggs, and vanilla. Set aside. (Note that the mixture will start to look curdled as it sits; that's okay.)
- In the bowl of an electric mixer fitted with the paddle attachment or beaters, combine the flour, baking powder, baking soda, salt, and remaining 2 cups of sugar. Beat on low speed for 30 seconds to combine. Add the softened butter and half of the buttermilk mixture and mix on low speed until moistened but still a little crumbly, about 1 minute. With the mixer running on low, gradually add the remaining buttermilk mixture until incorporated, then increase the speed to medium and mix for three minutes, stopping once to scrape down the sides and bottom of the bowl with a rubber spatula. The batter should look pale and creamy. Scrape down the sides and bottom of the bowl again, making sure the batter is evenly mixed.
- Transfer about 2½ cups (600 ml) of the batter to a medium bowl. Add the chocolate mixture and whisk until smooth.
- Spoon half of the remaining vanilla batter into the prepared Bundt pan. Pour the chocolate batter over top. Finish by spooning the remaining vanilla batter over the chocolate (don't worry about covering the chocolate layer completely). Using a butter knife, swirl the batters together with a zig-zag motion, going three times around the pan. It may not look like the batters are swirled; that's okay. It's important not to over-swirl.
- Bake for 60 to 70 minutes, or until a cake tester comes out clean.
- While the cake bakes, make the glaze: In a small saucepan, combine the butter, sugar, water, and vanilla. Bring to a boil, then reduce the heat and simmer until the sugar is dissolved, about 1 minute.
- Set the pan on a cooling rack. Using a skewer or toothpick, poke about 40 holes in the bottom of the still-hot cake, going about ¾ of the way down. Spoon or brush half of the glaze evenly over the bottom of the cake. If the glaze starts to pool on the surface, poke more holes to help it absorb. Leave the cake on the rack to cool for 30 minutes.
- Invert the cake onto a serving platter. Brush the remaining glaze evenly over the top and sides of the cake, letting it soak in as you go. (Go slowly so that the glaze gets absorbed.) Let the cake sit for at least two hours before serving. Cut with a serrated knife.
Notes
- If you’d prefer not to buy it, check out some easy guidance on how to make buttermilk using milk and lemon juice or vinegar.
- Make-Ahead/Freezing Instructions: This cake keeps well for several days. Once cool, store in a cake dome (or cover with plastic wrap) at room temperature until ready to serve. The cake can also be frozen for up to 3 months. After it is completely cooled, double-wrap it securely with aluminum foil or plastic freezer wrap, or place it in heavy-duty freezer bag. Thaw overnight on the countertop before serving.
Nutrition Information
This website is written and produced for informational purposes only. I am not a certified nutritionist and the nutritional data on this site has not been evaluated or approved by a nutritionist or the Food and Drug Administration. Nutritional information is offered as a courtesy and should not be construed as a guarantee. The data is calculated through an online nutritional calculator, Edamam.com. Although I do my best to provide accurate nutritional information, these figures should be considered estimates only. Varying factors such as product types or brands purchased, natural fluctuations in fresh produce, and the way ingredients are processed change the effective nutritional information in any given recipe. Furthermore, different online calculators provide different results depending on their own nutrition fact sources and algorithms. To obtain the most accurate nutritional information in a given recipe, you should calculate the nutritional information with the actual ingredients used in your recipe, using your preferred nutrition calculator.
Never tasted a yummier marble cake! Thank you for sharing this treasure of a recipe ♡
Can a 10″ tube pan (angel food cake pan) be substituted for the bundt cake pan? If so, should the temperature be adjusted? Thank you!
Hi Sharon, a tube pan should be fine. The only change is it may take a few less minutes in the oven, so keep a close eye on it. Please LMK how it comes out!
This was a beautiful cake, rose beautifully. I made too much chocolate portion and not enough white. Did an icing for the top and added strawberries in the center upon serving. It is my go-to bundt now.