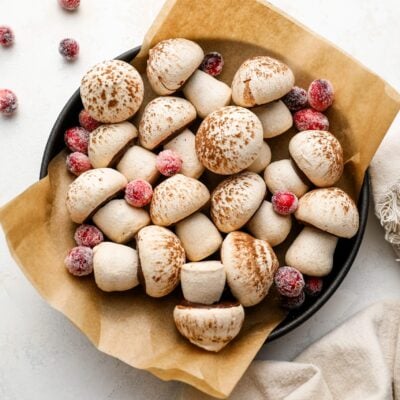
Meringue Mushrooms

This post may contain affiliate links. Read my full disclosure policy.
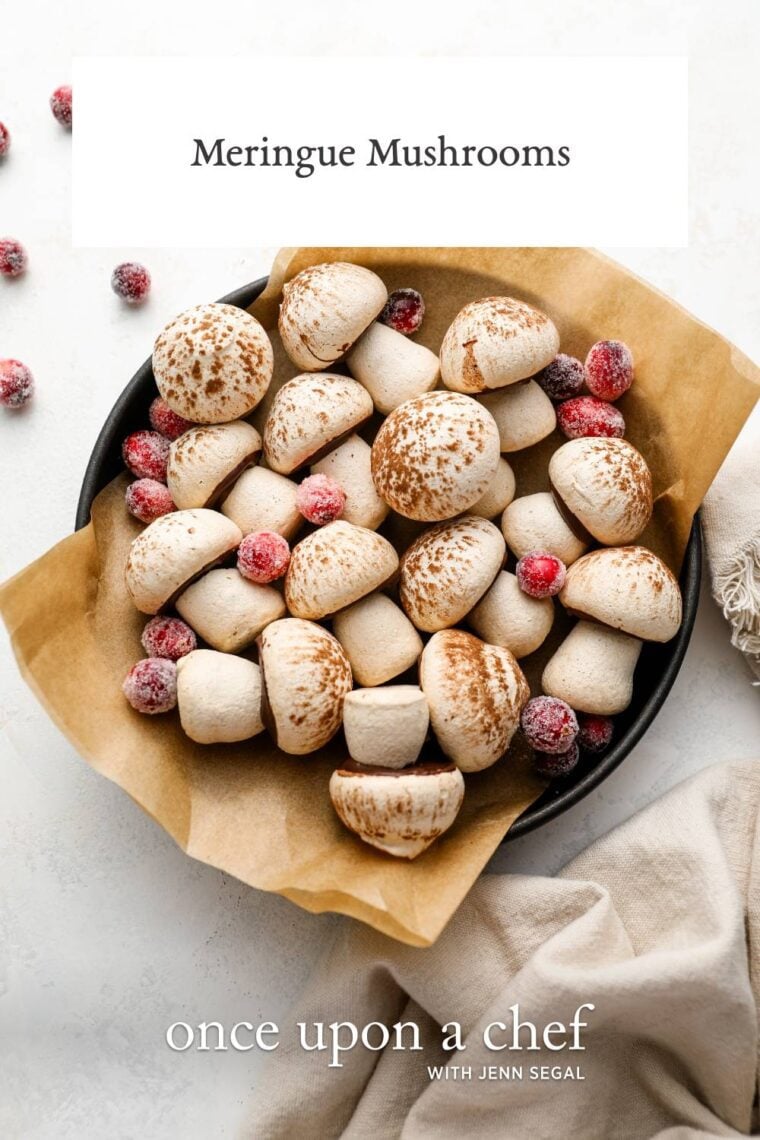
If you’re decorating a Yule log or putting together a winter dessert table, these light, crisp meringue mushrooms add instant charm.
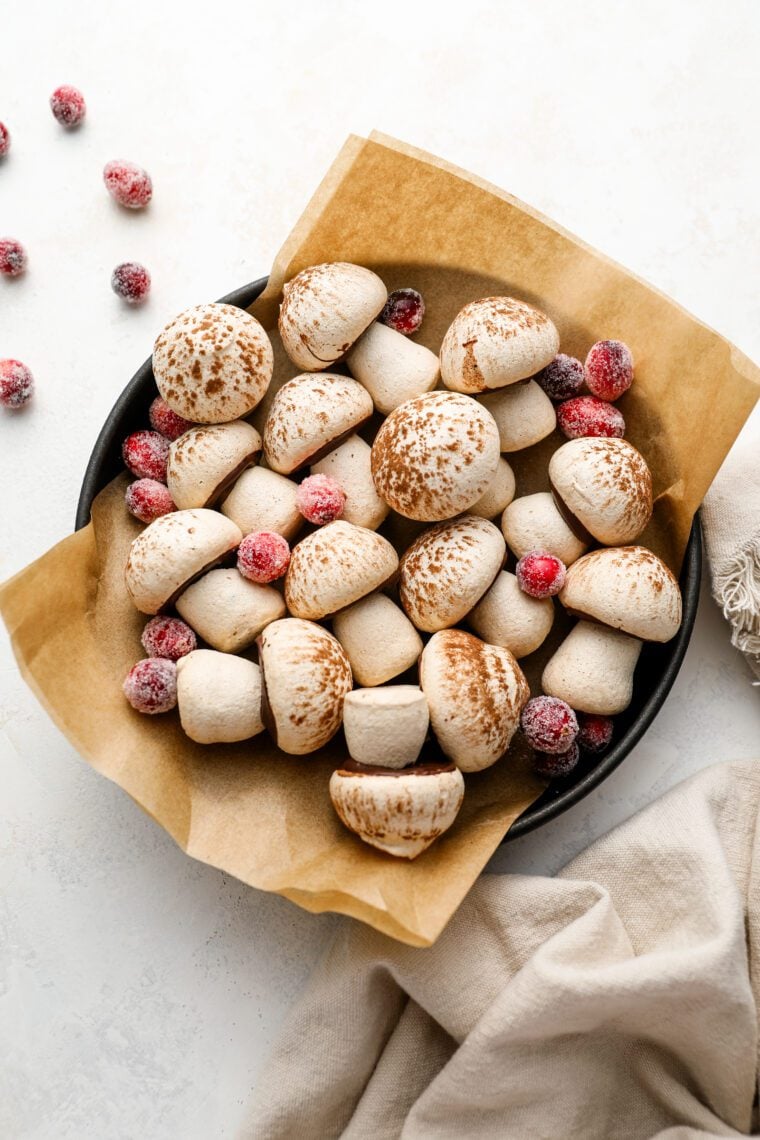
These little meringue mushrooms are best known for their starring role on a Yule log cake, where they add that charming, straight-out-of-the-forest look that makes the whole dessert feel extra special. But once you make a batch, you’ll find they’re useful beyond that. I love tucking them onto holiday cookie trays, winter dessert tables, and cakes as edible décor—they instantly make everything feel more festive without much effort. They’re light, crisp, not too sweet, and keep well, which makes them perfect for decorating ahead of time (and nibbling on while you do).
What You’ll Need To Make Meringue Mushrooms
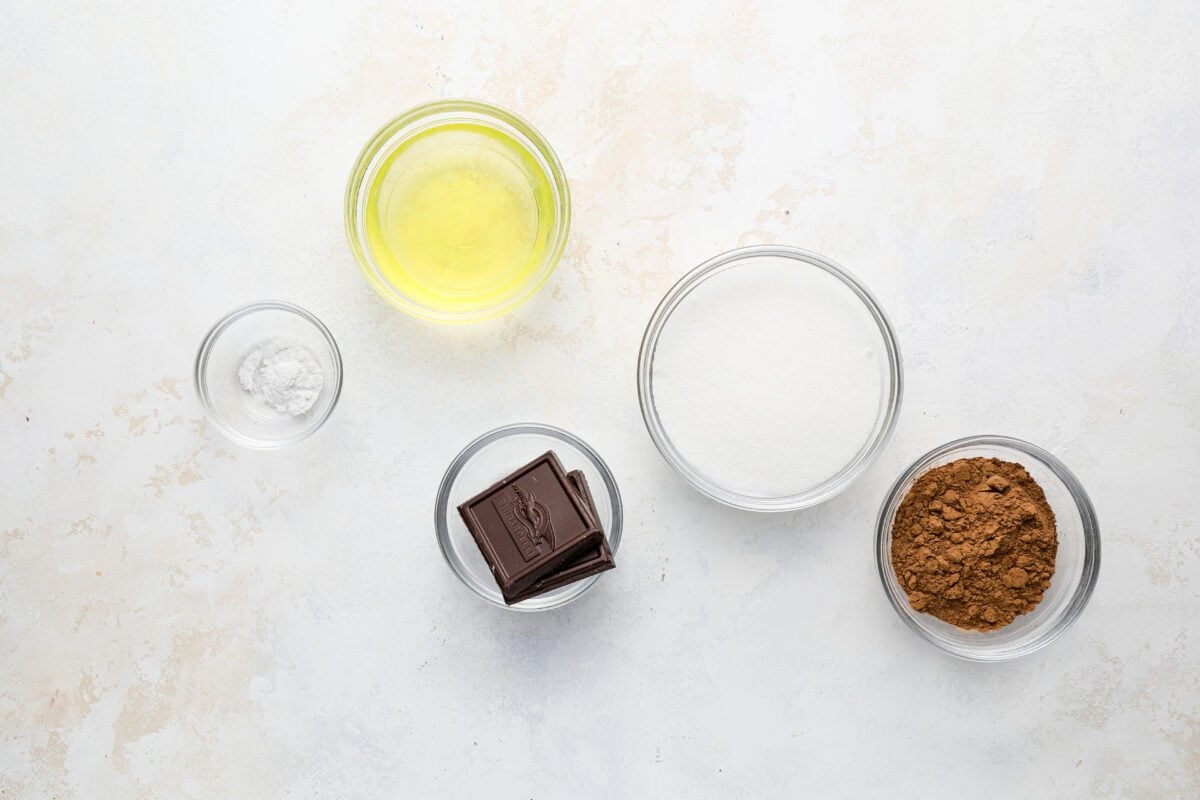
You’ll need egg whites, cream of tartar, sugar, semi-sweet chocolate, and cocoa powder. See the recipe card for precise measurements.
Step-By-Step Instructions
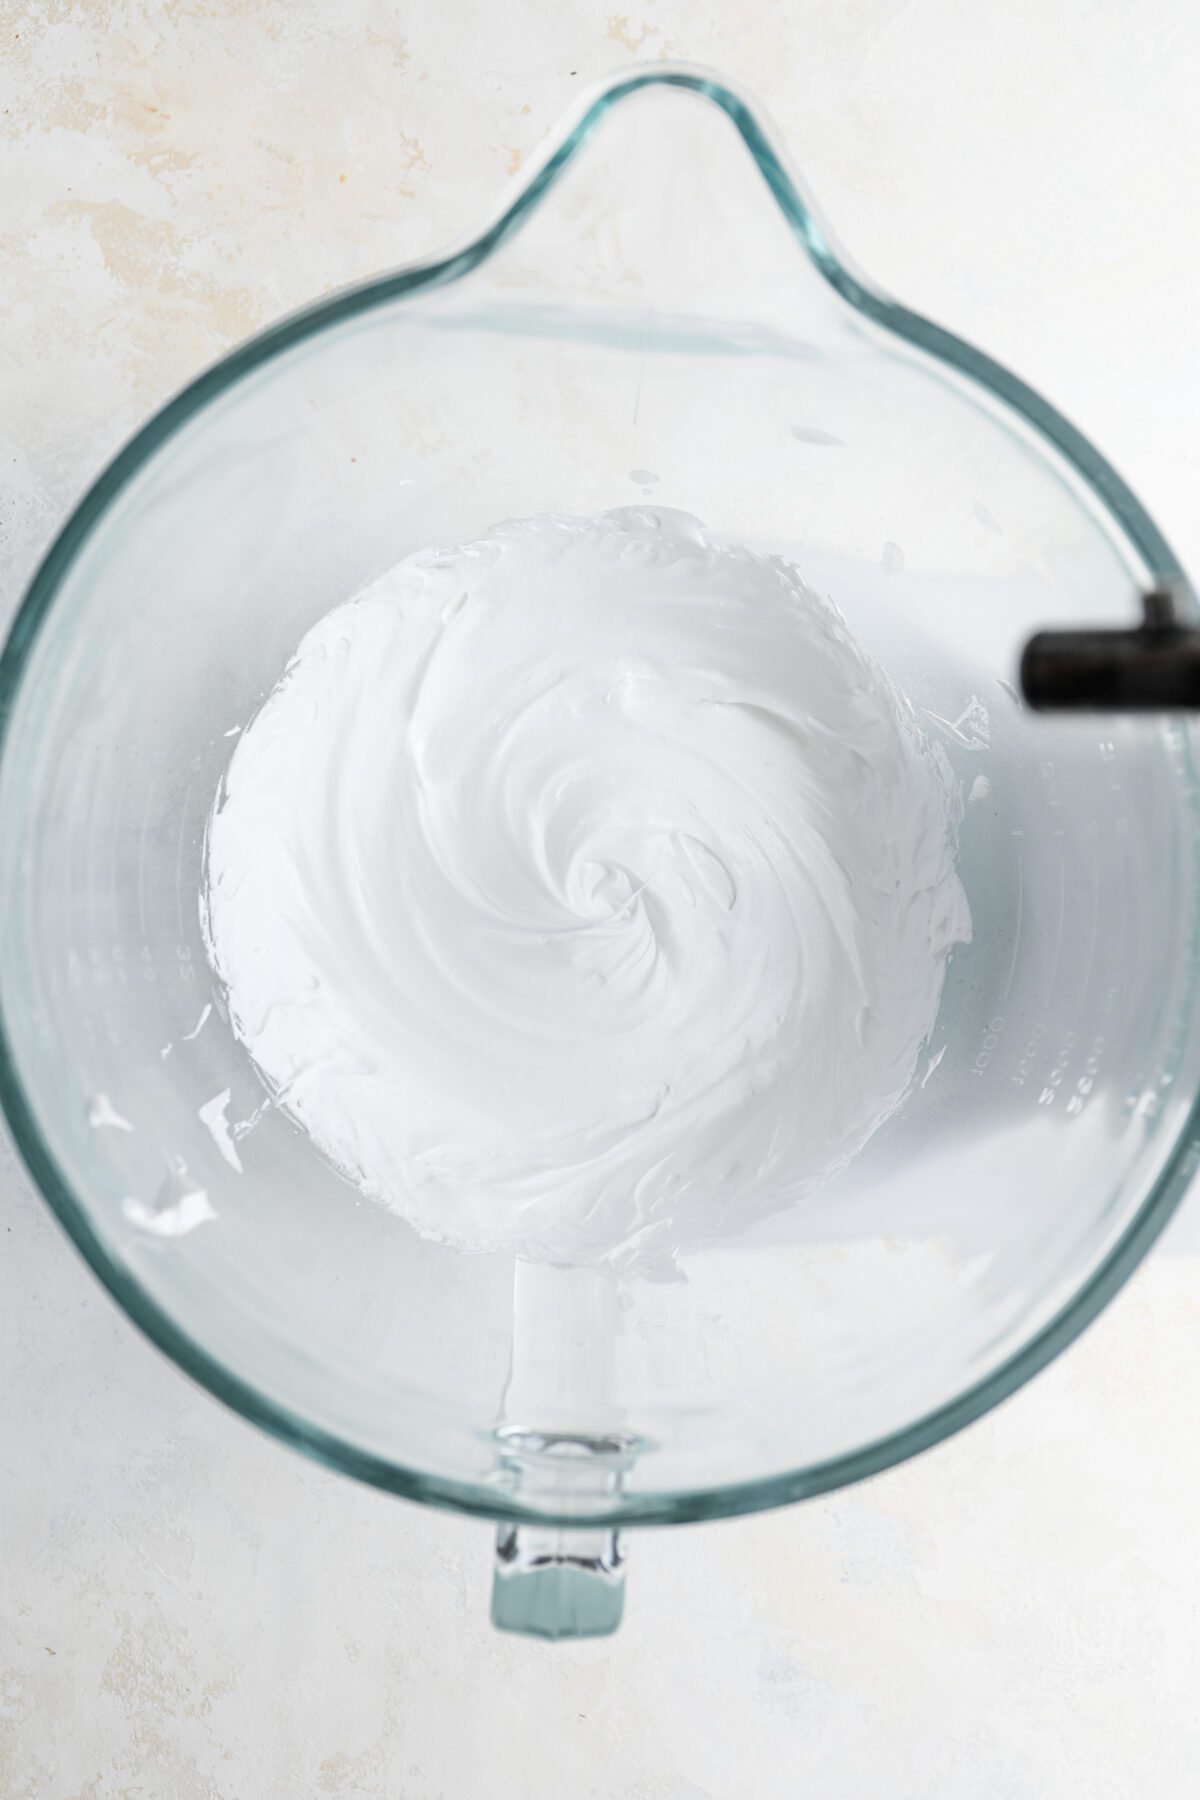
Step 1. Make the meringue. In the bowl of an electric mixer fitted with the whisk attachment, beat the egg whites and cream of tartar on medium speed until soft peaks form, about 2 minutes. Gradually add the sugar, one tablespoon at a time, then increase to high speed and beat until stiff, glossy peaks form and the sugar is fully dissolved, 7 to 10 minutes.
Pro Tip: The meringue is ready when it holds a firm peak with a slight curl and feels smooth—not gritty—when rubbed between your fingers.

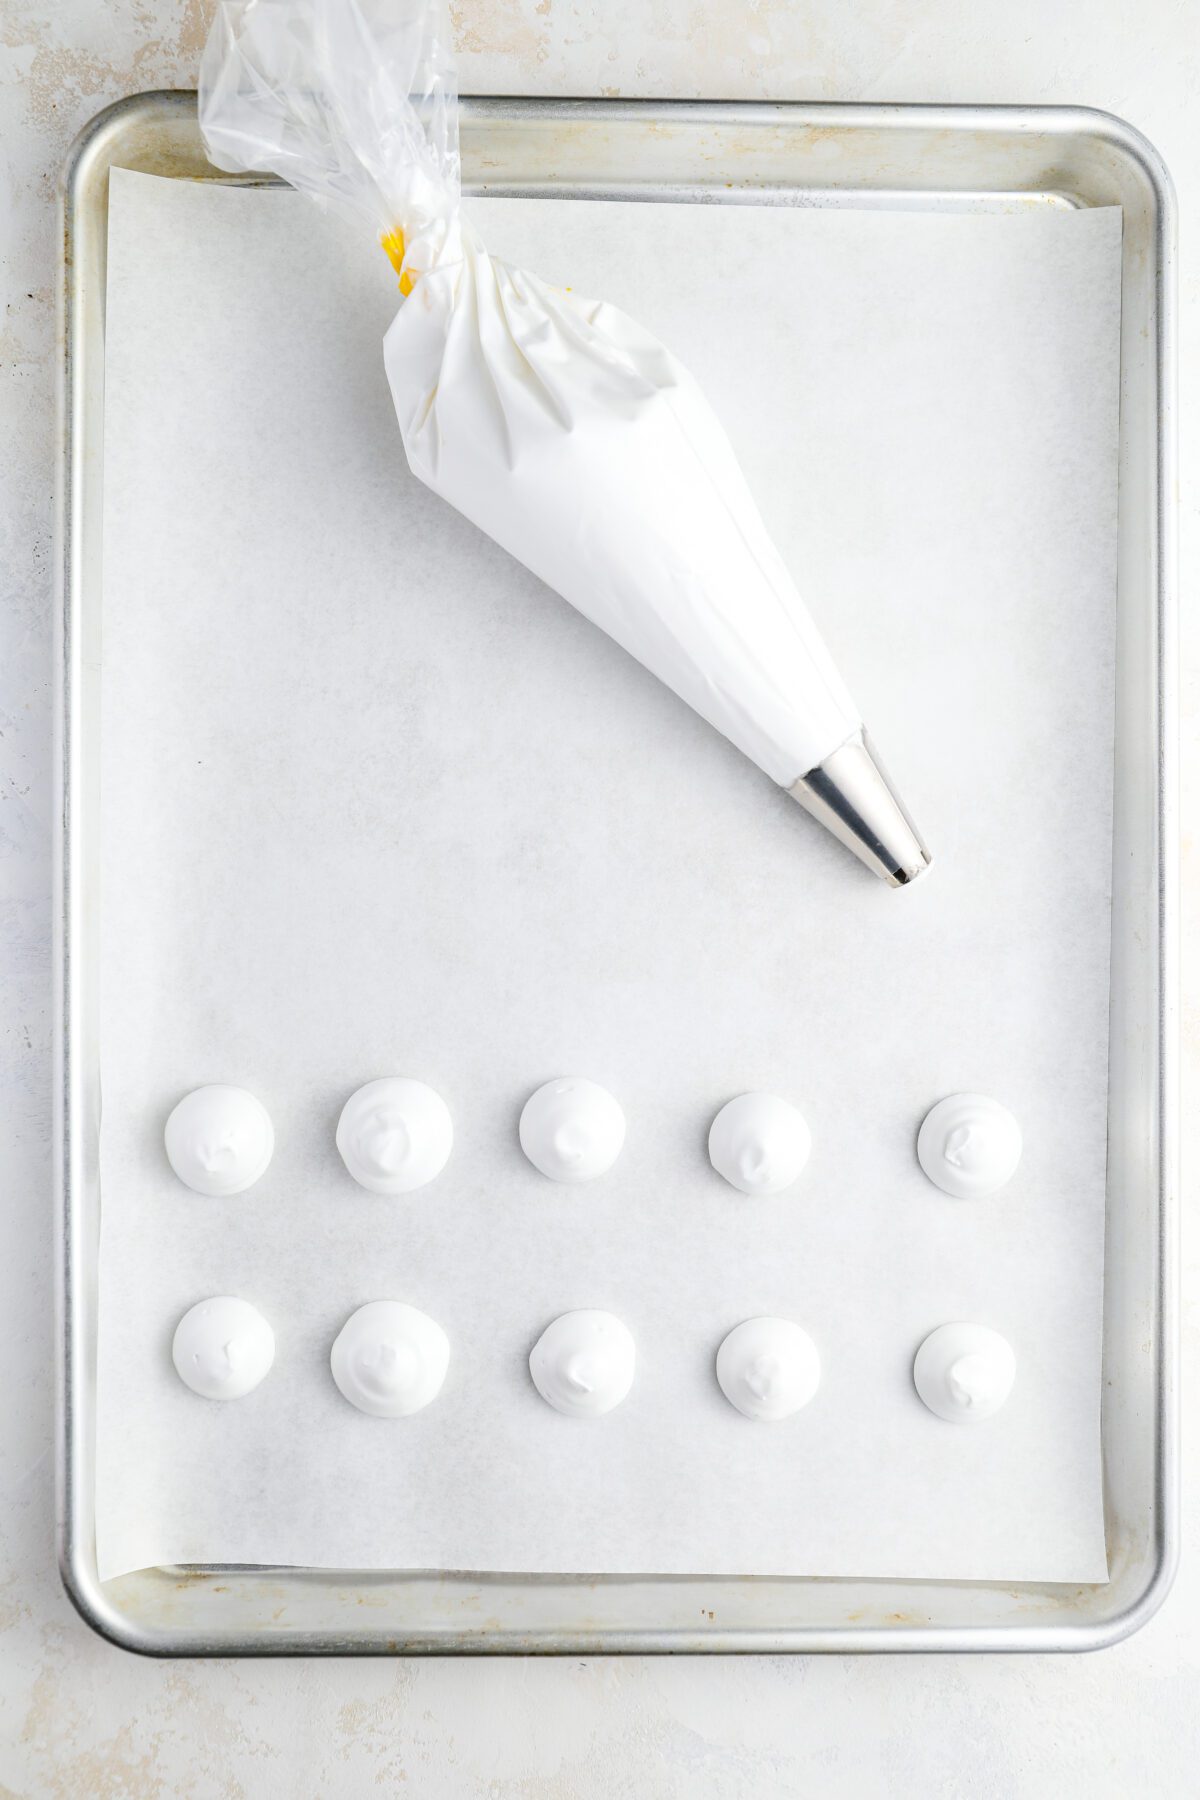
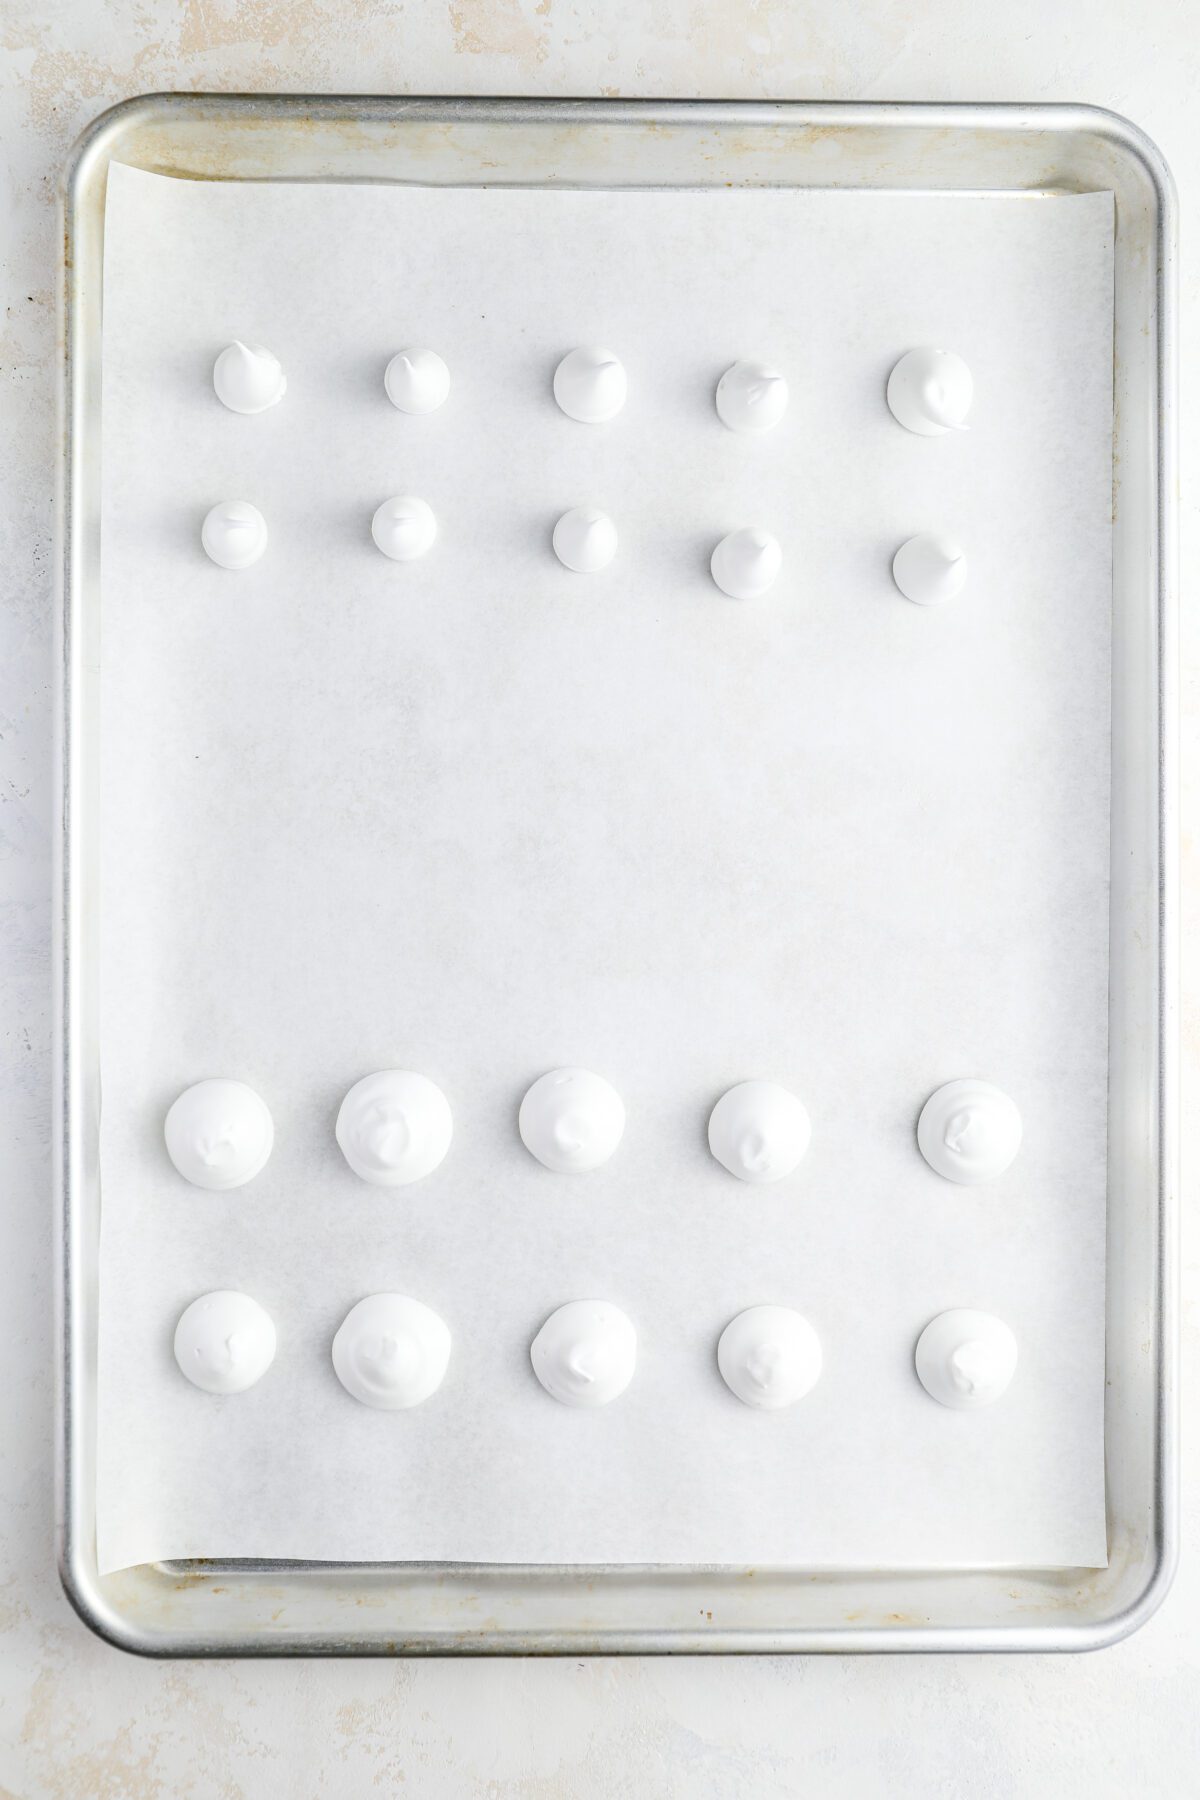
Step 2. Pipe the mushrooms. Transfer the meringue to a piping bag fitted with a ½-inch round tip. On a parchment-lined baking sheet, pipe 12 caps and 12 stems, plus a few extras. Pipe the caps as small rounds, 1 to 1½ inches wide, holding the bag straight up and stopping before lifting to avoid peaks; smooth any points with a damp fingertip. Pipe the stems as upright mounds about 1 inch tall, easing pressure as you lift to create a gentle taper.
Pro Tip: If any caps have little points, smooth them with a damp fingertip. (Don’t worry about the stems since you’ll trim them later.)
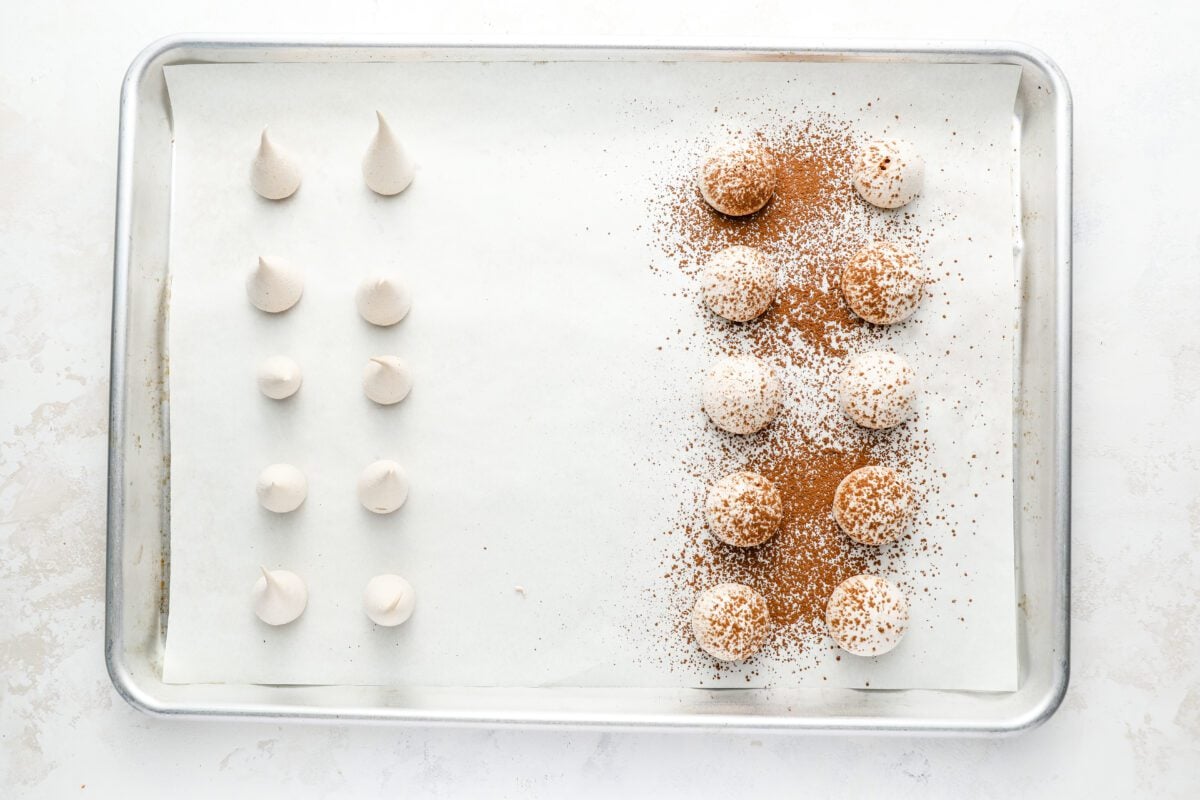
Step 3. Bake and dry. Lightly dust the caps with cocoa powder. Bake until dry and crisp but not browned, about 1½ hours. Turn off the oven, prop the door open slightly, and let the meringues cool completely inside.
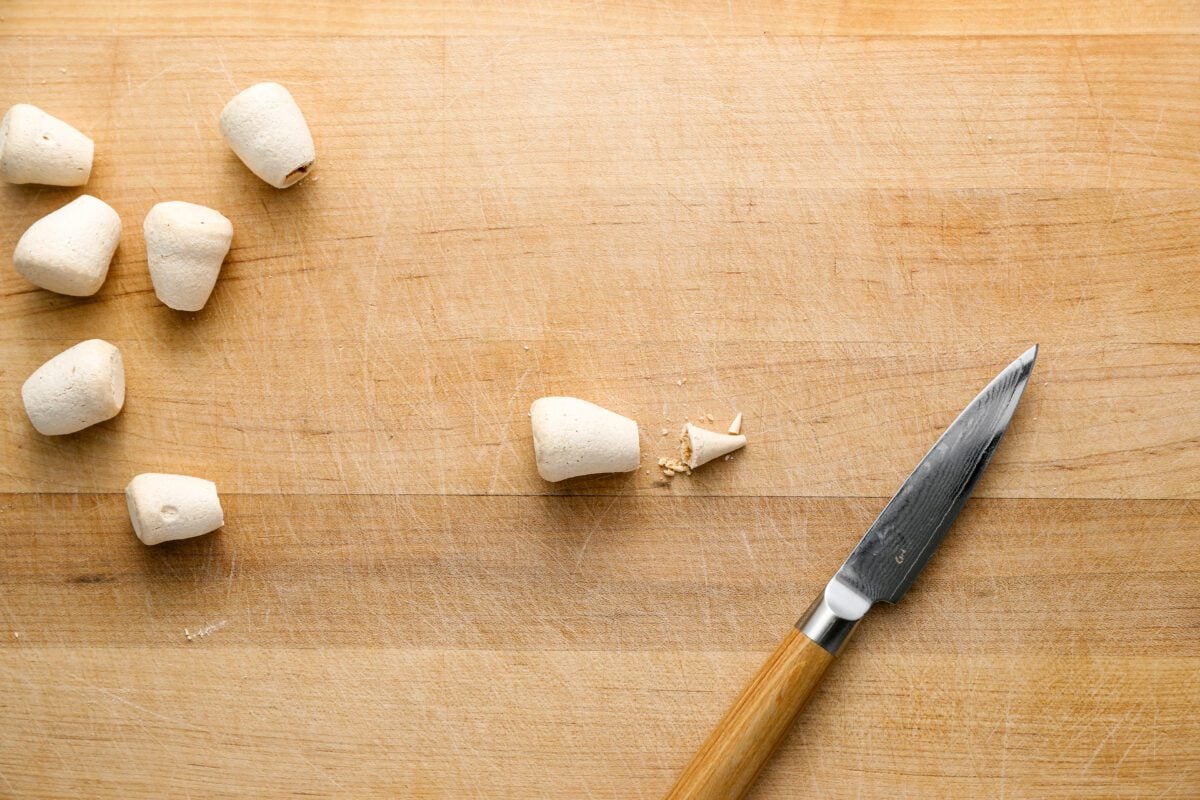
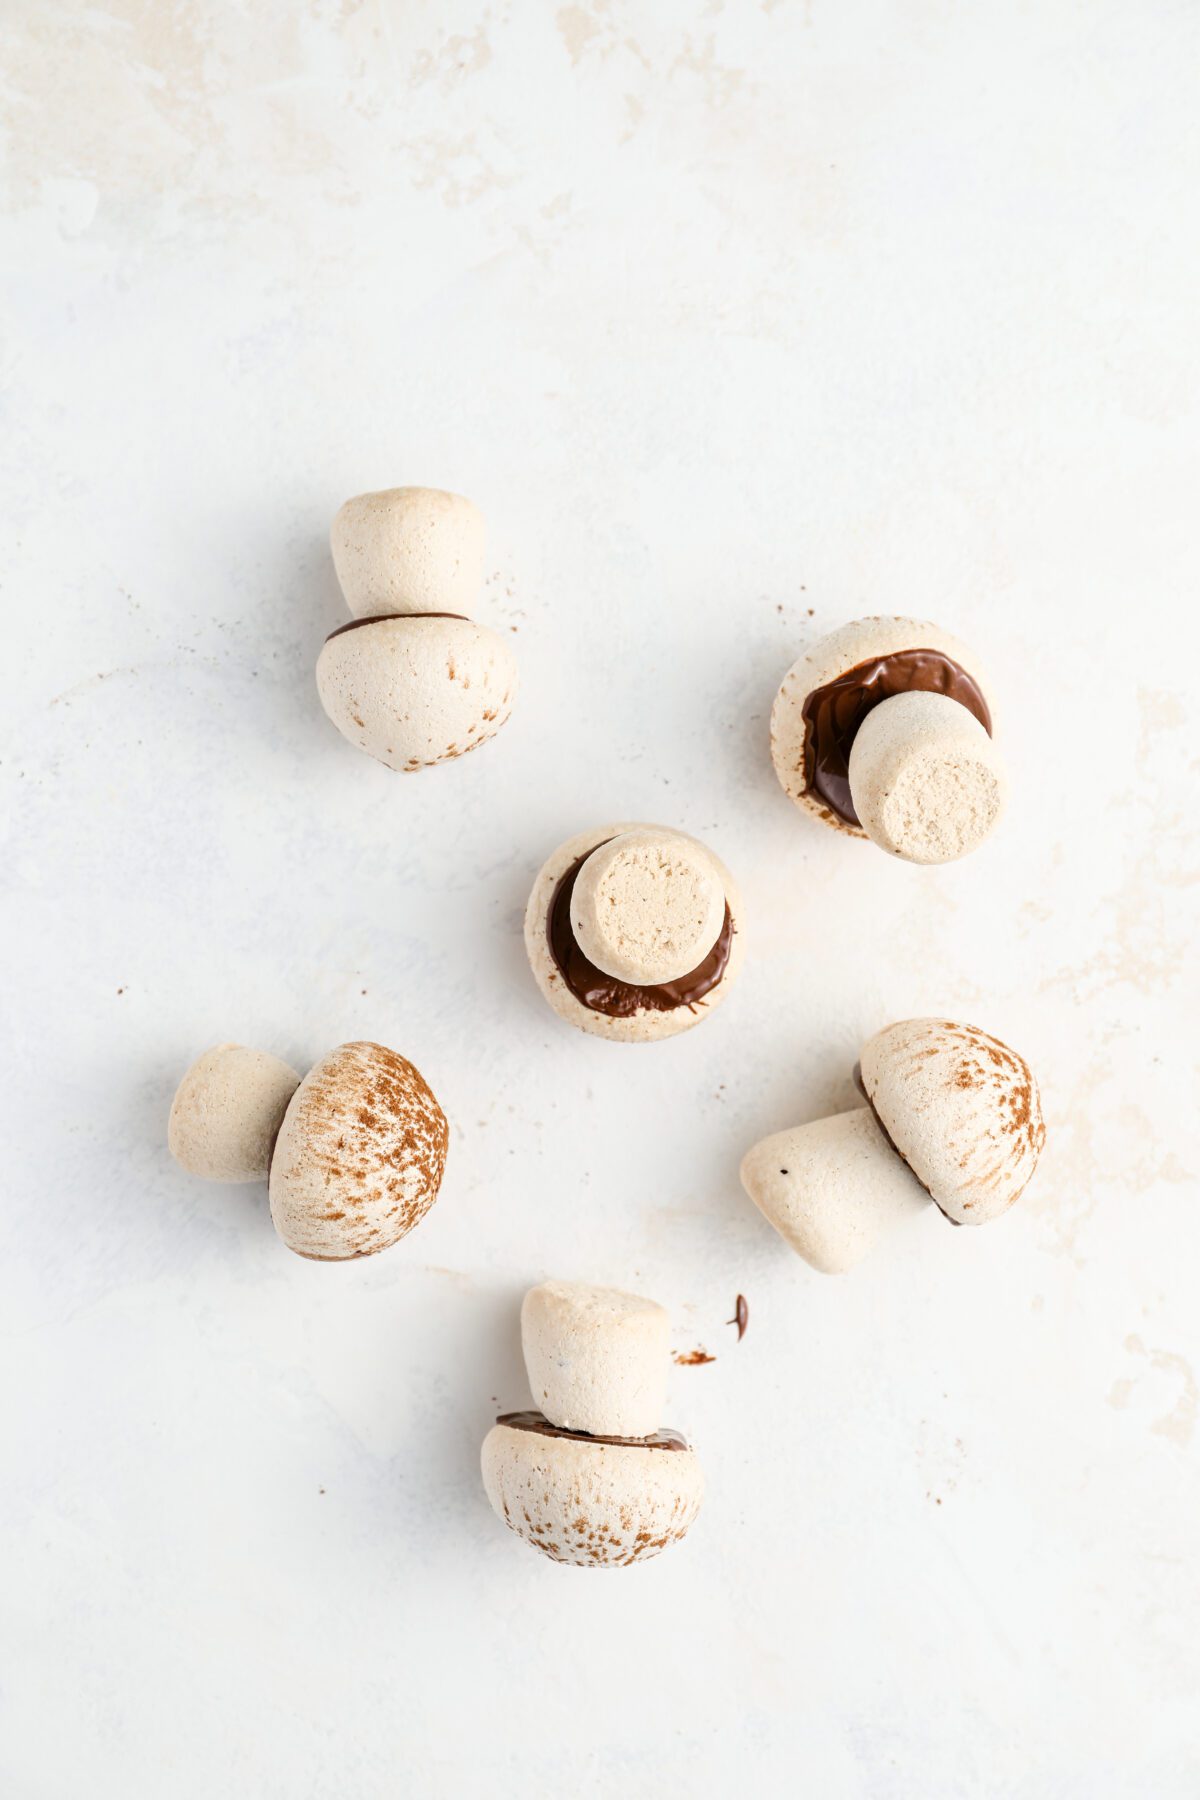
Step 4. Cut the stems. Use a paring knife to gently cut off the pointed tip of each stem so they’ll be flat.
Pro Tip: Don’t worry if the stems look a little wonky or uneven. Once they’re attached, the mushroom caps are wider than the stems and hide most imperfections—what matters more is that the stems are flat on top so they adhere well.
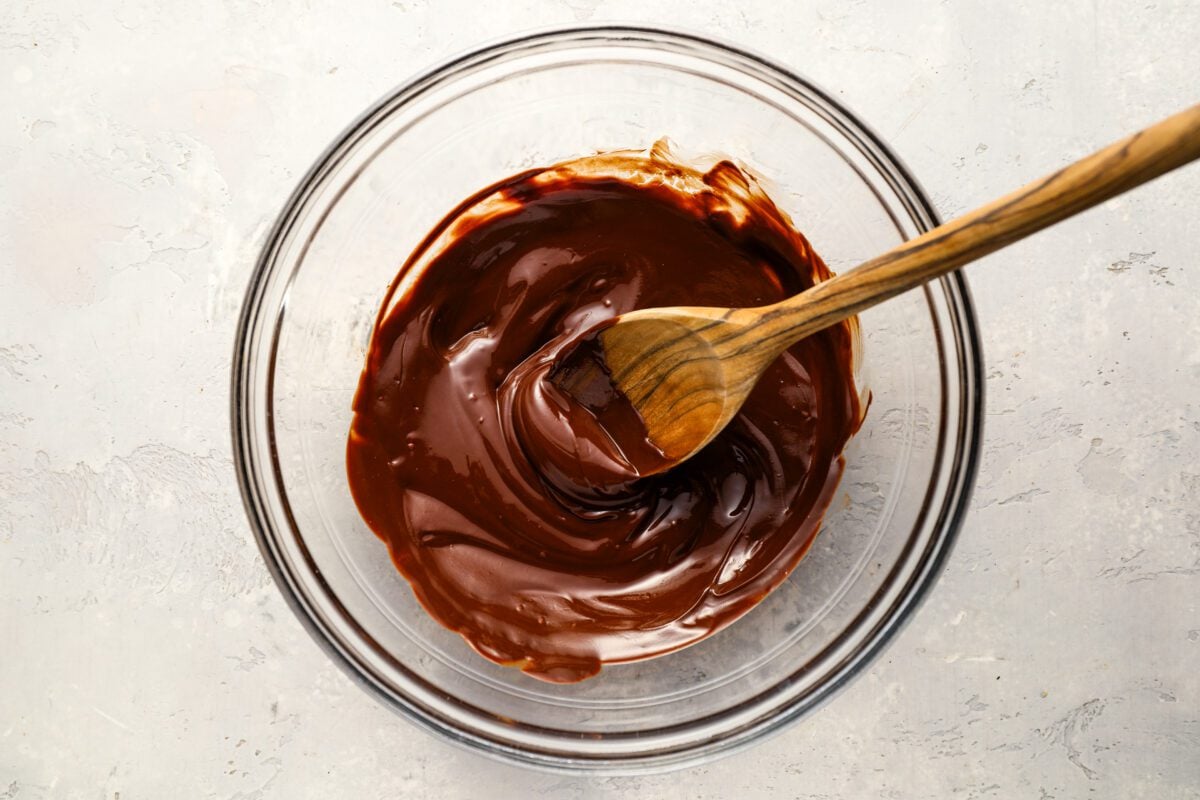
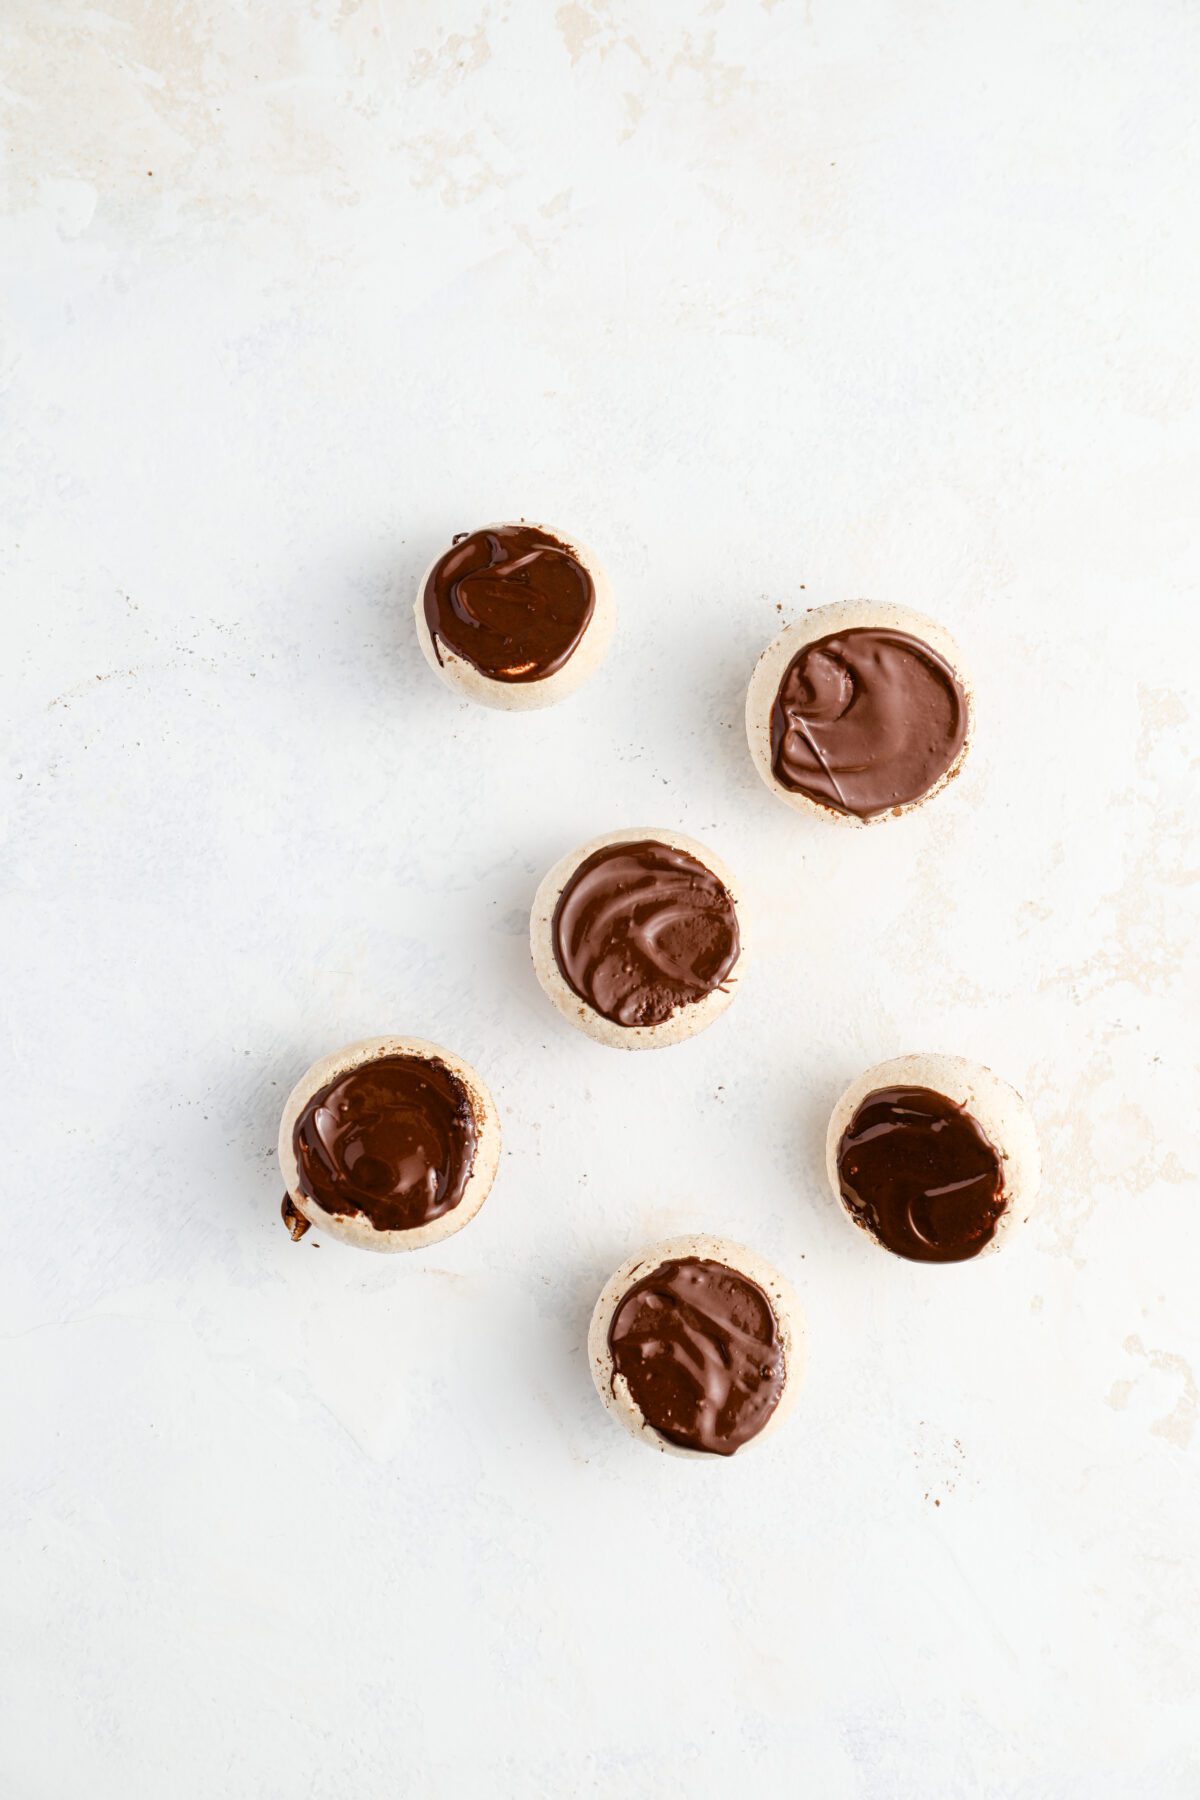
Step 5: Melt the chocolate. Place the chopped chocolate in a small microwave-safe bowl and heat in 20-second bursts, stirring after each, until just melted and smooth (stop before it’s fully melted and let the residual heat finish the job so it doesn’t scorch).
Step 5. Assemble. Flip the caps over and spread a thin layer of melted chocolate on the underside of each one (this becomes the “gills”). While the chocolate is still soft, gently press a stem into the center. Turn the mushrooms upside down (caps flat, stems pointing up) and set them on a parchment-lined baking sheet until the chocolate firms up, about 10 to 15 minutes at room temperature or in the fridge. Once set, they’re surprisingly sturdy—and you can make them up to a week ahead and store them in an airtight container at room temperature.
Video Tutorial
More Holiday Treats You may like

Meringue Mushrooms
Ingredients
- 2 large egg whites, no trace of yolks, at room temperature
- ¼ teaspoon cream of tartar
- ½ cup sugar
- 1 oz semi-sweet chocolate, melted
- Cocoa powder, for dusting
Instructions
- Preheat the oven to 225°F (107°C) and line a baking sheet with parchment paper.
- In the bowl of an electric mixer fitted with the whisk attachment, beat the egg whites and cream of tartar on medium speed until soft peaks form, about 2 minutes Gradually add the sugar, one tablespoon at a time, then increase to high speed and beat until stiff, glossy peaks form and the sugar is fully dissolved, about 7 to 10 minutes (rub a little between your fingers—it shouldn’t feel gritty). You'll know it's ready when you lift the whisk out of the bowl and the meringue holds a firm peak that curls just slightly over.
- Transfer the meringue to a piping bag fitted with a ½-in (13-mm) round tip. On the prepared baking sheet, pipe 12 mushroom caps and 12 stems, plus one or two extras of each in case any crack or don’t match up perfectly.
- To make the caps, hold the piping bag perpendicular to the pan and pipe small rounds about 1 to 1½ in (2.5 to 4 cm) wide, stopping just before lifting the bag to avoid forming peaks.
- For the stems, pipe small upright mounds about 1 inch (2.5 cm) tall, applying a little more pressure at the base and easing up as you lift to create a gentle taper—narrower at the top, wider at the bottom. Don’t worry about making them perfect; once the mushrooms are assembled, you won’t notice minor differences, and a little variation actually makes them look more natural.
- If any caps have little points, smooth them with a damp fingertip. (Don’t worry about the stems since you’ll trim them later.)
- Lightly dust the caps with cocoa powder for a natural look. Bake until dry and crisp but not browned, about 1½ hours. Turn off the oven, prop the door open slightly, and let the meringues cool completely inside, 1 to 2 hours.
- Use a paring knife to gently cut off the pointed tip of each stem so they’ll be flat. Place the chopped chocolate in a small microwave-safe bowl and heat in 20-second bursts, stirring after each, until just melted and smooth (stop before it’s fully melted and let the residual heat finish the job so it doesn’t scorch).
- Using a small offset spatula or the back of a spoon, spread a thin layer of melted chocolate over the entire underside of each cap—this gives them a realistic, dark “gill” look. Then, while the chocolate is still soft, gently press a stem into the center of each cap. Place the assembled mushrooms upside down on the parchment-lined baking sheet (caps resting flat, stems pointing up). They won’t stand upright until the chocolate sets, so this helps keep everything in place. Let them sit at room temperature or in the fridge until firm, 10 to 15 minutes.
Notes
Nutrition Information
This website is written and produced for informational purposes only. I am not a certified nutritionist and the nutritional data on this site has not been evaluated or approved by a nutritionist or the Food and Drug Administration. Nutritional information is offered as a courtesy and should not be construed as a guarantee. The data is calculated through an online nutritional calculator, Edamam.com. Although I do my best to provide accurate nutritional information, these figures should be considered estimates only. Varying factors such as product types or brands purchased, natural fluctuations in fresh produce, and the way ingredients are processed change the effective nutritional information in any given recipe. Furthermore, different online calculators provide different results depending on their own nutrition fact sources and algorithms. To obtain the most accurate nutritional information in a given recipe, you should calculate the nutritional information with the actual ingredients used in your recipe, using your preferred nutrition calculator.
Gluten-Free Adaptable Note
To the best of my knowledge, all of the ingredients used in this recipe are gluten-free or widely available in gluten-free versions. There is hidden gluten in many foods; if you're following a gluten-free diet or cooking for someone with gluten allergies, always read the labels of your ingredients to verify that they are gluten-free.
I couldn’t manage to get the meringue to form the stems–they just turned into little flat blobs. I actually did it twice but got the same result. I wonder if it’s because of my altitude–I live at 7000′. Thoughts?
Hi Sarah, I’m sorry you had a problem with the stems! Did you beat the egg whites and sugar until they held firm peaks? If so, I suspect it was the altitude. I’d love to be able to give you suggestions for how to fix it, but I don’t have any experience baking at high altitudes. I do have some tips at the bottom of this post, but not sure how much it will help you with meringue. BTW, even if the stems were kind of blobs, if they’ve got any height at all, you could still attach the mushroom tops. The stems don’t show that much anyway.
Love that you have this recipe and love the detailed yet concise instructions!
Made a double batch with my kiddos today and we had a blast making them! Among all sorts of other shapes we made with extra meringue – hearts, snowflakes and Christmas trees on popsicle sticks were a hit as well, and we will definitely be making them for other upcoming holidays from now on.
Thank you, Jenn! ❤️