Pâte Sucrée (Sweet Tart Dough)

This post may contain affiliate links. Read my full disclosure policy.
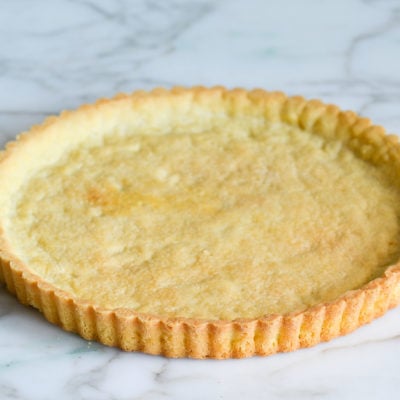
A pâte sucrée is a crisp yet tender pastry crust that is slightly sweet. It maintains its shortbread-like texture when chilled, which makes it ideal for tarts that require refrigeration.
Enriched with egg yolk, butter, and sugar, pâte sucrée is a crisp yet tender pastry crust that is slightly sweet. (In French, pâte means dough and sucrée means sweet.) The dough maintains its shortbread-like texture even when chilled, which makes it ideal for tarts that require refrigeration, like a classic French fruit tart.
Pâte sucrée dough is typically rolled out using a rolling pin, but since it’s very prone to tearing, I find it easier to simply press the pastry into the bottom and up the sides of the pan; there’s also less risk of overworking the dough this way.
This recipe makes enough dough for one 9.5 x 1-inch high fluted tart pan with a removable bottom or a 9-inch pie shell. Feel free to double the recipe and freeze half for another time; it keeps well in the freezer for up to 3 months.
What You’ll Need To Make Pâte Sucrée (Sweet Tart Dough)
Step-By-Step Instructions
In a stand mixer fitted with a paddle attachment, combine the butter, sugar, and salt.
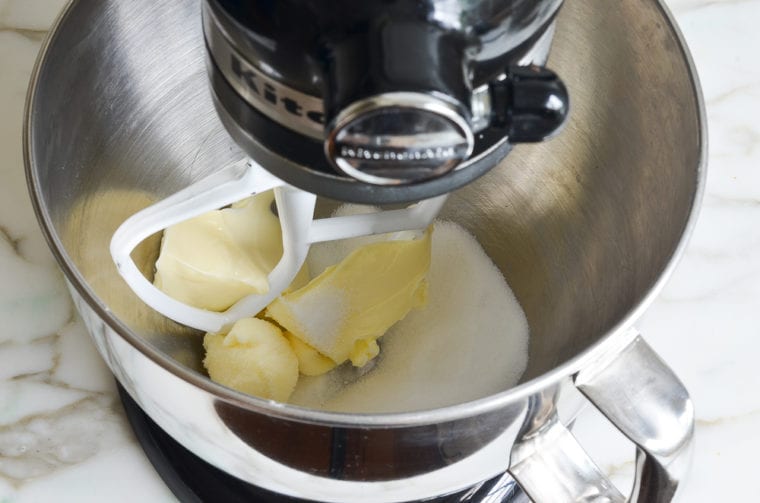
Beat on medium speed until pale and creamy, about 2 minutes. Scrape down the sides and bottom of the bowl with a rubber spatula and add the flour.
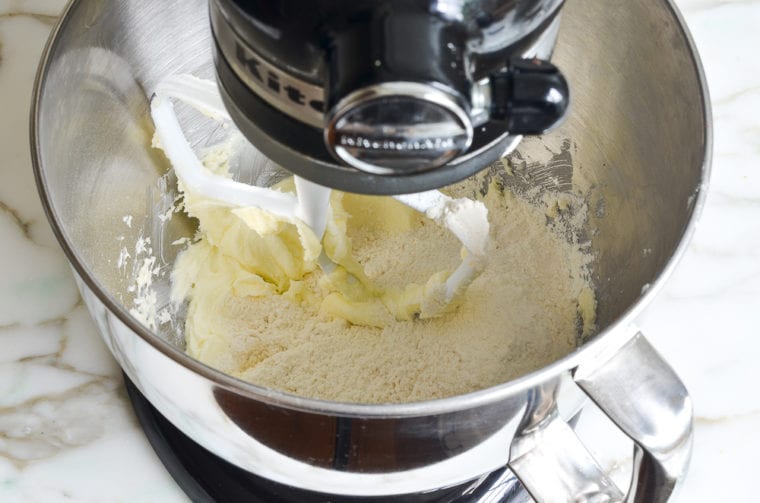
Mix on low speed for about 30 seconds, until the flour is incorporated, and then add the egg yolk.
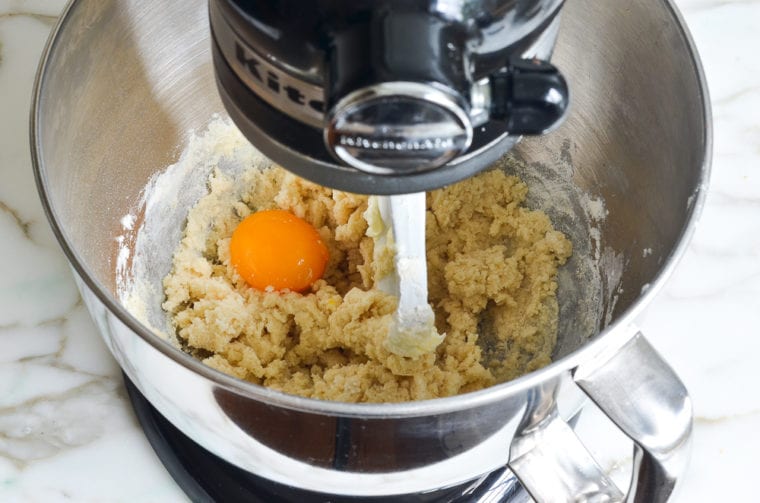
Mix on low speed until the yolk is evenly incorporated and the dough is clumpy, about 30 seconds.
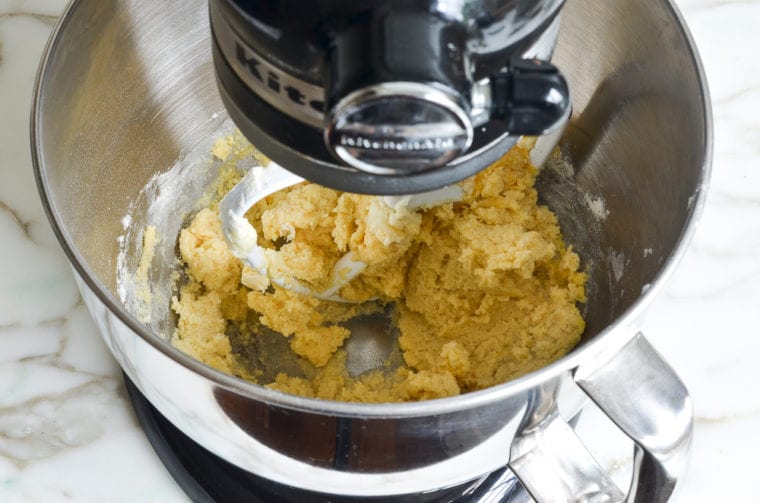
Using your hand, lightly knead the dough into a ball inside the bowl.
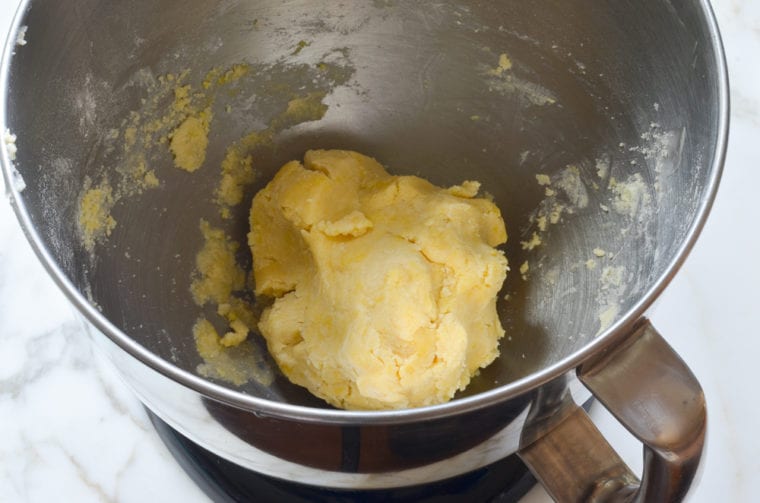
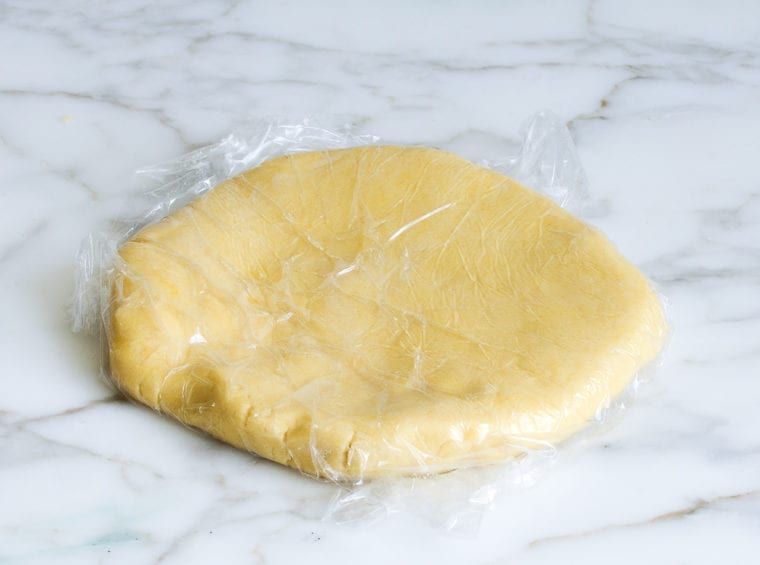
Remove the dough from the bowl, press it into a 6-inch disk, wrap it tightly in plastic wrap, and let it rest in the refrigerator for about 30 minutes. (The dough can be tightly wrapped in plastic and stored in the refrigerator for up to 5 days or in the freezer for up to 3 months. If frozen, thaw it in the refrigerator overnight before using.)
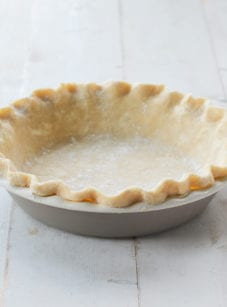
Lightly spray a 9.5-inch tart pan with a removable bottom or a 9-inch pie shell with nonstick cooking spray with flour. Place the chilled dough inside the pan. Pinch off pieces of dough and press them against the sides of the pan to reach about 1/8-inch thick and about 1/8 inch above the rim.
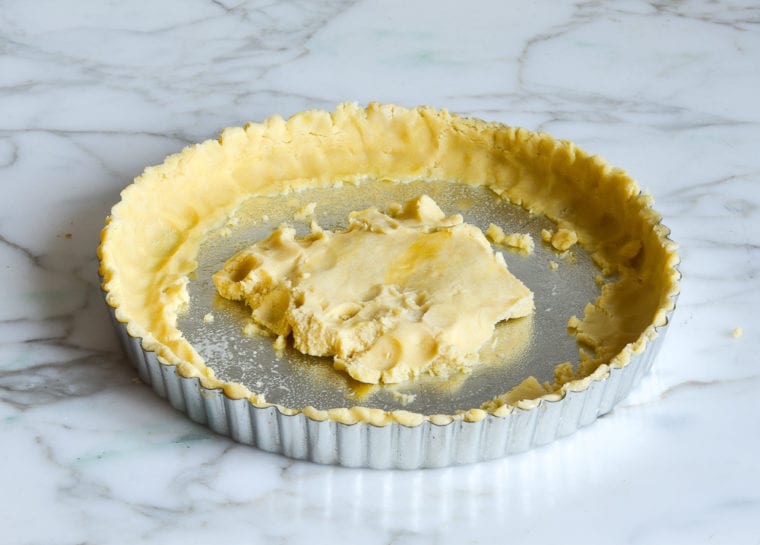
Using the heel of your hand, press the rest of the dough evenly into the bottom of the pan. It will look like a mess, and it may seem like you won’t have enough dough at first, but have faith, it will come together.
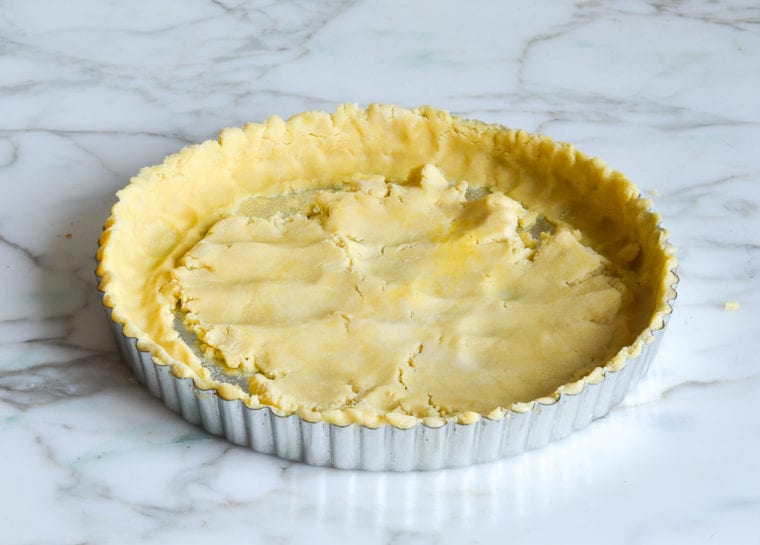
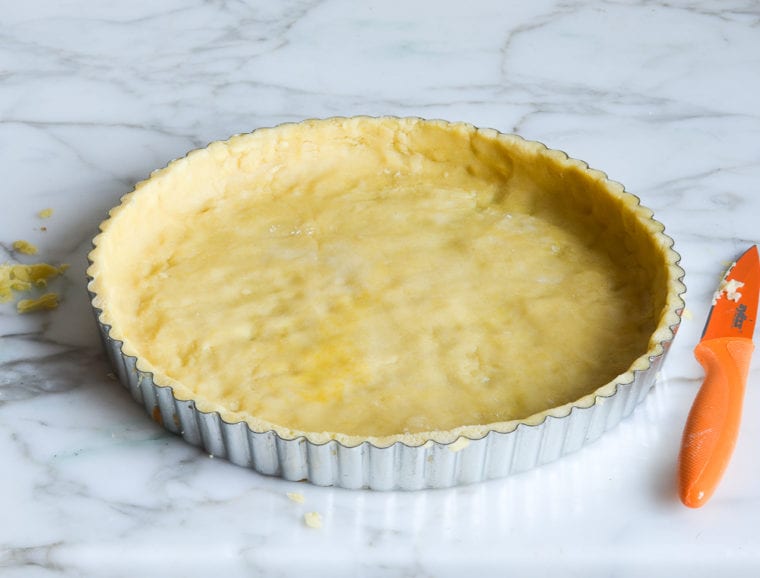
Be sure there are no seams in the dough, and press it squarely along the corners where the bottom meets the sides to avoid extra-thick edges. Use a paring knife to trim the top edge of the dough so it is even with the rim of the pan. Cover with plastic wrap and place in the freezer for about 30 minutes to chill.
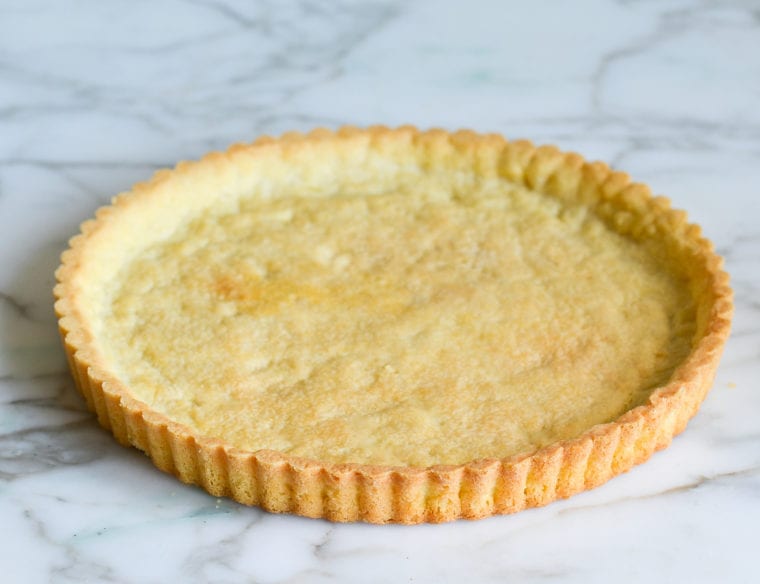
Preheat the oven to 350°F. Place the chilled pâte sucrée on a baking sheet (for easy handling).

Bake for 23 to 26 minutes, or until lightly golden.
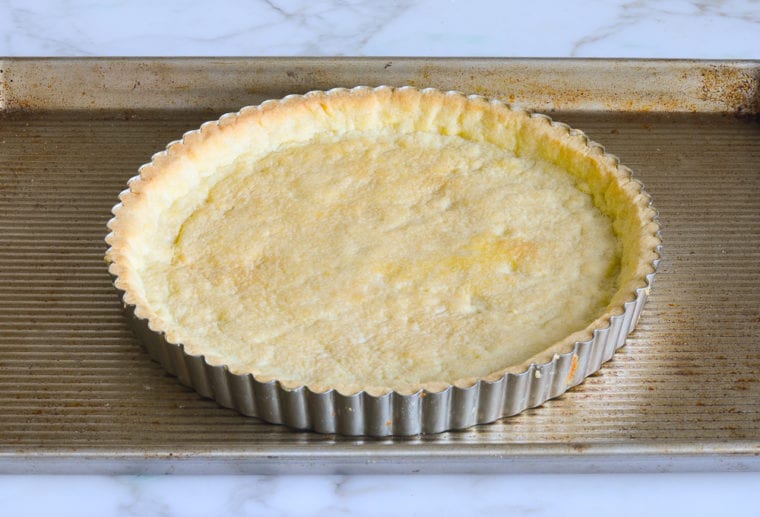
Let cool to room temperature.
You May Also Like


Pâte Sucrée (Sweet Tart Dough)
Ingredients
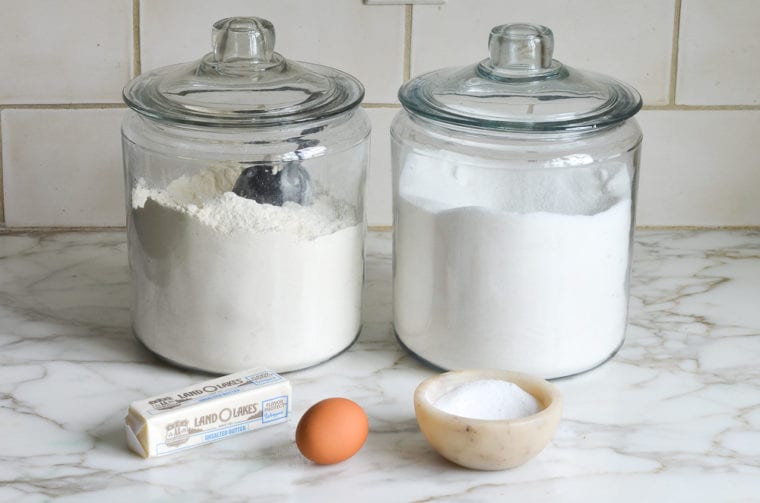
- ½ cup (1 stick) unsalted butter, at room temperature
- ⅓ cup sugar
- ¼ teaspoon salt
- 1¼ cups all-purpose flour, spooned into measuring cup and leveled-off
- 1 egg yolk
- Nonstick cooking spray with flour for baking
Instructions
- In a stand mixer fitted with a paddle attachment, cream the butter, sugar, and salt on medium speed until pale and creamy, about 2 minutes. Scrape down the sides and bottom of the bowl with a rubber spatula. Add the flour and mix on low speed for about 30 seconds, until the flour is incorporated. The mixture will look like wet, clumpy sand. Add the egg yolk and mix on low speed until the yolk is evenly incorporated and the dough is clumpy, about 30 seconds. Using your hand, lightly knead the dough into a ball inside the bowl. Remove the dough from the bowl, press it into a 6-in (15-cm) disk, wrap it tightly in plastic wrap, and let it rest in the refrigerator for about 30 minutes. (The dough can be tightly wrapped in plastic and stored in the refrigerator for up to 5 days or in the freezer for up to 3 months. If frozen, thaw it in the refrigerator overnight before using.)
- Lightly spray a 9.5-in/24-cm tart pan with a removable bottom or a 9-in (23-cm) pie shell with nonstick cooking spray with flour. Place the chilled dough inside the pan. Pinch off pieces of dough and press them against the sides of the pan to reach about ⅛-in (3-mm) thick and about ⅛-in (3-mm) above the rim (you'll trim the top later). Using the heel of your hand, press the rest of the dough evenly into the bottom of the pan. (It will look like a mess, and it may seem like you won't have enough dough at first, but have faith, it will come together.) Be sure there are no seams in the dough, and press it squarely along the corners where the bottom meets the sides to avoid extra-thick edges. Use a paring knife to trim the top edge of the dough so it is even with the rim of the pan. Cover with plastic wrap and place in the freezer for at least 30 minutes to chill.
- Preheat the oven to 350°F (175°C) and set an oven rack in the middle position.
- Place the chilled pâte sucrée on a baking sheet (for easy handling) and bake for 23 to 26 minutes, or until lightly golden. Let cool to room temperature on a wire rack.
Nutrition Information
This website is written and produced for informational purposes only. I am not a certified nutritionist and the nutritional data on this site has not been evaluated or approved by a nutritionist or the Food and Drug Administration. Nutritional information is offered as a courtesy and should not be construed as a guarantee. The data is calculated through an online nutritional calculator, Edamam.com. Although I do my best to provide accurate nutritional information, these figures should be considered estimates only. Varying factors such as product types or brands purchased, natural fluctuations in fresh produce, and the way ingredients are processed change the effective nutritional information in any given recipe. Furthermore, different online calculators provide different results depending on their own nutrition fact sources and algorithms. To obtain the most accurate nutritional information in a given recipe, you should calculate the nutritional information with the actual ingredients used in your recipe, using your preferred nutrition calculator.
I’ve made the pâté sucré about 5 times so far, in conjunction with the fruit tart. Literally the best! Everyone I’ve made it for always asks me to bring it for dessert. I follow the recipe to the T. I’ve also have made the dough and frozen it so I can easily make it for dessert, and it works out great.
Thank you so much for sharing!
This made an amazing tart crust. I only had a 12 inch tart pan but it worked out fine. The fruit tart was the star of our Easter dinner. It’s nothing but a memory now.
Sweet Tart Dough
This was probably my favorite part of the fruit tart. It turned out golden and tasted buttery. I didn’t have a tart pan so lined a 9″ cake pan with parchment, then buttered that. I put two criss-crossed strips of parchment under that with the ends hanging out so I could lift the crust when done.
I followed the recipe, except I did use a rolling pin to roll mine out and that worked well.
If there was somewhere to add a photo comment I’d share, because it turned out so well.
Hi Sam, glad to hear this came out well for you! The blog isn’t set up to receive pictures, but you can email them to me at jennifer@onceuponachef.com, or if you’re on Instagram, you can share it there; be sure to tag me @onceuponachef!
I’ve not made your crust, but I’m giving it 5 stars for the press in technique. My signature pie (a Maple Pecan Chocolate Tart courtesy of Bon Appetite in either the late 80s or early 90’s) has this crust (with the addition of ground pecans). I make it every year for Thanksgiving. The crust is uber finicky. I will definitely use the press in method in the future. Love all of your recipes and know that I can make them with confidence with excellent results.
Hello, Jenn! I love your recipes! I am preparing for Rosh Hashanah, and I would like to make your fruit tart. I have a tart pan with removable sides which measures 10 inches on the bottom, and I have a ceramic tart dish that measures about 9 1/2 inches on the bottom. Neither is exactly what you recommend, I wonder whether I can use one or the other?
Thank you,
Gay
Hi Gay, so glad you liked the recipes! Either of your pans Will work nicely. Enjoy and happy new year!
Is it possible to make this crust using a good gluten free 1:1 flour?
Hi Amy, I’ve never made a gluten-free version of this, but one reader commented that she did successfully, so I think it’s worth a try!