Perfect Apple Pie
This post may contain affiliate links. Read my full disclosure policy.
With a crisp, flaky crust and thick, cider-flavored apple filling, this is my idea of the perfect apple pie.
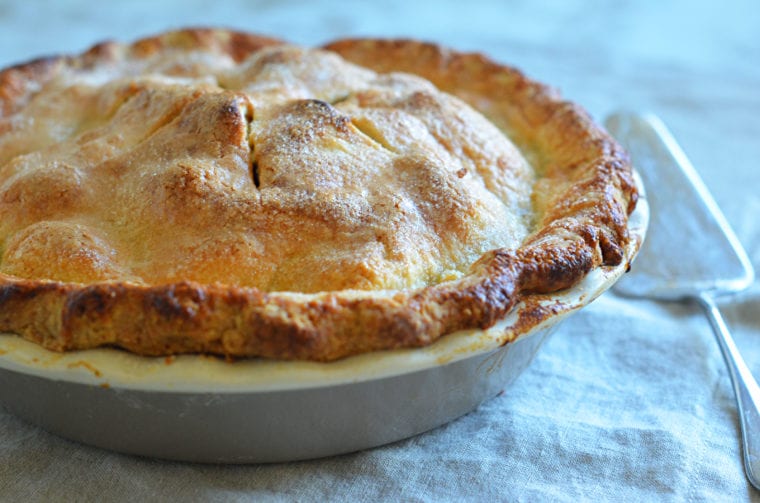
Even with years of professional and home cooking experience, I still approach homemade pie with a bit of trepidation. I’ve said it before: the person who coined the term “easy as pie” had obviously never made a homemade pie! But making a delicious apple pie is totally doable as long as you have a tried-and-true recipe like this one. The key is to avoid the typical apple pie pitfalls — a soggy crust and waterlogged filling — by blind baking the crust and boiling down the juices before filling the pie. These steps add a bit of extra time but ensure a crisp and flaky crust and a cider-flavored filling that’s not the least bit watery. The perfect apple pie!
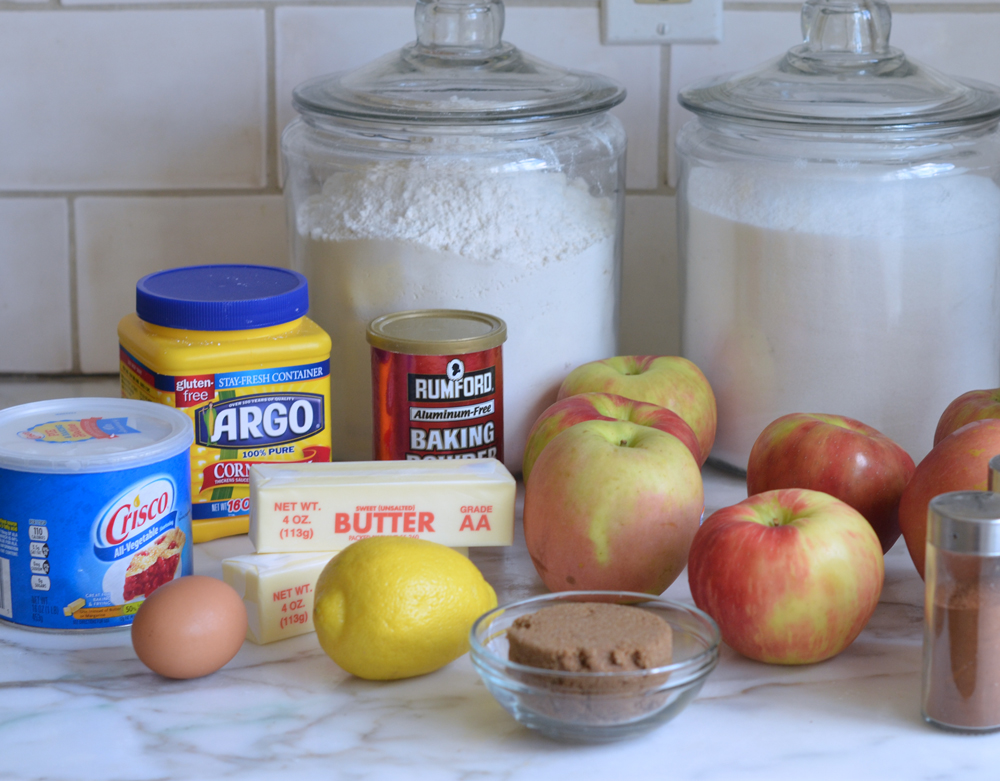
What you’ll need to make Apple pie
How to make Apple pie
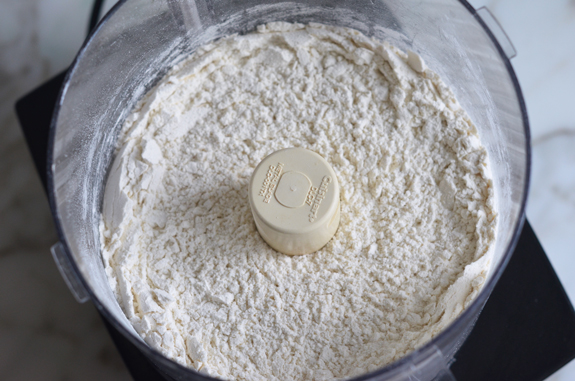
Begin by making the crust. It’s easiest to use a food processor but you can also make it by hand if need be. Combine the flour, sugar, salt and baking powder in the bowl of a food processor fitted with the metal blade. (The baking powder is added to prevent the crust from shrinking during baking — it helps the crust expand into the pan rather than slip down the sides.) Pulse a few times to combine.
Add the pieces of butter and shortening.
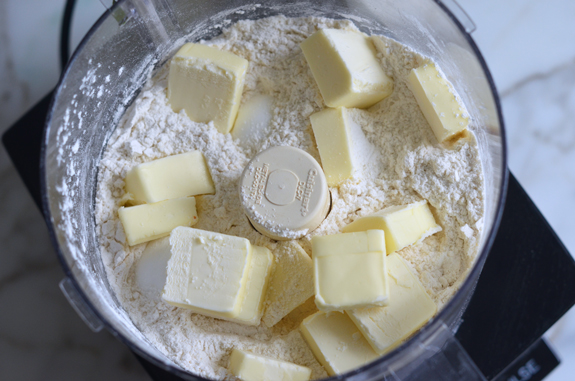
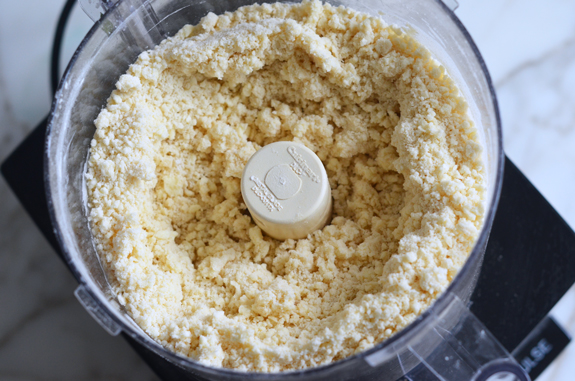
Pulse until you have coarse crumbs with lots of pea and chickpea-size clumps of butter and shortening within.
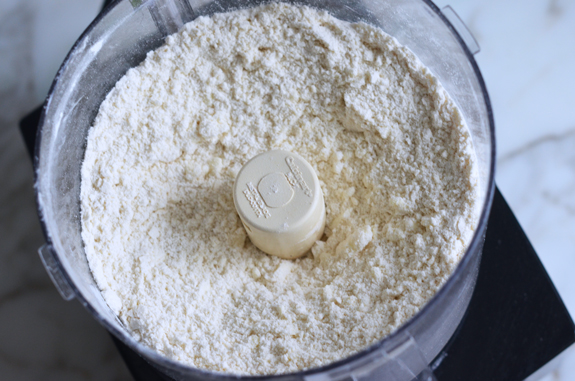
Add the water and pulse until the mixture is evenly moistened and very crumbly.
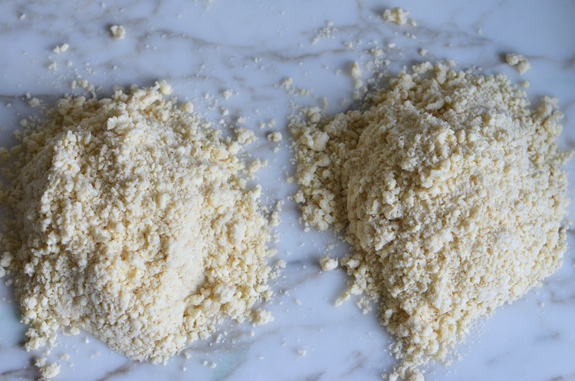
Dump the crumbly dough out onto a clean work surface and divide into two piles, with one pile about 15% bigger than the other.
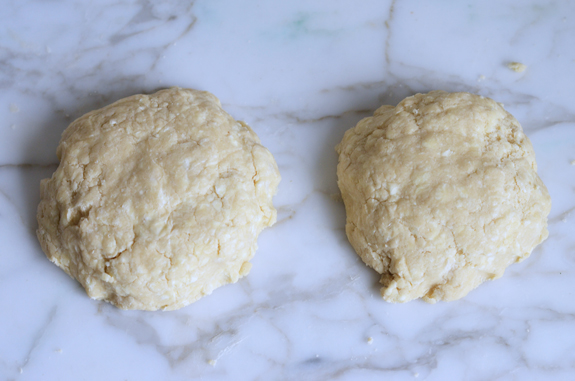
Make two balls of dough and pat each one into a 5-inch disc. Wrap the discs in plastic and refrigerate for at least 45 minutes.
Take the larger disc of dough out of the refrigerator. Dust your work surface lightly with flour and place the dough on top; sprinkle a little flour more over the dough. Use your hands to quickly knead the dough into a soft and malleable disc (don’t overwork it; you want it just supple enough to roll).
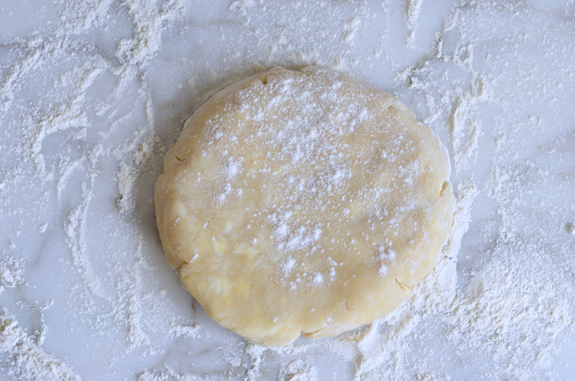
Roll the dough, adding more flour as necessary under and on top of the dough so it doesn’t stick, into a 13-inch circle.
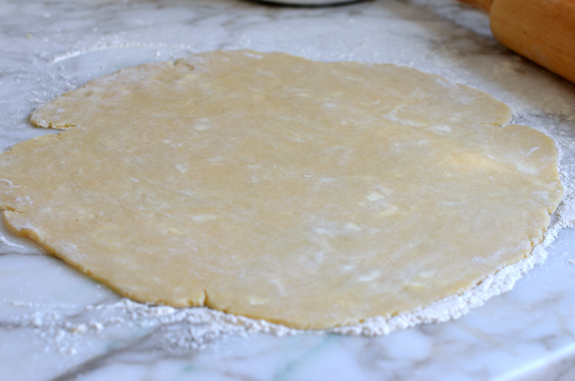
Carefully drape the dough over the rolling pin and transfer it to a 9-inch deep-dish pie pan (at least 1-1/2 inches deep). Gently fit the dough into the pan, easing it inwards rather than stretching it outwards. Trim the edges to 1/2-inch beyond the lip of the pie pan. Turn the edges under to create a rim on the crust. Press the rim against the lip of the pan, forming it into an even edge as you work your way around. Use any scraps to patch in any tears or thin areas. Place the crust in the refrigerator for at least 30 minutes while you heat the oven to 375°F.
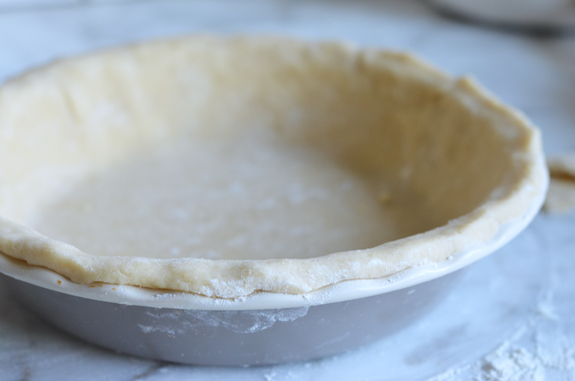
Remove the pie crust from the refrigerator and cover with a piece of parchment paper. Fill the crust with dried beans or pie weights.
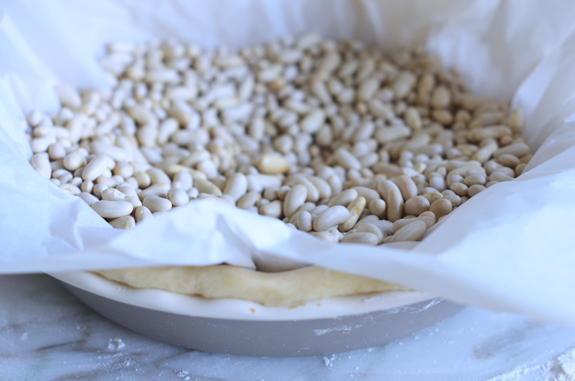
Bake for 20 minutes, then remove the parchment paper and beans/pie weights and tent the edges with a few strips of aluminum foil. (The foil will protect the edges from getting too dark.) Bake for another 15 to 20 minutes, until the dough is dry and golden. Let the crust cool to room temperature. Increase the oven temperature to 425°F.
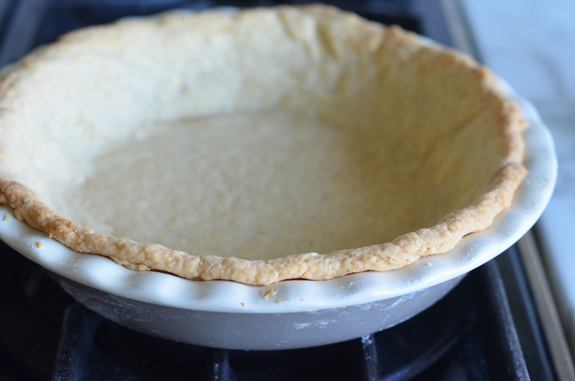
Meanwhile, combine the apples, lemon zest, lemon juice, granulated sugar, brown sugar, salt, and cinnamon.
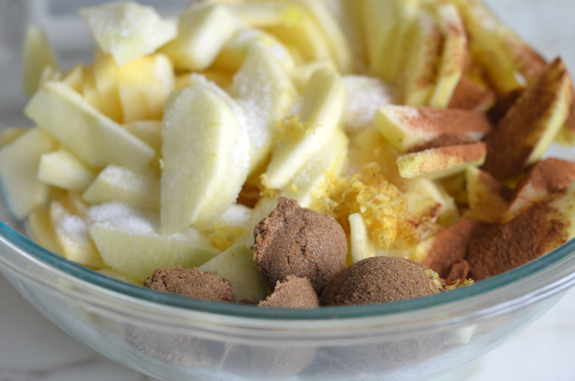
Toss until the sugar is dissolved and the apples are evenly coated. Let sit for at least 30 minutes.
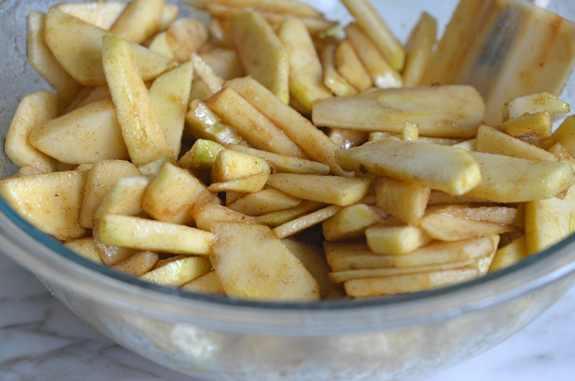
Drain the apples, collecting the syrupy juice in another bowl.
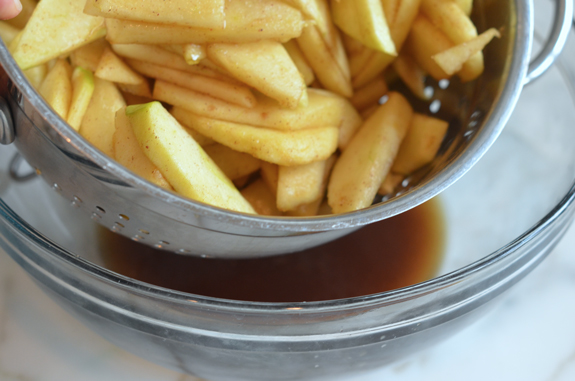
Pour the juice into a 2-cup microwave-safe measuring cup.
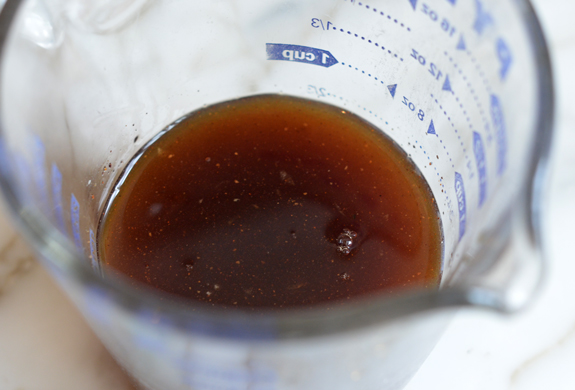
Heat on high power in the microwave until the juice is reduced by half, about 4 minutes. (Alternatively, you can boil the juices in a small pan on the stove.) The syrup should be just slightly thickened.
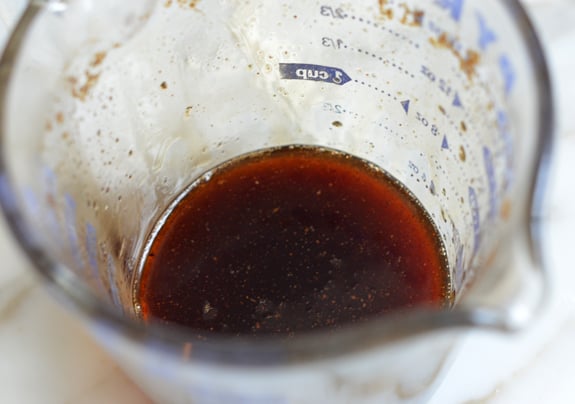
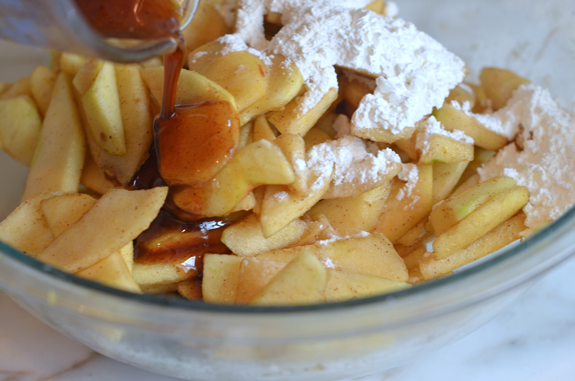
Add the syrup back to the apples, along with the flour and cornstarch; toss to combine.
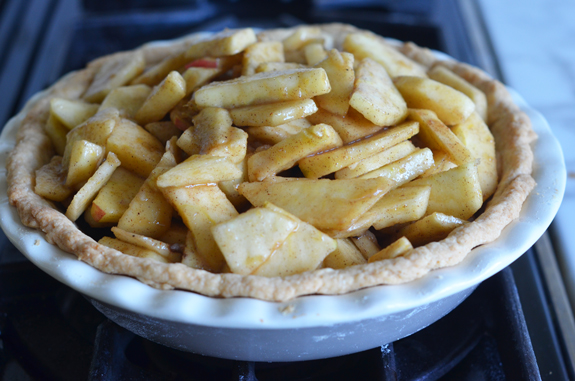
Add the apple filling to the baked pie shell.
Take the other piece of dough out of the fridge and roll into an 11-inch circle, using the same process described above. Place the dough over the apples and crimp the edges with a fork or flute with your fingers, sealing the top and bottom crust together. Work quickly as the heat from the pan will soften the dough. Brush the top crust with the egg wash and sprinkle some sugar over top. Cut a few slits in the top crust to allow the steam to escape.
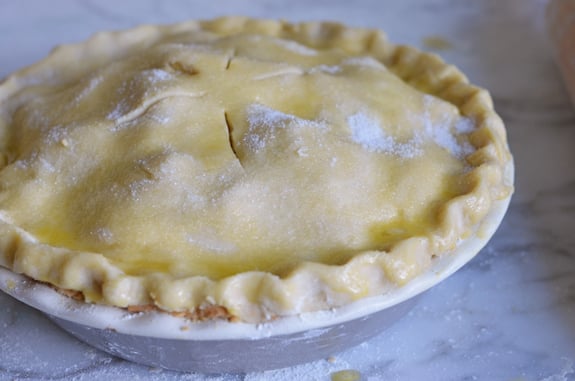
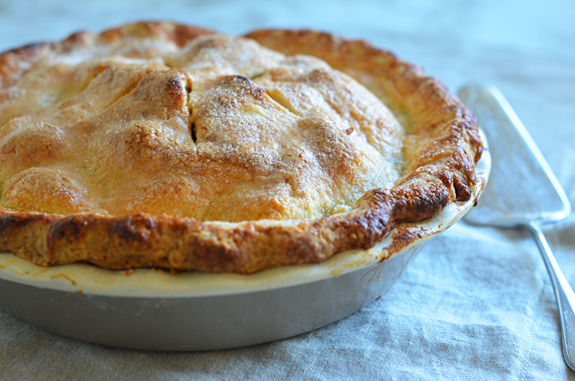
Bake at 425°F for 15 minutes, then reduce the heat to 375°F, and bake for an additional 45 minutes, or until the top is brown and filling is bubbly. Let the pie cool completely on a wire rack before cutting, about 4 hours. Enjoy!
You may also like
- 24 Best Thanksgiving Side Dishes
- 16 Thanksgiving Desserts Worth Saving Room For
- Rustic French Apple Tart
- Apple Cranberry Oat Crumble
- French Apple Cake
- Apple Pecan Crisp
- Old-Fashioned Baked Apples
Perfect Apple Pie
With a crisp, flaky crust and thick, cider-flavored apple filling, this is my idea of the perfect apple pie.
Ingredients
For the Crust
- 2¾ cups all-purpose flour, spooned into measuring cup and leveled with a knife
- 3 tablespoons sugar
- 1 teaspoon salt
- ¼ teaspoon baking powder
- 14 tablespoons cold unsalted butter, sliced into 1-inch pieces
- ¼ cup cold vegetable shortening, in 4 pieces
- 7 tablespoons ice cold water
For the Filling
- 3½ pounds baking apples (see note), peeled, cored, sliced ¼-inch thick
- 1 teaspoon lemon zest and 1 tablespoon lemon juice, from 1 lemon
- ½ cup granulated sugar
- 6 tablespoons packed dark brown sugar
- Heaping ¼ teaspoon salt
- ¼ teaspoon cinnamon
- 2 tablespoons all-purpose flour
- 2 tablespoons cornstarch
For Baking
- A beaten egg, cream, or milk, for brushing over crust
- 2 tablespoons granulated sugar, for topping the pie
Instructions
For the Crust
- Combine the flour, sugar, salt and baking powder in the bowl of a food processor fitted with the metal blade. Pulse a few times to combine. Add the pieces of butter and shortening and pulse until the mixture is crumbly with lots of pea and chickpea-size clumps of butter and shortening within.
- Add the water and pulse until the mixture is evenly moistened and very crumbly. Dump the dough crumbles onto a work surface and divide into two piles, with one pile about 15% bigger than the other (13 oz and 11.5 oz). Make two balls of dough and pat each one into a 5-inch disc. Wrap the discs in plastic and refrigerate for at least 45 minutes.
- Take the larger disc of dough out of the refrigerator. Dust your work surface lightly with flour and place the dough on top; sprinkle a little flour over the dough. Use your hands to quickly knead the dough into a soft and malleable disc (don’t overwork it; you want it just supple enough to roll).
- Roll the dough, adding more flour as necessary under and on top of the dough so it doesn't stick, into a 13-in circle. Carefully drape the dough over the rolling pin and transfer it to a 9-in deep-dish pie pan (it should be at least 1½ in deep). Gently fit the dough into the pan, easing it inwards rather than stretching it outwards. Trim the edges to ½ inch beyond the lip of the pie pan. Turn the edges under to create a rim on the crust. Press the rim against the lip of the pan, forming it into an even edge. Use any scraps to patch in any tears or thin areas. Place the crust in the refrigerator for 30 minutes while you heat the oven.
- Preheat the oven to 375°F. Set an oven rack in the middle position.
- Remove the pie crust from the refrigerator and place on a baking sheet (this makes it easy to move in and out of the oven). Cover the crust with a piece of parchment paper and fill it with dried beans or pie weights. Bake for 20 minutes. Take the crust out of the oven; remove the parchment paper and beans/pie weights and tent the edges with a few strips of aluminum foil. (The foil will protect the edges from getting too dark.) Bake for another 15 to 20 minutes, until the dough is dry and golden. Don't worry if the bottom puffs up; just press it down gently with a flat spatula, such as a pancake turner, taking care not to puncture it. Let the crust cool to room temperature.
- Increase the oven temperature to 425°F.
For the Filling & Baking
- Meanwhile, combine the apples, lemon zest, lemon juice, granulated sugar, brown sugar, salt, and cinnamon. Toss until the sugar is dissolved and the apples are evenly coated. Let sit for at least 30 minutes.
- Drain the apples, collecting the syrupy juice in another bowl. Pour the syrupy juice into a 2-cup microwave-safe liquid measuring cup. Take note of the quantity and then heat on high power in the microwave, checking frequently, until the syrup is reduced by half. This will take about 4 minutes but keep a close eye on it as all microwaves are different. You don't want to cook it for too long, or it will turn into sticky caramel (see note below on how to correct this if it happens). The syrup should be just slightly thickened and still pourable. (Alternatively, you can boil the juices in a small pan on the stove.)
- Add the syrup back to the apples, along with the flour and cornstarch; toss to combine.
- Take the other piece of dough out of the fridge and roll into an 11-inch circle, using the same process described above. If necessary, use a little dough to patch up any holes in the bottom crust. Add the apple filling to the baked pie shell, compacting the apples as tightly as possible. (Too many air pockets will cause the crust to dome, creating a gap between the apples and the crust.) Place the rolled dough over top. Crimp the edges with a fork or flute with your fingers, sealing the top and bottom crust together. Work quickly, dusting your fingers with flour as necessary, so the dough doesn't get too warm.
- Brush the top crust with the beaten egg (or cream or milk). Sprinkle the remaining 2 tablespoons sugar over the top crust. Cut a few slits in the top crust to allow the steam to escape.
- Bake for 15 minutes, then reduce the heat to 375°F, and bake for an additional 45 minutes, or until the top is golden and the filling is bubbly. Let the pie cool completely on a wire rack before cutting, about 4 hours.
- Note: Be sure to use baking apples that hold their shape when cooked, such as Honeycrisp, Jonagold, Fuji, Granny Smith, or Golden Delicious. And use a mix of different varietals for the best flavor.
- Note: If you accidentally over-reduce the syrup and it seizes up when you pour it over the apples, transfer the apple mixture to a large sauté pan and cook over high heat until the caramel melts. Let cool completely in the fridge before proceeding with the recipe.
- Freezer-Friendly Instructions: The pie can be frozen for up to 3 months before or after baking it. (If freezing it unbaked, hold off on brushing the top crust with the beaten egg and sprinkling it with sugar; you can do that right before baking.) If baked, let it cool completely and place it in the freezer uncovered. When fully frozen, wrap the pie securely in foil and freeze. If the pie is unbaked, wrap it securely in foil and freeze. When ready to serve, proceed with baking instructions above (pie is likely to take a bit longer in the oven).
Nutrition Information
Powered by ![]()
- Calories: 589
- Fat: 24g
- Saturated fat: 14g
- Carbohydrates: 91g
- Sugar: 48g
- Fiber: 6g
- Protein: 5g
- Sodium: 383mg
- Cholesterol: 53mg
This website is written and produced for informational purposes only. I am not a certified nutritionist and the nutritional data on this site has not been evaluated or approved by a nutritionist or the Food and Drug Administration. Nutritional information is offered as a courtesy and should not be construed as a guarantee. The data is calculated through an online nutritional calculator, Edamam.com. Although I do my best to provide accurate nutritional information, these figures should be considered estimates only. Varying factors such as product types or brands purchased, natural fluctuations in fresh produce, and the way ingredients are processed change the effective nutritional information in any given recipe. Furthermore, different online calculators provide different results depending on their own nutrition fact sources and algorithms. To obtain the most accurate nutritional information in a given recipe, you should calculate the nutritional information with the actual ingredients used in your recipe, using your preferred nutrition calculator.

Hi!!
I want to make this for dessert for tomorrow and I saw i can prepare it the night before and just leave it out . Do you suggest wrapping it up tight? Can i reheat it when we are ready to eat it tomorrow ? Also i have the frozen crust trays do i have to adjust anything ?
Thank you !
K
Hi Kara, Are frozen crust trays ready-made pie crusts? If so, I would follow the instructions on the package for blind baking the bottom crust. And if you make it ahead, no need to wrap tightly; I’d just cover loosely with foil. It keeps well for a few days.
Yes it is pie crusts deep dish ready to fill in 9″ pans . So i want to make it now and it will be served tomorrow after dinner
Got it. You can make it now and warm it briefly in the oven tomorrow. Pre-heat your oven to 350 degrees. Cover the pie lightly with foil and heat for about 15 minutes. You don’t want it to get too warm or the pie will be soupy and hard to serve. Enjoy!
Hi Jennifer! I am making this pie now. I put slits in the top but how can I tell if it is bubbling? I guess my slits are less like windows. Also, I pre-cooked my apples for 5-10 minutes and now I am worried that I cooked all the moisture out. Can I make a bit of extra syrup with an apple I have on hand and pour a bit in the slits?
The pie looks amazing in the oven….I’m just worried about it not being gooey enough. I guess I can always cover it up with a scoop of ice cream. I just preordered your cookbook- your recipes are the best!
Hi Chithra, First, don’t worry! So long as you followed the directions, and added the warm apples along with the thickened juices to the bottom crust, your pie will be gooey and delicious! Plus, you don’t want too much liquid or it will ooze out and make the crust soggy. You should be able to see the bubbling a bit, and maybe even hear it. Good luck and please lmk how it turns out! 🙂
I was worried for no reason. It was great! Rave reviews from my family 😊. Thank you for yet another solid gold recipe!
Yay!
If you cook the apples on the stove top, do you add the cornstarch and flour into the apples before you cook them?
Hi Karen, You would add them after.
Hi, Jenn!
Half of the apples I bought are Granny Smith, 1/4 are Fuji and 1/4 are Golden Delicious. I was wondering whether these varietals will keep their shape if I cook the apple/sugar mixture for 10 minutes, as suggested in a few of your reviews. Also, should I bother draining them first or just cook the apples once I’ve coated them with sugar? Lastly, do I still add in the cornstarch and flour to the apple mixture after cooking it? Thanks in advance!
Hi Kim, Yes, those are the perfect apples to use. If you’d like to cook them a bit before filling the pie, you don’t need to drain them. To save yourself from dirtying a bowl, I would combine the apples, sugar, etc. right in the pan, and then add the flour and cornstarch after cooking it. Just be sure to let the apples cool as the pie crust will be difficult to work with if the apples are warm. Hope that clarifies!
Are there any different baking requirements if I want to do a lattice crust?
The only issue with a lattice crust is that you need to add the top crust quickly so that it doesn’t get too warm from the heat of the bottom crust. I’d keep the strips pretty wide so you can move fast. Otherwise, baking requirements would be the same. Hope it turns out well!
Could I make the filling a day or two ahead of time? I’m thinking I could have the filling all ready to go in the fridge and then assemble and bake on Thanksgiving morning, so that I have the freshness of fresh baked, but a little less food prep stress…
Hi Casey, Unfortunately, I don’t think the apples will hold up well. You can, however, bake the whole pie a day ahead of time. It will still be delicious and fresh the next day.
Can I make the dough for the crust of the apple pie the day and refrigerate it unbaked overnight (to bake it the next day?)?
Sure Mardi – pie crust actually benefits from a “rest” in the fridge.
Hi Jenn,
If I were to make this pie one day ahead is it best to cook all the way through and leave on the counter, or in fridge? Or make days ahead and freeze it unbaked and pull out and bake it the same day we want to eat it? If you think freezing it unbaked is best, do I still prebake the bottom crust first? Thank you
Hi Cheryl, I’d make it a day ahead and leave it on the counter. Hope you enjoy it!
Can I use butter in place of the shortening without changing the recipe?
Sure, Bette. Please come back and lmk how it turns out!
So I’ve never cooked the pie crust before adding the filling before and I’m nervous, it doesn’t overcook?? And how are you supposed to seal and flute the edges when the bottom half is already cooked?? I’m going to try this for Friendsgiving next weekend, I’d love your advice, looks like a fab recipe!
Hi Erica, Blind baking the crust is the only way to ensure that it’s not soggy – and I promise it doesn’t overcook :). You want to press the top crust against the bottom crust (the heat will help it seal) and then crimp the top crust only. Just work quickly as you don’t want the dough to get too warm.
I am not much of a dessert cook, but wanted to make an apple pie for my d-i-l’s birthday (her favorite). So the detailed instructions & pictures were a tremendous help! I followed the recipe exactly. On reducing the juices, I microwaved on high for one minute at a time. It only took two minutes. The juices were not much reduced in volume, but were a thick syrup (almost too thick, but worked just right) — so thanks for the tip on that. The verdict: they said, “This pie is perfection”,which I thought was pretty funny considering the name of the recipe. I have never made a successful pie before. Thank you!
I made this perfect apple pie today and my family loved it. They said it is the best apple pie they have ever had. Made no changes to the recipe and it was perfect.
Thank you for all your great recipes
Haven’t made this yet, but the recipe sounds great. I have an apple tree bursting with apples so would like to make a couple of apple pies and freeze them for Thanksgiving. Wondering if you think it would be better to freeze uncooked and cook still frozen or let the pie thaw for a couple of hours before baking. Will the quality hold up if frozen?
How nice to have apple trees! I would think it’s fine to freeze them unbaked. I’d let them defrost for at least several hours before taking them. Enjoy!
Unbaked pies freeze well! I’ve egg washed them and cooked them right out of the freezer and they always came out great.
What do I do with the apples while peeling them all so they’ve don’t turn brown?
While it’s not totally necessary as the apples will be “hidden” under the crust, you could toss the peeled, sliced apples with a little lemon juice to prevent browning.
I made this and it was great.I made it again but added 1/4 cup of pink pickled ginger like that used in sushi bars. and it was better to me. I’d like to hear your opinion, should you try it.
You’re are a peach.
I love this apple pie recipe! I made it on the Fourth of July for a barbecue party and it was a great! Instead of making one big pie, I used this recipe to make mini pies in a cupcake tray. It turned out way better than I expected- so cute and delicious~!
When making the crust, I did find the dough a bit crumbly, so I just added 1/2 tbsp more water to accommodate. Also, the apple filling was slightly too sweet for me, so I reduced the sugar by a bit and added a pinch of nutmeg.
Hi Jen, thank you so much for your detailed recipes. Your site is the first place i go! For this pie, can i also make with peaches? Would everything else be the same? Thank you.
Hi Wendy, every fruit reacts differently when baked and pies can be quite finicky. Unless you’re a really experienced pie baker and can make changes “on the fly” I’d suggest sticking with the apples here. Sorry!
Hi, can’t find the Apple Crumble Pie I made, which was delicious. Can you send it to me?
Thank you very much. BTW, I am the person who used a graham cracker crust and it was fabulous.
Libby
Hi Libby, Are you sure the Apple Crumble Pie is my recipe? I don’t think I have anything like that on the site.
I made this pie and served it to my family. Everyone went crazy for it!! My dad said it was the best apple pie he had ever had. Thanks for making a delicious, simple apple pie recipe! I’ll definitely be making this again
Can the apple filling be prepared ahead of time and refrigerated for a day or two?
Sure Denise, that would be fine. Hope you enjoy the pie!
Hi Jenn!
I made this glorious pie for Christmas Eve this year. First of all, let me just say that I had the best time of my life baking this even though it did take me a total of 5 hours from start to finish! (I made such a mess in my kitchen!) I took pictures of the pie as I was so proud of it! I loved every bite! My husband is diabetic and I am on a diet so we were limited to how much we could eat, but we just had to taste it. The crust was absolutely the best I have ever made in my life. I will always use this recipe for all of my crusts from now on. My sweet mother-in-law felt that it needed more sugar, but I totally disagreed. It was just right. Thank you so much for sharing your knowledge with all of us out here who don’t have the opportunities to get the education. I am 62 and about to retire in about 3 1/2 years. Heaven help us both! I love to be in the kitchen! Again, thank you for a wonderful recipe! Five stars all the way!!!
This really is the perfect apple pie. It was more work than I would normally do but it was worth it. I have made many apple pies in the past. All really good, but this is the best.
I made this and it was beautiful and very impressive and delicious. I had trouble with the crust as it was very crumbly and hard to roll out. I had used the food processor and poured the water through the hole at the top, and found that after i dumped out the dough, the corners/crevices of the bowl were very wet and I think a lot of the water got caught there without making it into the dough, leading to the dryness of the dough. If I did this again, I would probably take off the top of the machine to pour the water directly on the dry ingredients, or maybe even mix the dough by hand. I also read other reviewers comments about the pocket of air, so instead of straining and microwaving the liquid, i cooked the apples and liquid down for 10 minutes on the stove top…I also felt like that led to fewer dirty dishes which was a plus. Overall, delicious pie and very pretty. Would make it again.
Dear Jenn,
I have never baked an apple pie before and I decided to try your recipe first because everything always comes so perfect so. . . It was a beautiful pie with amazing crust and I just had to really follow every step carefully. I messed up the first crust because I did not use cold butter but a bit towards room temperature and it really needs to be cold, once I started the second batch following the instructions it came out exactly like your pictures.
I did get confused a bit with the ratio of apples because once you cut the core off you end up with less than 3.5 lb but I made my apple pie in a deep dish from William Sonoma so all the extra apples fit well there! Just fixed the cinnamon ration and sugar but it was pefect perfect perfect.
One thing I added was some bourbon to the syrup reduction but that was it. I used fuji apples because that is all I get here and the filling was amazing.
I will make another one for Christmas!!!
Thank you for a great recipe, no need to keep looking.
Sara
Love the idea to add bourbon, Sara…I’ll try that next time. So glad it turned out well!
The filling was wonderful–the apples cooked perfectly. I used a mixture of granny smith and fuji apples. I had a lot of trouble with the crust and I am not a novice with pie crust. It was very crumbly, even when it seemed to hold together. I have had consistent success with Rose Levy Berenbaum’s crust recipes, so in the future, I’d use her basic flaky pie crust.
When I made this, I made the rookie mistake of not reading the recipe carefully enough. This resulted in me using 3.5 lbs chopped apples, not 3.5 lbs of apples, chopped. I didn’t realize this until I added the top crust, so I couldn’t fix it. With the higher apple to sugar/flour/etc ratio, it was still very good although more cinnamon would have been better. I used the extra apples to make a second apple crumble because I had so many extra after already tossing them with the other ingredients. The 4/5 starts comes from that I think the pie should bake for 5-10 more minutes because the apples (I used honeycrisp) were just a little too crunchy for my family’s preference. However, I cut them in about 1/2-3/4 in cubes so that may have affected how they softened in the oven.
Excellent recipe! I made this for Thanksgiving for GF and DF people. I used King Arthur Measure for Measure GF flour,
Earth Balance dairy free butter, and Palm Shortening for the crust. Huge hit!!! My only problem came when I did not have a baking sheet under the pie and the juices boiled over making a big mess on the bottom of my oven. Lesson learned.
I was wondering if using the earth balance dairy free butter would affect it. I use it for cooking all the time, but haven’t used it for baking. Looks like I’ll give this recipe a try! Thank you
Hi Jenn, I want to make this apple pie, but do I have to add vegetable shortening? Can I replace it with anything else?
Hi Serena, Shortening helps the crust hold its shape and makes it a little easier to work with but you can use all butter here. Enjoy!
Hi Jenn,
I’m making this recipe for Thanksgiving (with my own all-butter pâte brisée), but I have two questions. Does using a prebaked crust complicate doing a ruffled border? It seems it would be harder to seal the crust. Also, if I wanted to add homemade salted caramel to the filling, would it have any adverse effects on the texture/consistency etc?
Hi Jeremy! It does complicate it a little but it’s still possible to make a pretty edge — it will just be a little more rustic, as you can see from the photo. When I seal the top crust to the bottom crust, I crimp it along the lip of the pie pan and it works fine — although with an all butter pate brisee, it won’t hold its shape as nicely as it would with a little shortening. As for the salted caramel, the only concern would be that it would sweeten the filling even more, so the pie could be a little on the sweet side. But the salt might balance that out. I would say just don’t add too much. Please let me know how it turns out!
Hi Jen, I would like to make this pie for thanksgiving but was wondering if you can make the dough in advance and freeze it before use. If so, would you recommend moving it to the refrigerator a day before using to soften?
Thanks, Stefani
Hi Stefani, Yes and yes :).
the best apple pie ever
Hi Jen,
I am making this apple pie for Thanksgiving and I was wondering if I can use a prepared crust instead of making it from scratch (saves some time!).
Thanks,
Cathy
Sure Cathy, that would work. (And most prepared crusts have instructions for blind baking, so I’d follow those on the package.)
Hi Jen,
This really looks good. I’d like to try and make it for Thanksgiving. But I have a question. Can I make this a day before? If so, do I keep it in the fridge? And how would I warm it up for my guests? Reheat it in the oven? Please advise.
Thanks.
Lucy
Hi Lucy, You can definitely make it a day ahead and store it at room temperature. I don’t recommend serving apple pie too warm, as it tends to get soupy when hot. But you could pop it in a 300°F oven for 15-20 minutes to warm it up just a bit.
Hi Jenn,
Would you be able to offer a streusel/crumb topping variation on this to make it into a Dutch apple pie?
Thanks!
Hi Lauren, The topping that goes on my apple pecan crisp would work well here. I’d love to hear how it turns out!
I made the Dutch apple pie for Thanksgiving, using the streusel topping from Sarabeth’s Bakery cookbook (it’s a small batch, so I tripled it), only because we had pecans on our sweet potatoes. The pie came out fantastic! Probably the best apple pie I’ve ever made, and I’ve made a bunch over the years. I loved your apple recommendations: used a mix of granny smith, golden delicious and jonagold. It probably helped that I bought them from a local orchard, as opposed to the grocery store. And I went a bit heavier on the cinnamon than what you call for because we are cinna-fanatics. Blind-baking the crust really made a huge difference as far as avoiding a soggy bottom. Love this recipe, would definitely make it again, and highly recommend it with a crumb topping.
Hi Jenn and Lauren,
If I decide to go with the streusel topping, how and where do I place it on the pie? When do i add it? before, during or after baking?
Thanks
Hi Eric, you’d put the streusel on top before baking. Hope you enjoy!
This recipe is perfect!! Follow the directions carefully and you won’t be disapointed! I let my apples sit for close to an 1 and 1/2 hours….while I was preparing the crust. The person it was made for said “This is the best homemade apple pie I’ve ever had.”
This pie was beyond outstanding! Thank you for this terrific recipe. There were alot of steps and it took some time but the results, WOW, so worth it! We are big fans of cinnamon, so I increased the cinnamon to 1.5 teaspoons. I used “Granny Smith” cut as directed and “Macs” cut into chunks. This combo had a really great flavour.
The tips for prevailing the bottom crust and reducing the syrup really help make a great crust which isn’t soggy at all! Thank you my husband loved it ?
This pie was fantastic! Everyone I served it to loved it and it held up very well the next day too! The pictures for the crust really helped. I didn’t have any issues with a gap between the crust and apples, but will watch for it next time I make it. Thanks for another great recipe Jen!
This pie was absolutely delicious and the technique details/photos, combined with the weight measurements for the flour, made a huge difference in the quality of the crust. The only issue I had was with the crust doming – when I cut into the pie there was a large air pocket between the crust and the apples. Any suggestions on how to alleviate this problem? I weighed the apples, but compared to your photos, it seemed like maybe I had more than your pie (the pan is exactly the same size).
Hi Katie, So glad you enjoyed the pie! This is a common issue with apple pie because the crust sets before the apples soften and sink a bit. Compacting the apples tightly in the crust to eliminate air pockets helps a lot (I’ve updated the instructions to emphasize this) but the only way to alleviate the issue completely is to cook the apples before filling the pie. If you want to try it, instead of straining and reducing the syrup, you can cook the apple and sugar mixture on the stovetop for about 10 minutes, until the apples are softened and the syrup is reduced. Then you’ll need to let the mixture cool before using — if the apples are warm, the dough for the top crust will be impossible to work with. Hope that helps!
Yes, it does! Thank you so much, Jenn!
Hi, I made this pie the other day and it was (still is!) delicious. Like the other reviewer, I had the same problem with the apples cooking down and leaving at least a 2″ gap between the pastry and the apples. Could you provide the extra instructions for pre-cooking the apples? Also, I used only about 2 lbs of apples and the pie was huge! Love all the recipes I’ve tried on your site. Thanks!
Hi Jane, I’m so happy you enjoyed the pie. The gap seems to be a common theme – see my response to Katie above for instructions. It’s a bit more work, but it will do the trick. If you go this route, I would definitely use the full amount of apples or the pie will be sunken in.
Hi Jenn,
Love your website! I made your Perfect Apple Pie and all the components were perfect. Great crust and yummy apple filling that didn’t run. I made mine in an Emile Henry dish as well. But the top crust had a one to two-inch gap where the crust rose and the apples fell. That’s happened to me before with that dish. I think it’s more related to a deep-dish pie vs the actual Emile Henry dish. Any ideas what causes that and more importantly, how to avoid that issue altogether? Thanks again for a great website with reliably delicious meals!
Hi Vanessa, So glad you enjoyed the pie! That happens to me occasionally as well, although typically the crust sinks down the level of the apples after the pie cools. The only surefire way to avoid a gap between the apples and the crust is to cook the apples on the stovetop first until they soften. I thought it would be one step too many for this recipe (it’s already a project and a half!) but it definitely works. It’s also helpful to really pack the apples in compactly.
Thanks very much. A must for Thanksgiving!
Can I omit the 3 tbsps. of sugar from the pastry recipe? If so, do I need to increase the flour to 3 cups? I want to use the pastry for Christmas Eve Revellion Tortiere.
Yes Mary, you can omit the sugar (but no need to increase the flour).
Hi Jennifer,
I’ve never made pie before but I think I will give this a try. I have always disliked soggy pie crust so this appeals to me. I also don’t like the filling that is dry and the apple slices kind of crunchy. I love the gooey, pectiny type filling. How did this recipe turn out?
Thanks!
Hi Lisa, The apples hold their shape and are slightly syrupy. If you’d like a softer, juicier filling, mix in some McIntosh apples. I hope you enjoy it as much as my family does!
Hi Jenn, this recipe looks great but I was wondering if there was a way to eliminate/sub something for the cornstarch? By husband’s family had a processed corn allergy and they get allergic reactions to things with cornstarch. Thank you!
Sure, Pam. You can easily replace the cornstarch with more flour. Hope you enjoy it and please let me know how it turns out!
How do you crimp raw dough to a crust that is already cooked? The cooked crust is stiff and would break with the slightest manipulation ( I would think). Using milk instead of water in your crust will give it a nice golden color even without the egg wash (for the vegans).
Hi Joyce, I try to just press the raw dough against the edge of the pie plate, which effectively seals the bottom and top crust together. And the bottom crust is actually pretty sturdy so I don’t have any issues with breakage.
Good morning
Can I substitute something for shortening or leave it out?
Thanks
Chantal
Hi Chantal, Shortening helps the crust hold its shape and makes it a little easier to work with but you can use all butter here.
I will be making this pie. I love the idea of the syrup. This is not the first time I’ve used our recipes. They’ve all been delicious.
Jennifer, I compared your recipe/ instructions to my apple pie recipes which have plenty of my personal notes & changes. From reading my notes, I think you covered everything I’ve gleaned over the years to come up with a great….I mean…Perfect great Apple Pie. My mother made the best apple pies (which I took for granted as a kid). I’m still trying to duplicate the quantity of syrup that would slightly run onto my plate once a portion of pie is cut.
Your pictures are detailed and clear.
This is a wonderful blog.
Thank you so much.
You have a real winner here.
This looks great but very time consuming so would love to do it well ahead of time. How does it freeze? Loved the baking powder in the crust… genius! Thanks, ga
Hi Gretchen, I haven’t frozen this pie, but I think it would work. Enjoy!
Looks scrummy. If you are in a hurry and don’t want to blind bake the base (and I rather like the bottom to be a bit soft and juicy – I know that makes me weird), scattering a couple of tablespoons of ground almonds over the base before you add the fruit helps to stop it going soggy. If you don’t want to add any almond flavour, semolina does the same job – both help to thicken the juice slightly so that it doesn’t sink into the pastry as much.