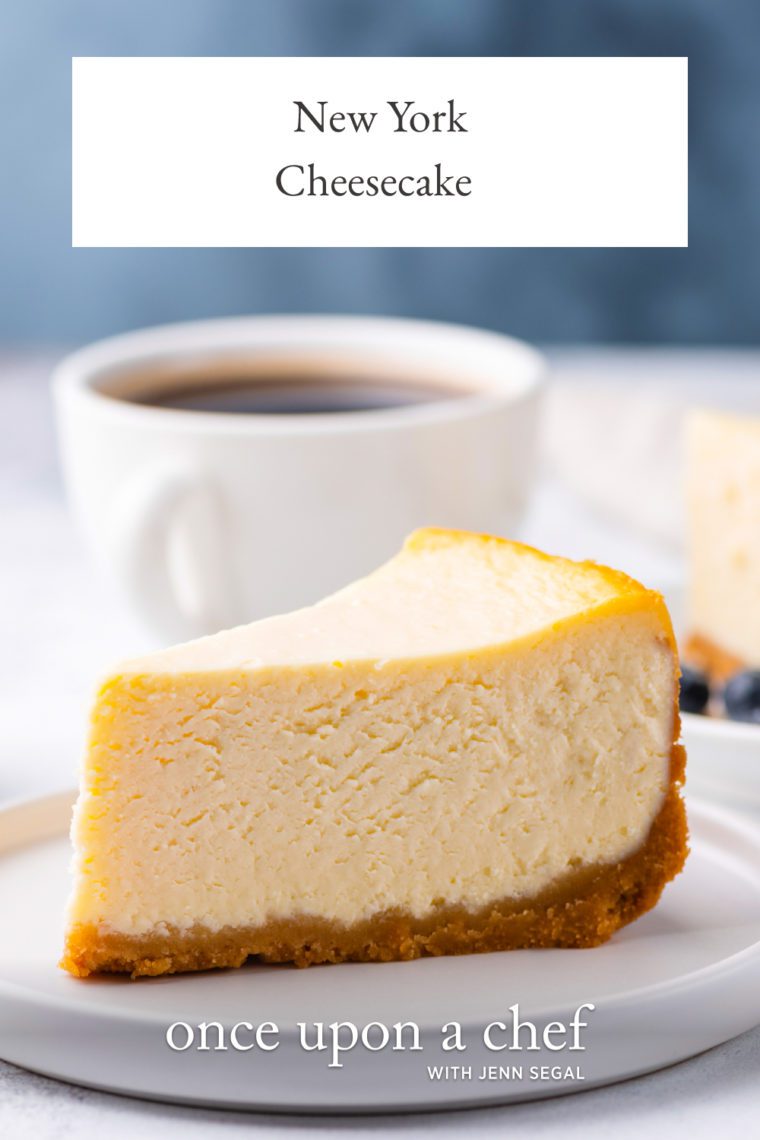
Classic New York Cheesecake

This post may contain affiliate links. Read my full disclosure policy.
Think making cheesecake is difficult? Think again! This foolproof recipe delivers a cheesecake that’s dense, rich, and creamy—rivaling those from New York’s most beloved delis—and it’s simple enough for beginners to master.

Cheesecake has always been my husband Michael’s favorite dessert. I remember when I first met my future mother-in-law over 20 years ago, she told me the key to her son’s heart was through his stomach—and he could be persuaded to do just about anything for a slice of NY cheesecake. Fortunately, I had just graduated from culinary school, so I had a little advantage in both winning his heart and perfecting my cheesecake recipe!
I know making cheesecake can be intimidating. It’s a custard dessert that needs careful baking in a water bath to prevent cracking and to get that perfect, creamy consistency. But don’t let that scare you off. With a few pointers and a tried-and-true recipe, even beginners can whip up a dense, rich, and crack-free cheesecake. Who knows, it might even help you win someone over!
“I made this for my family at Christmas time and everyone LOVED it!”
What You’ll Need To Make New York Cheesecake
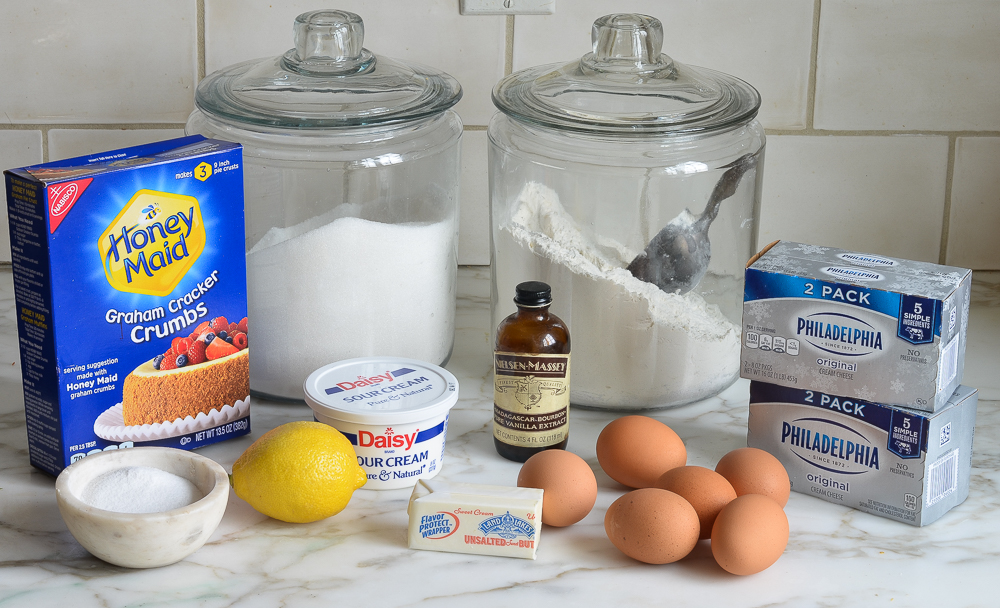
- Graham cracker crumbs: Forms the base of the graham cracker crust, providing a sweet, crumbly texture.
- Butter: Binds the graham cracker crumbs together and adds richness to the crust.
- Sugar: Sweetens the crust and filling.
- Cream cheese: The key ingredient of the filling, it provides the rich, creamy texture and tangy flavor. I recommend using a good brand, like Philadelphia.
- All-purpose flour: While it may seem unusual in a cheesecake, the flour is the secret to success. A little starch helps prevent cracking and makes the filling lighter and fluffier.
- Vanilla extract & lemon zest/juice: Flavorings that add warmth, brightness, and just enough tang to cut through the richness.
- Eggs: Provide structure and stability, helping the cheesecake set.
- Sour cream: Adds tang, moisture, and a silky, creamy texture.
- Jump to the printable recipe for precise measurements
Key Equipment
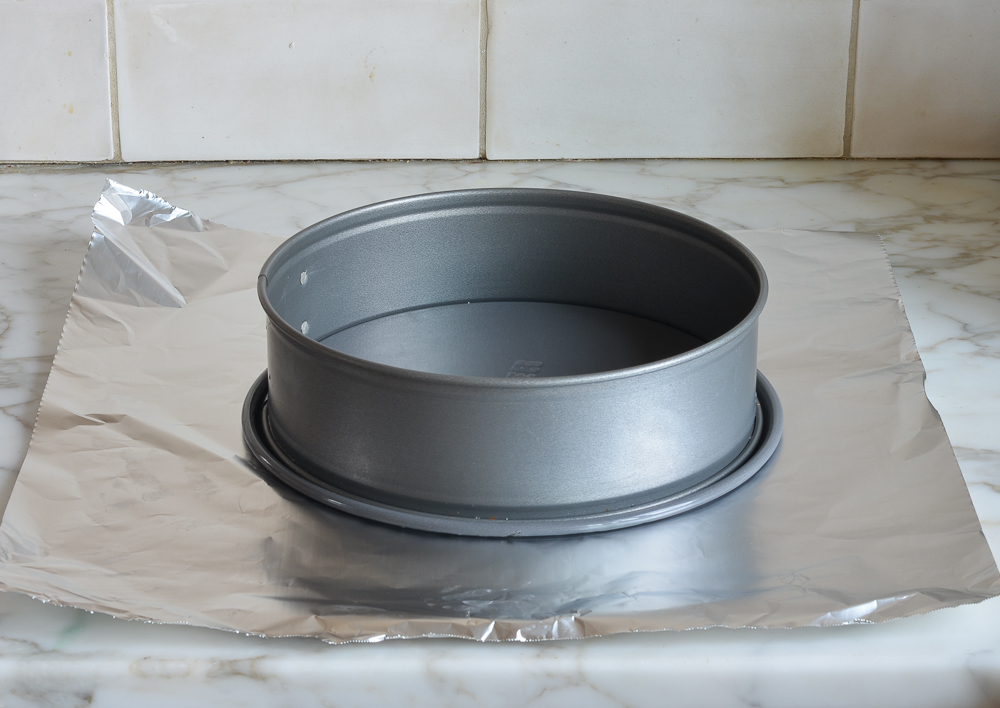
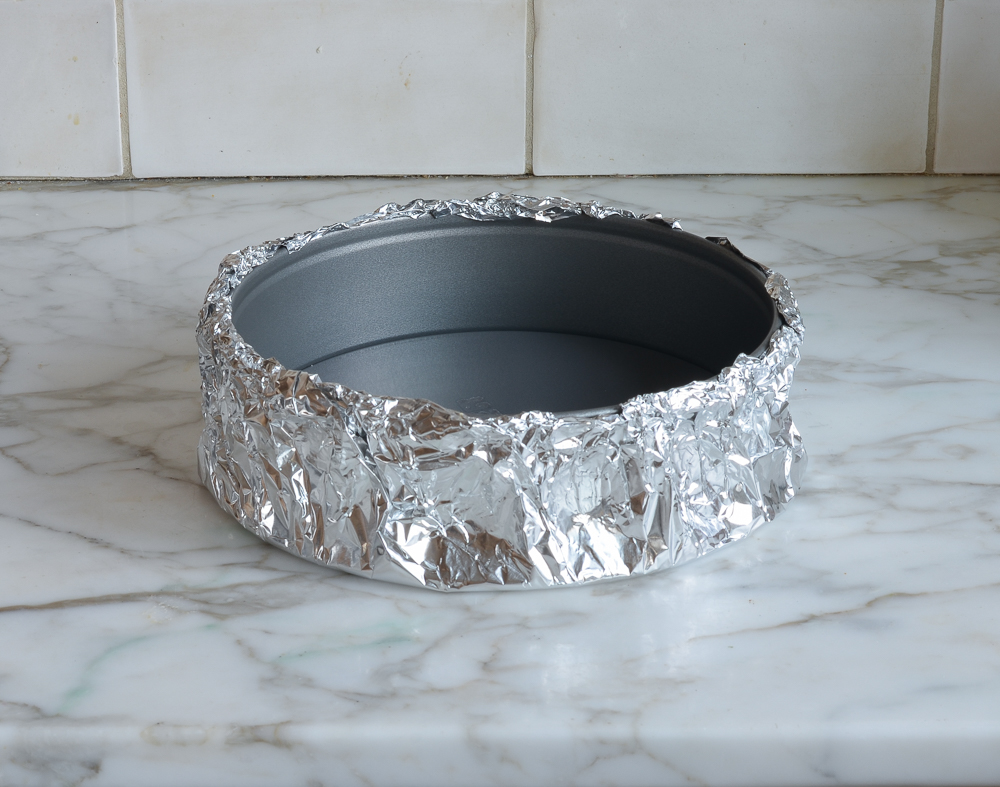
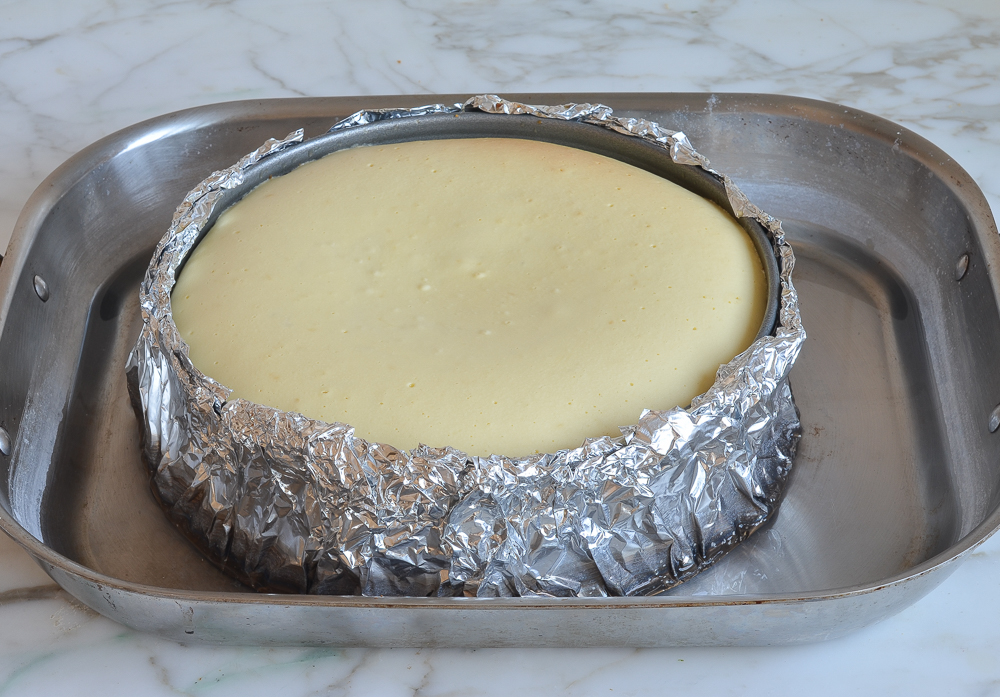
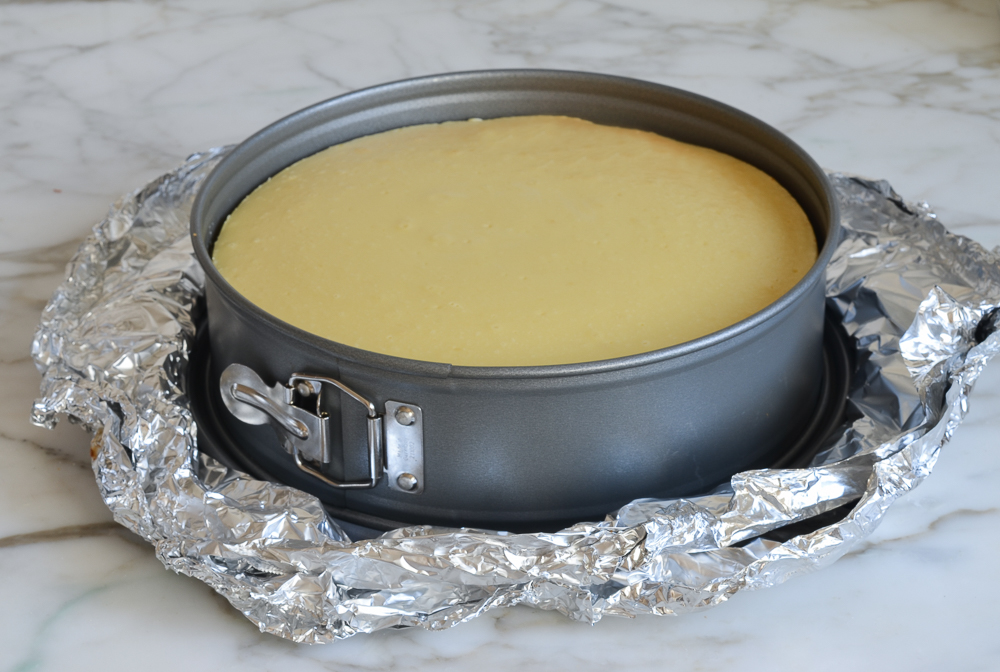
You’ll need a 9- or 10-inch springform pan and heavy-duty foil. The removable sides make it easy to release the cheesecake, but they often leak. Wrapping the pan in foil prevents water from seeping in during the water bath. Alternatively, place the springform in a larger cake pan to avoid using foil (see how it’s done here) or purchase a silicone wrap for your pan. You will also need an electric mixer for whipping up the batter and a large roasting pan for the water bath.
Video Tutorial
Step-by-Step Instructions
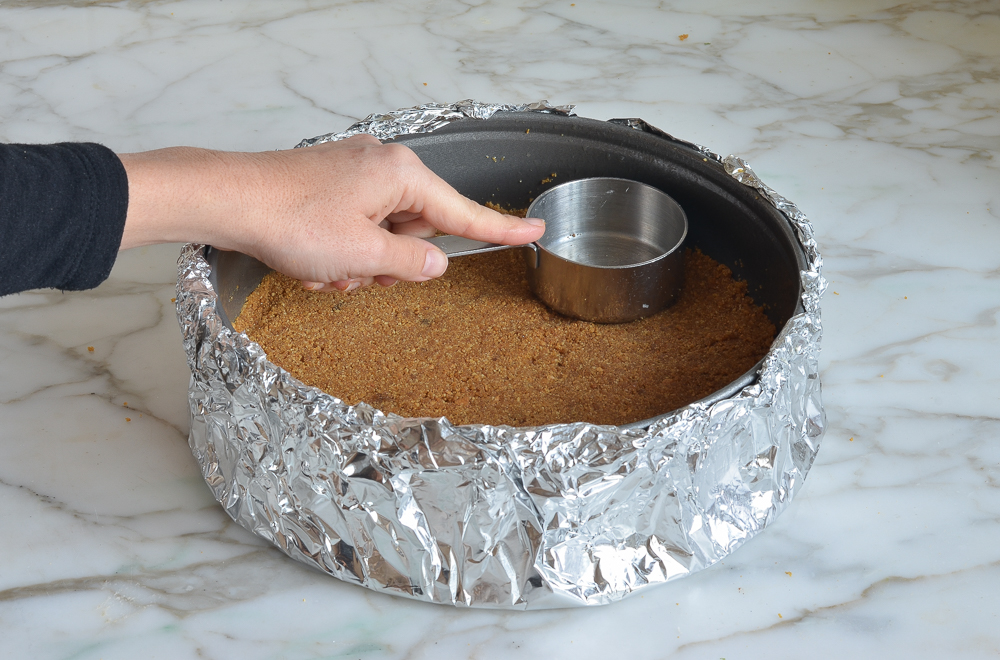
Step 1: Prep the pan and preheat the oven. Set the oven to 375°F. Wrap the springform pan with two layers of heavy-duty foil, covering the bottom and sides. Spray the inside with nonstick cooking spray.
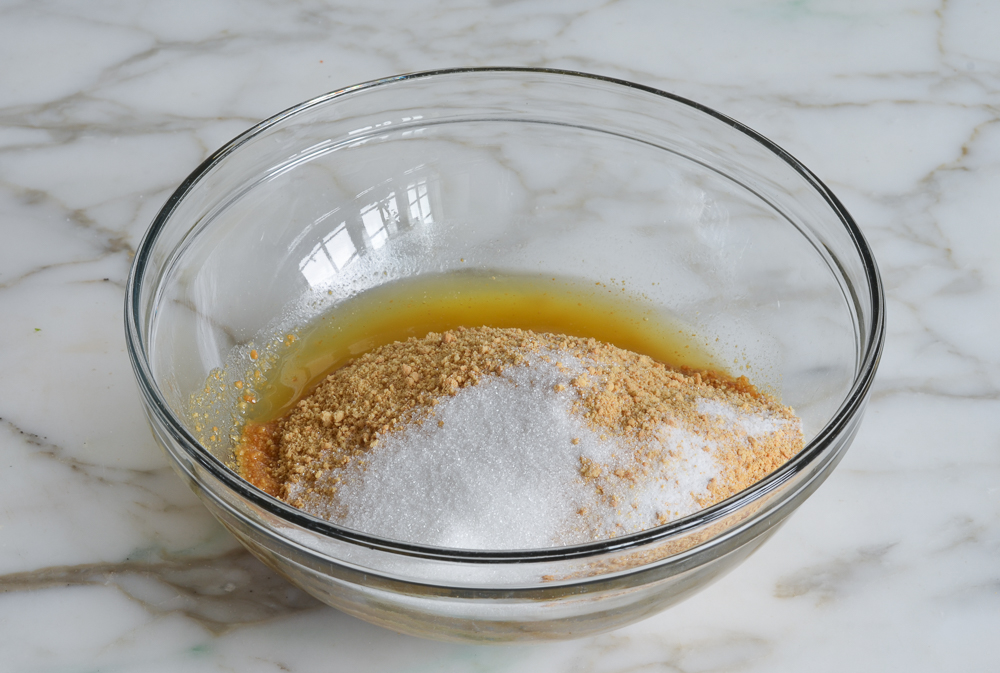
Step 2: Make the graham cracker crust. In a medium bowl, combine the graham cracker crumbs, melted butter, sugar, and salt; stir to combine.
Step 3: Form and bake the crust. Press the crumbs into an even layer on the bottom of the prepared pan. Bake the crust for 10 minutes, until set.
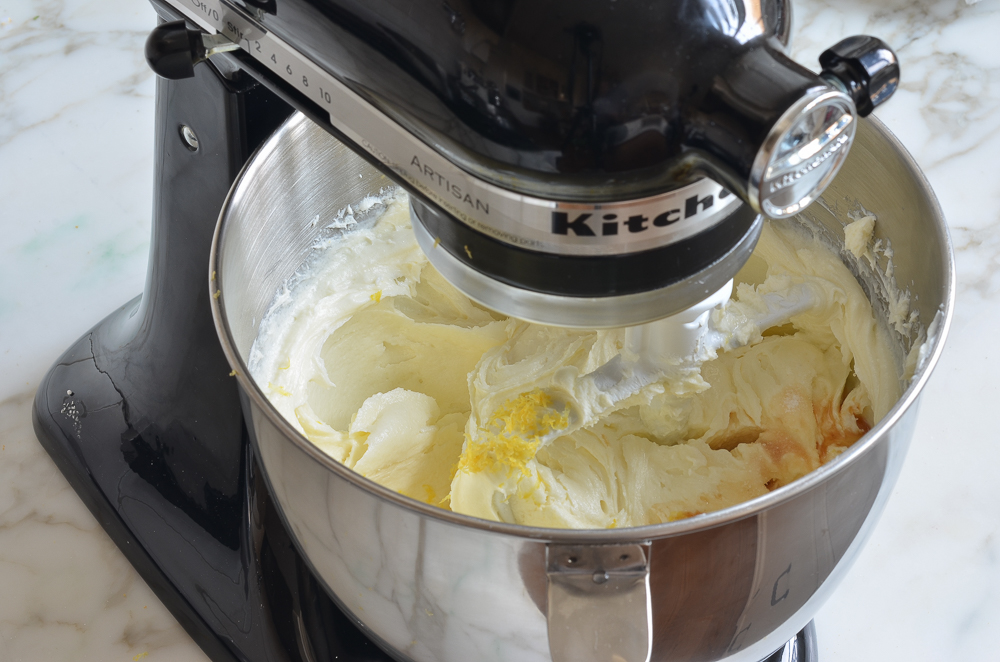
Step 3: Start the cheesecake batter. In the bowl of an electric mixer fitted with the paddle attachment or beaters, combine the cream cheese, sugar, and flour. Beat on medium speed until just smooth, about 1 minute, then mix in the vanilla, lemon zest, lemon juice, and salt.
Step 4: Add the eggs and sour cream. With the mixer on low, add the eggs, one at a time, mixing until incorporated, scraping the bowl as necessary. Then add the sour cream and mix until the batter is uniform.

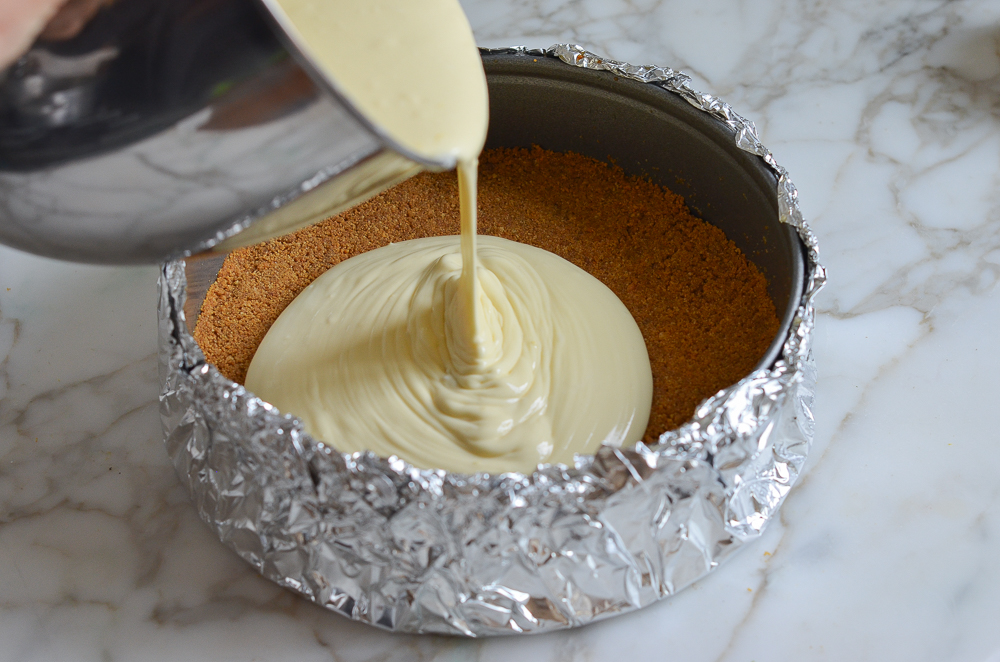
Step 5: Assemble the cheesecake. Pour the batter on top of the baked crust.
Step 6: Bake. Place the unbaked cheesecake in a large roasting pan and add boiling water to the pan, about an inch up the sides of the springform. This water bath, or bain marie, ensures even, gentle baking and helps prevent cracking or drying. Bake the cheesecake at 325°F until it’s just set; it should not appear liquid, but will slightly wobble when gently nudged, as it will continue to cook as it cools.
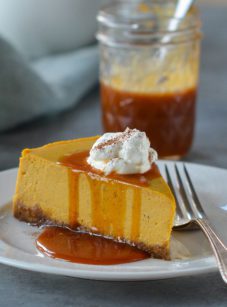
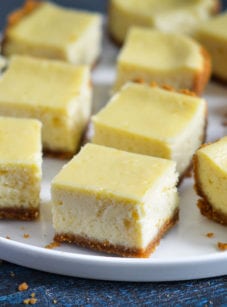
Step 7: Cool, chill, and serve. Remove the roasting pan from the oven and cool the cheesecake in the water bath on a wire rack for 45 minutes. Then, remove the springform pan, discard the foil, and refrigerate the cheesecake for at least 8 hours or overnight. Slice with a sharp knife, wiping clean between cuts. Serve with berry sauce, if you like. Cheesecake can be made up to two days ahead of time, or frozen for up to 3 months.
You May Also Like


Classic New York Cheesecake Recipe

Ingredients
For the Crust
- 1½ cups graham cracker crumbs, from 12 whole crackers
- 5 tablespoons unsalted butter, melted
- 2 tablespoons sugar
- ⅛ teaspoon salt
For the Filling
- 32 oz (four 8-oz blocks) cream cheese, at room temperature
- 2 cups sugar
- 3 tablespoons all-purpose flour
- 4 teaspoons vanilla extract
- 1 teaspoon packed lemon zest, from 1 lemon
- 2 teaspoons fresh lemon juice, from 1 lemon
- ¼ teaspoon salt
- 6 large eggs
- ½ cup sour cream
- Special equipment: 9 or 10-in (23 to 25-cm) springform pan; 18-in (46-cm) heavy-duty aluminum foil (see Pro Tip)
- Berry sauce, for serving (optional)
Instructions
For the Crust
- Preheat the oven to 375°F (190°C) and set an oven rack in the lower middle position. Wrap a 9 or 10-in (23 or 25-cm) springform pan with one large piece of heavy-duty aluminum foil, covering the underside and extending all the way to the top so there are no seams on the bottom or sides of the pan. Repeat with another sheet of foil for insurance. Spray the inside of the pan with nonstick cooking spray.
- Make the crust: In a medium bowl, combine the graham cracker crumbs, melted butter, sugar, and salt. Stir until well combined. Press the crumbs into an even layer on the the bottom of the prepared pan. Bake the crust for 10 minutes, until set. Remove the pan from the oven and set aside.
- Reduce the oven temperature to 325°F (165°C). Set a kettle of water to boil.
- Make the batter: In the bowl of an electric mixer fitted with the paddle attachment or beaters, beat the cream cheese, sugar, and flour together on medium speed until just smooth, about 1 minute. Scrape the bottom and sides of the bowl to be sure the mixture is evenly combined. Add the vanilla, lemon zest, lemon juice, and salt; beat on low speed until just combined. Add the eggs, one at a time, mixing on low speed until incorporated, scraping the bowl as necessary. Mix in the sour cream. Make sure the batter is uniform but do not over-mix.
- Check to make sure your oven has cooled to 325°F (165°C), then set the cheesecake pan in a large roasting pan. Pour the batter on top of the crust. Pour the boiling water into the large roasting pan to come about 1 inch up the side of the cake pan. Bake until the cake is just set, 1 hour and 30 minutes to 1 hour and 45 minutes. (If the cheesecake starts to look too golden on top towards the end, cover it loosely with foil.) The cake should not look liquidy at all, but will wobble just a bit when the pan is nudged; it will continue to cook as it cools. Carefully remove the roasting pan from the oven and set it on a wire rack. Cool the cheesecake in the water bath until the water is just warm, about 45 minutes. Remove the springform pan from the water bath and discard the foil. If necessary, run a thin-bladed knife around the edge of the cake to make sure it's not sticking to the sides (which can cause cracks as it cools), then cover with plastic wrap and transfer to the refrigerator to cool for at least 8 hours or overnight.
- For serving: Remove the sides of the springform pan. Serve the cheesecake right from the base of the pan; or, to transfer it to a serving platter, run a long, thin spatula between the crust and the pan bottom, and then use two large spatulas to carefully transfer the cheesecake to a serving dish. Slice with a sharp knife, wiping the knife clean between slices. Serve with berry sauce, if you like.
Notes
- Make-Ahead/Freezing Instructions: The cheesecake can be stored in the springform pan in the fridge, tightly covered with plastic wrap, for up to two days. It can also be frozen for up to 3 months. To freeze, place the cake in the freezer briefly, unwrapped, to firm it up. Then double-wrap it tightly with aluminum foil or plastic freezer wrap, or place it in a heavy-duty freezer bag. Thaw in the refrigerator the night before you plan to eat it.
- Pro Tip: Springform pans are notorious for leaking. Since a cheesecake bakes in a water bath, the foil prevents the water from seeping in during baking. Please do not attempt to use standard 12-inch (30cm) aluminum foil – you can’t have any foil seams on the bottom or sides of the pan. No matter how well (or how many times) you wrap the pan, if there are seams exposed to the water, the water will find a way in. Even when wrapped properly, you can occasionally get some condensation inside the foil. If this happens, don’t worry – the crust is likely just a bit moist around the edges. Simply remove the sides of the springform pan before refrigerating and let it dry out in the refrigerator.
Nutrition Information
This website is written and produced for informational purposes only. I am not a certified nutritionist and the nutritional data on this site has not been evaluated or approved by a nutritionist or the Food and Drug Administration. Nutritional information is offered as a courtesy and should not be construed as a guarantee. The data is calculated through an online nutritional calculator, Edamam.com. Although I do my best to provide accurate nutritional information, these figures should be considered estimates only. Varying factors such as product types or brands purchased, natural fluctuations in fresh produce, and the way ingredients are processed change the effective nutritional information in any given recipe. Furthermore, different online calculators provide different results depending on their own nutrition fact sources and algorithms. To obtain the most accurate nutritional information in a given recipe, you should calculate the nutritional information with the actual ingredients used in your recipe, using your preferred nutrition calculator.
Going to made this on Friday to take to Saturday Bible study.
Everyone loved this cheesecake. I’ve made it twice before for different guests and it’s always been a hit. Thank you!
I like it. I didn’t do it perfectly- every other cheesecake I’ve made had the crust the same temp as the filling, so I didn’t realize I had to lower the temp and I overcooked the top a bit. I took it out right at 90 mins so it turned out OK in that regard but it may have caused it to be a bit dense. Wish I had noticed that in the instructions though, 325 and 375 look sneakily similar lol. I do think 6 eggs and the flour may be a bit much, I’ve never made a cheesecake with that many eggs, usually it’s half that… But I didn’t know until I looked it up that apparently NY cheesecake is denser than other types, so maybe that’s why 6 eggs are needed? I still like the pumpkin swirl cheesecake from Sally’s Baking Addiction best, but for a Summer option this one is good too. I made a strawberry sauce I found online that helped lighten it up a bit.