
Challah


This post may contain affiliate links. Read my full disclosure policy.
Learn how to make my favorite challah recipe with this step-by-step guide, including how to create a beautiful four-strand braid. Perfect for Shabbat, holidays, or any special occasion.
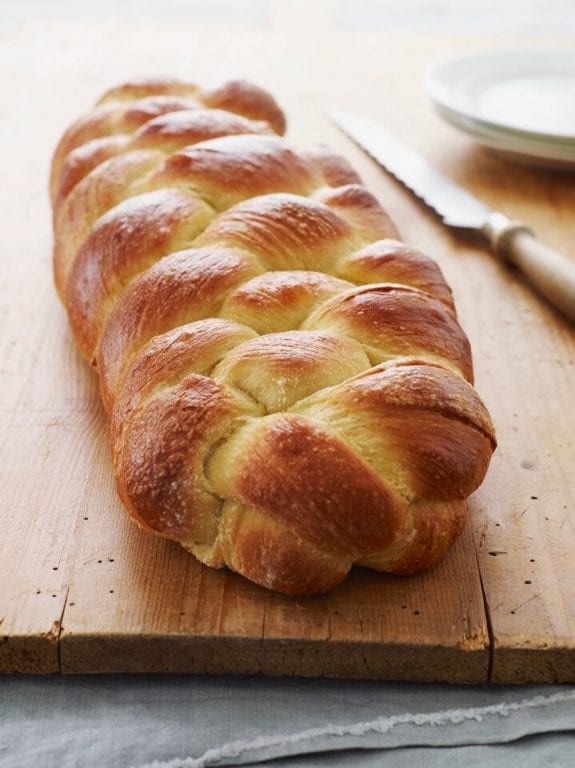
Photo by Alexandra Grablewski (Chronicle Books, 2018)
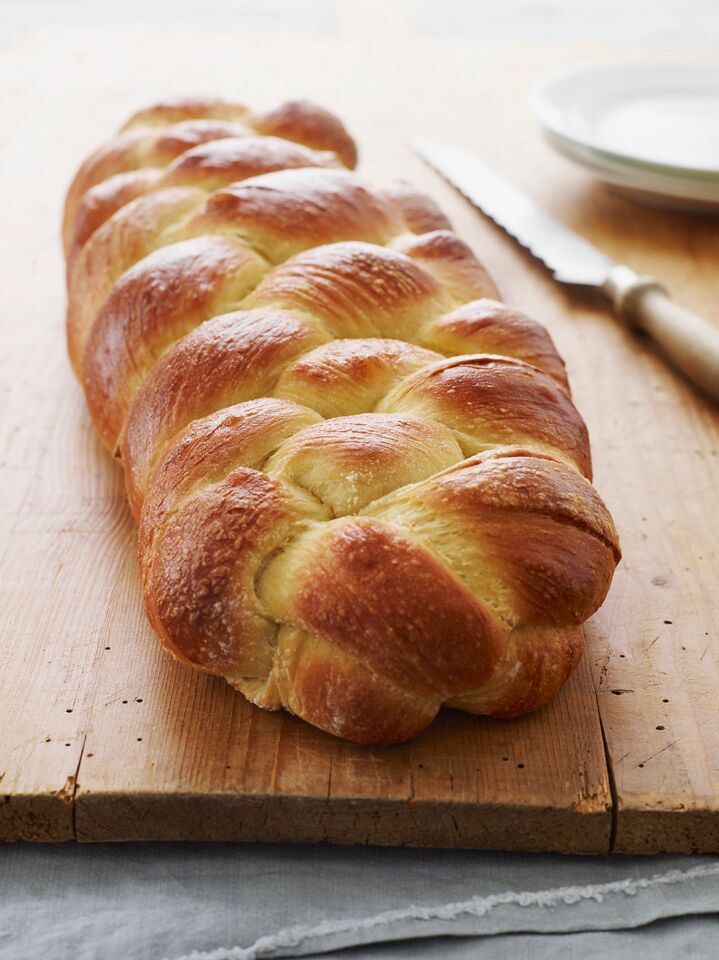
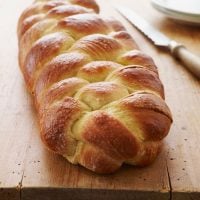
Challah is the bread of celebration in Jewish tradition, but I put it in the matzo ball soup and bagel category: it appeals to everyone. It’s a rich, slightly sweet loaf with a shiny, golden crust and pillowy-soft interior. But what makes it truly special is its distinctive braid, which symbolizes, among other things, the joining together of family and friends.
Rest assured, challah looks like far more trouble than it actually is. Think of it as a once-in-a-while baking therapy project. Kneading and braiding the dough, smelling the challah baking in the oven—it really is satisfying. And when the long braided loaf is presented at the dinner table, it is a sight to behold!
I owe much of the credit for this recipe to Nanci Hirschorn, one of my lovely readers, who has been perfecting her challah recipe for over thirty-five years. Thank you, Nanci, for all the pointers! Heads up: this recipe makes one 16-in loaf. It’s huge! If you have leftovers, use it to make challah French toast.
“This was my first attempt at challah and it was AMAZING! Easy to follow directions and looked and tasted great.”
What You’ll Need To Make Challah
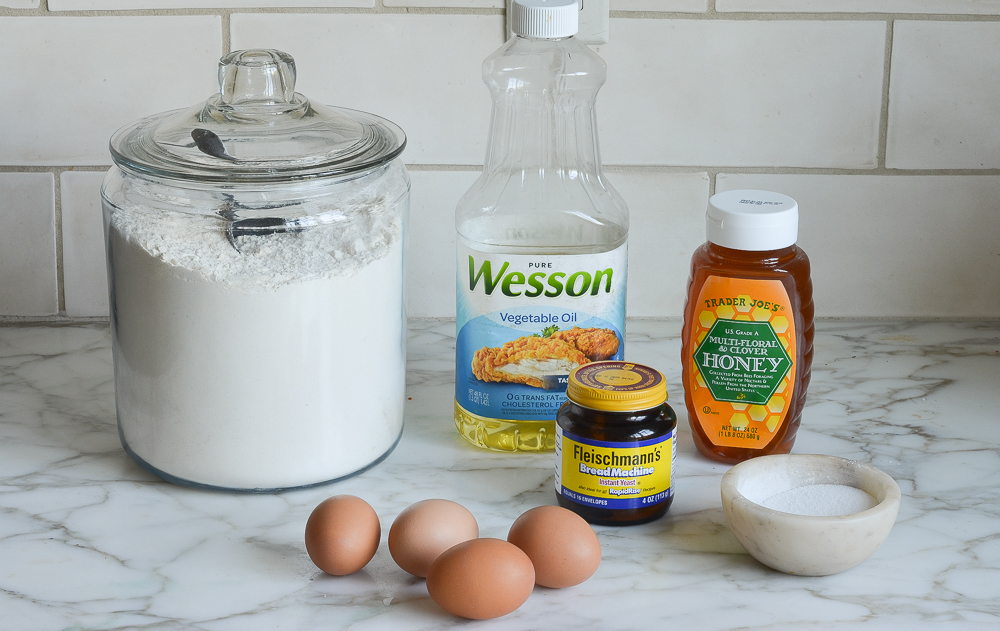
- All-purpose flour: Gives the challah structure while keeping the crumb soft and tender. For the most accurate results, I recommend weighing the flour with a digital kitchen scale; if measuring by volume, spoon it into the measuring cup and level it off.
- Instant/rapid-rise yeast: Can be mixed right into the flour—no proofing required. Note that the recipe calls for 1 tablespoon, which is more than one standard packet.
- Lukewarm water: The water should feel warm, not hot, so it encourages the yeast without damaging it.
- Vegetable oil: Keeps the challah soft and moist without adding a competing flavor.
- Honey: Gives the loaf its subtle sweetness and helps create a beautiful golden crust.
- Eggs: Give challah its characteristic richness, golden color, and tender crumb. Be sure they’re at room temperature; cold eggs can slow the rise.
- Jump to the printable recipe for precise measurements
How To Make Challah
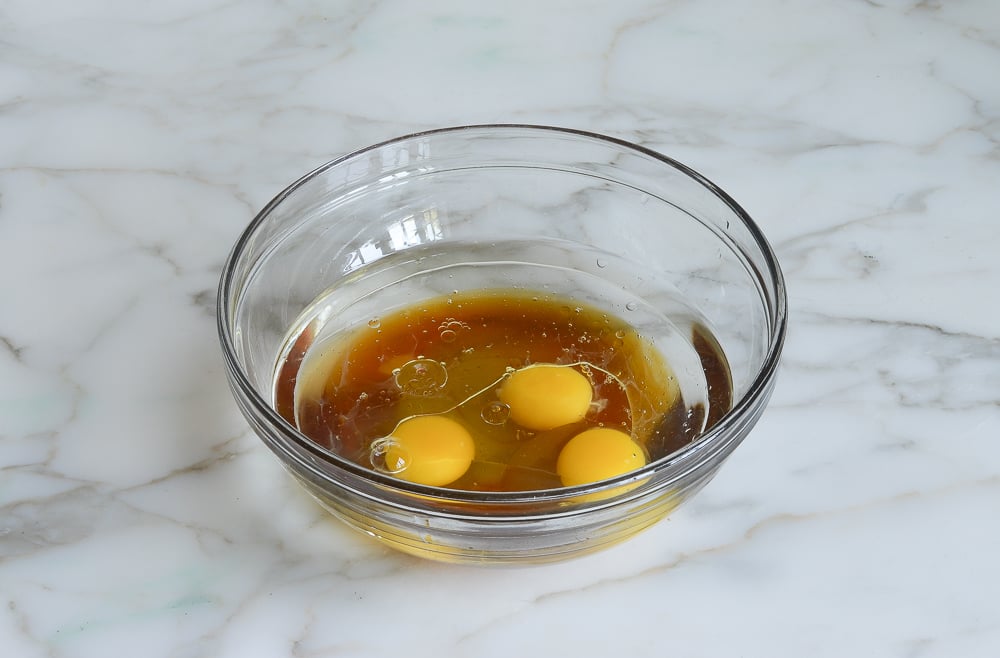
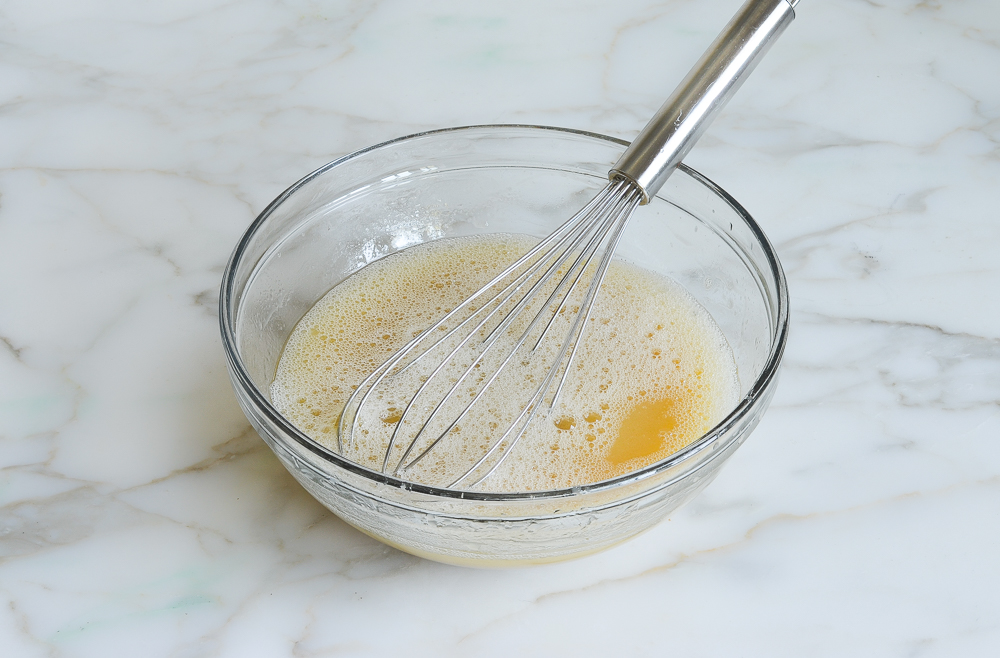
Step 1: Mix the wet and dry ingredients. Whisk the water, oil, honey, eggs, and egg yolk together until well combined.
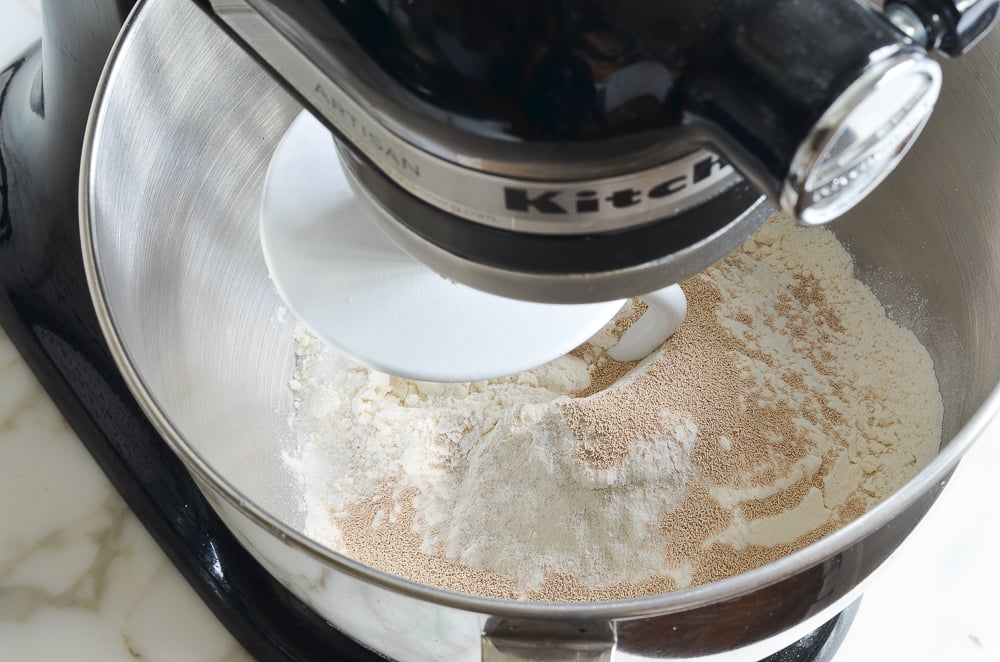
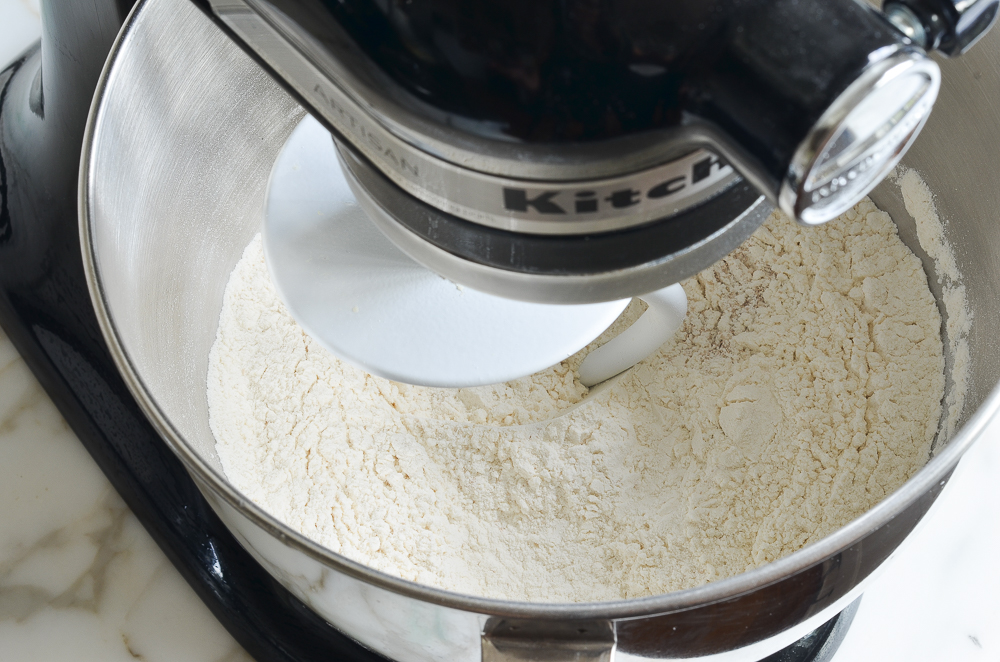
Step 2: Mix the dry ingredients. Combine the flour, yeast, and salt in the bowl of a stand mixer fitted with the dough hook.
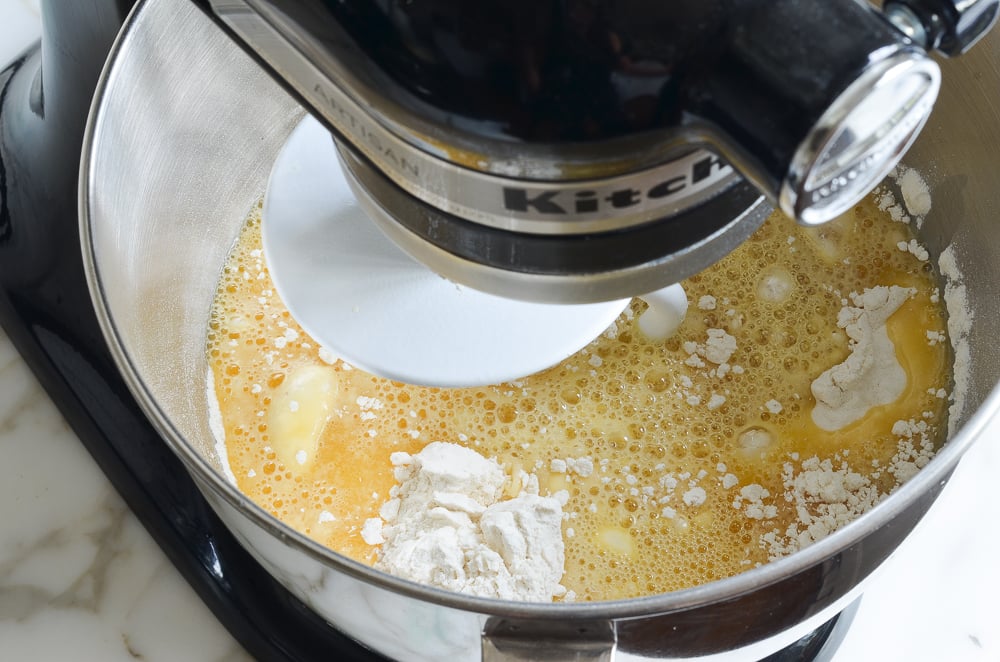
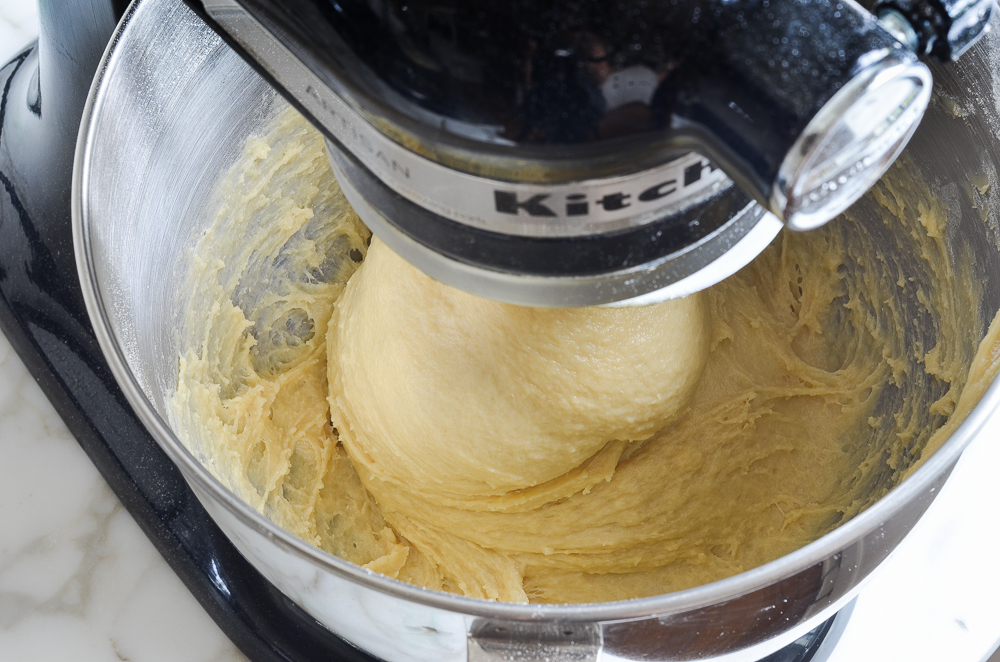
Step 3: Mix and knead the dough. Add the wet ingredients to the dry and knead on medium-low speed for 5 to 7 minutes. The finished dough should be smooth and elastic but still quite sticky—it will cling to the bottom of the bowl and may look wetter than you expect. Resist the urge to add more flour; that soft, sticky dough is what gives the challah its tender, pillowy texture.
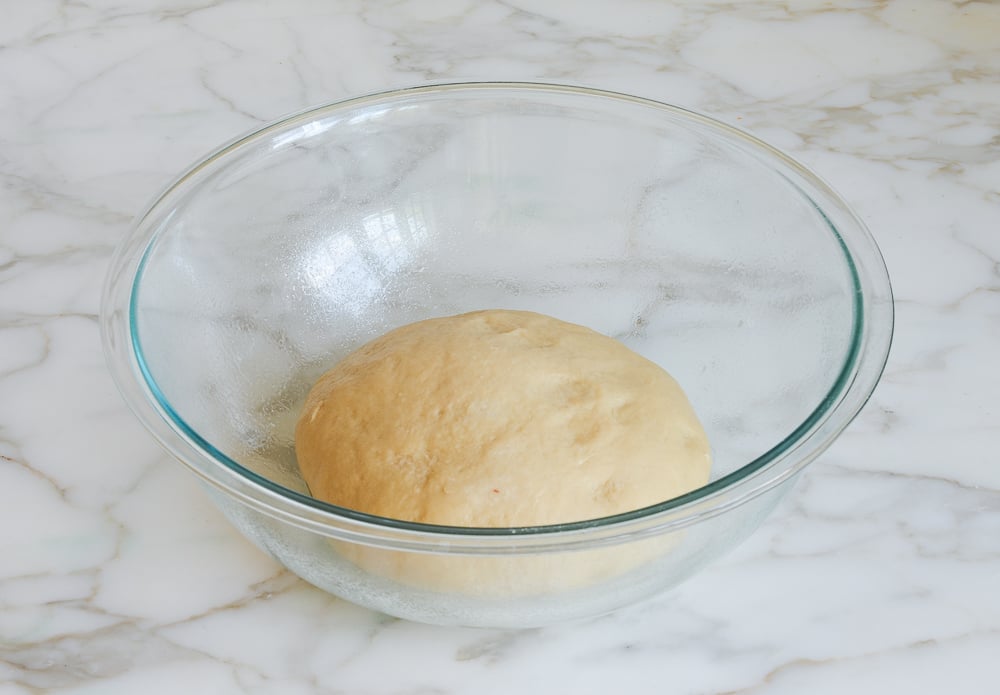
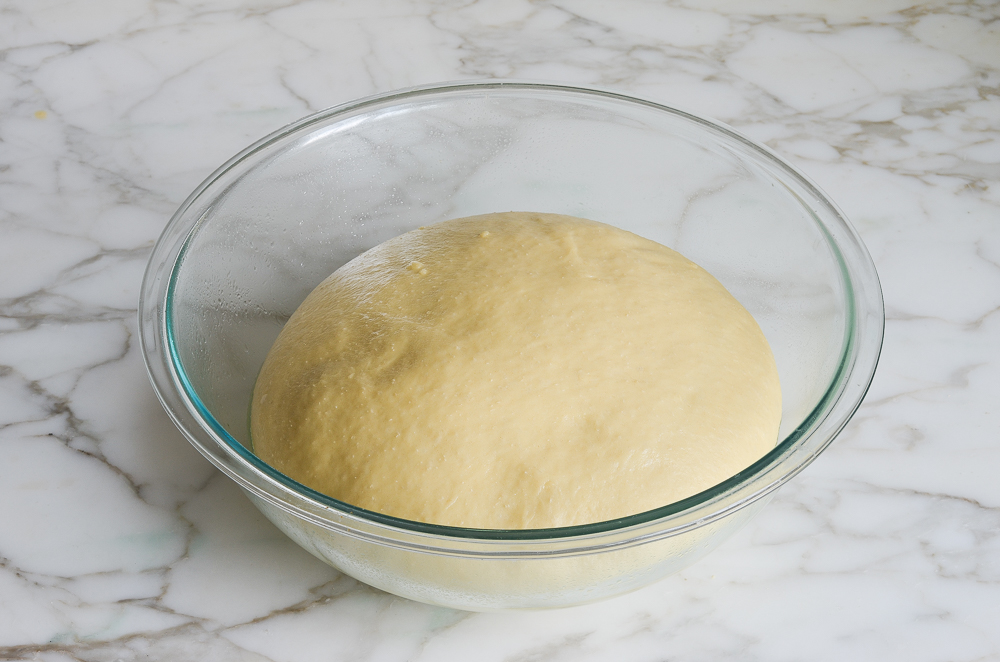
Step 3: Let the dough rise. Turn the dough out onto a lightly floured surface and knead briefly, adding just enough flour to form a soft, smooth ball. Place in a lightly greased bowl, cover, and let rise in a warm spot until doubled in size, 2 to 3 hours. Go by how the dough looks rather than the clock—a cool kitchen may take longer.
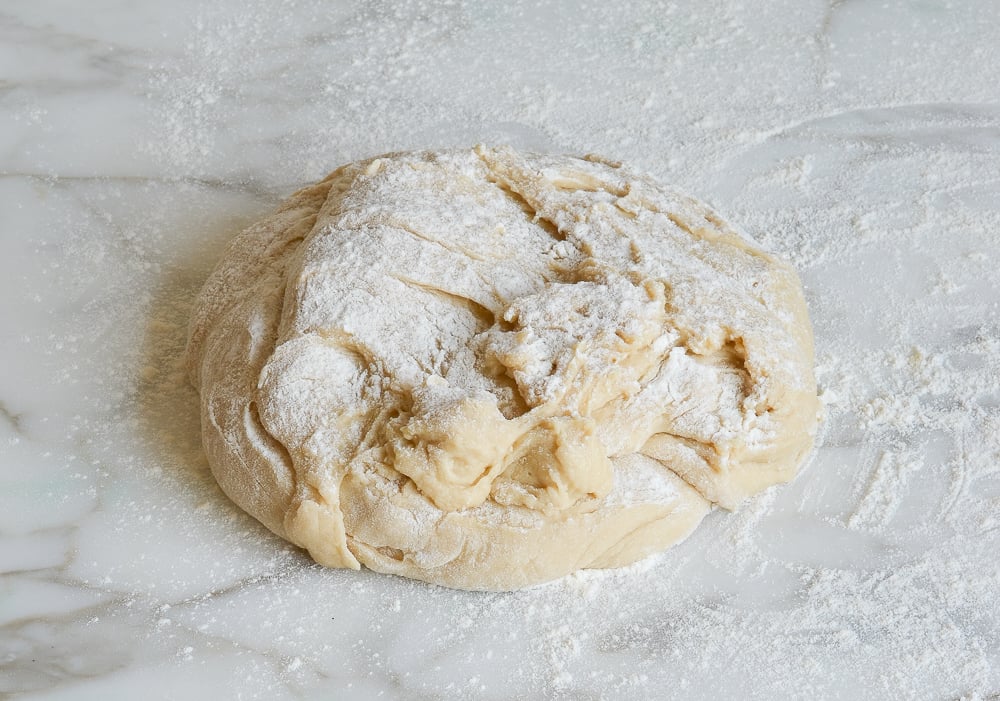
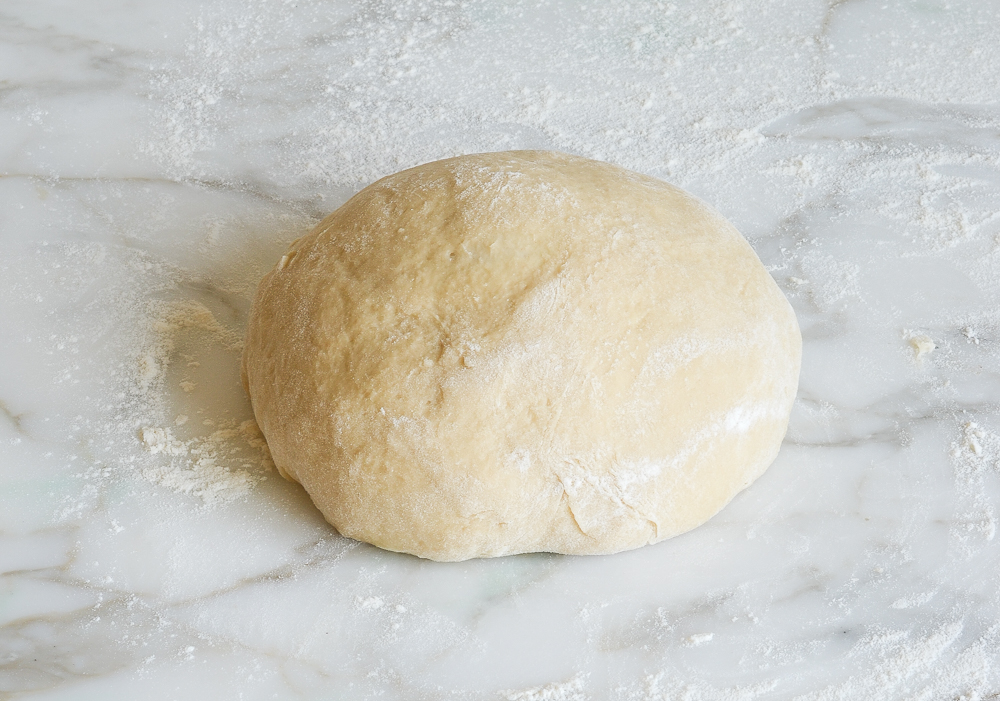
Step 4: Divide the dough. Turn the dough onto a lightly floured work surface and divide it into four equal pieces. For the most even-looking loaf, weigh the pieces; each should be about 9 ounces (255 grams).
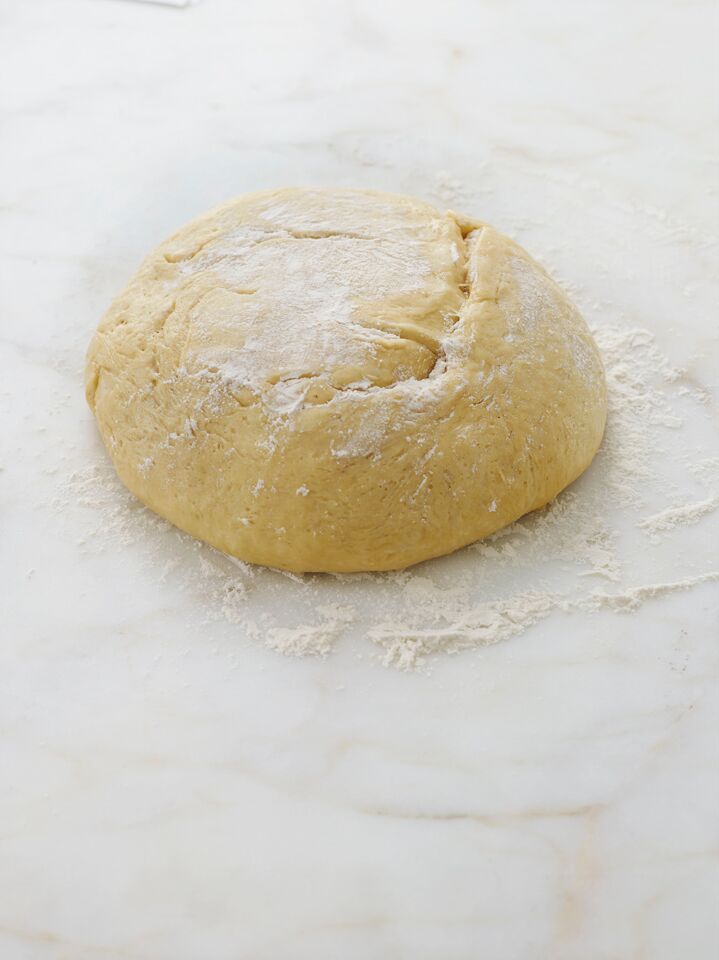
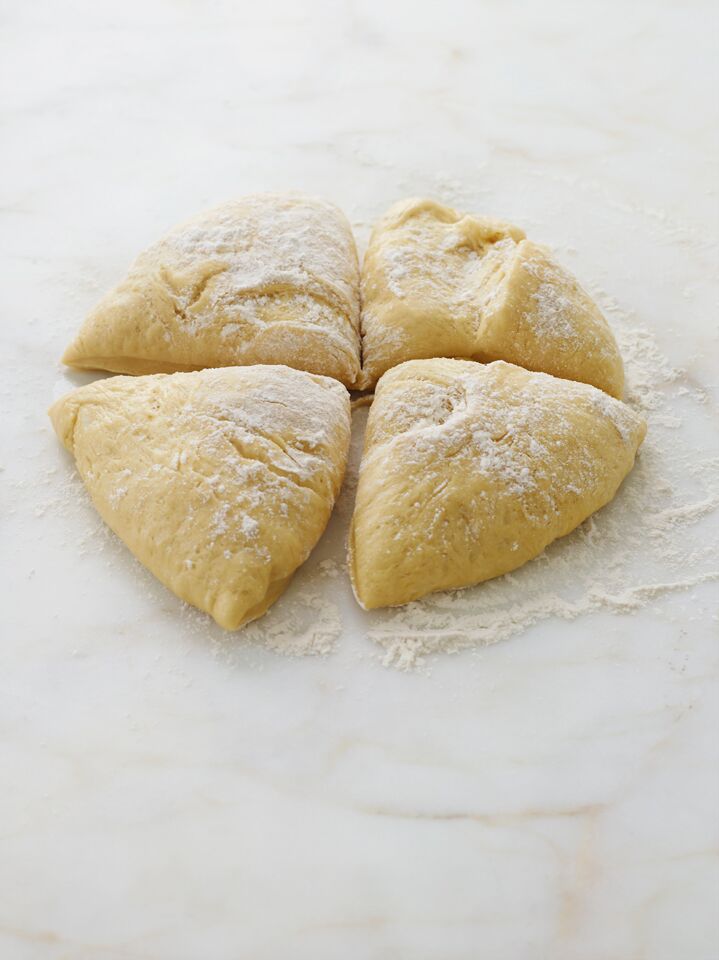
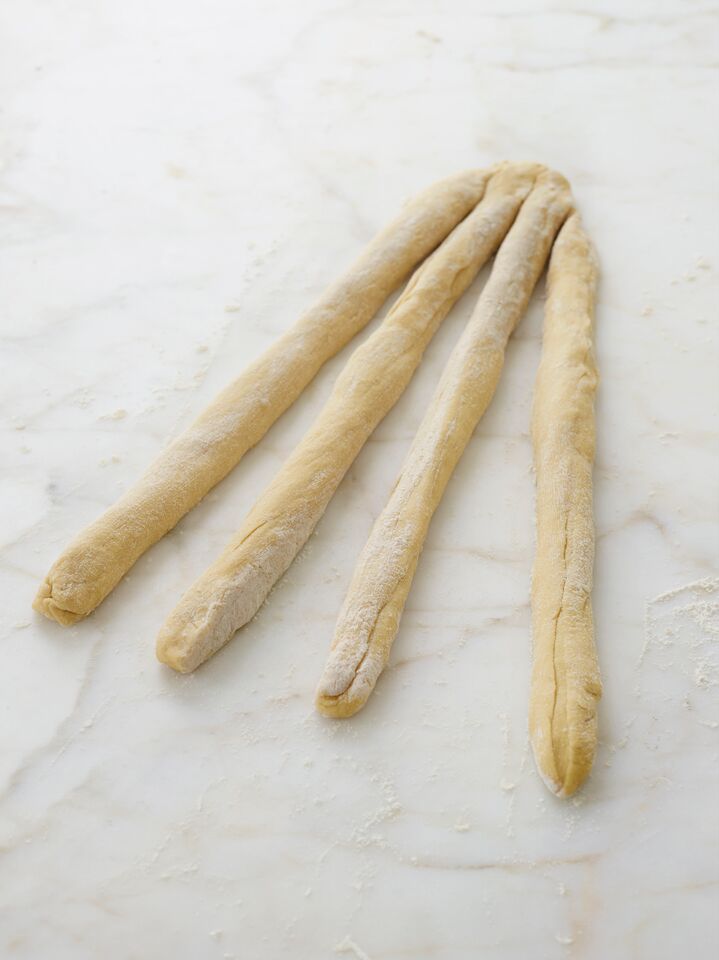
Step 5: Braid the challah. Roll each piece into a rope about 20 inches long. Arrange the four ropes vertically, side by side, and pinch them together at the top. Starting with the strand on the far right, weave it to the left using an over-under-over pattern. Repeat with the new strand on the far right, continuing until you reach the bottom. Pinch the ends together and tuck them underneath the loaf. Don’t worry about a perfect braid—it will smooth out as it rises and bakes.
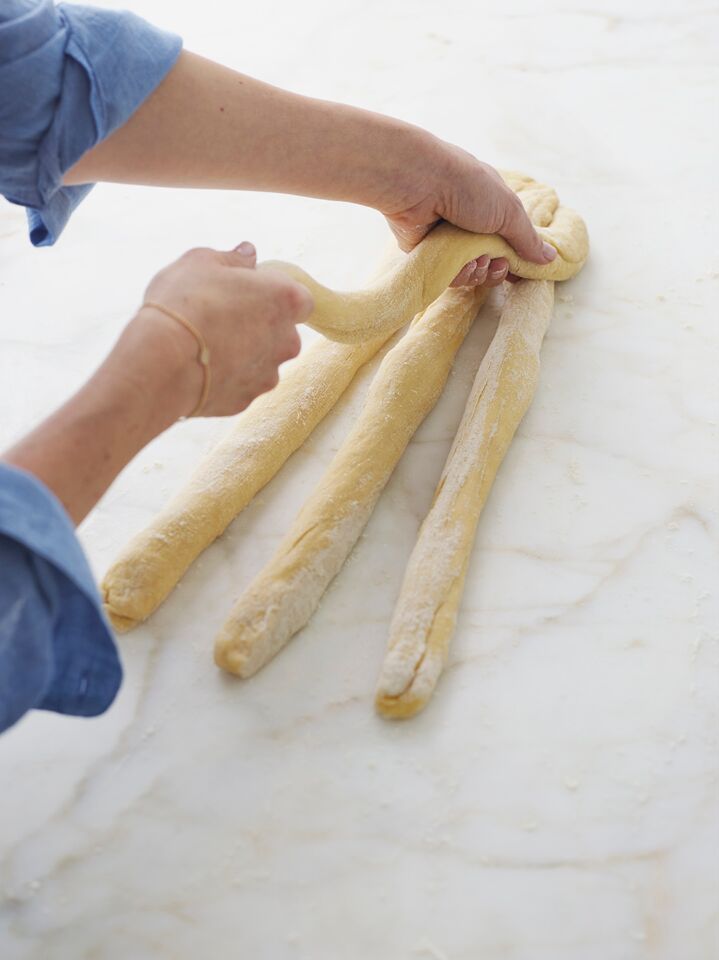
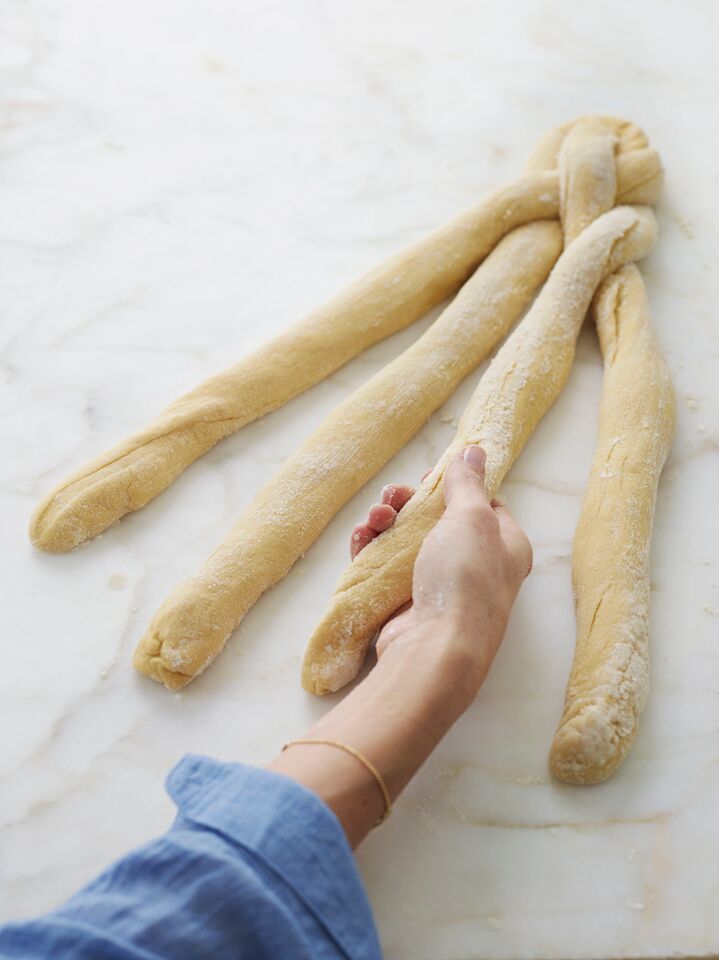
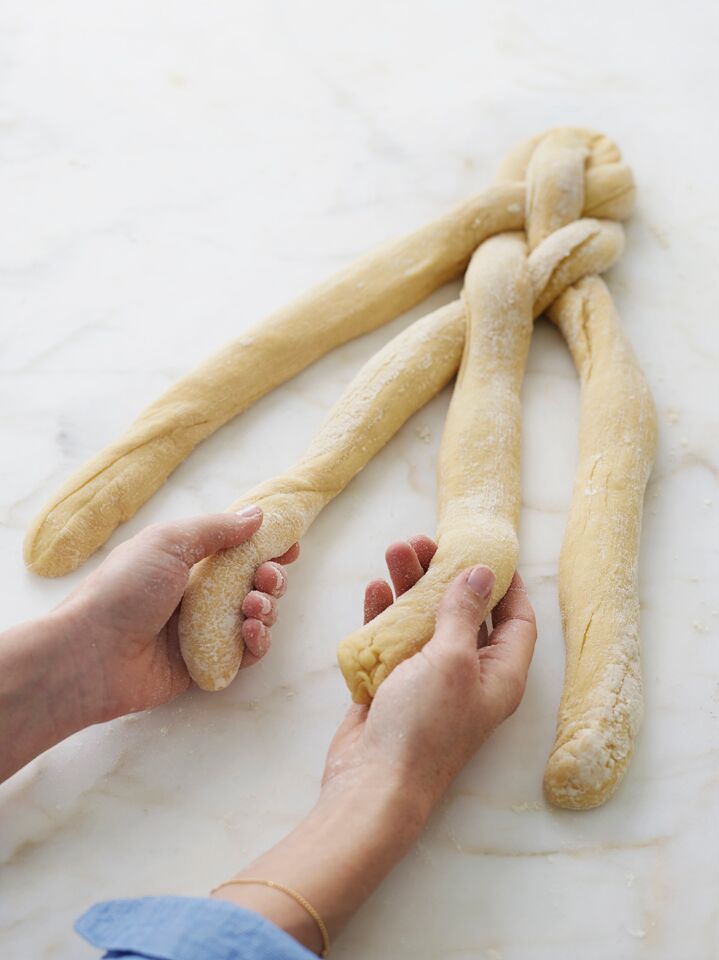
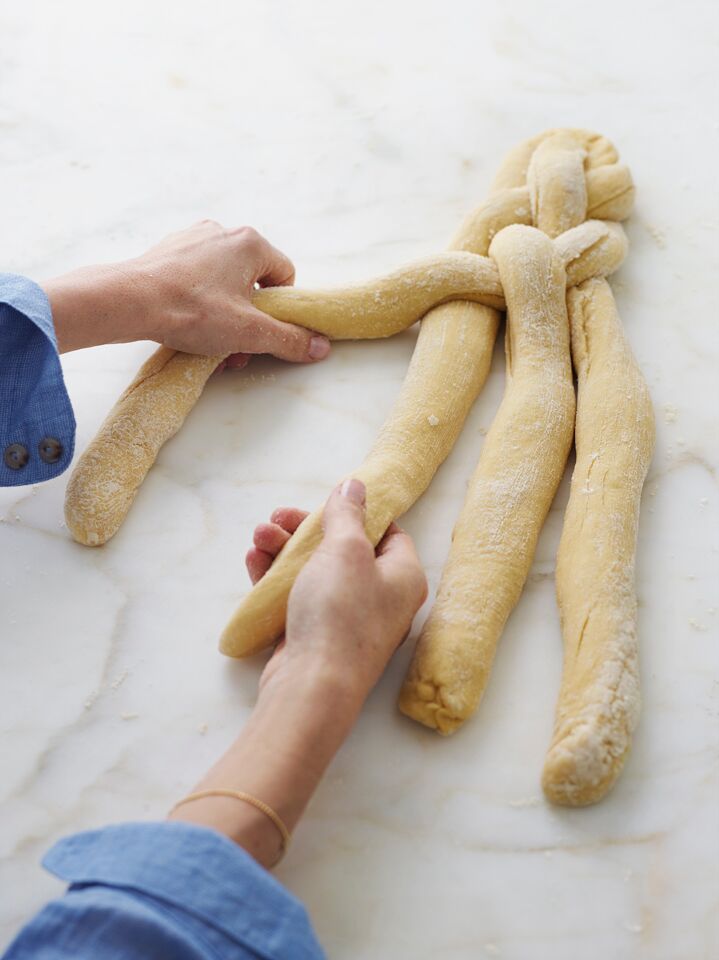
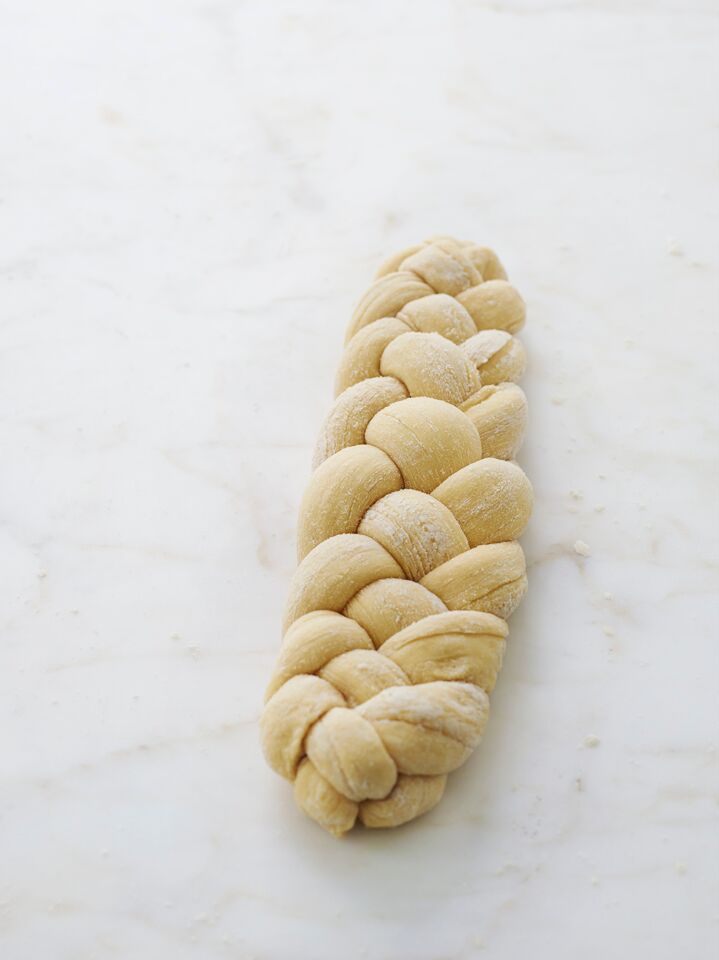
Step 6: Let rise and egg wash. Transfer the challah to a parchment-lined baking sheet, cover loosely, and let rise until noticeably puffy and about 1½ times its original size. Brush generously with beaten egg, making sure to get into the crevices of the braid. Sprinkle with sesame or poppy seeds, if desired.
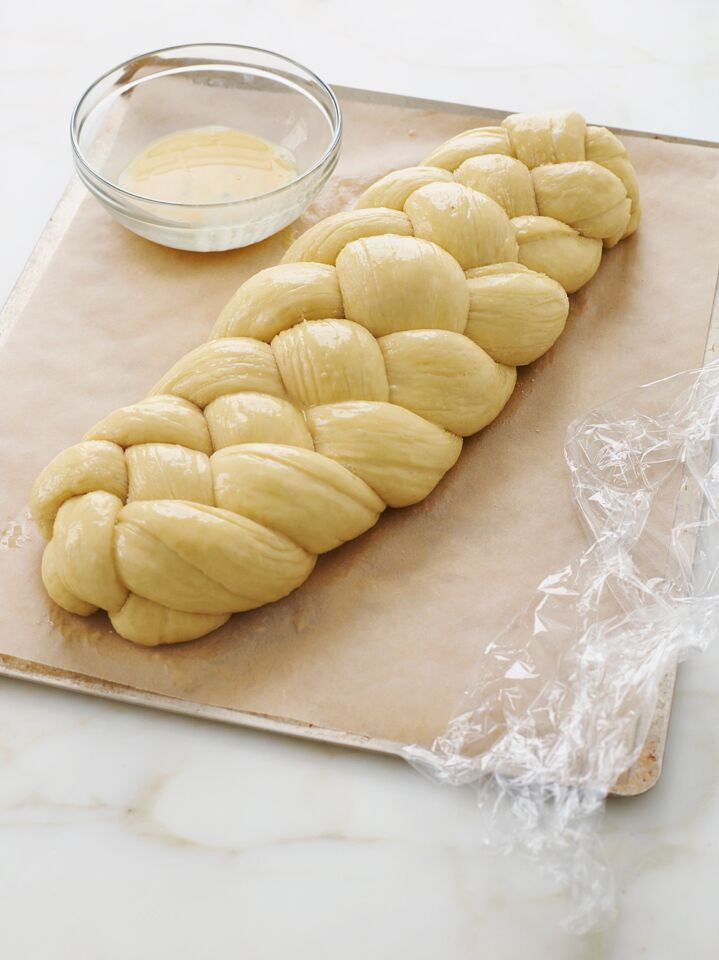
Step 7: Bake. Stack the baking sheet on top of a second baking sheet; the extra insulation helps keep the bottom from getting too dark. Bake until the challah is a rich golden brown and the center registers 190°F to 200°F on an instant-read thermometer. Transfer to a rack and let cool before slicing.
Challah keeps well at room temperature for a few days; freeze it for longer storage. If you’re making challah for a holiday meal, you’ll find plenty more inspiration in my collection of Jewish recipes, including brisket, crispy latkes, and apple cake.
More Homemade Breads You’ll Love
Homemade Challah
Ingredients
- 4¼ cups all-purpose flour, spooned into measuring cup and leveled-off, plus more for dusting
- 1 tablespoon instant/rapid-rise yeast (see note)
- 2 teaspoons salt
- ¾ cup lukewarm water
- ¼ cup + 2 tablespoons vegetable oil
- ¼ cup + 2 tablespoons honey
- 3 eggs, at room temperature
- 1 egg yolk, at room temperature
Instructions
- In a stand mixer fitted with the dough hook, combine the flour, yeast, and salt. Mix on low speed for 30 seconds to combine. In a separate bowl, combine the lukewarm water, oil, honey, 2 of the eggs, and the egg yolk. Add to the dry ingredients and knead on medium-low speed until you have a sticky dough that clings to the bottom of the bowl, 5 to 7 minutes. The dough may seem too wet but have faith—it’s supposed to be.
- Dust your hands generously with flour, then scrape the sticky, elastic dough out onto a lightly floured work surface. Dust the top of the dough lightly with flour and knead briefly into a soft, smooth ball. Lightly grease a large bowl with oil or nonstick cooking spray. Place the dough in the bowl, flip it over once so the top is lightly oiled, and then cover the bowl with plastic wrap. Allow the dough to rise in a warm, draft-free spot until it’s puffy and doubled in size, 2 to 3 hours.
- Invert the dough onto a lightly floured work surface and dust with flour. It will deflate. Cut the dough into four even 9-oz (255-g) pieces, and then stretch and roll each piece into a rope about 20 inches (50 cm) long. Lay the ropes parallel to one another (vertically). Pinch them tightly together at the top, and then fan them out. If the ropes shrink a bit, just work them back into their original length.
- Begin by taking the strand farthest to the right and weave it toward the left through the other strands using this pattern: over, under, over. Take the strand furthest to the right and repeat the weaving pattern again: over, under, over. Repeat this pattern, always starting with the strand farthest to the right, until the whole loaf is braided. Tuck the ends under to give the loaf a finished look.
- Carefully transfer the braided loaf to a parchment-lined 13 x 18-inch (33 x 46-cm) baking sheet. Cover the loaf loosely with plastic wrap and let it rise in a warm, draft-free spot until about 1.5 times the size, 1 to 2 hours. Toward the end of the rising time, preheat the oven to 350°F (175°C) and set an oven rack in the middle position. (Note that the loaf will continue to rise significantly in the oven.)
- In a small bowl, beat the remaining egg and brush the beaten egg generously over the risen dough. (Note: If you like, sprinkle poppy or sesame seeds onto the challah before putting it in the oven.) Place the baking sheet atop another baking sheet; this will prevent the bottom crust from browning too much. Bake for 25 to 35 minutes, until the crust is a rich brown color and the internal temperature is between 190°F and 200°F (88°C and 93°C) on an instant-read thermometer. Remove the bread from the oven and place it on a rack to cool. Challah is best enjoyed fresh, but leftovers will keep for a few days in a sealed plastic bag.
Notes
Nutrition Information
This website is written and produced for informational purposes only. I am not a certified nutritionist and the nutritional data on this site has not been evaluated or approved by a nutritionist or the Food and Drug Administration. Nutritional information is offered as a courtesy and should not be construed as a guarantee. The data is calculated through an online nutritional calculator, Edamam.com. Although I do my best to provide accurate nutritional information, these figures should be considered estimates only. Varying factors such as product types or brands purchased, natural fluctuations in fresh produce, and the way ingredients are processed change the effective nutritional information in any given recipe. Furthermore, different online calculators provide different results depending on their own nutrition fact sources and algorithms. To obtain the most accurate nutritional information in a given recipe, you should calculate the nutritional information with the actual ingredients used in your recipe, using your preferred nutrition calculator.
Hi! I’m making this tomorrow morning and have one question. You say to place the baking sheet atop another baking sheet. I only have 1 half-sheet pan that I’ll bake it on. Did you mean another pan, of the same size, so it sits inside the 2nd pan or another pan of a smaller size so it sits on top of the second pan rather than the oven rack? Hope that makes sense. Thank you!!
Hi Julie, I may be weighing in too late to help, but yes when I mention placing the baking sheet on top of another one, yes, they should be the same size. If you don’t have two baking sheets of the same size, as long as you have another thin metal pan, you could just invert it under a baking sheet that the challah will rest on so that isn’t sitting directly on the rack. Hope that helps!
Hi Jenn! I’m making this bread right now but my dough is very dry! I put all the ingredients in just like you wrote them; what is happening?? Can I fix this or do I need to start over and use less flour?
Sorry I’m just now seeing this, Kayla. How did it turn out?
What If I only have a hand mixer? can I do this all by hand? What would your recommendation be? I want to make this today!
Yes, it’s fine to do it by hand. Enjoy!
Hi Jenn! I’ve now made this challah twice (in one week!), and it’s so delicious, but I think it’s a little denser than most challahs I’m used to. On the second challah I tried to increase rise times, but not too drastically, and it was about the same density as the first. Any advice? Thanks!
Hi Caroline, Glad you like it. Regarding the texture, it sounds like perhaps you’re using too much flour. Do you use the spoon and level method to measure the flour? Even a few extra ounces can make a big difference. This article/video explains it nicely.
Thank you so much for the reply! I made another challah yesterday and used the correct flour measuring method and the challah came out PERFECT! And it made a great french toast this morning. Thanks again!
So glad — thanks for the follow-up!
I had never tried to make homemade bread before other than biscuits. I followed your step by step instructions and the results were gorgeous. My son in law is Jewish and he was so happy that the Hanukkah challah was homemade.
I made this today and it turned out amazing! I accidentally used bread flour instead of all purpose and didn’t realize until I was cleaning up and saw the flour bag. I was really worried it would be a flop after that but it actually turned out really good and fluffy! My whole family loved it. We’ve always gotten store-bought challah but this was way better and the 4-braid gave it a really nice appearance. I plan on making it again but with all-purpose flour. Thank you for sharing this recipe, it was easy to follow and absolutely delicious!!
Delicious! I can’t stop making this bread!
Hello Jenn
I’m looking forward to making this but I’m going to use active dry yeast. Typically the yeast is put into the liquid and left for 5-10 minutes. If I add the yeast directly to the dry ingredients will it still rise properly?
Thanks Jenn – I’m fairly new with using yeast:)
Nicole
You can do it either way, Nicole. But if you dissolve the yeast in liquid, the dough will rise a bit faster.
Jenn
Yesterday I made my first Challah bread . This was the first time
I ever used the dough hook on that fancy black kitchen aid
machine which until this past week I only used to make
chocolate chip cookies ! The bread was amazing although it had
a little bit of a Charlie Brown look to it (as we started to weave the
bread some of the strands were a little shorter than the others .When
we stretched them they became a little skinnier from when we started
so one end of the baked loaf ended up a little narrower than the beginning)
I gave this first one to my daughter .They loved it as asked me to make another
for a photo shoot they are doing of their home at xmas .On monday I will make
one for our son and his squeeze. Question .Your instructions say you can make ahead
and keep it fridge overnight . I take it that means you do the first rise of dough.Shape the
bread ,do the second rise of 1.5 to 2 hours then put in fridge overnight and give it another hour when you take it out , correct ? I would like to do it this way second time as it is a long process from beginning to end and I don’t want to start at 5 am for lunch delivery ! Thanks for another great recipe.
ron vaage
Vancouver BC
Canada
Hi Ron, You can skip the second rise at room temperature because the braided dough will rise in the fridge overnight (although much more slowly). Hope that helps!
Ok thanks
I am doing second loaf now the conventional way
Will try overnight in fridge for third loaf
Thanks
Ron
I made it pretty much exactly as written, and this is the best bread I’ve ever made! I appreciated the instruction to have faith when the dough seemed to sticky/wet, because I’ve made challah before that turned out too dry. It definitely stuck to the bottom and sides of my mixer, but the dough itself wasn’t wet, just sticky. I divided the dough to make 4 buns and 1 braided loaf. Will definitely make it again! 🙂
Hi Jenn,
I have your cookbook and I made this 4 times this week now. This is soo good and I couldn’t believe I made it and it came out with a very beautiful presentation. I have a question – can I omit the honey to sugar? And how much? does it change the flavor? This is the best and I made this with baked bourbon with praline topping.😍😍😍😍😍
Thanks
Rose 🌹
So glad you like this, Rose! It’s fine to use sugar in place of the honey—you’ll need to use the same amount so 6 tablespoons. 🙂
My daughter and I made this today and had a few issues with how the challah turned out. First, the braids sort of blobbed together, they didn’t stay separate. Second, while it tastes really yummy, it seems kind of crumbly instead of pillowy. And third, once I brushed the top with the egg, the dough deflated even though I brushed ever so lightly. Can you help us? Wondering if it was in the proofing? Did we handle too much? Want to try again next Friday! Thanks so much.
Caron and Darcy
Hi Caron and Darcy, sorry to hear you had some problems with the challah! What brand of flour did you use? Also, did you let it rise for the amount of time specified in the recipe? If so, did it seem to rise as it should’ve?