Chicken Piccata

This post may contain affiliate links. Read my full disclosure policy.
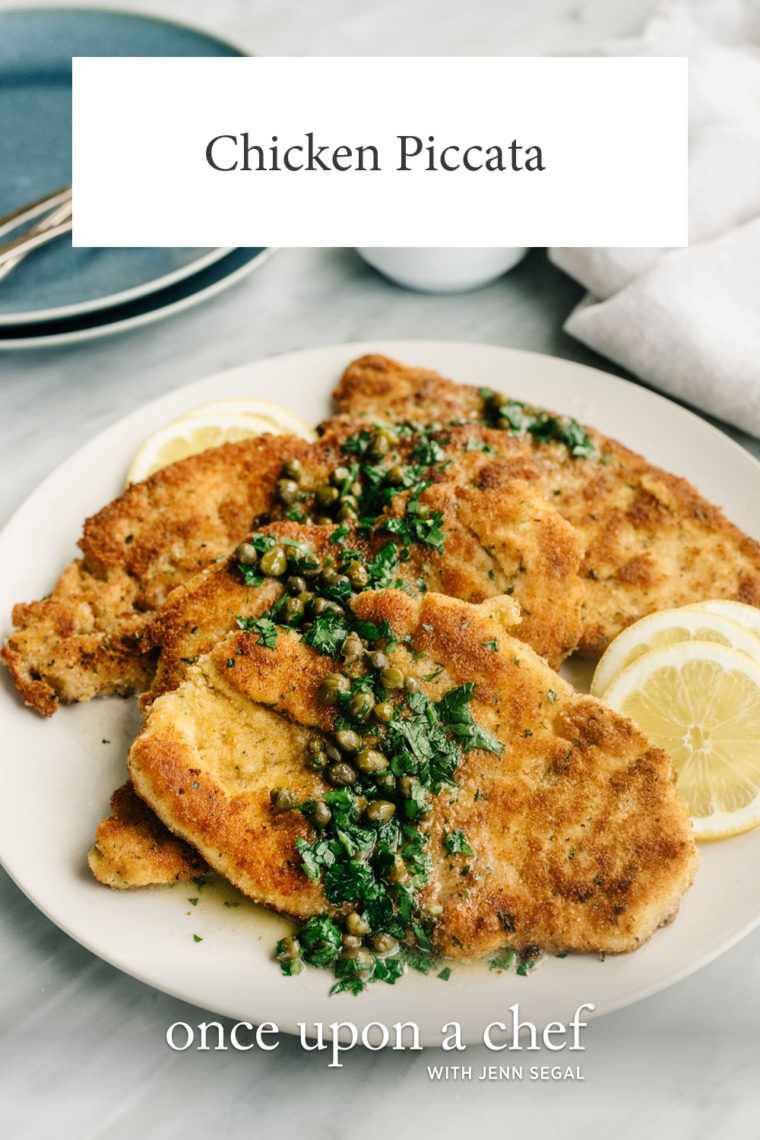
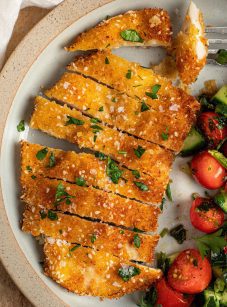
Whip up classic chicken piccata—crispy chicken cutlets drenched in a zesty lemon-butter and caper sauce. It’s the quick, easy supper guaranteed to bring smiles all around the table.
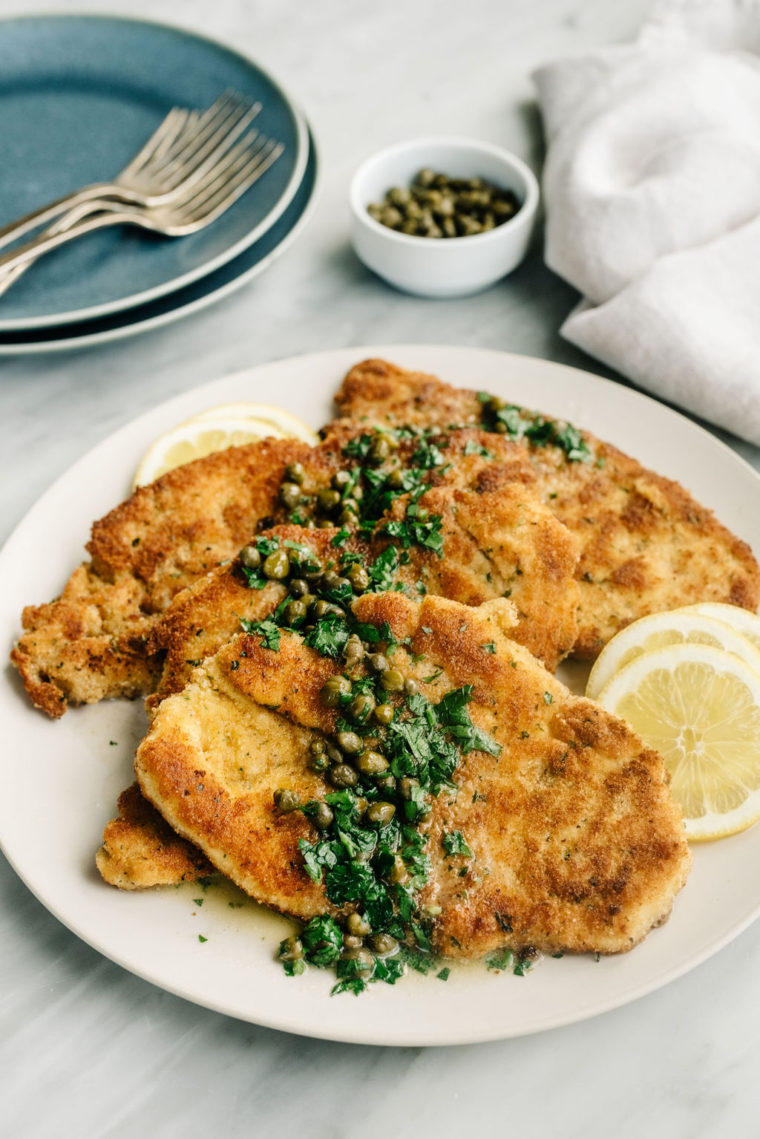
When it’s 5:30 PM, and I’m staring blankly into the fridge at a package of boneless chicken breasts, this chicken piccata recipe often comes to the rescue. Crispy, golden chicken cutlets in a buttery, lemony caper sauce, it’s a quick weeknight dinner that makes everyone happy. For the picky eaters, you can serve the chicken plain, while those who love bold flavors can enjoy the zesty, lemony sauce. If you love those same bright, briny flavors in a slightly different form, my chicken piccata meatballs are a fun twist on the classic.
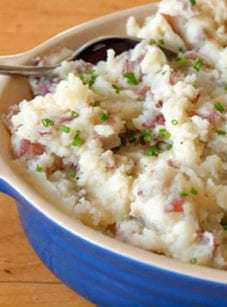
Capers tend to be a love-’em-or-hate-’em ingredient, so feel free to leave them out if you’re not a fan. Chicken piccata pairs well with many easy sides, such as spaghetti aglio e olio, roasted carrots, Parmesan smashed potatoes or polenta.
“I have already made this recipe twice this week! A fast favorite in our household.”
What You’ll Need To Make Chicken Piccata
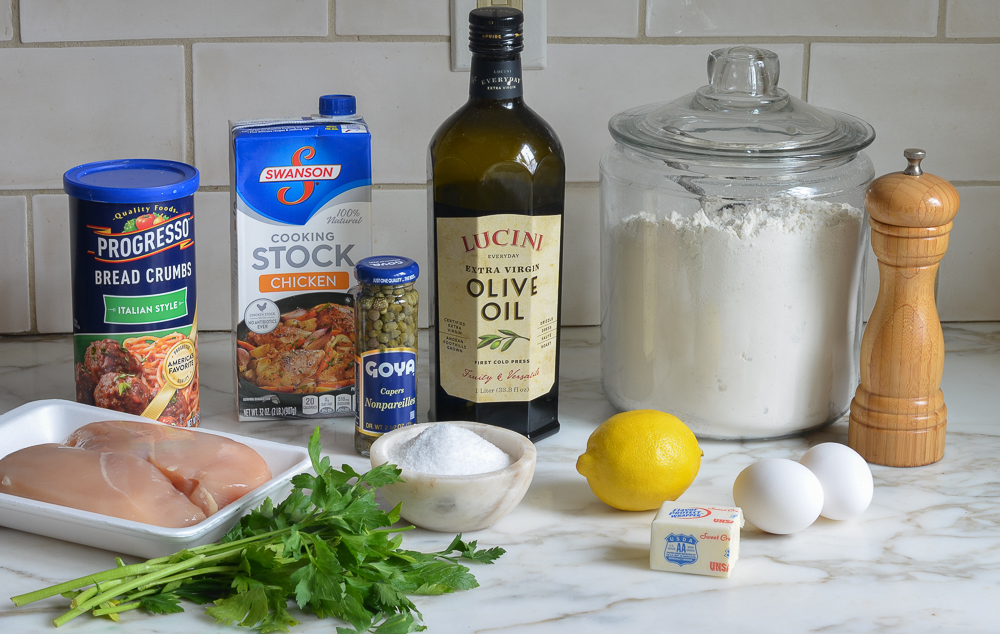
- All-Purpose Flour: Step one in the breading process. Used to lightly coat the chicken, ensuring the crust adheres well during cooking.
- Eggs: Step two in the breading process. The floured chicken is dipped in beaten eggs, creating a sticky base for the breadcrumbs to cling to.
- Seasoned Italian Bread Crumbs: The final step in the breading process, providing a flavorful, crispy coating once cooked.
- Extra-Virgin Olive Oil: Used for pan-frying.
- Chicken Stock: Forms the base of the sauce.
- Lemon Juice: Adds a bright contrast to the rich sauce.
- Capers: A burst of tangy, briny flavor that’s characteristic of piccata sauce.
- Butter: Swirled into the sauce for a silky finish.
- Fresh Italian Parsley: Adds a pop of color and freshness.
- Jump to the printable recipe for precise measurements
Step-By-Step Instructions
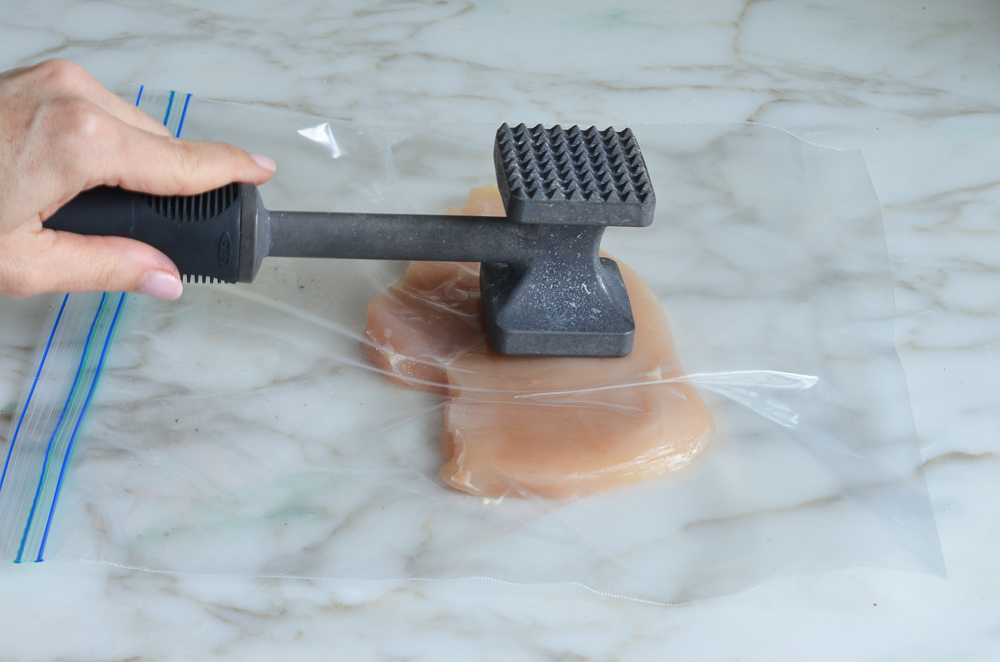
Begin by prepping the chicken breasts. First slice each chicken breast in half horizontally.
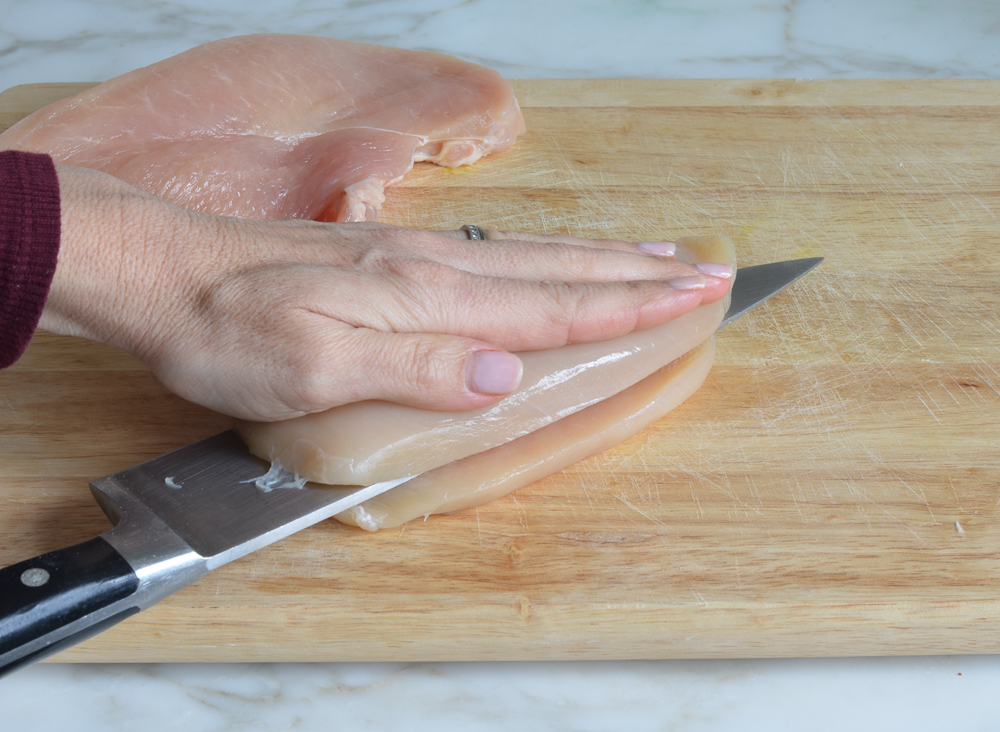
Place the chicken breasts in a large sealable plastic bag and, using a meat mallet or rolling pin, pound them to an even 1/4-inch thickness. This ensures that they cook quickly and evenly.
To the bag, add the flour, salt, and pepper; seal and shake to combine.
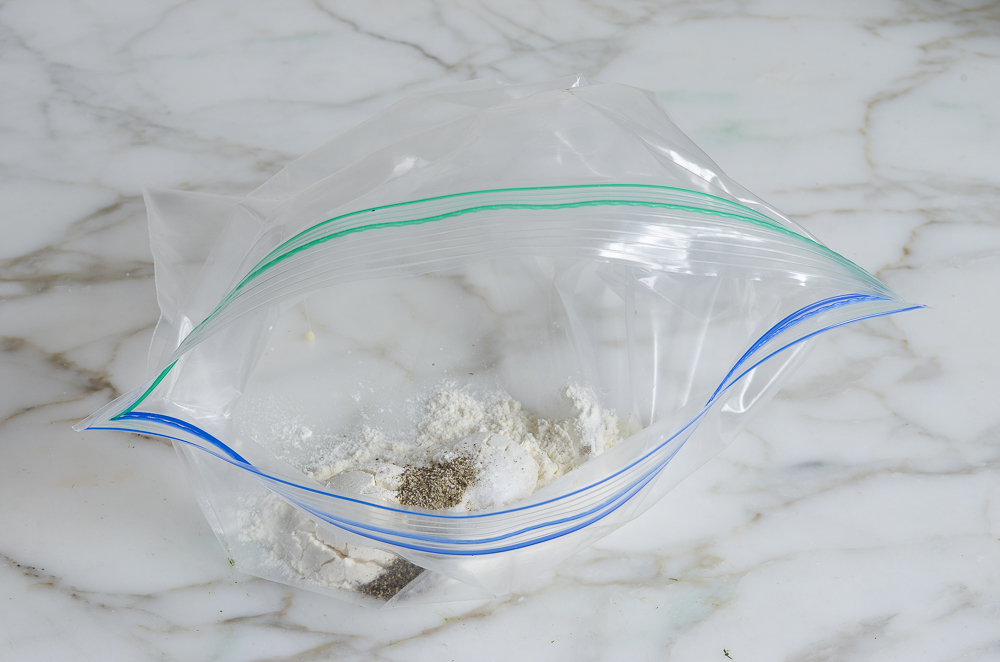
Add the chicken to the bag, seal, and shake to coat evenly.
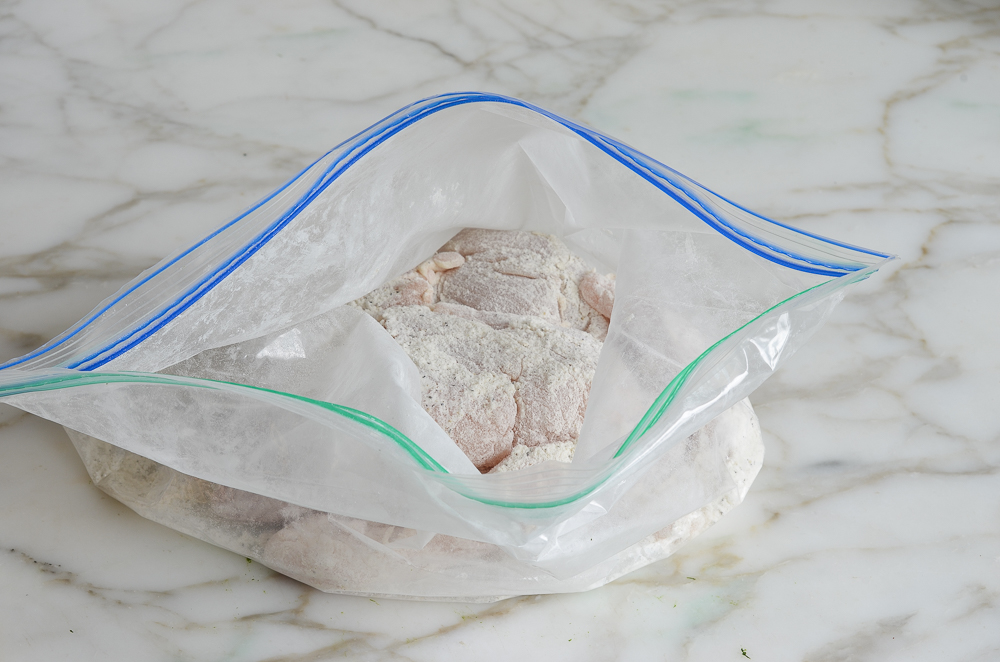
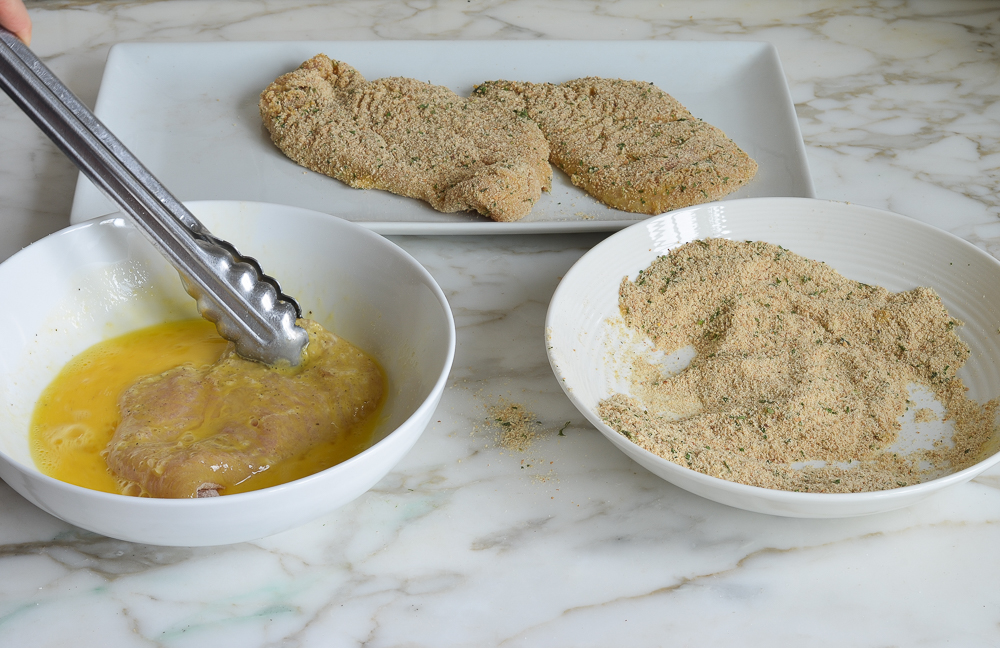
Beat the eggs in a large, shallow bowl. In another bowl, combine the bread crumbs and salt. Dip each chicken breast in the egg mixture, then coat evenly in the bread crumbs. (The breaded chicken can be refrigerated for 4 hours or frozen for up to 3 months.)
Heat the oil in a large sauté pan over medium-high heat. Add the chicken to the pan and cook for until the first side is golden brown.
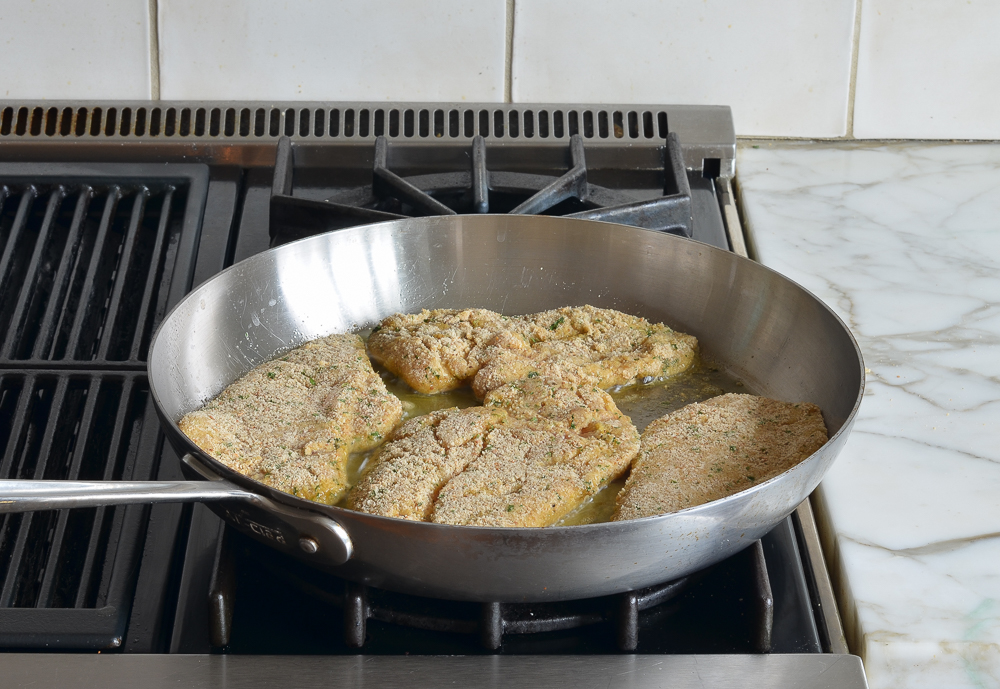
Flip the chicken and cook until the second side is golden, about 2 minutes more.
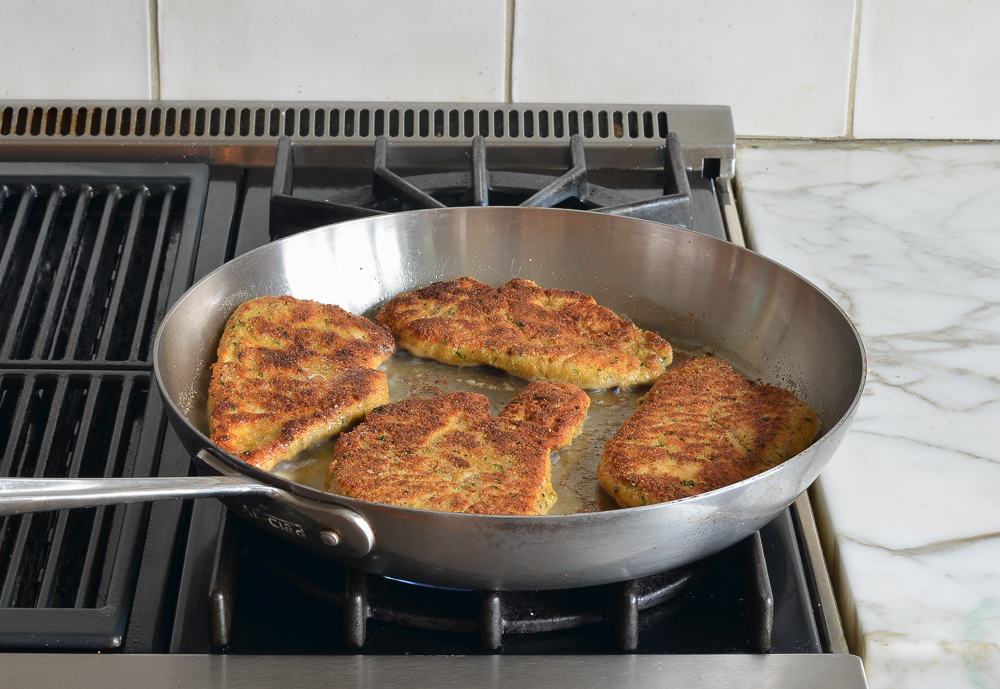
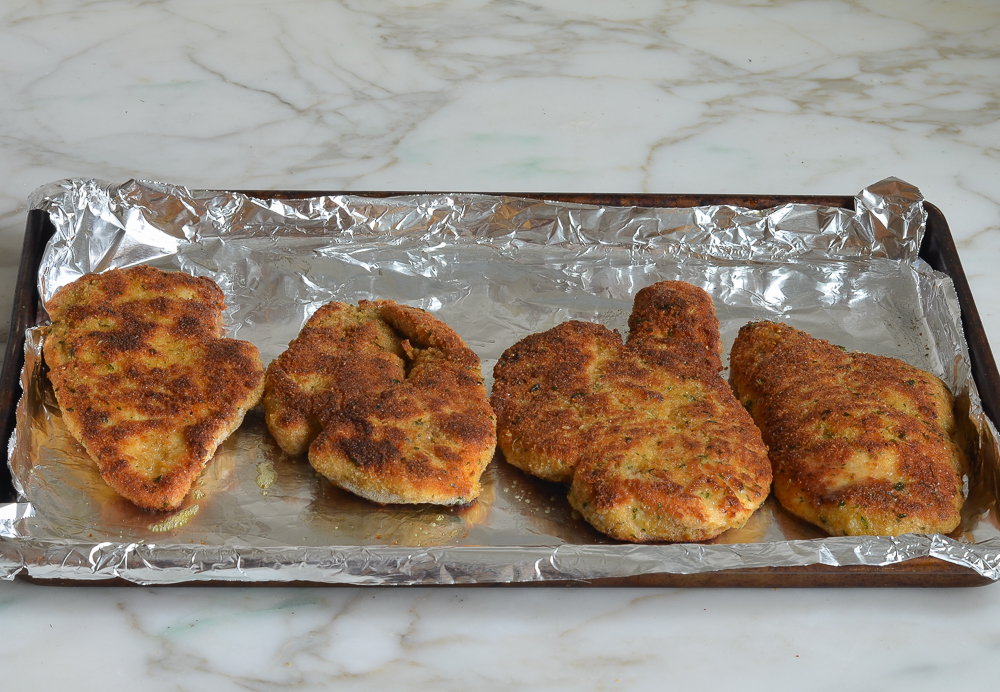
Transfer the chicken to the prepared baking sheet and place in the oven while you make the sauce.
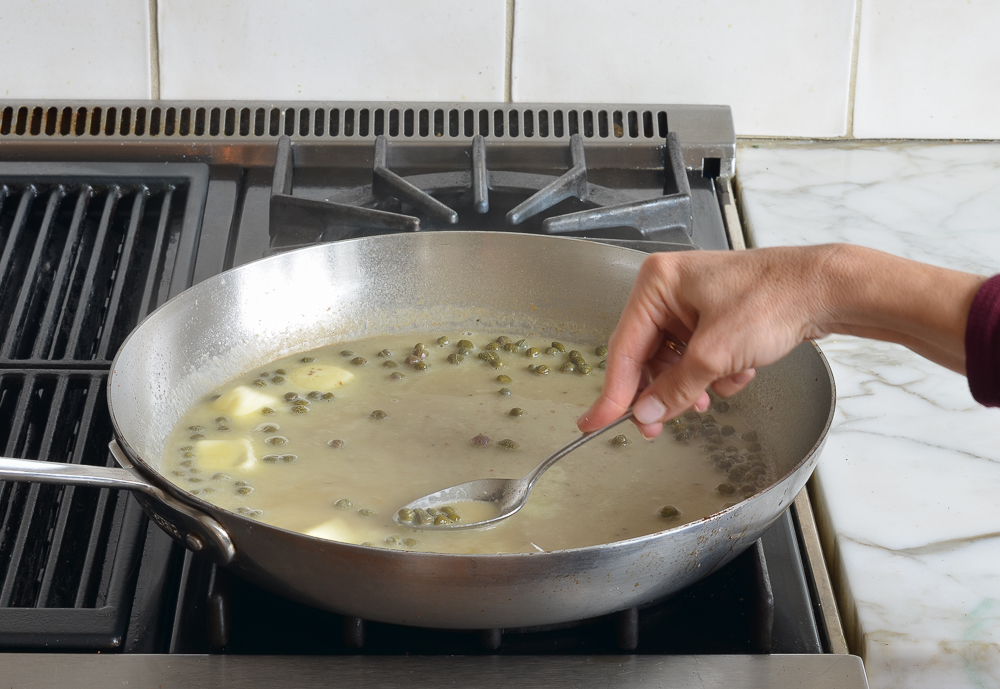
Discard any excess oil from the pan. Add the stock, lemon juice, and capers and bring to a boil, scraping up any brown bits from the pan. Gently simmer for about two minutes.
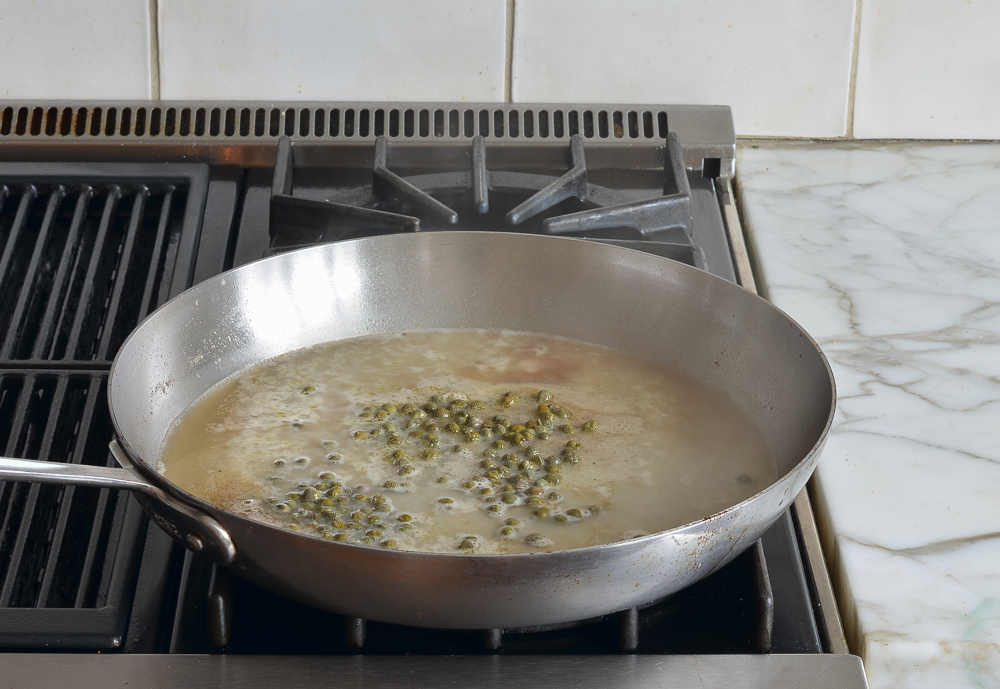
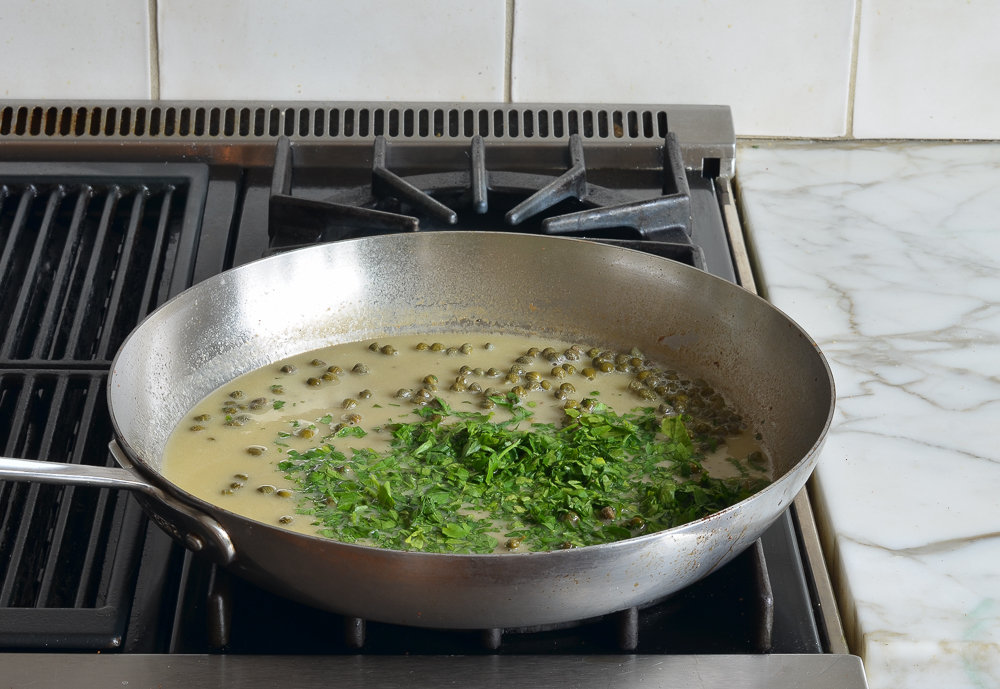
Off the heat, swirl in the butter.
Add the parsley.
Remove the chicken piccata from the oven and transfer to plates. Spoon the sauce over top and enjoy!

You May Also Like

Chicken Piccata

Ingredients
For the Chicken
- 1½ lbs boneless skinless chicken breasts
- 3 tablespoons all-purpose flour
- Salt and freshly ground black pepper
- 2 eggs
- 1 cup seasoned Italian bread crumbs
- ¼ cup extra-virgin olive oil
For the Sauce
- 1 cup chicken stock
- 2 tablespoons fresh lemon juice, from 1 lemon
- 3 tablespoons brined capers, drained and rinsed
- 3 tablespoons unsalted butter
- Salt and pepper
- ¼ cup chopped fresh Italian parsley
Instructions
- Preheat the oven to 350°F (175°C). Line a baking sheet with aluminum foil.
- Using a very sharp knife, slice each chicken breast in half horizontally. One at a time, place the chicken breasts in a large sealable plastic bag and, using a meat mallet or rolling pin, pound them to an even ¼-in (6-mm) thickness. (If your chicken breasts are very small, you can skip the step of cutting them in half horizontally. I use two ¾-lb/340-g breasts to make 4 portions.) Save the bag.
- To the bag, add the flour, ¾ teaspoon salt, and ¼ teaspoon pepper; seal and shake to combine. Add the chicken to the bag; seal and shake to coat the chicken evenly. Beat the eggs in a large, shallow bowl. In another large, shallow bowl, mix the bread crumbs with ¼ teaspoon salt. Using tongs (or your hands), dip each chicken breast first in the egg mixture, turning to coat evenly and letting any excess egg drip off, and then into the bread crumbs, turning to coat evenly.
- Heat the oil in a large sauté pan over medium-high heat. When the oil is hot and shimmering, add the chicken to the pan and cook for until the first side is golden brown, 2 to 3 minutes. Flip the chicken and cook until the second side is golden, about 2 minutes more. Transfer the chicken to the prepared baking sheet and place in the oven while you make the sauce. (Note: the chicken should be almost fully cooked at this point. Don't leave it in the oven for more than 5 minutes or it will overcook.)
- Discard any excess oil from the pan. Add the stock, lemon juice, and capers and bring to a boil, scraping up any brown bits from the pan. Gently boil for about two minutes, until slightly reduced. Off the heat, swirl in the butter, followed by the parsley. Taste and adjust seasoning with salt and pepper, if necessary. Remove the chicken from the oven and transfer to plates. Spoon the sauce over top.
Notes
Pair with

Nutrition Information
This website is written and produced for informational purposes only. I am not a certified nutritionist and the nutritional data on this site has not been evaluated or approved by a nutritionist or the Food and Drug Administration. Nutritional information is offered as a courtesy and should not be construed as a guarantee. The data is calculated through an online nutritional calculator, Edamam.com. Although I do my best to provide accurate nutritional information, these figures should be considered estimates only. Varying factors such as product types or brands purchased, natural fluctuations in fresh produce, and the way ingredients are processed change the effective nutritional information in any given recipe. Furthermore, different online calculators provide different results depending on their own nutrition fact sources and algorithms. To obtain the most accurate nutritional information in a given recipe, you should calculate the nutritional information with the actual ingredients used in your recipe, using your preferred nutrition calculator.
This Chicken Piccata recipe is absolutely divine, Jennifer! The combination of the crispy breaded chicken with the bright lemon-caper sauce is restaurant-quality. I love how you explain each step so clearly — the tip about pounding the chicken to even thickness really makes a difference. This has become a weeknight staple in our kitchen!
Super delicious and better than our local Italian restaurant! Beyond 5 stars! Amazing and quick to put together on a week night! What a treat! Served with rice pilaf. Thank you Chef!
I made this chicken piccata and I swear to God, it makes me look like I am a professional chef.
Where has Once upon a Chef been all my life?? I am loving this site.
This is the most delicious chicken piccata and the presentation impresses all.
I paired it with a Potato au gratin.
Easy and delicious!
Hi Jenn,
Would chicken tenders work for this recipe?
Sure, just flatten them a little with the palm of your hand. 😊
Hi Jenn,
I’m making freezer meals for my daughter who’s a new Mom. I can see in the recipe about freezing the chicken, but wondered if the sauce could be made ahead and frozen as well? Thank you!
Hi Lynn, congrats on the new addition to your family! I’ve never frozen the sauce, but based on the ingredients, I think you can get away with it.
Hi! I’m considering making this in advance. Have you ever brined the cutlets before frying? I’m wondering if this would prevent them from drying out when reheating.
Hi Jamie, I can’t say I’ve ever brined the chicken in this recipe.
I have made this dish multiple times, and it is always delicious. However, I read where someone asked if the same preparation would work for fish. What?! We are consciously trying to eat more fish these days, and I made it with some frozen cod filets (obviously minus all the pounding), and it came out amazing. Served it with an oven-roasted, broccoli, shallot, bacon side dish that we love. Super flavorful and satisfying dinner.
This dish is also pretty amazing with chicken thighs. Sometimes you have to work with what you have on hand. Using an 8-pack of boneless, skinless thighs made a very nice meal for 4, with a slightly richer flavor and texture. I did not flatten the thighs, as they were already quite thin (bones removed). Served with buttery angel hair pasta sprinkled with some fresh parsley, and sauteed broccolini. You just can’t miss with piccata.
Delicious and came together in a flash! Perfect for a weeknight meal.
Thank you, Jen! 🙂