

This post may contain affiliate links. Read my full disclosure policy.
Knowing how to pull together a charcuterie board is a great trick to have up your sleeve when entertaining—and you don’t need to be a pro to make one that looks beautiful.
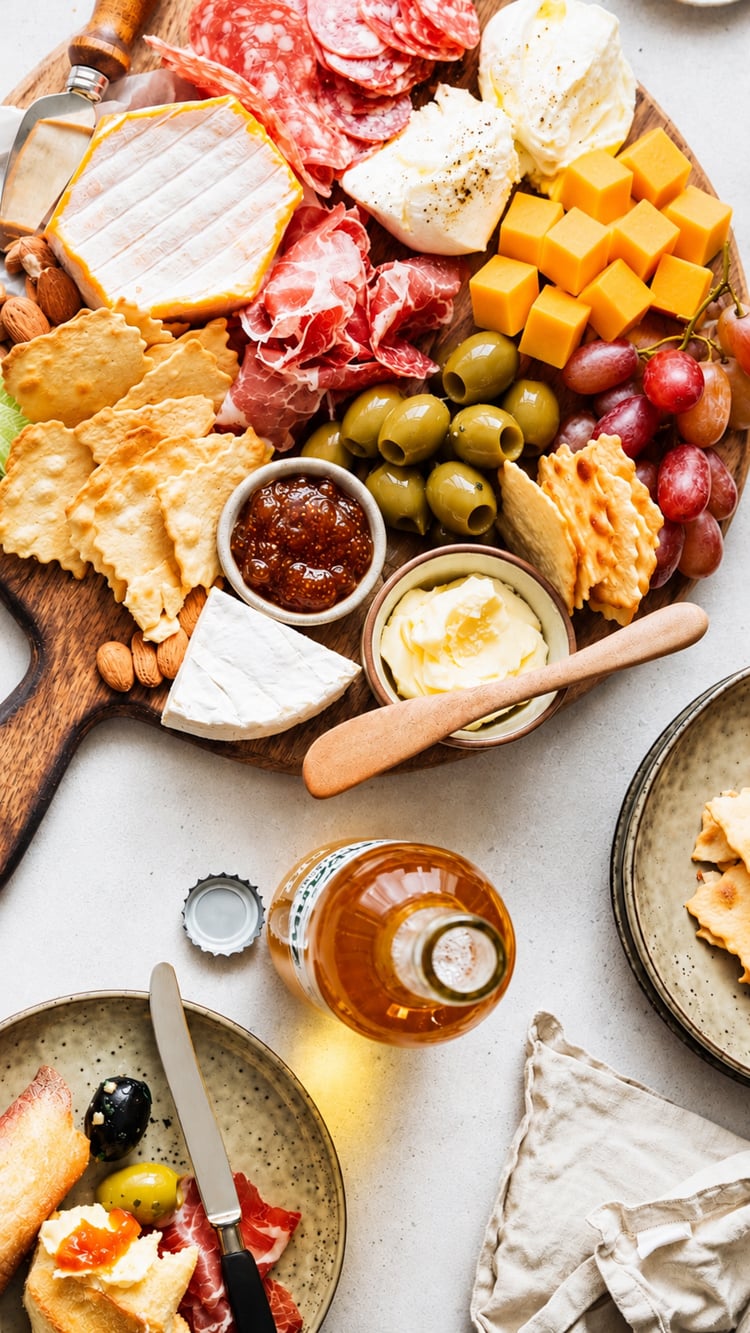
When I’m entertaining, I love the look and convenience of a charcuterie board. Done right, it feels abundant and inviting, with a little something for everyone—even the pickier guests. Best of all, there’s no cooking required, and putting it all together is easy and fun.
If you’ve ever wondered how to make a charcuterie board, there’s really no strict formula. The key is to offer a good mix of meats, cheeses, spreads, and accompaniments, with plenty of variety in color, flavor, and texture. And don’t worry about making everything look perfect. A board that’s a little loose and overflowing is much more inviting than one that’s too carefully arranged.
Start With the Right Board
Choose a board or platter that’s large enough to hold everything you plan to serve. Wood, marble, slate, or a simple neutral-colored platter all work well. You want the finished board to look plentiful, so if you’re serving a smaller group, it’s better to use a smaller board and fill it generously than to spread everything out on a large one.
What to Put on a Charcuterie Board
A good charcuterie board is all about variety. You don’t need every item on this list, but choosing a few from each category will give you a board that looks beautiful and offers guests lots of different combinations.
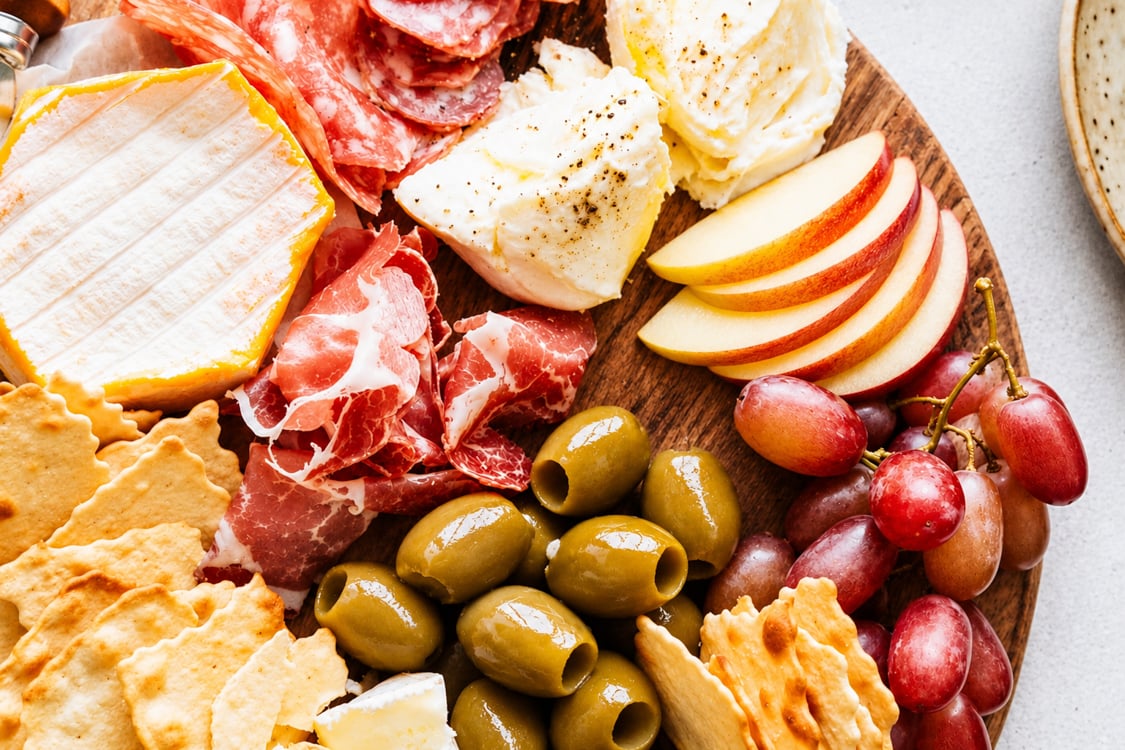
- Meats: Include a mix of flavors and textures, such as a firm salami like soppressata or chorizo along with something softer and more delicate, like prosciutto. Rather than laying the slices flat in stacks, separate and loosely fold or roll them to give the board some height and make them easy to pick up.
- Cheeses: Choose 2 to 3 varieties with different textures and flavors—a soft cheese, a firm cheese, and perhaps something in between. Leave some cheeses in wedges or blocks for a more rustic look, and slice or cube a portion of the harder cheeses so guests can easily help themselves.
- Fresh and dried fruit: Grapes, sliced pears or apples, dried apricots, and dates add sweetness and color. Small bunches of grapes are especially pretty tucked between cheeses and meats.
- Briny bites: Olives and cornichons provide a salty, tangy contrast to the richer meats and cheeses. Serve them in small bowls to keep their juices from running onto everything else.
- Nuts: Salted, roasted, spiced, or candied nuts add crunch and flavor to the board. Almonds, pistachios, walnuts, and pecans are all good choices. My candied pecans and spiced nuts are especially nice for entertaining, and nuts are perfect for filling little gaps between the other ingredients.
- Spreads: Fig jam, honey, mustard, or another sweet or savory spread gives guests even more ways to mix and match.
- Bread and crackers: Include crackers, crostini, or baguette slices for stacking with the meats, cheeses, and spreads. Stick with fairly neutral flavors so they don’t compete with everything else.
- Dips: A small bowl or ramekin of dip adds another flavor and texture while also helping to break up the arrangement visually. My spinach artichoke dip, cottage cheese spread, or caponata would all work well.
How Much Meat and Cheese Per Person?
How much you need depends on whether the charcuterie board is an appetizer or the main event. If you’re serving it before a meal, plan on about 2 ounces of meat and 2 ounces of cheese per person. If the board is substantial enough to stand in for a meal, bump that up to about 3 to 4 ounces each of meat and cheese per person. You can scale back a bit if you’re including plenty of other filling extras, such as fruit, nuts, dips, and bread.
Tips for Putting It All Together
- Make it look abundant. The prettiest charcuterie boards are full and generous, with very little empty space. Don’t be afraid to let ingredients overlap a bit or pile up naturally. If you can still see large patches of the board when you’re finished, tuck in a few more crackers, nuts, or pieces of fruit.
- Arrange the larger items first. Start by placing the bowls of olives, spreads, or dips, followed by the cheeses. Space them around the board rather than grouping everything together. Then arrange the meats and fill in with the smaller ingredients.
- Give the meats some shape. This makes a huge difference in how the finished board looks. Separate slices of salami that are stuck together, then fold them in halves or quarters and arrange them in loose clusters or overlapping rows. For prosciutto, gently pull apart the slices and loosely drape or bunch them into little ribbons. The idea is to create some height and movement rather than having everything lie flat.
- Spread out the colors. Instead of putting all the fruit in one spot or all the crackers in another, distribute them around the board. A few bunches of green grapes, some red berries, and golden dried apricots can make the whole arrangement look more colorful and inviting.
- Fill in the gaps. Once the larger ingredients are in place, tuck nuts, dried fruit, crackers, and other little extras into the empty spaces. This is what gives the board that beautiful, overflowing look.
- Bring the meats and cheeses to room temperature. Take them out of the refrigerator about 30 minutes before serving so their flavors and textures are at their best.
- Don’t forget serving utensils. Add small knives for the cheeses and spreads, spoons for jams or dips, and toothpicks or cocktail forks for anything that’s tricky to pick up.
- Do some of the prep ahead. You can wash and dry the fruit, cut the cheeses, and portion out the nuts and spreads ahead of time. Keep the perishable ingredients refrigerated, then assemble the board shortly before serving. Add crackers and bread at the end so they stay crisp.



Add a Comment