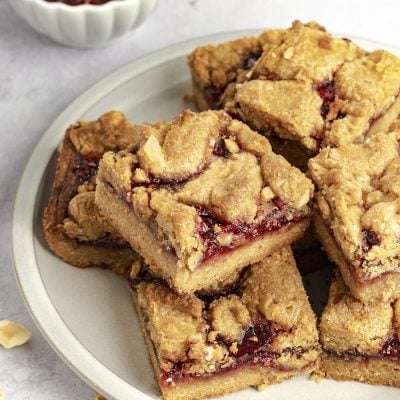
PB&J Bars


This post may contain affiliate links. Read my full disclosure policy.
Calling all PB&J lovers! These bars pack all the nostalgic flavor of your favorite childhood sandwich into a fun, snackable treat.

Imagine your favorite childhood sandwich transformed into a hand-held treat that’s perfect for sharing. That’s exactly what these PB&J bars are all about, so if you’re a fan of PB&J sandwiches, you’re going to love them! For the best results, use traditional supermarket peanut butter like Skippy—natural peanut butter isn’t ideal for baking—and a high-quality jam, like Bonne Maman raspberry. You can even make this PB&J bar recipe a day or two ahead; they keep beautifully. So, pour yourself a cup of coffee, whip up a batch, and enjoy a delicious trip down memory lane!
“My whole family loves PBu0026J so I anticipated these would be a hit, and I was right!”
What You’ll Need to Make PB&J Bars

- All-Purpose Flour: Forms the base of the bars.
- Baking Powder: Helps the bars rise and puff up, and gives them a light texture.
- Butter: Lends richness and moisture to the dough, and gives the bars a tender crumb.
- Sugar: Add sweetness and helps give the bars a lovely golden color.
- Eggs: Bind the ingredients together and add moisture to the dough.
- Peanut Butter: The key ingredient that gives the bars a rich, nutty flavor. Use a supermarket brand, like Skippy or Jif—natural peanut butter is prone to separating and isn’t recommended for baking.
- Vanilla Extract: Boosts the flavor of the bars with warm, aromatic notes.
- Raspberry Jam: The other key ingredient, right alongside the peanut butter. Use jam as opposed to jelly; jam is made from chunks of fruit, giving it a more intense fruity flavor, while jelly is made from fruit juice and tends to be milder.
- Salted Peanuts: Add a crunchy, salty pop of flavor. I love Virginia peanuts for both cooking and snacking—they are large and extra crunchy.
- Jump to the printable recipe for precise measurements
Step-By-Step Instructions
Preheat your oven to 350°F and set the rack in the middle. Line a 9×13-inch pan with foil, leaving some extra over the edges, and give it a quick spray of nonstick. In a medium bowl, whisk the flour, baking powder, and salt until combined.

In a stand mixer with the paddle attachment (or using hand beaters), beat the butter and sugar on medium speed until light and fluffy, about 3 minutes. Scrape down the bowl, then add the eggs one at a time, mixing after each addition.

Add the peanut butter and vanilla, then mix until everything is well combined, scraping down the bowl as needed—this should take about 30 seconds.

Scrape down the bowl, then add the flour mixture. Mix on low speed until just combined—about 30 seconds.

Take out about 1½ cups of the dough and set it aside for the topping. With the rest, spread it evenly into the prepared pan. Use an offset spatula or your flour-dusted fingers to press it in smoothly. Next, spread the jam on top, leaving a ¼-inch border all the way around.

Add the chopped peanuts into the reserved dough and stir to combine.

Using a teaspoon and your finger, drop the dough in clumps over the jam, allowing some jam to peek through.

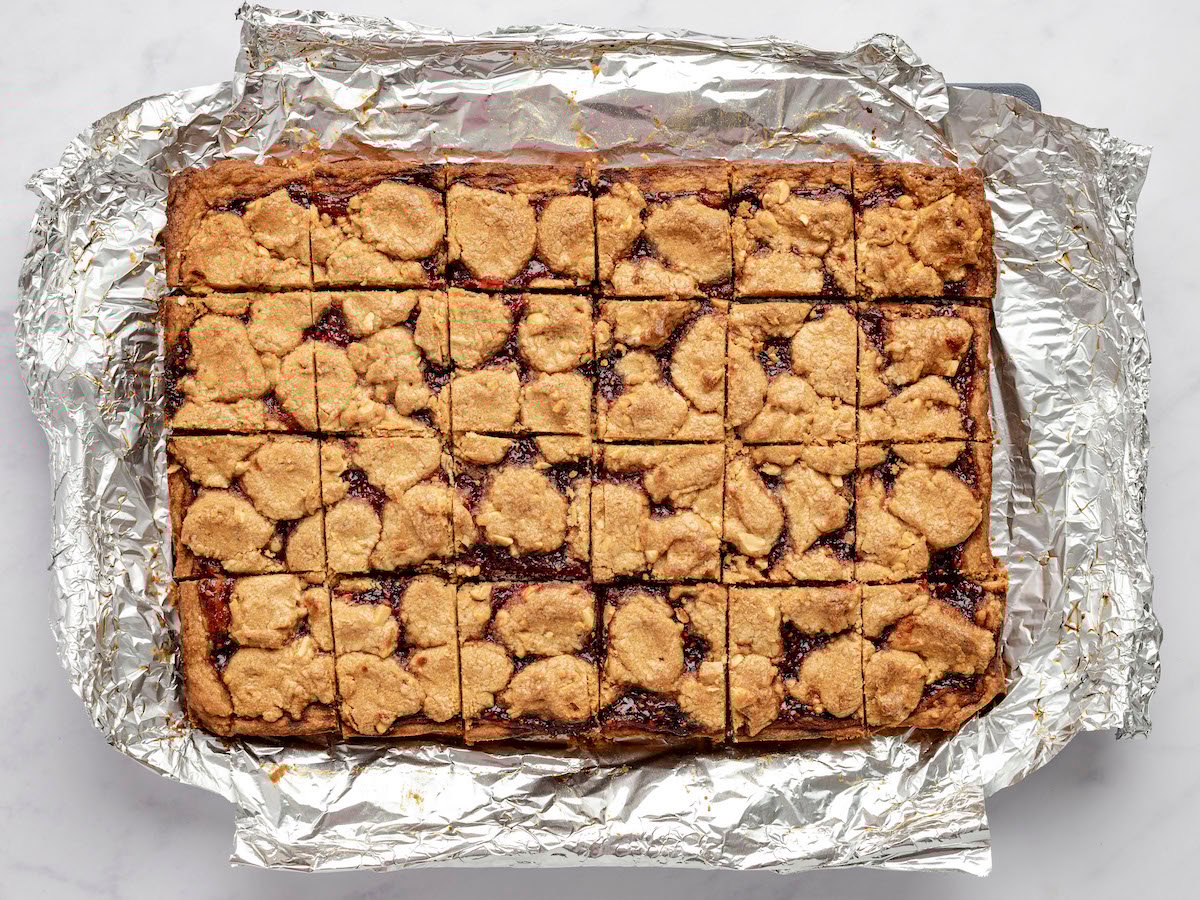
Bake for about 40 minutes, until the top is lightly golden. Allow to cool completely on a wire rack.

Lift the dessert out using the foil edges, transfer to a cutting board and slice into squares. These PB&J bars can be made up to two days in advance and stored in an airtight container; freeze for longer storage.
You May Also Like


PB & J Bars
Ingredients
- 2 cups all-purpose flour, spooned into measuring cup and leveled-off
- 1 teaspoon baking powder
- 1 teaspoon salt
- 12 tablespoons (1½ sticks) unsalted butter, at room temperature
- 1½ cups sugar
- 2 large eggs
- 1½ cups creamy peanut butter (recommended: Skippy Natural No Need To Stir)
- 1 teaspoon vanilla extract
- 1 (13-oz) jar (1 heaping cup) raspberry jam (recommended: Bonne Maman)
- ½ cup salted peanuts, coarsely chopped
Instructions
- Preheat the oven to 350°F (175°C) and set an oven rack in the middle position. Line a 9 x 13-in (23 x 33-cm) pan with heavy-duty aluminum foil, leaving an overhang on all sides for easy removal. Lightly coat the foil with nonstick cooking spray.
- In a medium bowl, whisk together the flour, baking powder, and salt.
- In the bowl of an electric mixer fitted with the paddle attachment or beaters, beat the butter and sugar on medium speed until light and fluffy, about 3 minutes. Scrape down the sides of the bowl and add the eggs, one at a time, beating after each addition. Add the peanut butter and vanilla, scraping down the bowl as necessary, and beat until evenly combined, about 30 seconds. Scrape down the bowl again and add the flour mixture; mix on low speed until just combined, about 30 seconds.
- Set aside about 1½ cups of the dough for the topping. Spread the remaining dough evenly into the prepared cake pan using an offset spatula; alternatively, use your fingers, lightly dusted with flour, to press it in. Spread the jam evenly over the dough, maintaining a ¼-in (6-mm) border around the edges. Using a spoon, stir the chopped peanuts into the reserved dough. Using a teaspoon and your finger, drop the dough in ½- to 1-in (13-mm to 2.5-cm) clumps over the jam, allowing some jam to peek through. Bake for about 40 minutes, until the top is lightly golden. Allow to cool completely on a wire rack. Lift the dessert out using the foil edges, transfer to a cutting board, slice into squares, and serve.
Notes
Nutrition Information
This website is written and produced for informational purposes only. I am not a certified nutritionist and the nutritional data on this site has not been evaluated or approved by a nutritionist or the Food and Drug Administration. Nutritional information is offered as a courtesy and should not be construed as a guarantee. The data is calculated through an online nutritional calculator, Edamam.com. Although I do my best to provide accurate nutritional information, these figures should be considered estimates only. Varying factors such as product types or brands purchased, natural fluctuations in fresh produce, and the way ingredients are processed change the effective nutritional information in any given recipe. Furthermore, different online calculators provide different results depending on their own nutrition fact sources and algorithms. To obtain the most accurate nutritional information in a given recipe, you should calculate the nutritional information with the actual ingredients used in your recipe, using your preferred nutrition calculator.
Can you half this recipe?
Sure!
Made this recipe exactly as written! It is awesome! Peanut butter “brownie”
just melts in your mouth! Highly recommend ❤️
These were amazing!!! I’ve tried similar recipes but they were always hard and crumbly. These are the perfect consistency and are a decadent dessert when you don’t want something too fussy. I used crunchy peanut butter for the entire dough to save time and it made these even easier 😊