Sweet Potato Pie

This post may contain affiliate links. Read my full disclosure policy.
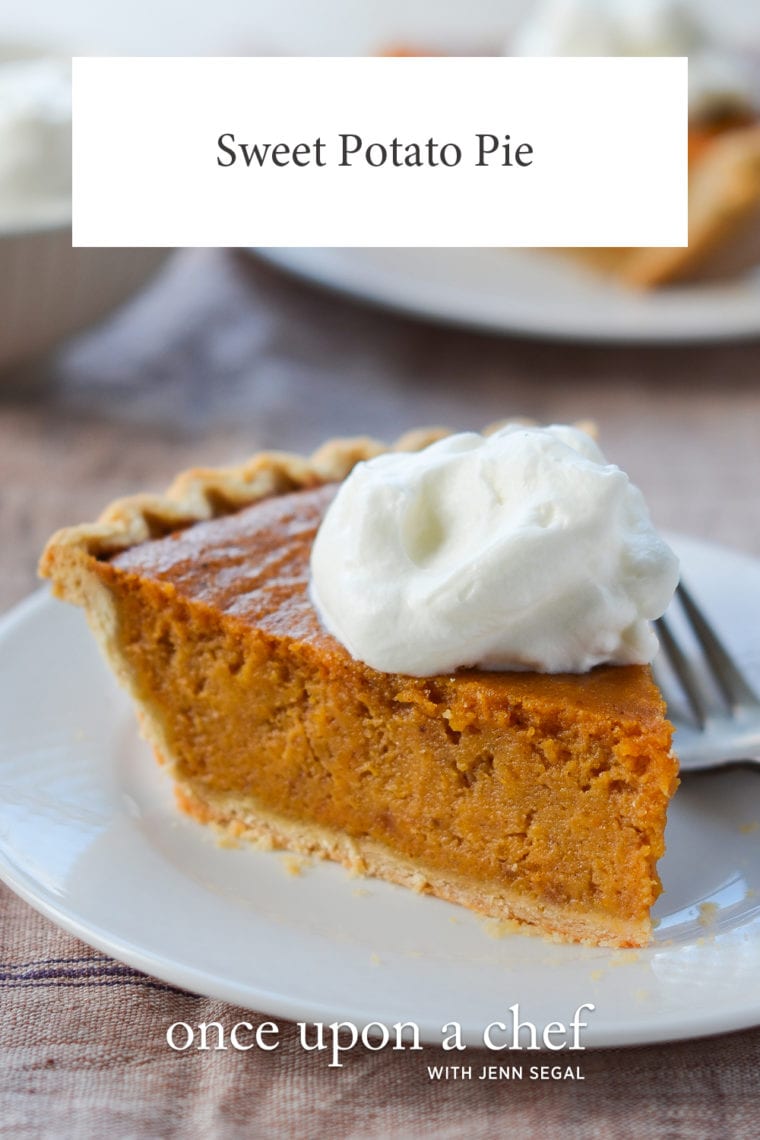
Bring a slice of the South to your kitchen with this classic sweet potato pie, a holiday favorite richly flavored with brown sugar and warm spices.

This sweet potato pie recipe comes from Mable Smith, a wonderful lady who has been a dear friend of my family for over 35 years. Originally from South Carolina, Mable is known for her Southern-style pies, which she bakes by the dozen to give away over the holidays. Her recipe calls for a store-bought frozen crust, which I think works perfectly well, but if you’d like to make your own, my favorite pie crust recipe will take it up a notch. The flavor of this pie improves over time, so go ahead and make it a few days ahead.seo
“This is the PERFECT Sweet Potato Pie Recipe!”
What You’ll Need To Make Sweet Potato Pie
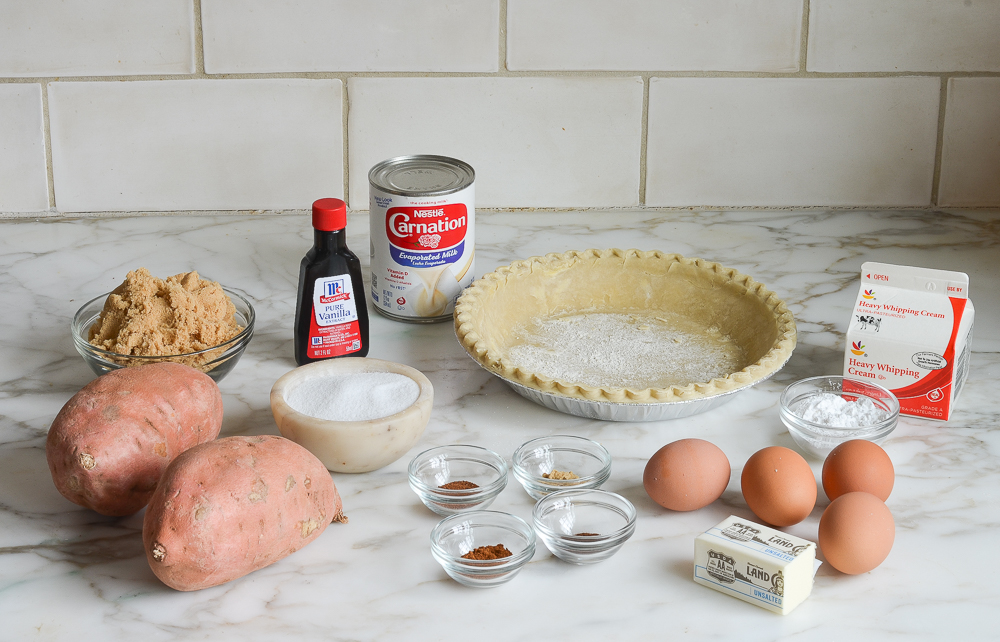
- Sweet potatoes – The base of the pie filling, baked sweet potatoes add natural sweetness and a smooth, creamy texture.
- Unsalted butter – Adds richness and enhances the flavor of the sweet potatoes.
- Packed light brown sugar – Sweetens the pie with a warm, molasses flavor.
- Egg – Provides structure and helps the filling set.
- Egg yolks – Add extra richness and create a silky, custard-like texture.
- Vanilla extract – Enhances the overall flavor with a subtle sweetness.
- Salt – Balances the sweetness and deepens the flavors.
- Ground cinnamon, nutmeg, cloves, and ginger – Classic warming spices that give the pie its signature cozy, spiced flavor.
- Evaporated milk – Adds creaminess and helps bind the filling without making it too heavy.
- Frozen or homemade pie crust – Store-bought works perfectly, but a homemade pie crust takes it up a notch.
- Jump to the printable recipe for precise measurements
Step-By-Step Instructions
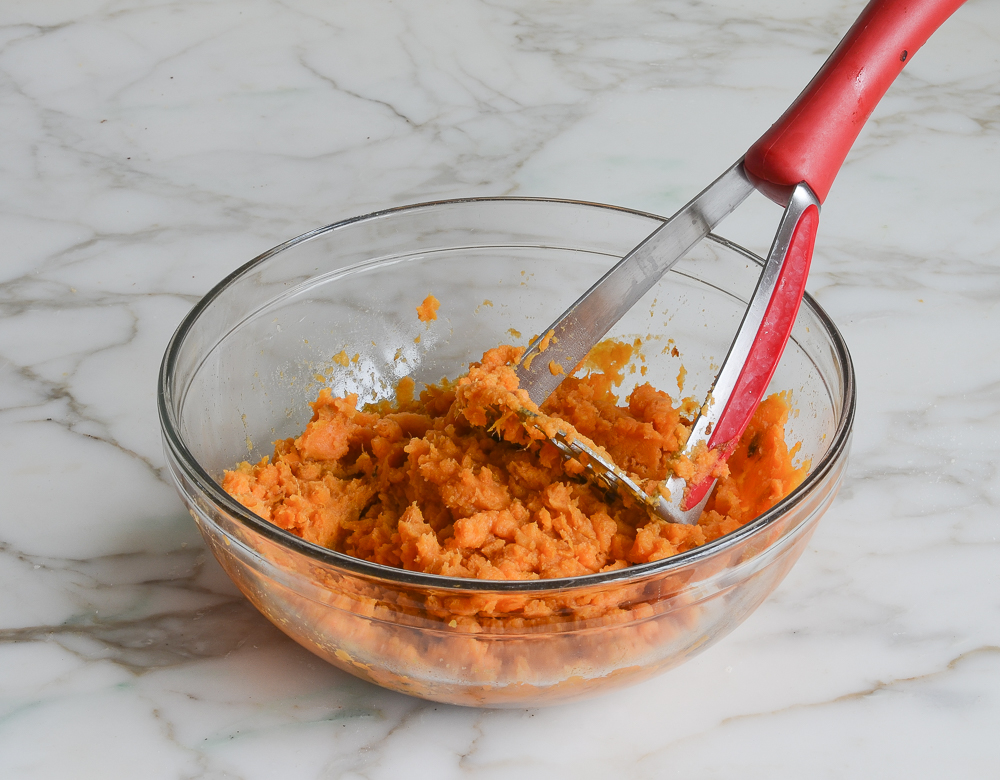
Step 1: Roast and Mash the Sweet Potatoes
Many sweet potato pie recipes call for boiling the sweet potatoes but in this recipe they are roasted. Roasting takes a bit longer but is completely hands-off, and you don’t have to worry about peeling or slicing them.
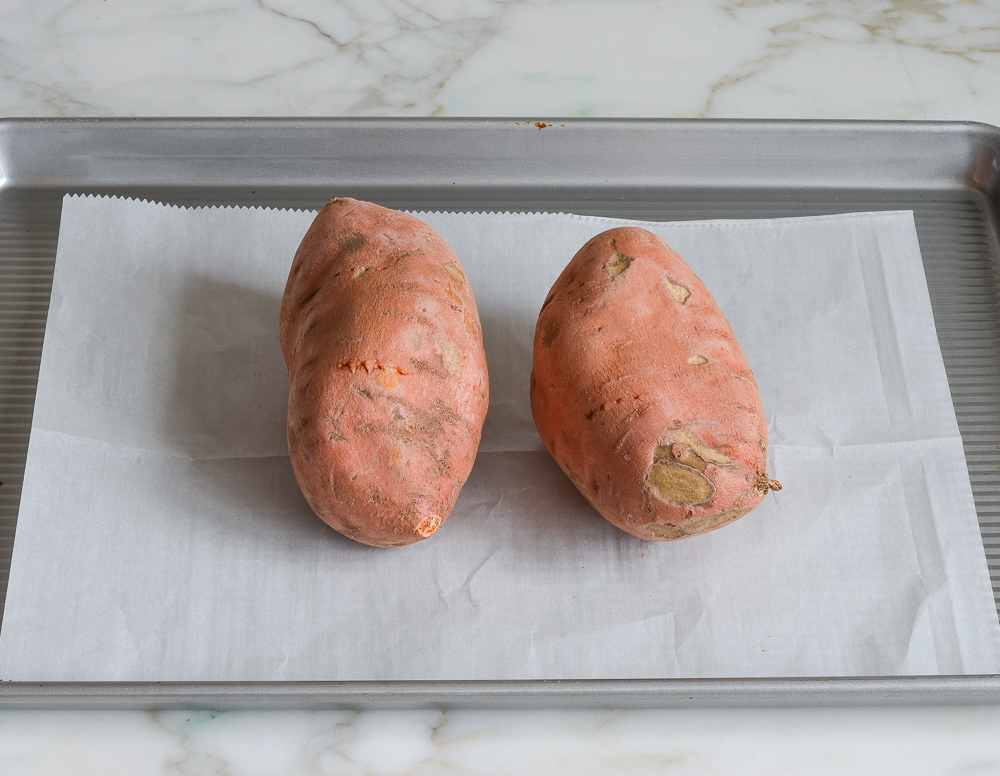
Simply poke the sweet potatoes with a fork five or six times and place them on a parchment-lined baking sheet. Roast until very tender, about 1 hour.
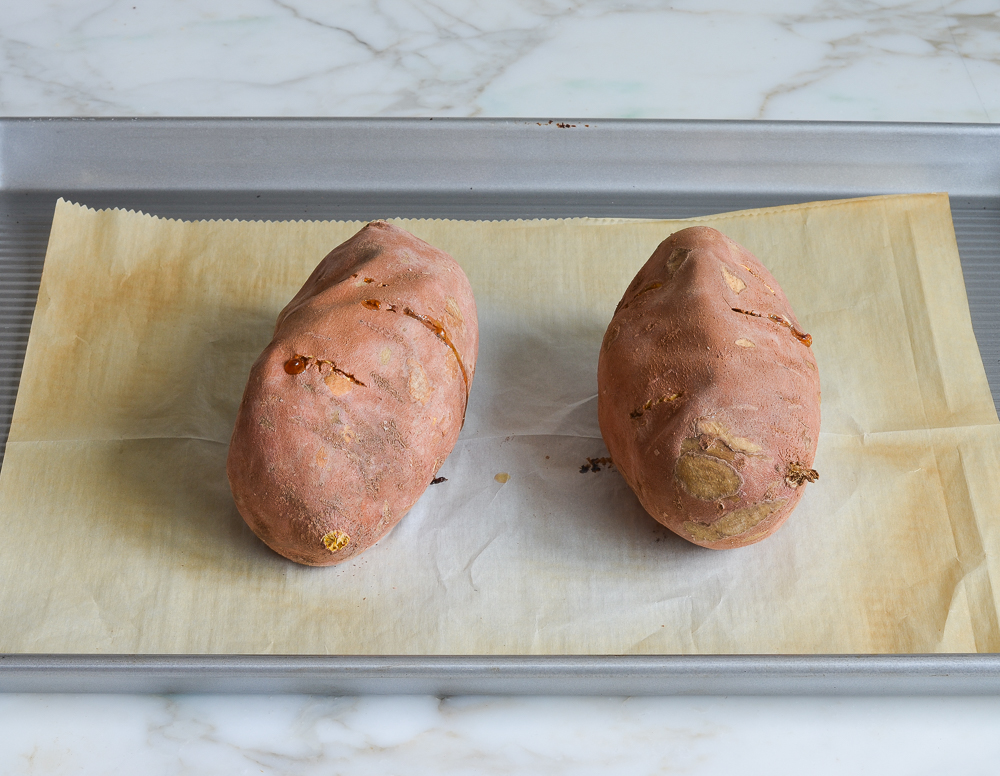
Let cool, then scoop the pulp out of the skin into a medium bowl. Using a potato masher or fork, mash until smooth. (Feel free to roast the sweet potatoes several days ahead of time and store the flesh in an airtight container in the refrigerator until needed.)
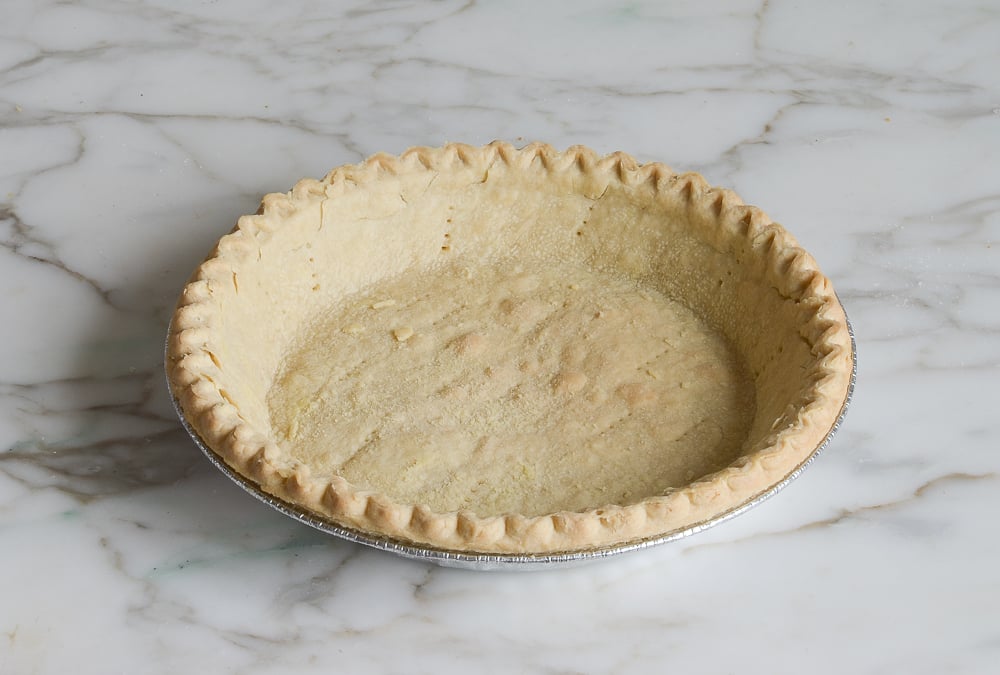
Step 2: Blind Bake the Crust
Blind baking is the process of pre-baking a pie crust before a wet filling is added. It is always necessary when pies have unbaked fillings (such as cream pies) but I blind bake the crust for all of my pies, as it helps keep the crust crunchy. Different crusts will have different instructions for blind baking, so follow the instructions on the package. Once the crust is blind baked, reduce the oven temperature to 350°F.
Step 3: Make the Sweet Potato Pie Filling
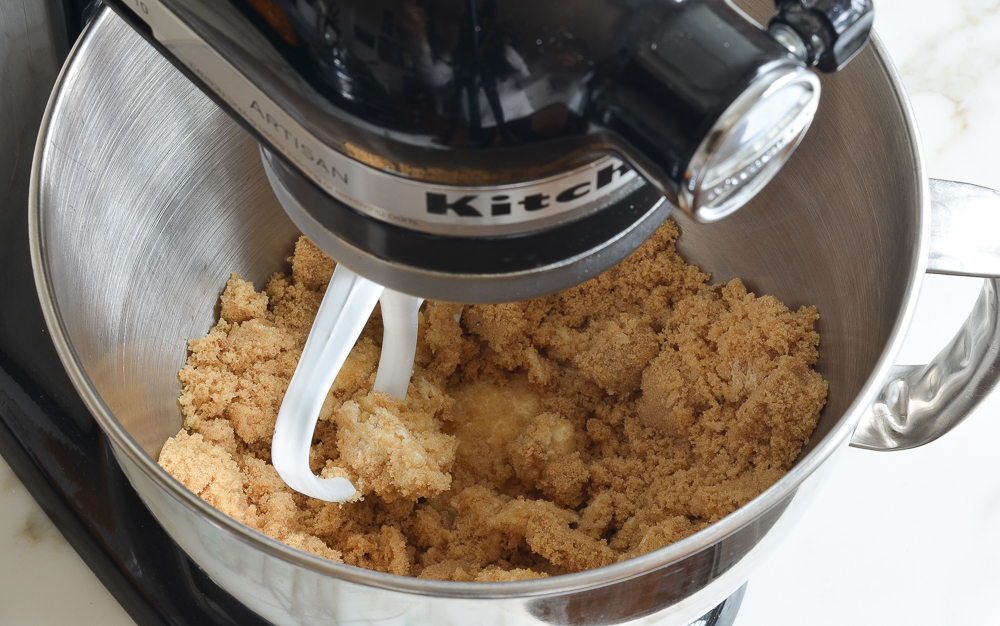
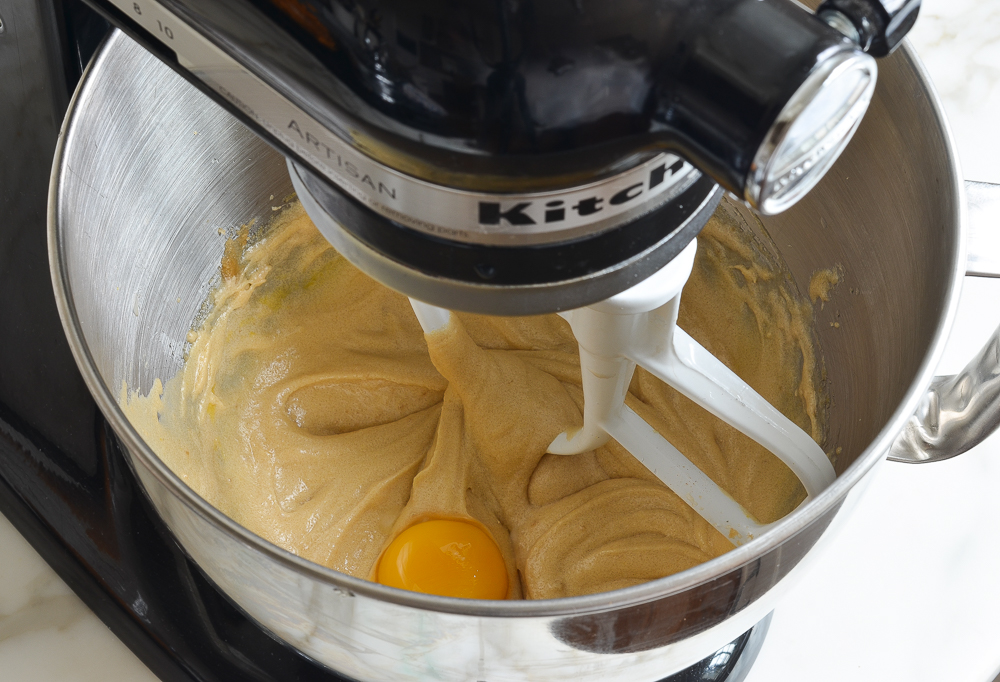
In the bowl of an electric mixer fitted with the paddle attachment (or beaters), beat the butter and brown sugar on medium speed until the mixture is moistened and crumbly, about 1 minute.
Beat in the egg.
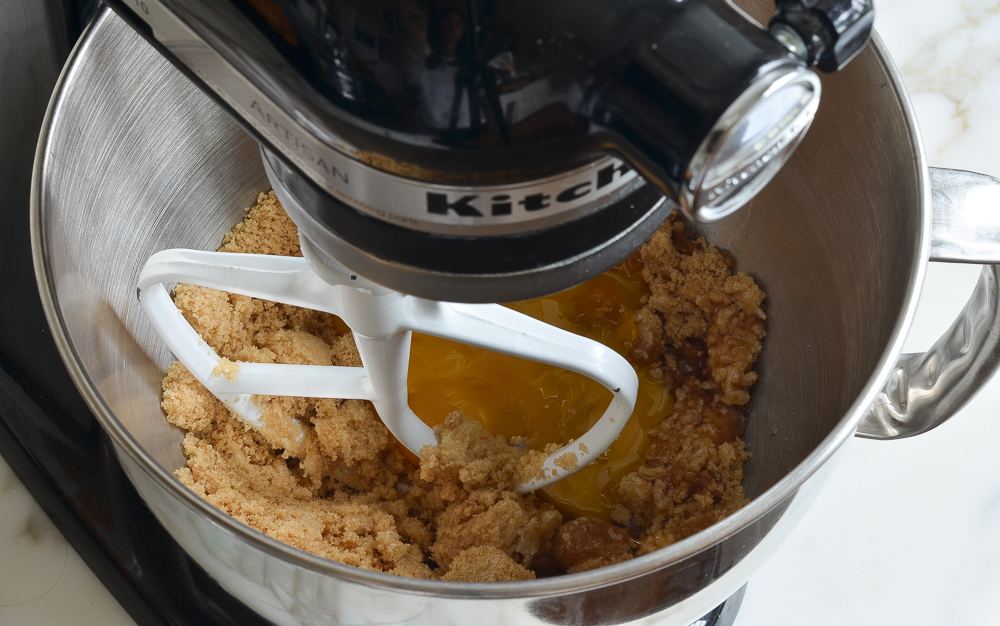
Then add the yolks, one at a time, until the mixture is creamy and smooth, a few minutes.
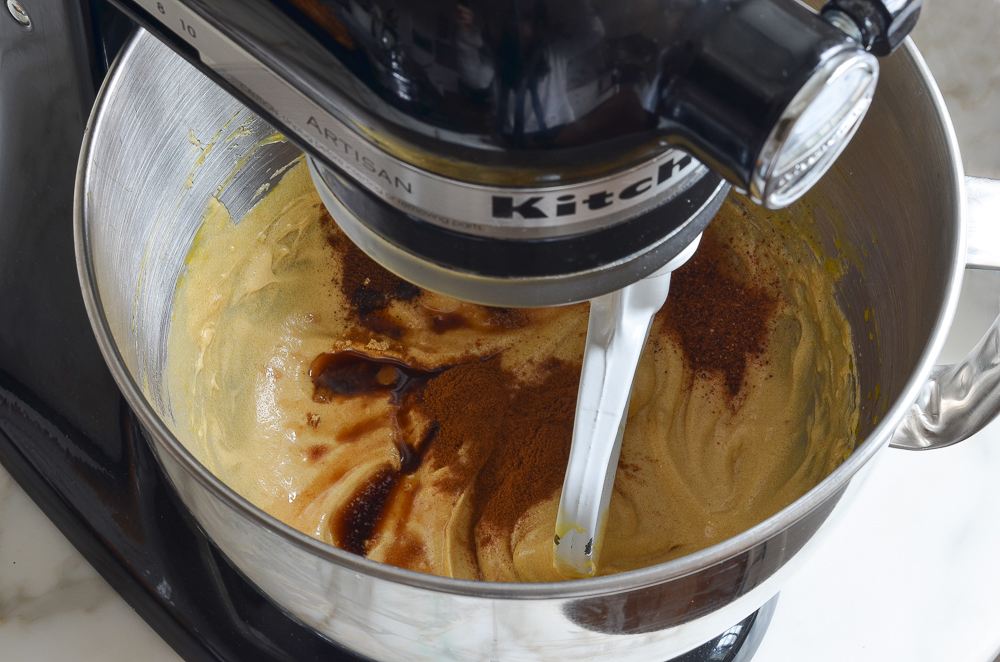
Add the vanilla, salt, cinnamon, nutmeg, cloves, and ginger; beat until just combined.
Add 1¾ cups of the mashed sweet potatoes (use any remaining sweet potatoes for another purpose or discard).
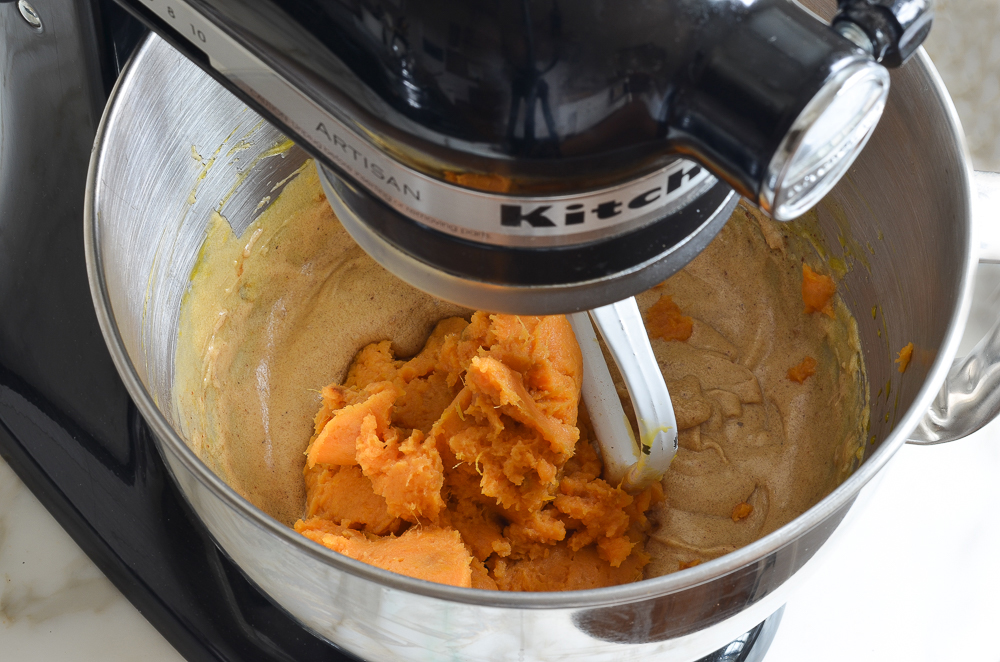
Mix to combine.
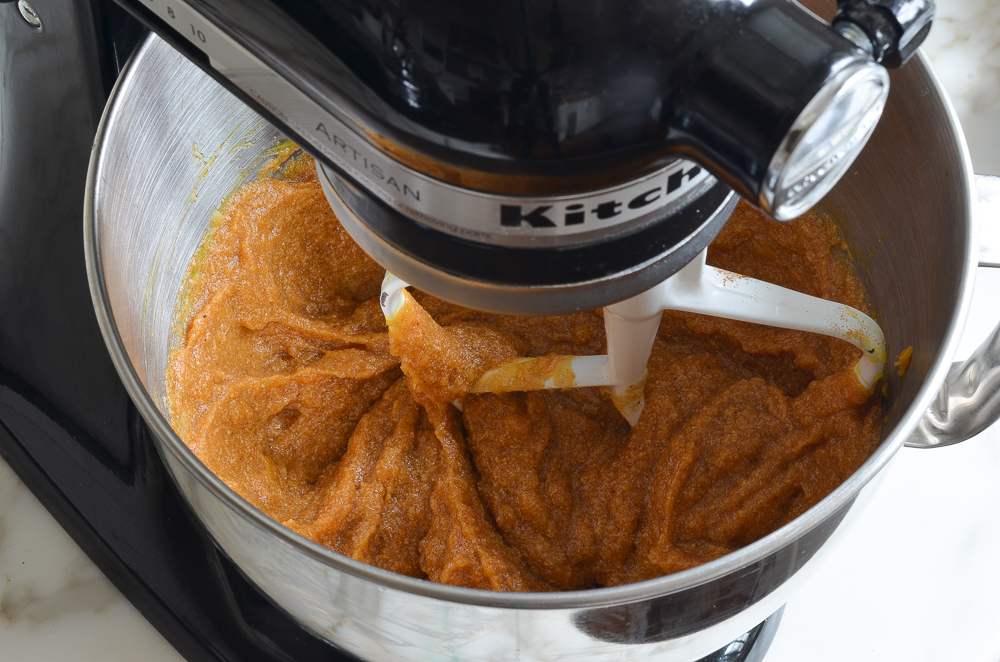
Finally, add the evaporated milk.
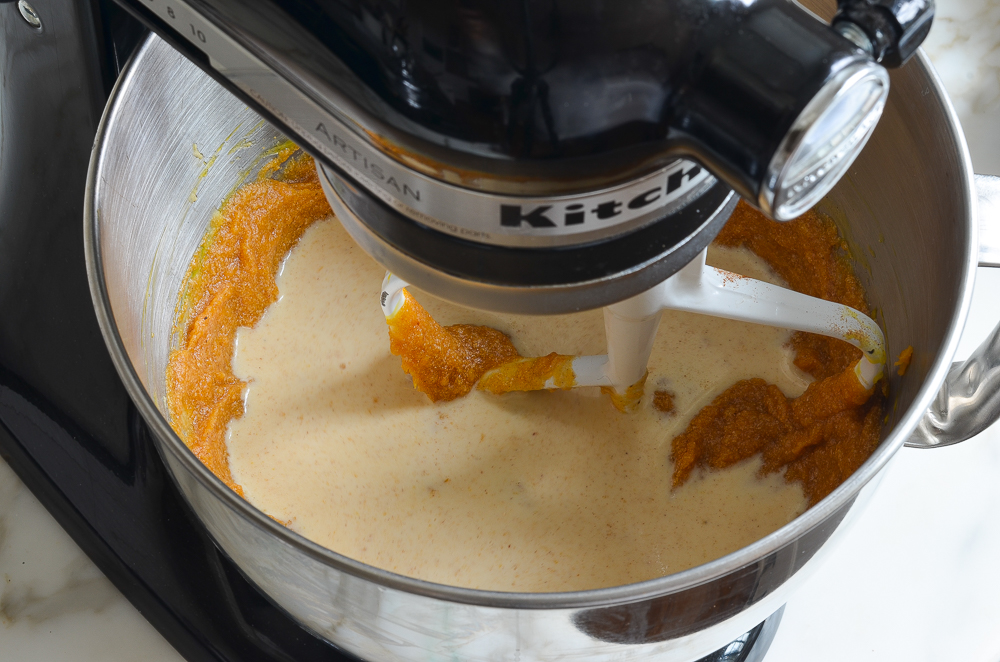
Mix on low speed to combine. Don’t worry if the mixture has a grainy or slightly curdled appearance; that’s normal.
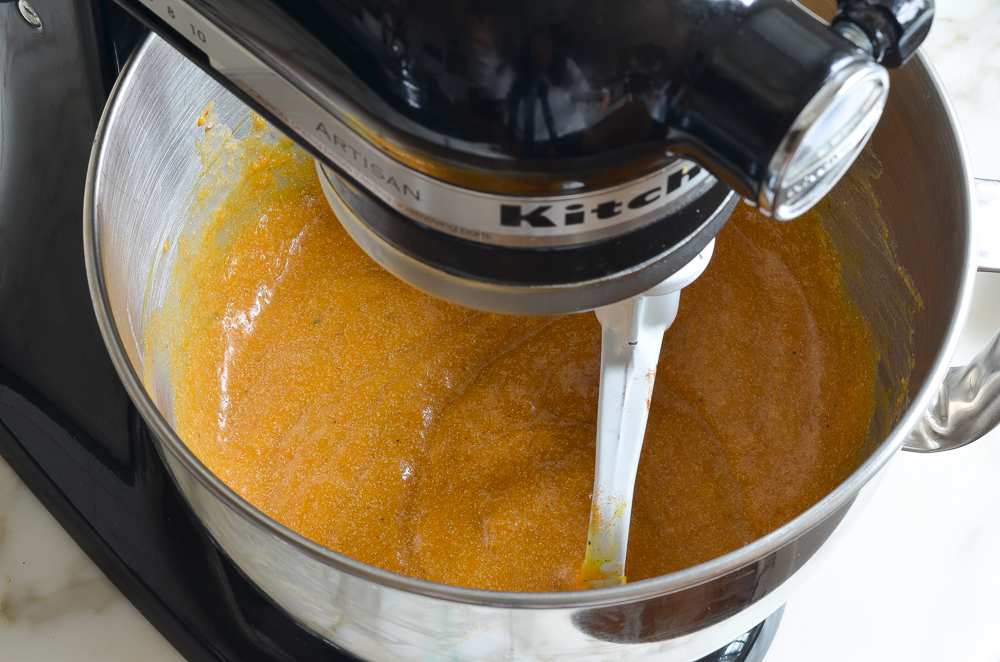
Pour the sweet potato filling into the pie crust and smooth the top with a rubber spatula.
Step 4: Fill and Bake the Pie

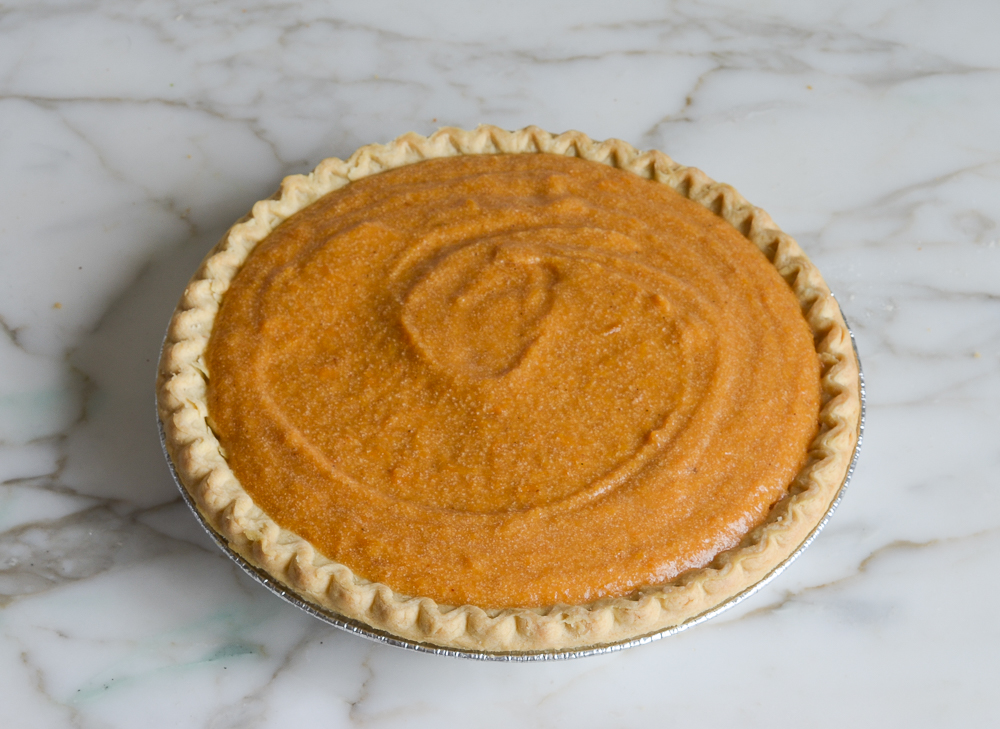
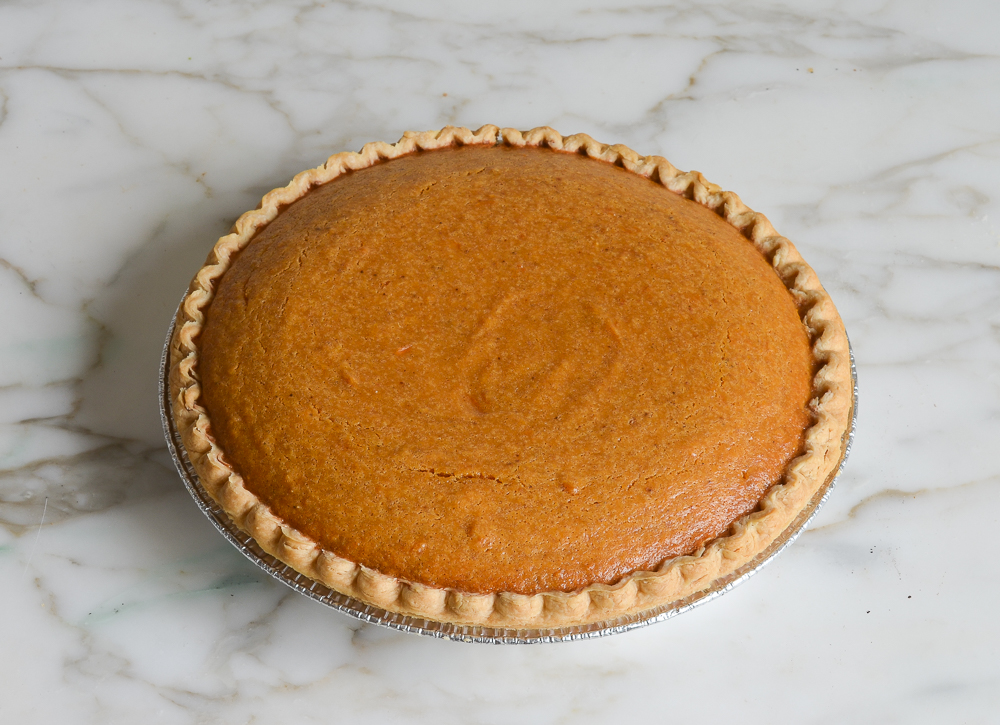
Place the pie on a baking sheet (for ease moving the pie in and out of the oven) and bake until the filling is set, 55 to 60 minutes. Set the pie on the counter and let cool completely before slicing, 2 to 3 hours.
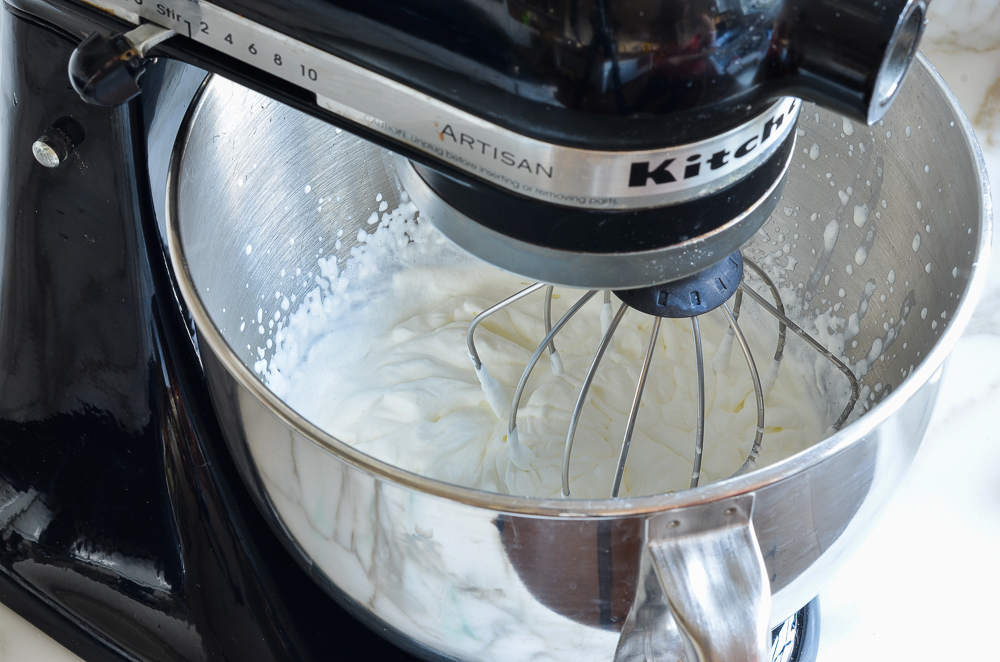
Step 5: Whip the Cream and Serve
Up to 3 hours before serving, whip the cream on medium speed in the bowl of an electric mixer fitted with the whisk attachment. When it starts to thicken, add the confectioners’ sugar. Continue to whip until it forms stiff peaks.
Before serving, slice the pie into wedges and top each slice with a dollop of whipped cream. The pie can be made up to two days in advance or frozen for up to 3 months.

You May Also Like


Sweet Potato Pie

Ingredients
For the Pie
- 2 large sweet potatoes (about 2¼ lb/1 kg)
- 4 tablespoons unsalted butter, softened
- 1 cup + 2 tablespoons (packed) light brown sugar
- 1 large egg, at room temperature
- 3 large egg yolks, at room temperature
- 1 teaspoon vanilla extract
- ¼ teaspoon salt
- ¾ teaspoon ground cinnamon
- ½ teaspoon ground nutmeg
- ⅛ teaspoon ground cloves
- ⅛ teaspoon ground ginger
- 1 cup evaporated milk
- 1 (9-in) deep-dish frozen pie crust (no need to thaw) or homemade pie crust
For the Whipped Cream
- 1 cup heavy whipping cream, cold
- 2 tablespoons confectioners' sugar
Instructions
- Preheat the oven to 425°F (220°C) and set an oven rack in the middle position. Line a baking sheet with parchment paper or aluminum foil.
- Poke each sweet potato with a fork 5 or 6 times and place them on the prepared baking sheet. Roast until very tender, about 1 hour. Let cool, then scoop the pulp out of the skin into a medium bowl. Using a potato masher or fork, mash until smooth.
- Follow the instructions on the package (or homemade recipe) for blind baking the crust.
- Reduce the oven temperature to 350°F (175°C).
- In the bowl of an electric mixer fitted with the paddle attachment (or beaters), beat the butter and brown sugar on medium speed until the mixture is moistened and crumbly, about 1 minute. Beat in the egg and yolks, one at a time, until the mixture is creamy and smooth, a few minutes. Add the vanilla, salt, cinnamon, nutmeg, cloves, and ginger; beat until just combined. Add 1¾ cups of the mashed sweet potatoes (use any remaining sweet potatoes for another purpose or discard) and mix until incorporated. Finally, add the evaporated milk and mix on low speed to combine. Don't worry if the mixture has a grainy or slightly curdled appearance; that's normal.
- Pour the sweet potato filling into the pie crust and smooth the top with a rubber spatula. Place the pie on a baking sheet (for ease moving the pie in and out of the oven) and bake until the filling is set, 55 to 60 minutes. Set the pie on the counter and let cool completely before slicing, 2 to 3 hours. Before serving, slice the pie into wedges and top each slice with a dollop of whipped cream.
For the Whipped Cream
- Up to 3 hours before serving, whip the cream on medium speed in the bowl of an electric mixer fitted with the whisk attachment. When it starts to thicken, add the Confectioners' sugar. Continue to whip until it forms stiff peaks. Cover with plastic wrap and store in the refrigerator until ready to serve.
Notes
Nutrition Information
This website is written and produced for informational purposes only. I am not a certified nutritionist and the nutritional data on this site has not been evaluated or approved by a nutritionist or the Food and Drug Administration. Nutritional information is offered as a courtesy and should not be construed as a guarantee. The data is calculated through an online nutritional calculator, Edamam.com. Although I do my best to provide accurate nutritional information, these figures should be considered estimates only. Varying factors such as product types or brands purchased, natural fluctuations in fresh produce, and the way ingredients are processed change the effective nutritional information in any given recipe. Furthermore, different online calculators provide different results depending on their own nutrition fact sources and algorithms. To obtain the most accurate nutritional information in a given recipe, you should calculate the nutritional information with the actual ingredients used in your recipe, using your preferred nutrition calculator.
Hi Jennifer, Happy Thanksgiving.
What size is the pie plate and is it deep dish? Can this be made without blind baking the crust? I made your recipe for Pecan Pie. According to the recipe it didn’t need blind baking since the baking sheet act’s like a pizza pan.
Thanks so much.
Hi Linda, It’s a 9-inch deep dish pie pan. This cooks at a lower temp than the pecan pie so blind baking is recommended. That said, if you don’t want to bother, the pie will still be delicious – just not as crisp on the bottom.