White Chicken Chili

This post may contain affiliate links. Read my full disclosure policy.
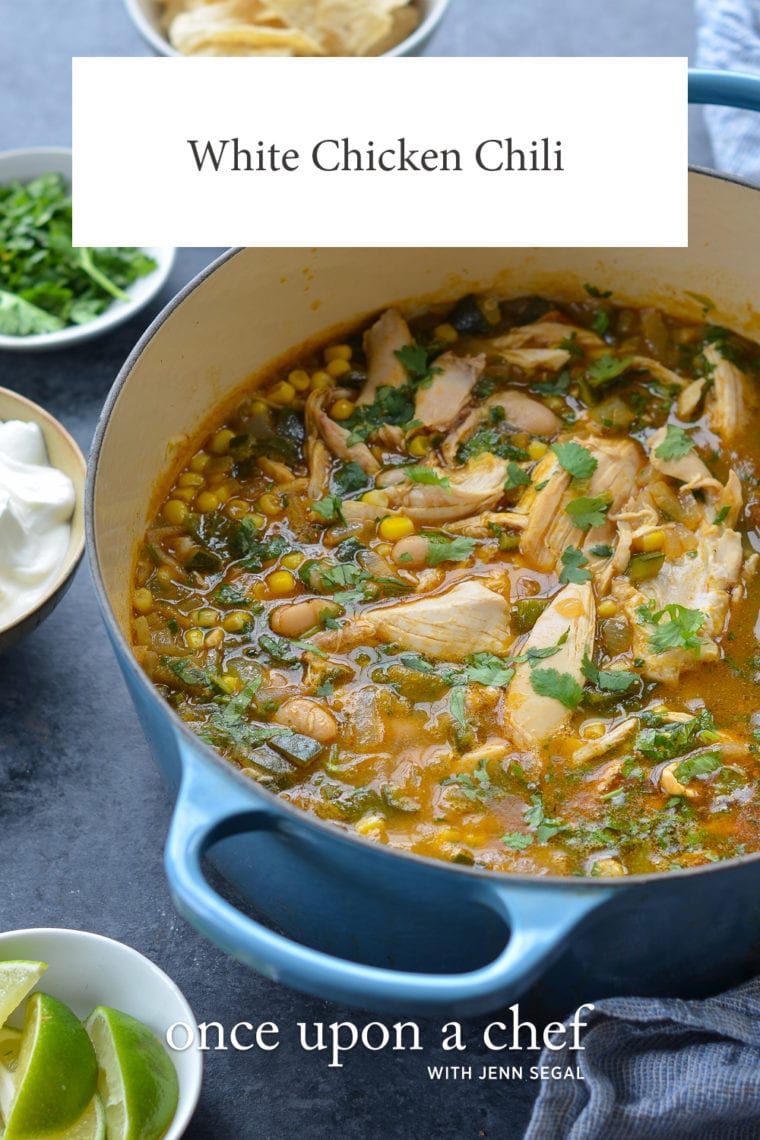
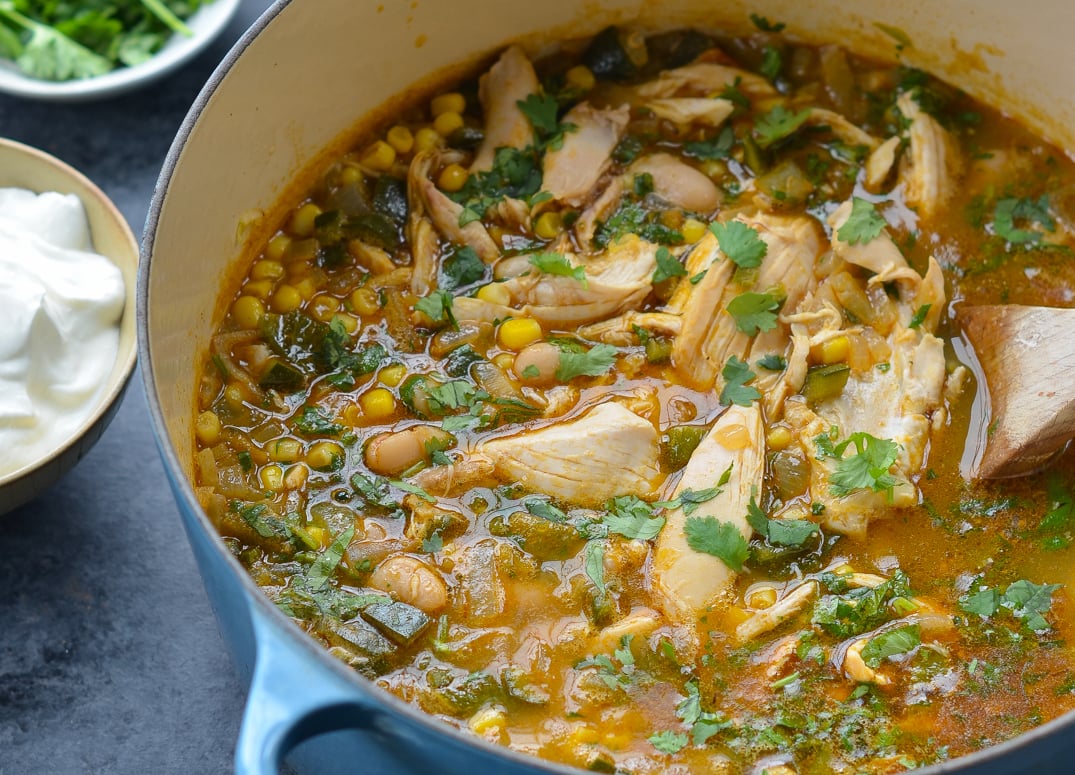
This chicken chili is the kind of cozy, one-pot meal that works just as well for game day as it does on a weeknight. And the leftovers? Even better the next day.
If you’re looking for a change from traditional chili, white chicken chili is a great option. It’s made with pulled chicken and white beans in a savory, spiced broth instead of the usual ground meat, kidney beans, and tomato base. It’s a bit more soup-like than my classic beef chili recipe, turkey chili, or chili con carne, but it still delivers big flavor.
I’ve tried countless white chicken chili recipes over the years—from slow-cooker shortcuts to more authentic, from-scratch takes, and this one is the clear winner. It strikes the perfect balance between ease and depth of flavor—and it’s my family’s favorite by far. Using a store-bought rotisserie chicken keeps the prep simple without sacrificing taste. Serve it with homemade cornbread for a cozy, comforting dinner in under an hour.
“This was amazing! So easy and pleased the whole family.”
What You’ll Need To Make White Chicken Chili
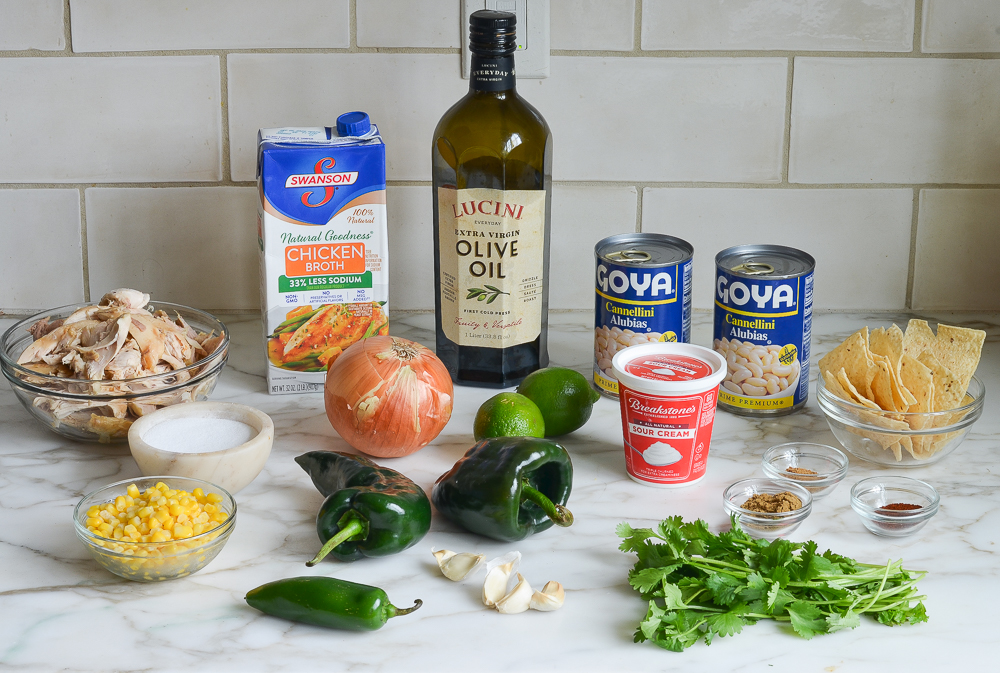
- Canned White Beans: Add creaminess and a hearty texture to the dish.
- Chicken Broth: The broth base of the chili. Low-sodium keeps the dish from being overly salty when paired with canned beans.
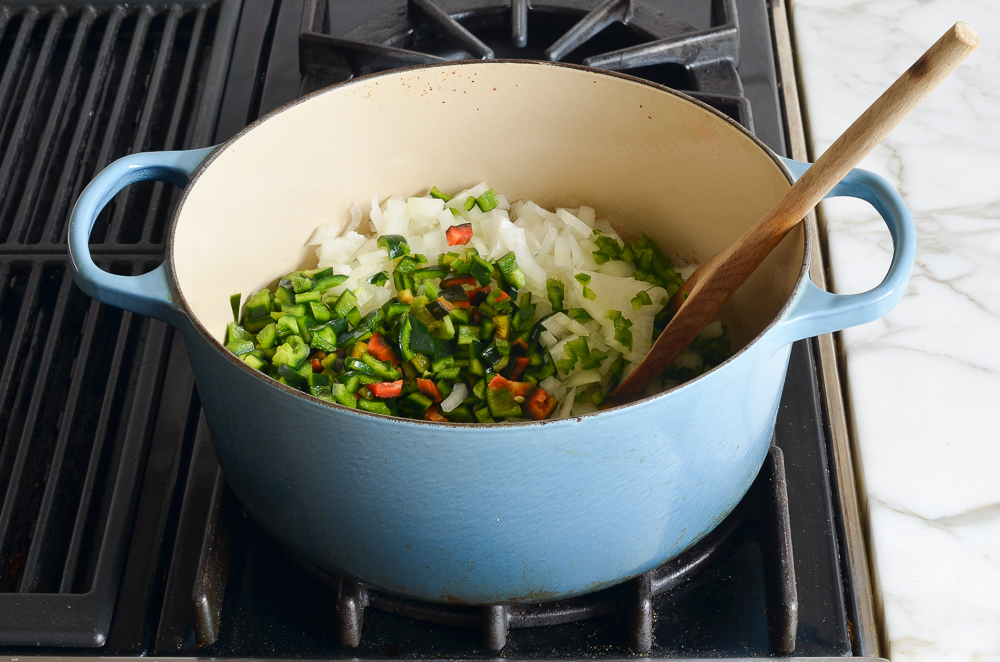
- Onion, garlic, jalapeño pepper & poblano pepper: Sautéed at the start for a flavorful aromatic foundation.
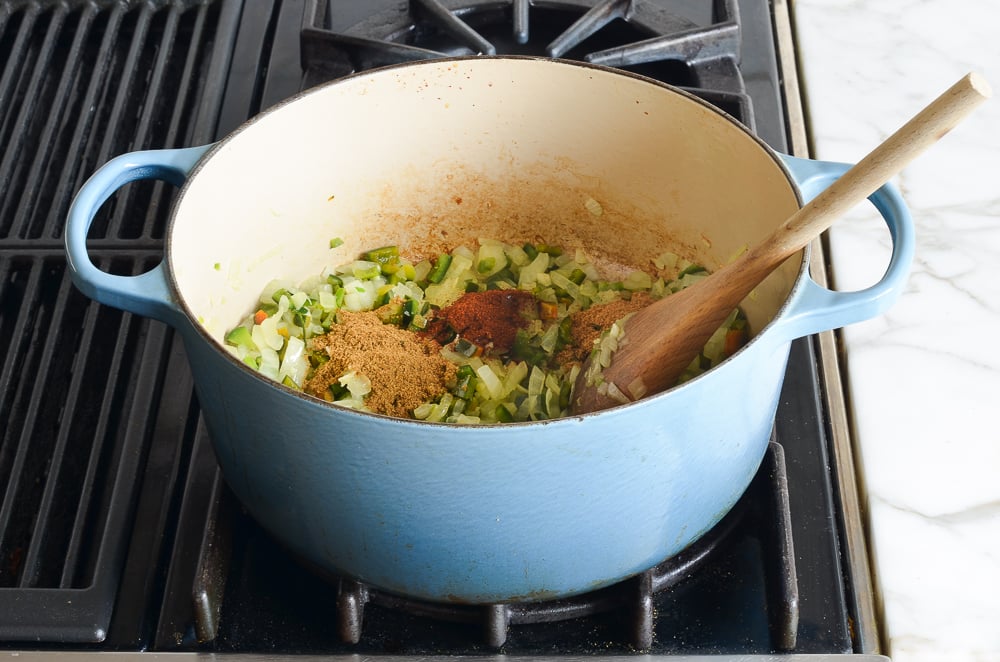
- Spices (Cumin, Coriander, Ancho Chile Powder): This earthy, smoky spice blend adds depth and warmth to the chili.
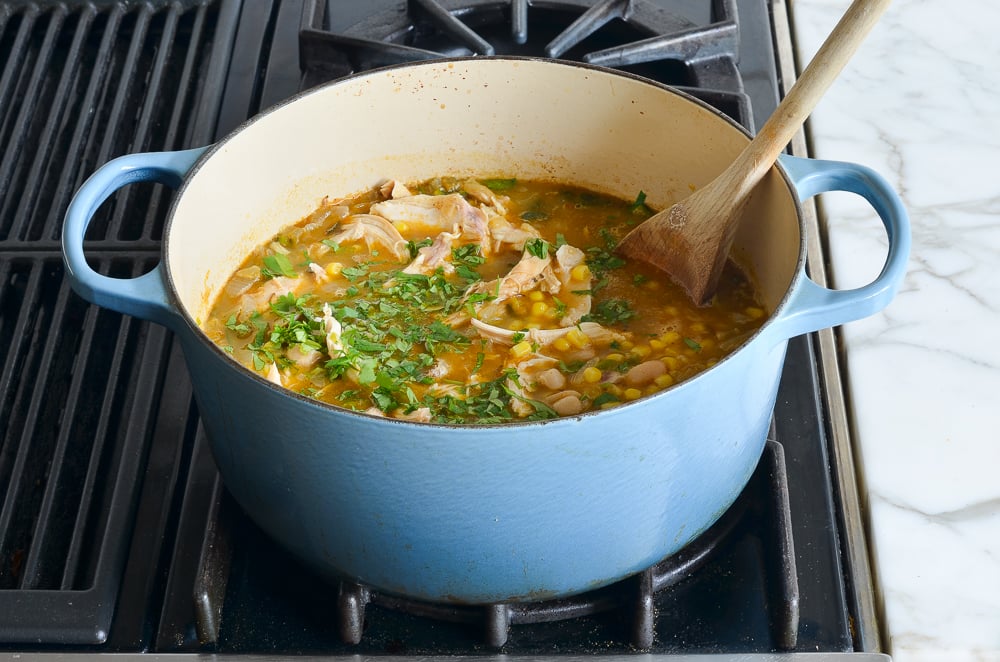
- Rotisserie chicken, white beans & corn: the add-ins. Shredded rotisserie chicken is a major time-saver, but feel free to use any leftover chicken. White beans like cannellini, Great Northern, or navy add heartiness and thicken to the broth, and corn brings sweetness and texture (fresh corn is ideal but frozen works too).
- Lime Juice & Fresh Cilantro: Added at the end for brightness and fresh flavor. Feel free to omit the cilantro or substitute parsley if you’re not a fan.
- Jump to the printable recipe for precise measurements
Step-by-Step Instructions
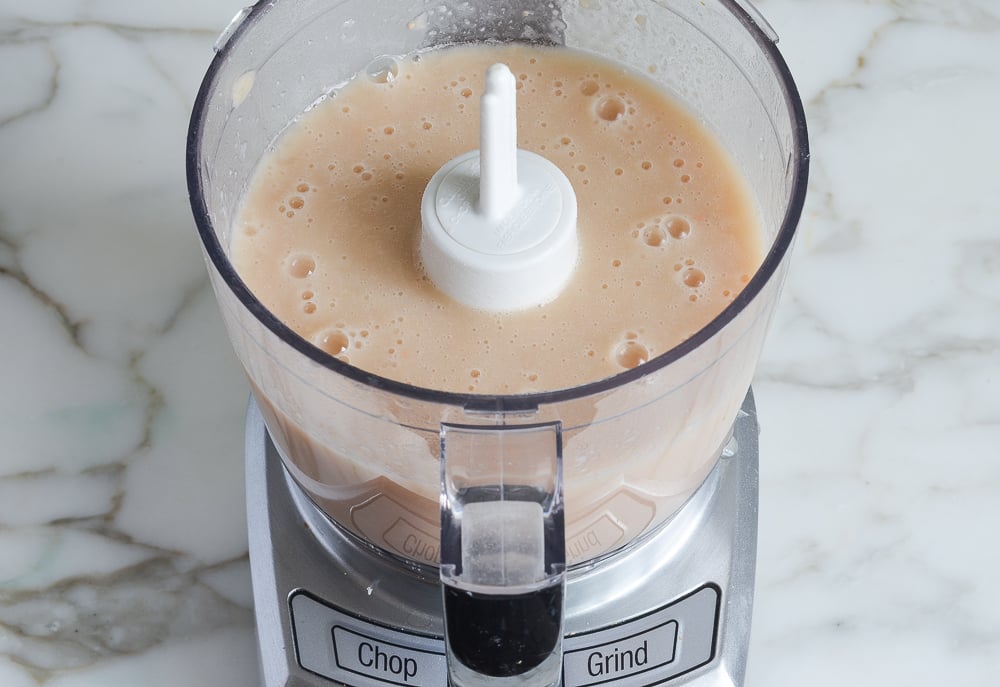
Step 1. Purée half the beans. In a food processor, combine half of the white beans with 1 cup of the chicken broth. Process until smooth—you’ll use this mixture to thicken the chili later.
Step 2. Sauté the aromatics. Heat the oil in a large pot or Dutch oven. Add the onions and peppers and cook until softened, about 4 minutes.
Step 3. Add garlic and spices. Stir in the garlic and cook until fragrant. Add the spices and cook a few minutes more to toast them and deepen their flavor.
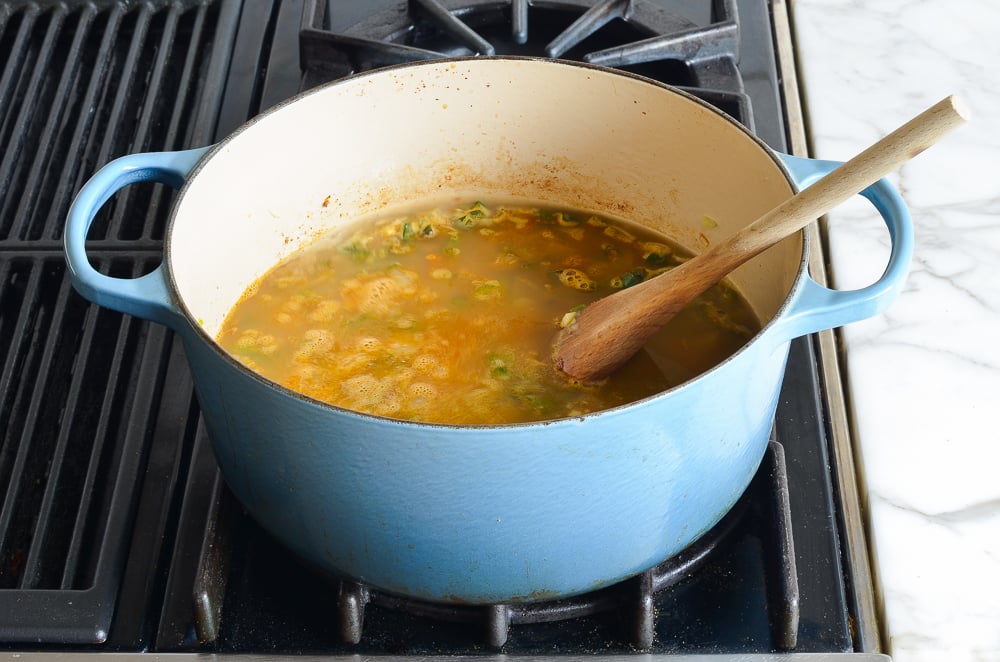
Step 4. Add broth and thicken. Pour in the remaining chicken broth, salt, and the puréed bean mixture. Stir to combine, bring to a boil, then reduce the heat and simmer for 20 minutes.
Step 5. Stir in the add-ins. Add the shredded chicken, remaining beans, corn, and lime juice. Simmer until everything is heated through, then finish with the fresh cilantro. The chili will be brothy but thickens as it sits; you can add broth or water to loosen it up if needed.
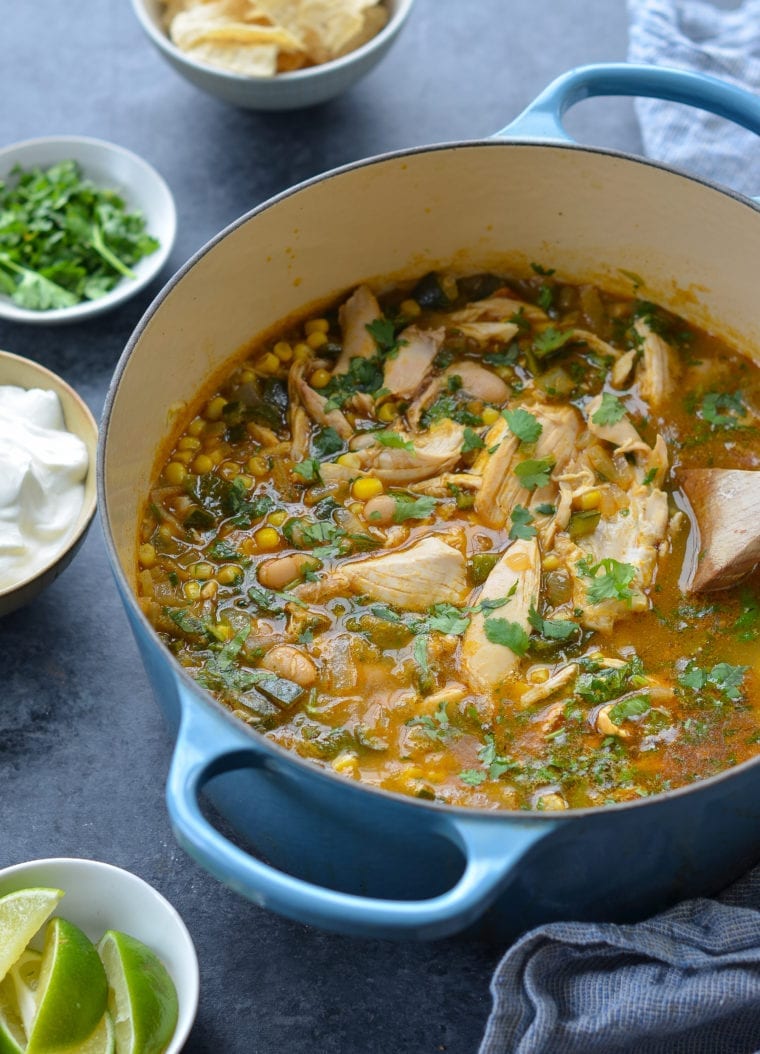
Step 6. Serve. Ladle into bowls and top with sour cream, lime wedges, shredded cheese, and crushed tortilla chips. Leftovers keep for up to 3 days in the fridge. The chili keeps nicely for up to 3 days in the fridge; freeze for longer storage.
Pro Tip: Short on freezer space? Ladle cooled chili into a resealable zip-top bag, press out the air, and seal it flat. Once frozen, it stacks neatly like a file—perfect for squeezing into a packed freezer.
Video Tutorial
More Tex-Mex Recipes to Spice Up Your Dinners


White Chicken Chili

Ingredients
- 2 (15.5-oz) cans white beans, rinsed and drained
- 4 cups low-sodium chicken broth, divided
- 2 tablespoons extra-virgin olive oil
- 1 large yellow onion, diced
- 1 jalapeño pepper, seeded and minced (see note)
- 2 medium poblano peppers, seeded and diced (see note)
- 4 cloves garlic, minced
- 1 tablespoon ground cumin
- 1½ teaspoons ground coriander
- 1 teaspoon ancho chile powder
- Salt
- 1 rotisserie chicken, skin removed and shredded (about 4 cups)
- ¾ cup frozen corn
- 1 tablespoon fresh lime juice, from 1 lime, plus more to taste
- ¼ cup fresh chopped cilantro
Optional For Serving
- Sour cream
- Crushed tortilla chips
- Shredded cheddar or Pepper Jack cheese
- Lime wedges
Instructions
- In a food processor, blend half of the beans (1 can) with 1 cup (240 ml) of the chicken broth. Set aside both the puréed beans and the remaining whole beans.
- Add the oil to a large pot or Dutch oven and heat it over medium-high heat. Add the onion, jalapeño pepper, and poblano peppers and cook, stirring frequently, until soft, 4 to 5 minutes. Add the garlic and cook for one minute more. Add the cumin, coriander, and ancho chile powder and continue to cook, stirring frequently, for one minute more to toast the spices. Add the chicken broth, puréed beans, and ½ teaspoon of salt; bring to a boil. Reduce the heat to low and simmer, uncovered, for 20 minutes.
- Stir in the shredded rotisserie chicken, reserved whole beans, corn, and lime juice; bring back to a simmer and cook until everything is heated through, about 5 minutes. Taste and adjust seasoning with more salt and lime juice, if necessary. Stir in the cilantro. (Note that the broth will be somewhat soupy -- that's how it is supposed to be. It thickens the longer it sits; see note below.) Ladle the chili into bowls and serve with sour cream, crushed tortilla chips, and lime wedges.
Notes
- The seeds and ribs in the peppers hold all of the heat. I don't use them to keep the chili mild and family-friendly, but if you like a spicy chili, save them and stir some in at the end. (If you do touch the seeds, be sure to wash your hands well and avoid touching your eyes.)
- The chili thickens as it sits. If you make it ahead of time, you will probably need to add more broth or water to thin it out.
- Nutrition info does not include optional toppings.
- Make-Ahead/Freezing Instructions: The chili will keep in the refrigerator in an airtight container for up to 3 days. Keep in mind that it will thicken up as it sits in the fridge. When you reheat it, you will likely need to add more broth or water to thin it out. The chili can be frozen for up to 3 months. Reheat it on the stovetop over medium-low heat until hot.
Pair with

Nutrition Information
This website is written and produced for informational purposes only. I am not a certified nutritionist and the nutritional data on this site has not been evaluated or approved by a nutritionist or the Food and Drug Administration. Nutritional information is offered as a courtesy and should not be construed as a guarantee. The data is calculated through an online nutritional calculator, Edamam.com. Although I do my best to provide accurate nutritional information, these figures should be considered estimates only. Varying factors such as product types or brands purchased, natural fluctuations in fresh produce, and the way ingredients are processed change the effective nutritional information in any given recipe. Furthermore, different online calculators provide different results depending on their own nutrition fact sources and algorithms. To obtain the most accurate nutritional information in a given recipe, you should calculate the nutritional information with the actual ingredients used in your recipe, using your preferred nutrition calculator.
I made this chile, pretty much as written. I greatly prefer the shredded chicken, as opposed to the ground chicken you will find in many recipes. In lieu of the rotisserie chickens, I brined several large boneless, skinless breasts in a water/salt/sugar mixture, and then cooked at 425 for 23 minutes. The brined chicken is always tender and delicious. The seasonings are perfect, and I served with shredded monterrey pepper jack cheese.
I liked this a lot, but two of my three sons not so much. It was too hot for them. Not to mention they both claimed that they have no intention of letting go of the potatoes-are-touching-my peas faze. However, they will inhale Jenn’s chewy granola bars and that’s a whole lot of ingredients touching. Sigh.
Great flavor! I had never cooked with coriander before but loved the taste with the poblanos and cumin. I made Jenn’s cornmeal muffins to go along with it, which are also delicious!
I made this recipe exactly as written and it was absolutely delicious. My finicky husband and son loved it. This is definitely going into our recipe rotation!
This is one of our favorite recipes! It’s always a crowd pleaser. The poblano peppers and cumin add such a unique taste. I like to serve it with shredded cheese, sour cream and tortilla chips but it is still fabulous without it!
I am so happy to have stumbled onto this food blog when searching for a chicken chili recipe this week. I made this on Monday night for my family and it was a huge success, even for my 4 and 7-year-old which really surprised me. I skipped the jalepenos and only used one poblano, which was still a bit spicy, but the girls loved it and so did my husband and I. This is definitely a keeper. Full of flavor and not difficult to make. FTW!
Very good recipe! Thanks for posting it! The step by step with pictures is great! My husband loves chili and I always felt so bad for feeding him unhealthy canned chili because I did not know how to cook it. This was so easy and so good! My husband liked it so much that after eating seconds he called the left over to take to work the next day.
Forgot to rate it!
Oh my, this was really good and so easy! What a great way to use up left over rotisserie chicken! I used red peppers as I didn’t have poblamo and a little more spice, wonderful.
Thanks Jenn!
WOW!! Just made this the other day and it was amazing. My husband loved it and I did too. I confess that it took me longer than 1 1/2 hours to make, but I’m a slow cooker.
I will be making this to take to new mothers or folks that need a meal.
We served it with sour cream and some fritos.
I also try to not use my food processor because I despise washing it. So I skipped that part and just mashed up the beans with a potato masher. It seemed just fine to me. Thanks for the wonderful recipe!!
A useful tip when using your food processor. If you chopping or puree in your work bowl and don’t need the feed tube put plastic wrap on the work bowl with the food in it then put cover on over plastic wrap. You don’t have to clean the cover the hard part.
What a great tip – had never thought of doing that before!