Chocolate Peanut Butter Squares
- By Jennifer Segal
- Updated November 12, 2024
- 16 Comments
- Leave a Review

This post may contain affiliate links. Read my full disclosure policy.
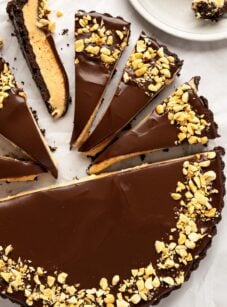
With an Oreo crust, peanut butter filling, and milk chocolate topping, these chocolate peanut butter squares are impossible to resist.

When it comes to sweets, I’ve learned that nothing makes people happier than the combination of chocolate and peanut butter. These indulgent, melt-in-your-mouth squares taste like like a homemade Reese’s peanut butter cup. If you’re a chocolate and peanut butter lover, be sure to also try my peanut butter pie, peanut butter blossoms, and buckeyes!
“Like Jenn says in the intro, these little treats are incredibly hard to resist — I love anything that combines chocolate and peanut butter and this dessert does not disappoint!! Like peanut butter cups, but better!”
You May Also Like
Chocolate Peanut Butter Squares

Ingredients
For the Crust
- 22 Oreo cookies
- 3 tablespoons butter, softened
- 2 tablespoons creamy peanut butter (I like Skippy Natural "No Need to Stir")
For the Peanut Butter Filling
- ⅓ cup (packed) dark brown sugar
- 2 cups Confectioners' sugar
- 6 tablespoons unsalted butter, softened
- 1 ⅓ cups creamy peanut butter
- ⅛ teaspoon salt
For the Milk Chocolate Ganache
- 1 (11.5-ounce bag) milk chocolate chips (preferably Ghirardelli or similar quality)
- 6 tablespoons heavy cream
Instructions
- Preheat the oven to 375°F and set an oven rack in the middle position. Line a 9-inch square baking pan with heavy-duty aluminum foil so that there is a 2-inch overhang on all sides. Spray the foil with non-stick cooking spray.
Make the Crust
- Combine the Oreos (with their filling), butter, and peanut butter in the bowl of a food processor fitted with the blade attachment and pulse until the cookies are finely crushed. Press the mixture firmly into the prepared baking pan (I spread it with my hands first, then use the bottom of a measuring cup to even it out). Bake for 6 minutes. Set on a rack to cool completely.
- In the meantime, make the peanut butter filling: Combine all of the filling ingredients together in the bowl of a mixer fitted with the paddle attachment and mix at medium-low speed until evenly combined (do not whip). Set the bowl in the refrigerator while you prepare the rest.
Make the Chocolate Ganache
- Combine the chocolate chips and heavy cream in a microwave-safe bowl. Microwave on medium power (50%) for 1 minute, then stir until the bowl no longer feels warm. Continue heating in 15-second intervals, stirring each time until the chocolate is smooth and melted. The mixture may appear a bit gloppy and separated during the melting process — this is normal. However, it should become smooth and glossy once fully melted. Be careful not to overheat, as this can cause the chocolate to separate.
Assemble the Bars
- Drizzle ⅓ cup of the ganache evenly over the cooled crust; spread into a thin layer with an offset spatula—don't worry about making it perfect, and try not to crumble the crust. Place the pan in the freezer until the chocolate is set, about 10 minutes. Dollop the peanut butter filling over the chocolate, then use your hands to press it into an even layer. (If the mixture is sticky, dust your hands with confectioners' sugar.) Reheat the remaining chocolate mixture on full power for 15 to 20 seconds in the microwave and stir until smooth. Pour it over the peanut butter layer and use the offset spatula to smooth it to the edges. Place the bars in the freezer for 1 hour or in the refrigerator for 2 to 3 hours to set. Once firm, use the foil overhang to lift the bars onto a cutting board. Using a sharp chef's knife, cut into small squares, as they are very rich. Store the bars in the refrigerator and serve cold. They will keep nicely in the fridge for up to 4 days.
Notes
Nutrition Information
This website is written and produced for informational purposes only. I am not a certified nutritionist and the nutritional data on this site has not been evaluated or approved by a nutritionist or the Food and Drug Administration. Nutritional information is offered as a courtesy and should not be construed as a guarantee. The data is calculated through an online nutritional calculator, Edamam.com. Although I do my best to provide accurate nutritional information, these figures should be considered estimates only. Varying factors such as product types or brands purchased, natural fluctuations in fresh produce, and the way ingredients are processed change the effective nutritional information in any given recipe. Furthermore, different online calculators provide different results depending on their own nutrition fact sources and algorithms. To obtain the most accurate nutritional information in a given recipe, you should calculate the nutritional information with the actual ingredients used in your recipe, using your preferred nutrition calculator.
See more recipes:
Comments
Add a Comment Cancel reply
This site uses Akismet to reduce spam. Learn how your comment data is processed.


Made this with my 5 year old and it was a big hit with our whole family! If you are having trouble with melting the chocolate, I suggest for the initial melting step, microwaving just the cream for 1 minute and then pouring it over the chocolate chips and then microwaving in 15 second intervals as needed after that! Thanks for a great recipe!!
I was having problems melting the chocolate and heavy cream it kept on getting very thick it was weird and I made it twice and the same thing happened. Once in the microwave and the second time over the stove
Alyssa, I’m sorry you had a problem with that (twice)! Were you using heavy cream? What brand of chocolate chips did you use?
Made these yesterday for a fan of Oreos and PB. What a hit with everyone. These are so so good.
Hi Jenn – I am planning to make this but I have a question. I have natural creamy peanut butter, not the no-stir kind with palm oil, etc. Will the recipe work with the natural kind?
Hi Naomi, it’s hard to say for sure, but because these squares are a bit of a project, for the most predictable results, I’d get a commercial smooth peanut butter.
Like Jenn says in the intro, these little treats are incredibly hard to resist — I love anything that combines chocolate and peanut butter and this dessert does not disappoint!! They’re like peanut butter cups, but better! I made these for a family get together this past weekend and I can’t wait to make them again!
Looks delicious, and I cannot wait to try it! Any tips for those of us without microwaves? We should be able to melt (and reheat) the chocolate and cream in a small saucepan, yes?
Hi Andrew, I’d actually use a double boiler as that will melt/combine everything more evenly.
I followed the recipe exactly except for using the food processor for the crumb base and then the PB filling (rinsed quickly) because I didn’t want to drag out my mixer. Worked fine. These are delicious but I did find the crust a bit too crumbly. I lost a lot of crust while I was cutting them. I think the crust might need more butter. Anybody else notice this? Nonetheless, my husband and friends LOVED these bars. Thank you.
What temp do we bake these? Also, what size pan are you using?
Hi Dawn, My bad — I just updated the recipe and forgot to include the first line of instructions: Preheat the oven to 375°F and spray a 9-inch square baking pan with non-stick cooking spray. Sorry about that and hope you enjoy!
What size pan are you using? I don’t see it.
Hi Barbara, My fault – I just updated the recipe and forgot to include the very first line of the instructions: Preheat the oven to 375°F and spray a 9-inch square baking pan with non-stick cooking spray. Sorry about that!
Hi, Jenn. You state to remove the bars by using foil overhang and I do not see this in pan prep. Help, please 😋
Hi Kathi, Sorry about that – it’s fixed 🙂 If you didn’t line the pan, you can cut the bars directly in the pan. Enjoy!