Flag Cake

This post may contain affiliate links. Read my full disclosure policy.
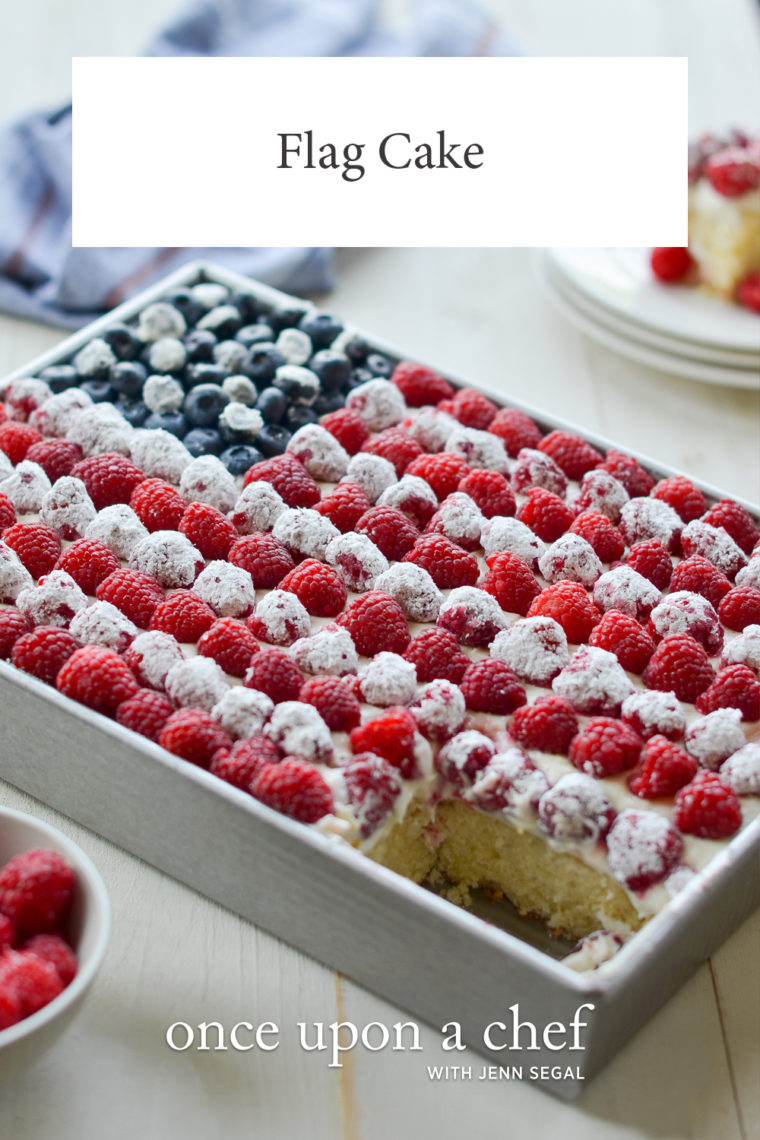
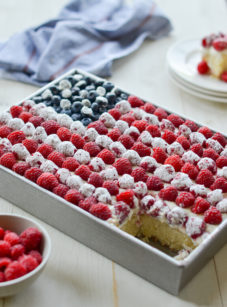
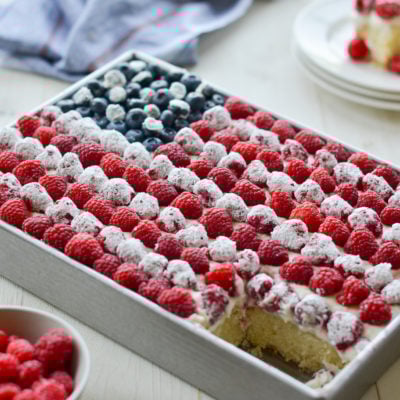
Red, white, and yum—this berry-topped flag cake is just the thing to bring to your Fourth of July get-together.

A soft yellow cake topped with luscious cream cheese frosting and fresh berries, this festive flag cake is the ultimate July 4th dessert. I know that decorating cakes can be intimidating, especially for non-bakers, but this one is quick and easy—promise!
Before we get to the step-by-step, I have to give credit where it’s due. The cake portion of this recipe comes from my all-time favorite cake cookbook, Perfect Cakes by Nick Malgieri. Decorating inspiration comes from Gaby Dalkin of What’s Gaby Cooking, whose easy method for creating the stars and stripes I copied. Instead of using a frosting-filled pastry bag fitted with a star tip to make the white portions of the flag design, she coats half of the berries in powdered sugar. This makes decorating the cake doable for everyone, even young kids.
What You’ll Need To Make A Flag Cake
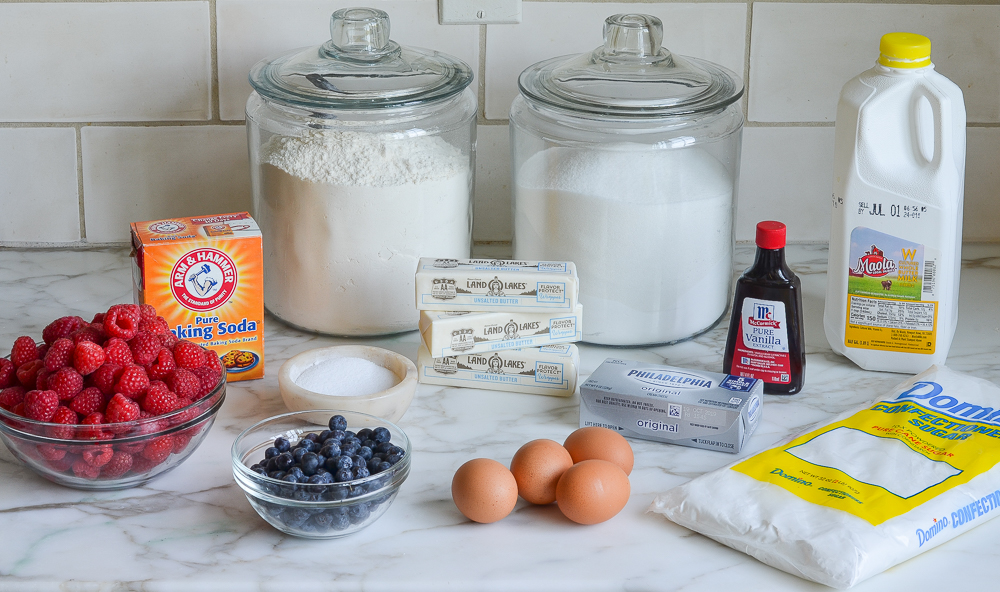
The ingredients for this flag cake are pretty straightforward. My only advice is to get the prettiest, firmest berries you can find. It will make decorating the cake much easier. Also, if you don’t want to purchase an entire carton of buttermilk for this recipe, see my post on how to make buttermilk using milk and vinegar or lemon juice.
Step-by-Step Instructions
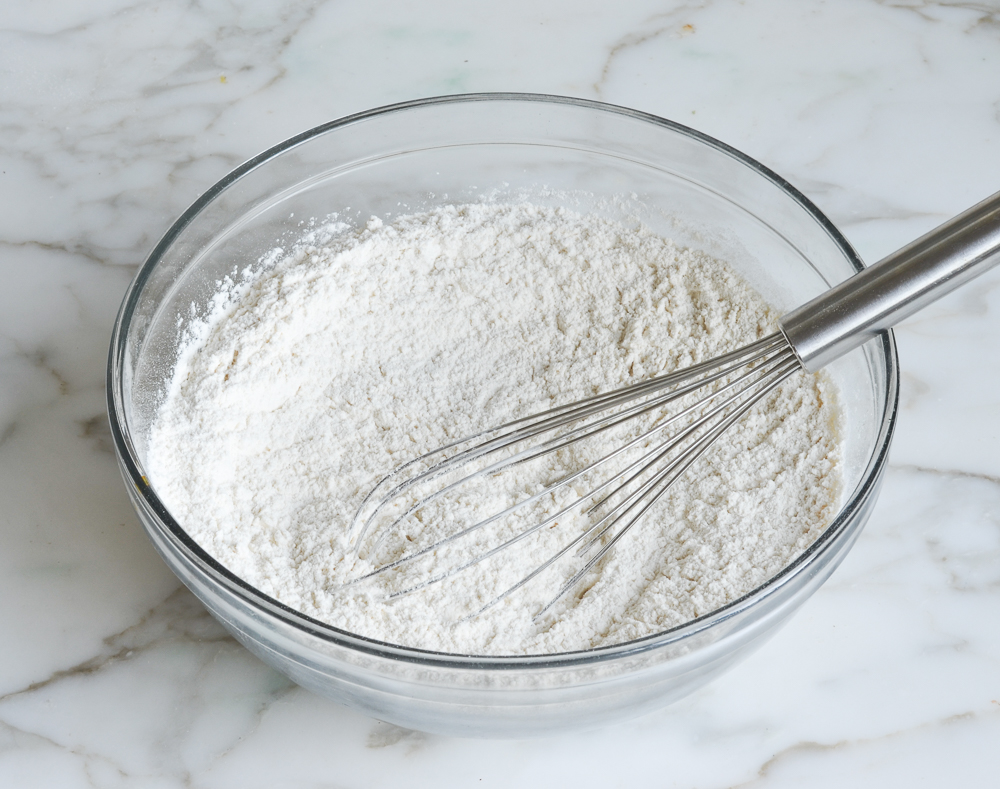
Step 1: Mix the dry ingredients. In a medium bowl, whisk together the flour, salt and baking soda and set aside.
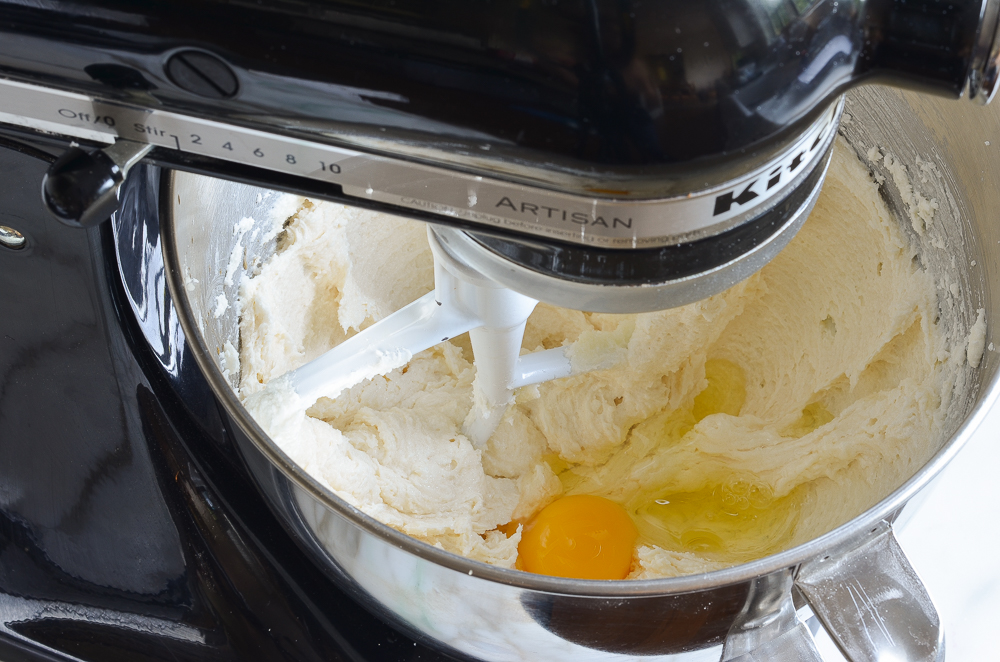
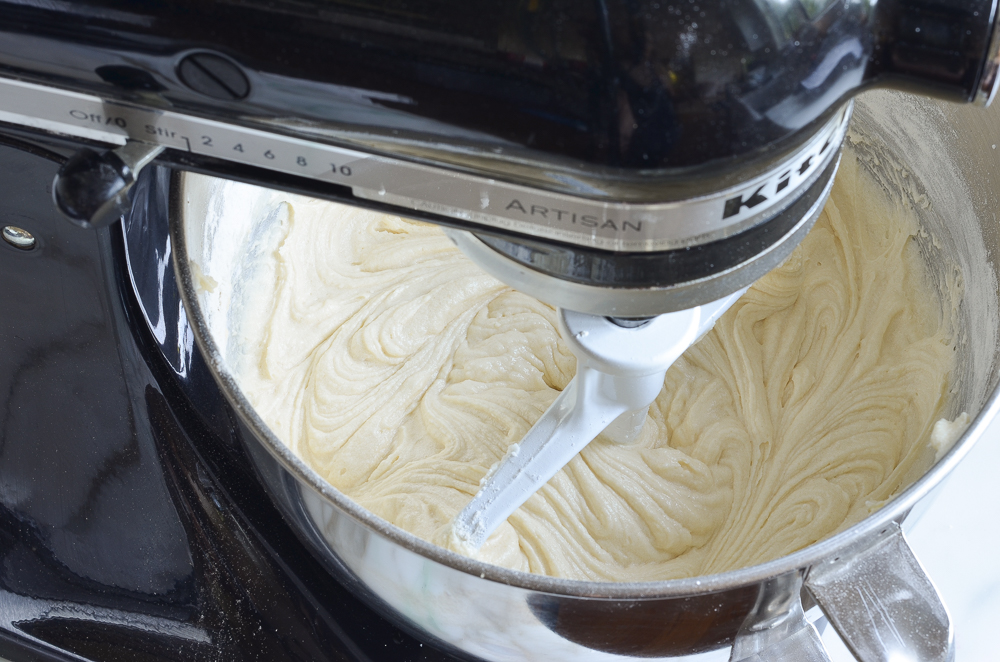
Step 2: Cream the butter and sugar. In the bowl of an electric mixer fitted with the paddle attachment (or beaters), beat the butter and sugar on medium speed until light and fluffy, about 5 minutes. Then mix in the vanilla.

Step 2: Add the eggs. Beat in the eggs, one at a time, scraping down the sides of the bowl as necessary. Don’t worry if the batter looks a little curdled at this point.
Step 3: Add the dry ingredients and buttermilk. With the mixer on low speed, add one-third of the flour mixture. Then pour in half of the buttermilk and mix just until combined. Scrape down the sides and bottom of the bowl, then add another third of the flour, followed by the rest of the buttermilk. Finish with the remaining flour and mix just until everything is evenly combined.
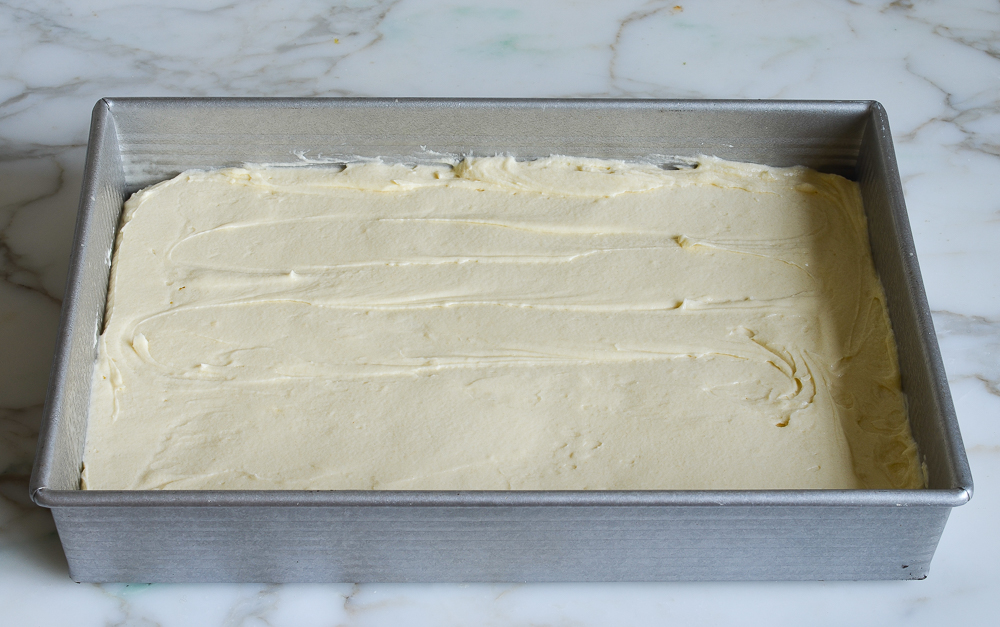
Step 4: Fill the pan. Scrape the batter into the prepared baking pan and use a rubber spatula to even out the top.
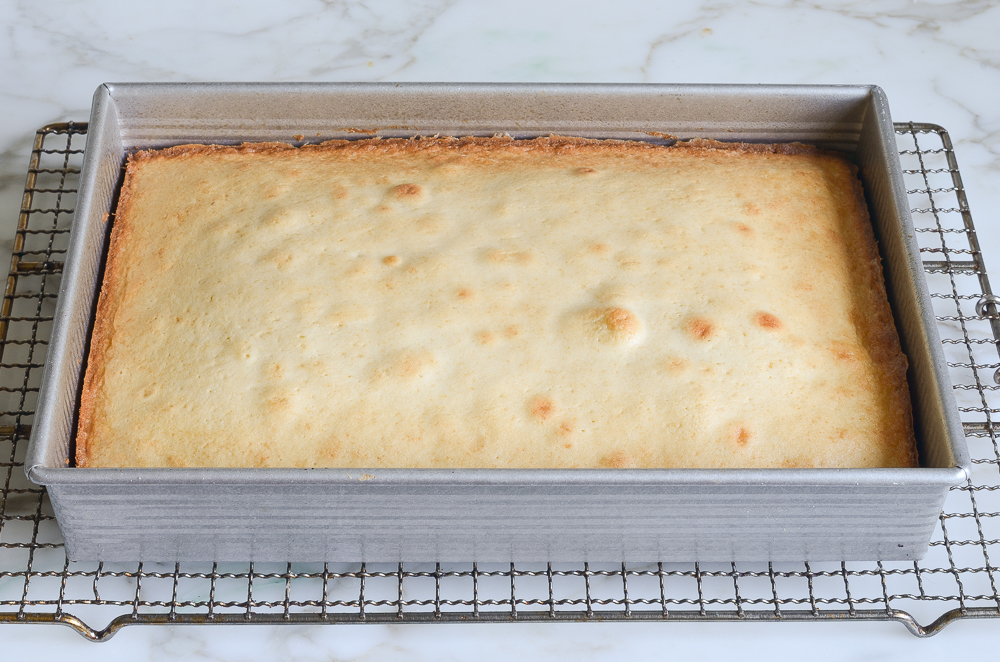
Step 5: Bake. Bake for about 30 minutes, until the cake is set and lightly golden around the edges, and a toothpick inserted into the center comes out clean. Set the cake on a wire rack to cool completely.
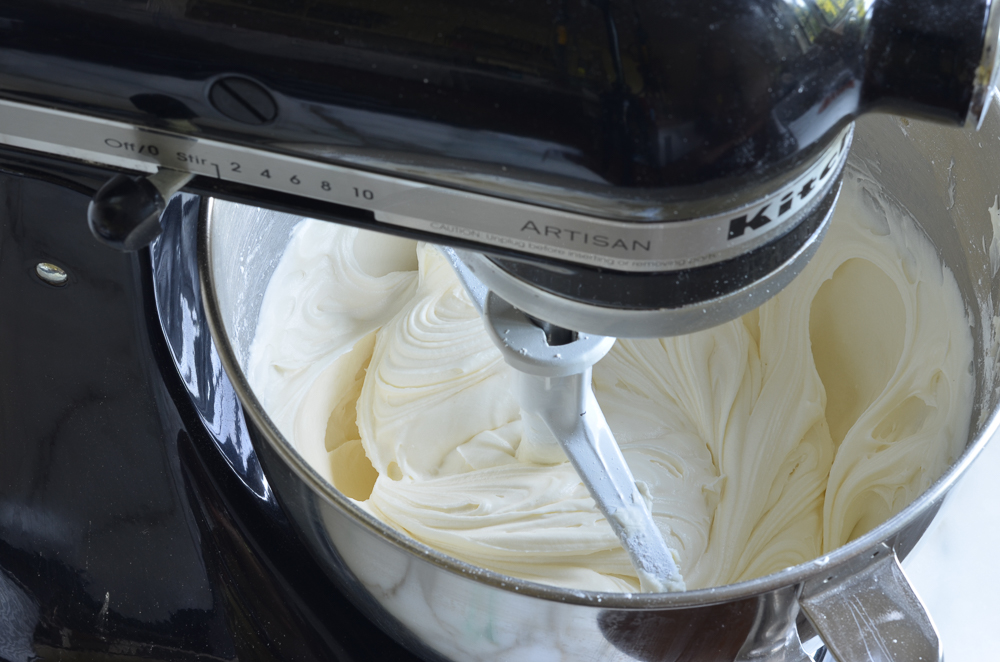
Step 6: Make the Frosting. In a stand mixer with the paddle attachment (or a large bowl with a hand mixer), beat the cream cheese, butter, vanilla, and salt on low until combined, then on medium-high until light and fluffy—about 2 minutes. Gradually mix in 4 cups of confectioners’ sugar on low, then beat again on medium-high until fluffy, about 1 more minute. Set aside 1 tablespoon of frosting for the blueberry “stars.”
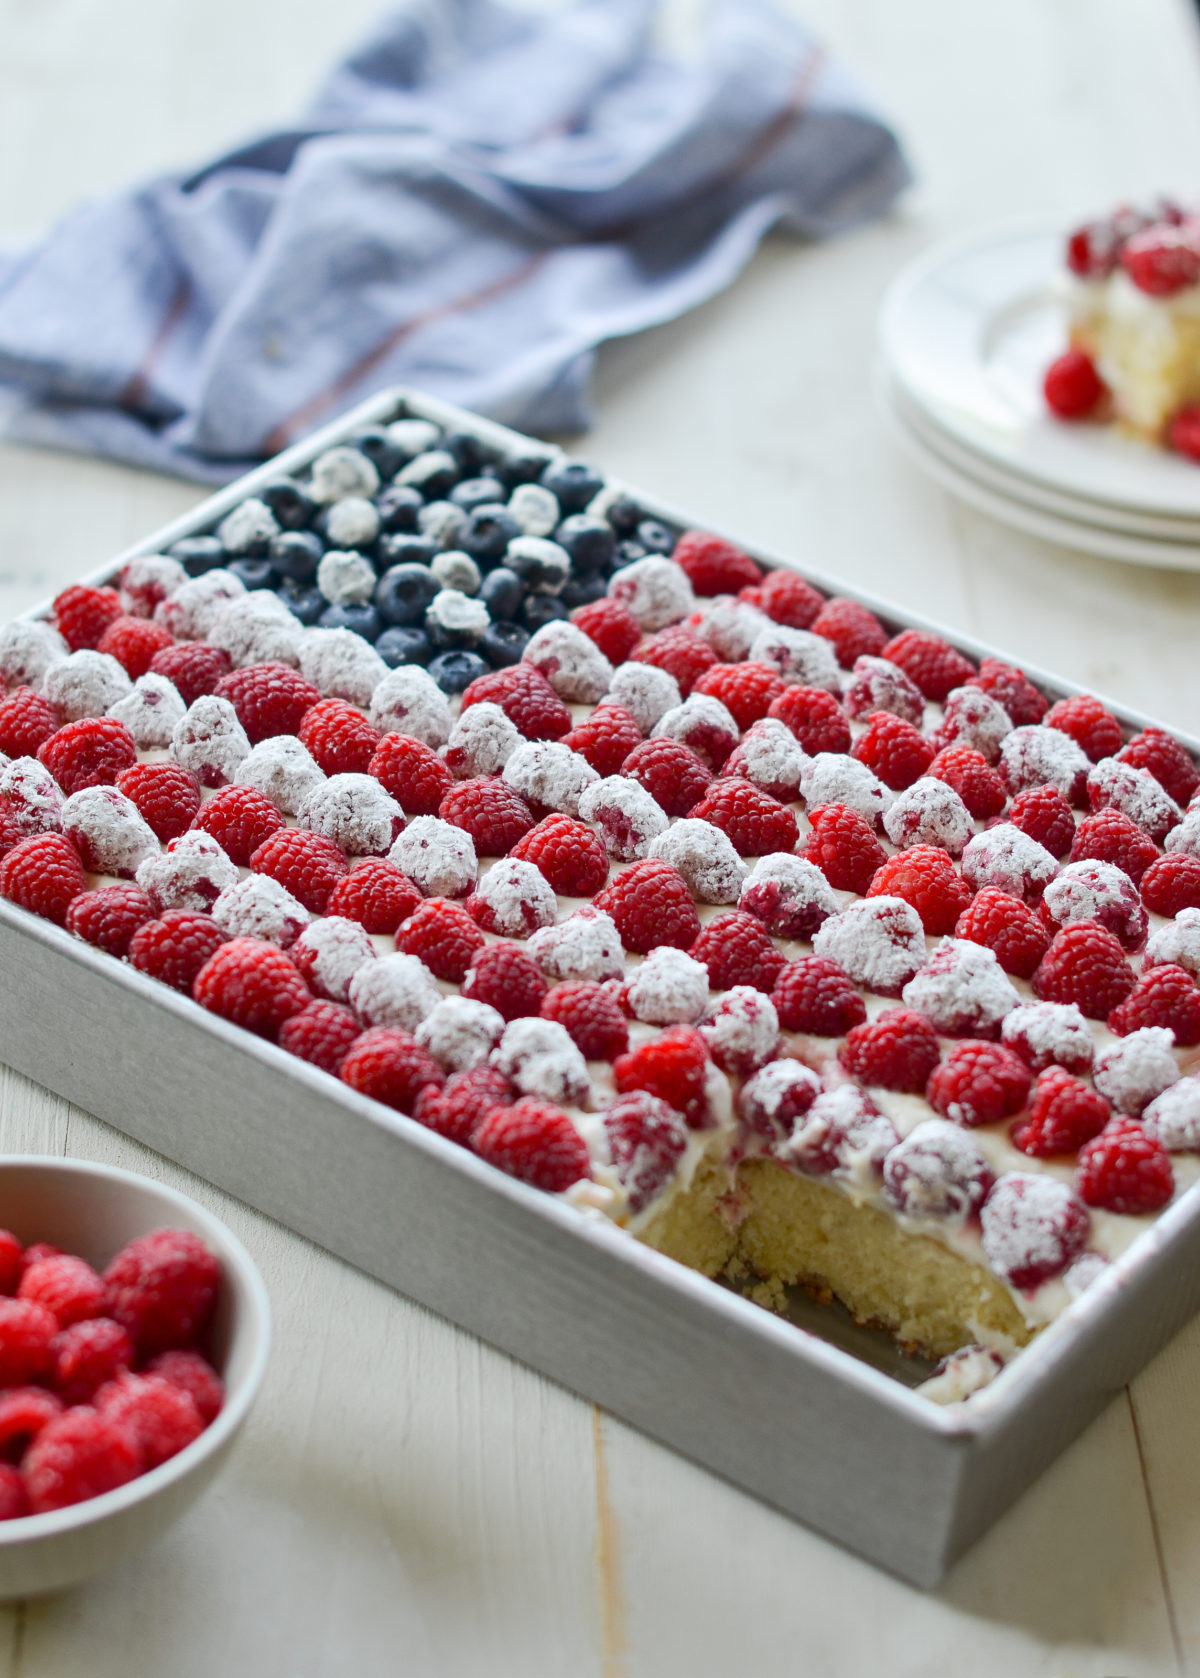
Step 7: Frost and decorate. Spread the frosting evenly over the top with an offset spatula. Don’t worry about making it perfect—it won’t show. Use a toothpick to outline the stars section in the upper left corner (or just eyeball it), then fill it in with a generous layer of blueberries. For the stripes, lay one row of raspberries across the top, sideways, for the first red stripe. Roll the next row of raspberries in confectioners’ sugar for a white stripe, and keep alternating until the flag is complete.
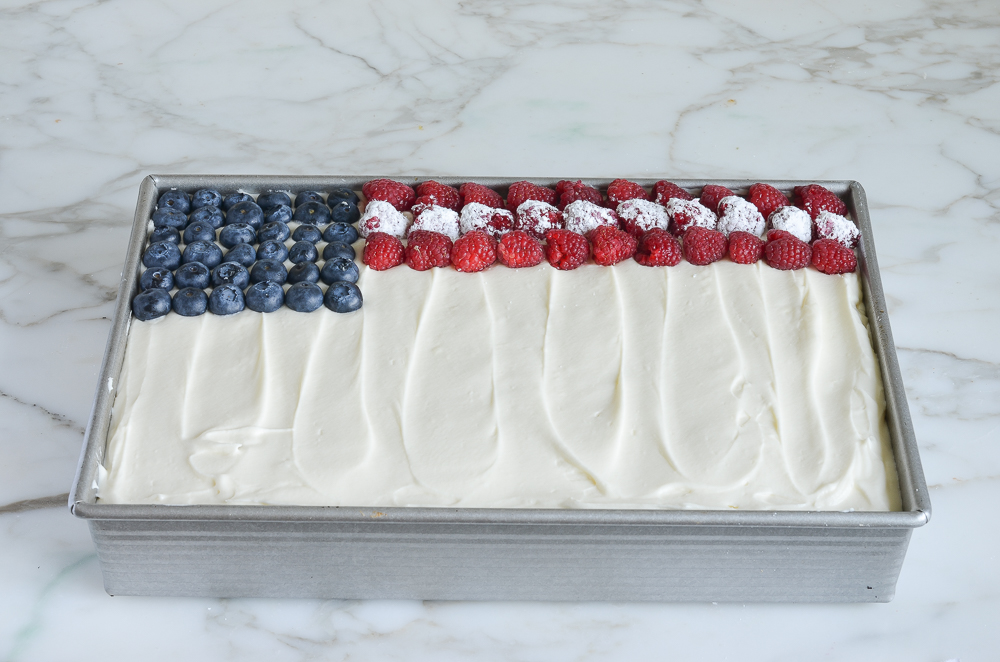
Dip a small handful of the remaining blueberries in the reserved frosting, then roll them in the remaining confectioners’ sugar to make white “stars.” Scatter them evenly over the blueberry section of the flag. Serve the cake right from the pan. It’s best enjoyed the day you make it—or the day after at the latest.
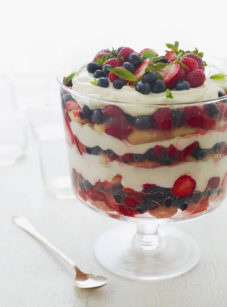
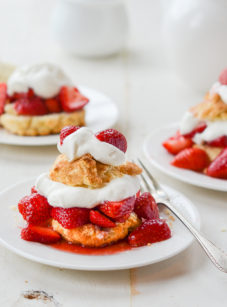
More July 4th Desserts You May Like

Flag Cake
Ingredients
For the Cake
- 2¾ cups all-purpose flour, spooned into measuring cup and leveled-off
- ½ teaspoon salt
- ½ teaspoon baking soda
- 1 cup (2 sticks) unsalted butter, softened
- 2 cups sugar
- 2 teaspoons vanilla extract
- 4 large eggs, at room temperature
- 1 cup buttermilk (see note)
For the Frosting and Topping
- 8 oz cream cheese, at room temperature
- ½ cup (1 stick) unsalted butter, at room temperature
- 1 teaspoon vanilla extract
- Pinch salt
- About 5½ cups confectioners' sugar, divided
- 1 half-pint (6 oz) blueberries (see note)
- 4 half-pints (24 oz) raspberries (see note)
Instructions
For the Cake
- Preheat the oven to 350°F (175°C) and set an oven rack in the middle position. Butter and flour a 9 x 13-in (23 x 33-cm) metal pan, or use nonstick cooking spray with flour in it, such as Baker's Joy or Pam with Flour.
- In a medium bowl, whisk together the flour, salt and baking soda. Set aside.
- In the bowl of an electric mixer fitted with the paddle attachment (or beaters), beat the butter and sugar on medium speed until light and fluffy, about 5 minutes. Beat in the vanilla, then beat in the eggs, one at a time, scraping down the sides of the bowl as necessary. (Don't worry if the batter looks a little curdled at this point.)
- Reduce the speed to low, then beat in one-third of the flour mixture, followed by half of the buttermilk. Scrape down the sides and bottom of the bowl, then add another third of the flour, followed by the remaining buttermilk. Beat in the remaining flour, then scrape down the bowl and beat again until the batter is evenly combined. Do not overmix.
- Scrape the batter into the prepared baking pan and bake for 30 to 35 minutes, until the cake is set and lightly golden around the edges, and a toothpick inserted into the center comes out clean. Set the cake on a wire rack to cool completely.
For the Frosting and Topping
- In the bowl of a stand mixer fitted with the paddle attachment (or large bowl if using a hand mixer), combine the cream cheese, butter, vanilla, and salt. Mix on low speed until combined, then increase the speed to medium-high and beat until aerated and light, about 2 minutes. Gradually add 4 cups (460 g) of the confectioners' sugar, mixing on low speed to combine. Once the confectioners' sugar is mixed in, increase the speed to medium-high and beat until fluffy, about 1 minute. Set aside 1 tablespoon of the frosting (you'll need it for the blueberry "stars.")
- When the cake is completely cool, use an offset spatula to spread the frosting evenly over top. The frosting won't show so no need to fuss over making it perfect.
- Outline the "stars" section on the upper left corner of the cake with a toothpick (or skip this step and just eyeball it) and fill with a generous layer of blueberries. Dip a small handful of the remaining blueberries in the reserved frosting, and then in the remaining 1½ cups (170 g) of confectioners' sugar to make white "stars." Evenly scatter the "stars" over the section of blueberries. Arrange 1 row of raspberries across the top of the cake, laying them sideways, like a red stripe. Gently roll the next row of raspberries in the confectioners' sugar to make a white stripe, and alternate until the flag is completed. (I suggest using one hand for rolling and one for placing; if any powdered sugar accidentally gets on the red "stripes," use your fingertip to dab the berries lightly with water, and it will come right off. )
- Cut the cake into squares and serve directly from the pan.
Notes
- Check out an easy method for how to make buttermilk using milk and lemon juice or vinegar.
- The berries should be dry before decorating the cake. (In general, I don't rinse raspberries because they are so delicate.)
- Make-Ahead Instructions: The cake itself can be made one day ahead of time. Cover with plastic wrap and store at room temperature. Frost and decorate the cake before serving.
Nutrition Information
This website is written and produced for informational purposes only. I am not a certified nutritionist and the nutritional data on this site has not been evaluated or approved by a nutritionist or the Food and Drug Administration. Nutritional information is offered as a courtesy and should not be construed as a guarantee. The data is calculated through an online nutritional calculator, Edamam.com. Although I do my best to provide accurate nutritional information, these figures should be considered estimates only. Varying factors such as product types or brands purchased, natural fluctuations in fresh produce, and the way ingredients are processed change the effective nutritional information in any given recipe. Furthermore, different online calculators provide different results depending on their own nutrition fact sources and algorithms. To obtain the most accurate nutritional information in a given recipe, you should calculate the nutritional information with the actual ingredients used in your recipe, using your preferred nutrition calculator.
Fun cake to make for a crowd. Delicious and enjoyed by all. Happy 4th!
Well, my cake is still baking as well past the timeframe of what you said was the right time. So I am praying that this is going to taste. OK. I’m not sure what’s going on. I have a new oven as in last five years so it’s not an old one not sure what’s going on, but I’m praying it’s going to be good.
This cake looks great! I plan on making it today. I’m wondering, can I add frozen berries in the batter before baking?
Hi Abby, I think I’m probably weighing in too late (sorry!), but I don’t recommend adding berries to the batter. Berries will add liquid, which will impact the wet to dry ratios of the cake.
This cake is absolutely amazing, can I use this batter and add additions like pistachios etc? 💚 loving your recipes from NH Jenn!
Sure, that should be fine (and glad you like it)!
Best. Cake. Ever. I made it for our church coffee hour, and it was a huge hit! Thank you for this wonderful recipe!