22 Quick and Easy Recipes in 30 Minutes (or less) + 5 Chef Secrets To Make You A Better Cook!

Pumpkin Cheesecake with Gingersnap Crust and Caramel Sauce

Tested & Perfected Recipes

This post may contain affiliate links. Read my full disclosure policy.

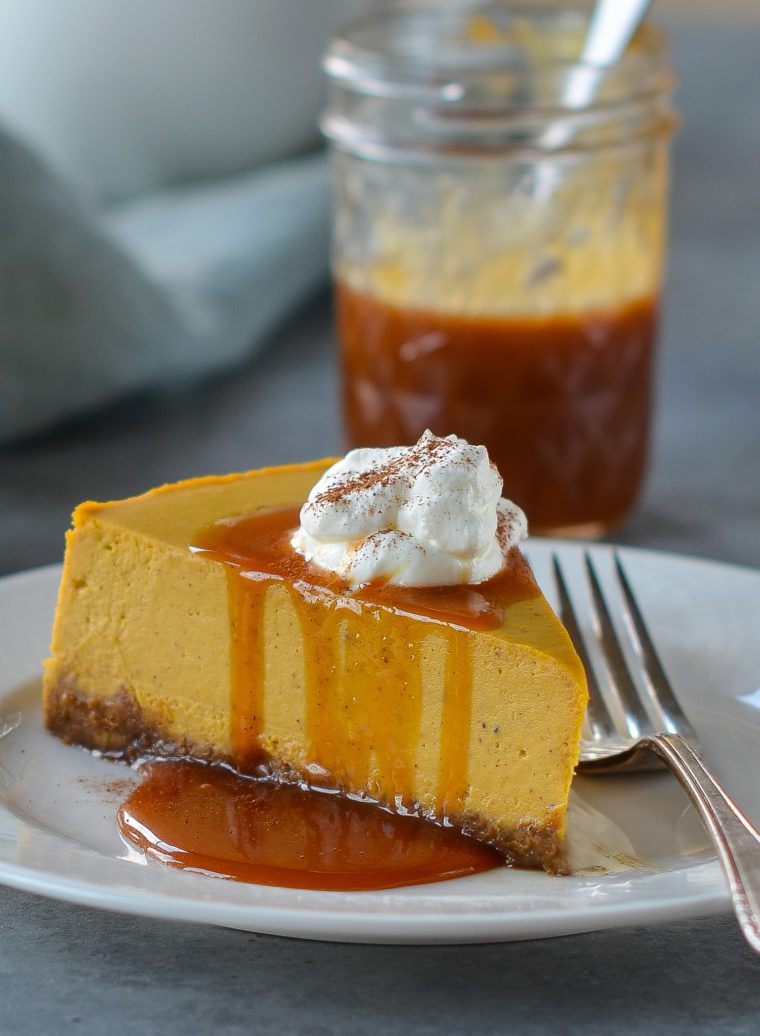
This pumpkin cheesecake is the ultimate sweet ending to your Thanksgiving feast — and no one will miss the pumpkin pie.

Slice of pumpkin cheesecake dripping with caramel sauce.

Pumpkin pie is always expected at Thanksgiving, but pumpkin cheesecake is just as festive and, honestly, so much more delicious. I promise no one will miss the pie! Instead of the traditional cheesecake graham cracker crust, I use a gingersnap crust to echo the spices in the filling and bring out the pumpkin flavor. I also borrow a genius technique from Rose Levy Beranbaum to cook down the pumpkin purée to intensify the flavor. The homemade caramel sauce comes from Cook’s Illustrated. It’s optional but 100% worth making, and you’ll be happy to know that it takes less than 10 minutes in the microwave.

Making cheesecake is not hard—there are very few ingredients—but it can be a little intimidating because cheesecakes need to baked in a water bath so they cook evenly and don’t crack. This seems fussy but it’s really not a big deal; all you do is set the cake pan in another larger pan and fill the larger pan with water. I walk you through the whole process below. Let’s get started!

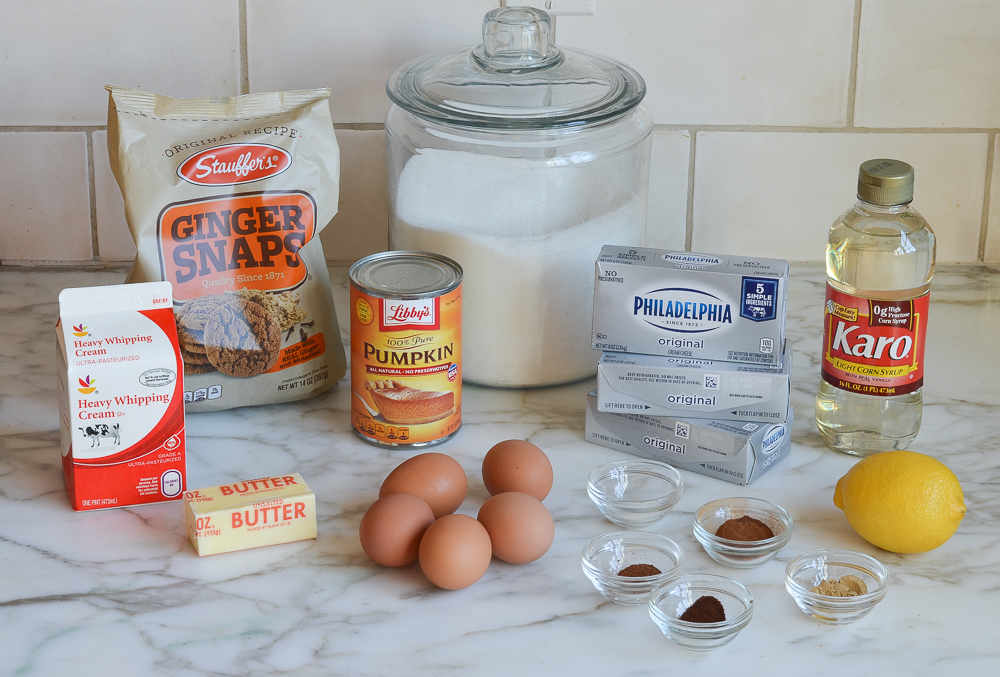
What you’ll need to make pumpkin cheesecake

Cheesecake ingredients including pumpkin puree, ginger snaps, and cream cheese.

Step-by-Step Instructions

Begin by wrapping a 9- or 10-inch springform pan with a double layer of aluminum foil. It’s important to use heavy-duty foil because it comes in wider sheets and does a better job of preventing water from seeping into the pan. (If you’d like to try another technique that doesn’t require wrapping the pan in foil, get more guidance here.) Spray the pan with nonstick cooking spray.
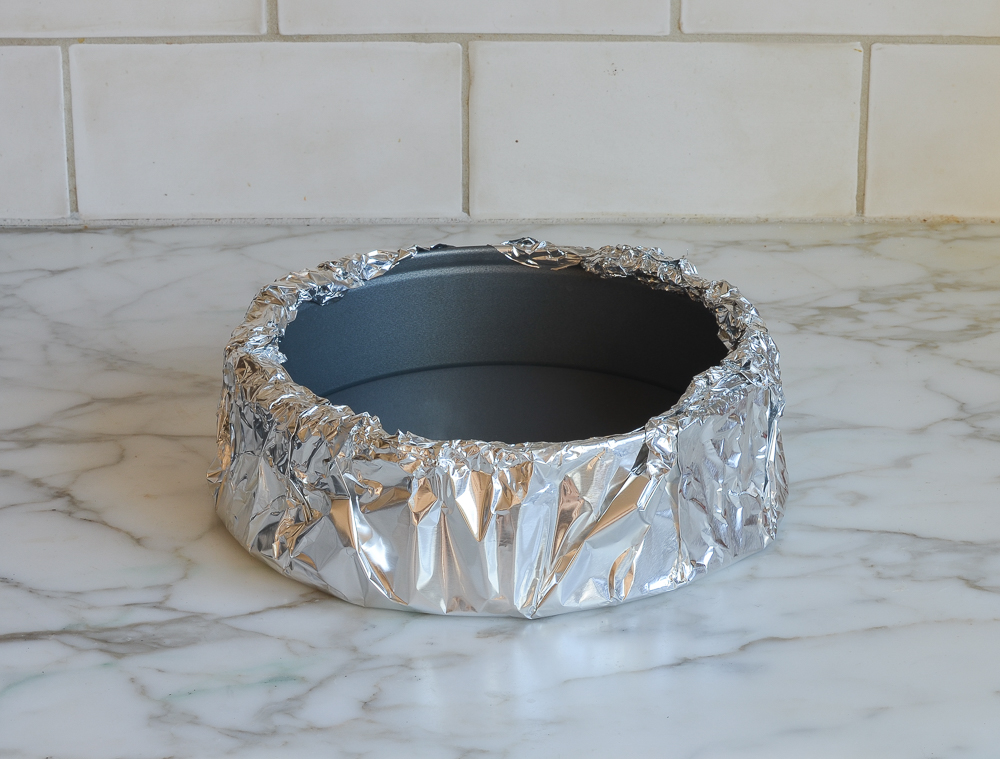
Springform pan wrapped in aluminum foil.

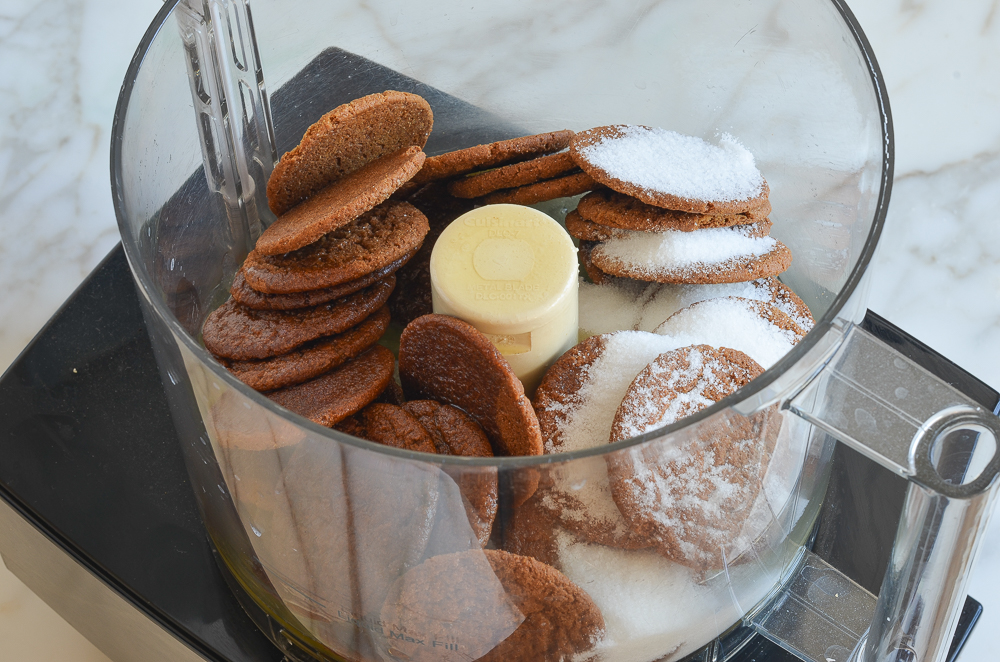
Next, make the crust: combine the gingersnaps, sugar, and melted butter in a food processor.

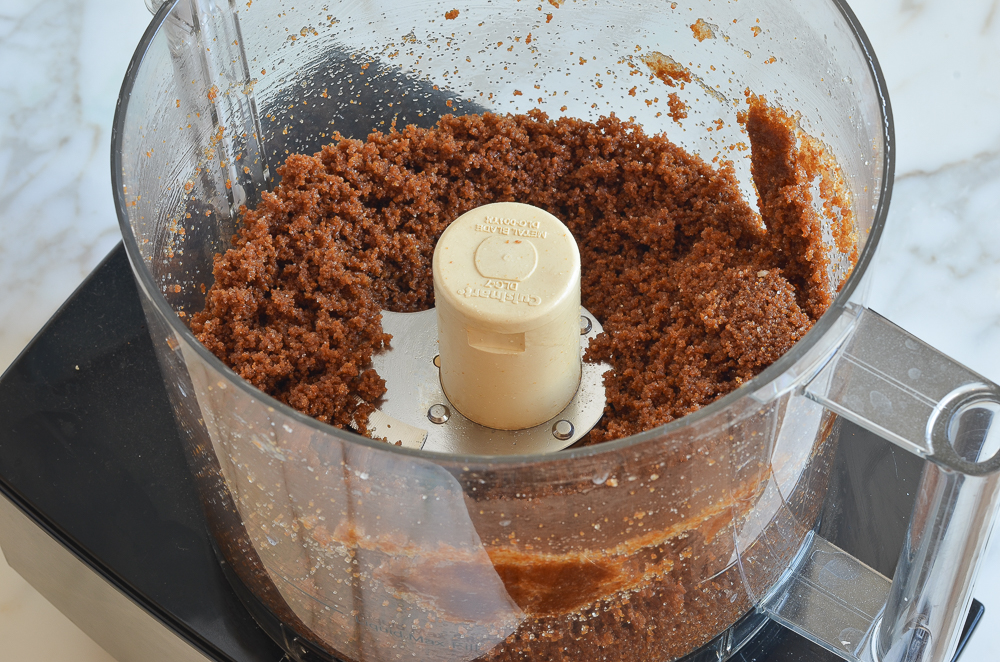
Food processor full of ginger snaps and sugar. Pulse until the crumbs are fine.

Ginger snap crumbs in a food processor.

Transfer the crumbs to the prepared pan. Press the crumbs into an even layer, then bake for 15 minutes.
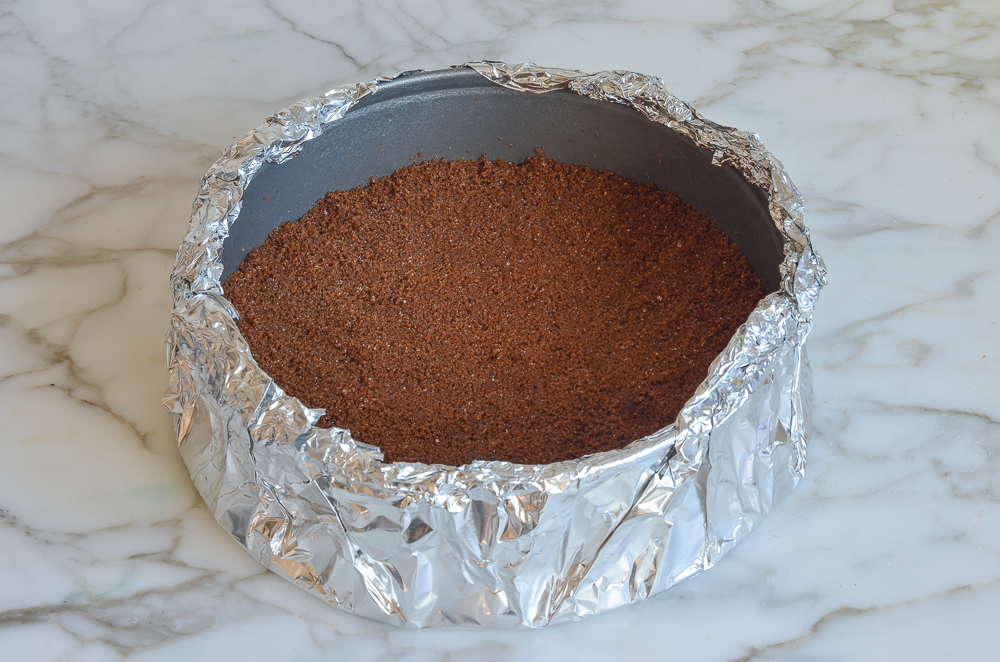
 

Foil-wrapped pan with a ginger snap crust.

Set the crust aside to cool, and move on to the filling. Combine the pumpkin, sugar and spices in a medium saucepan.
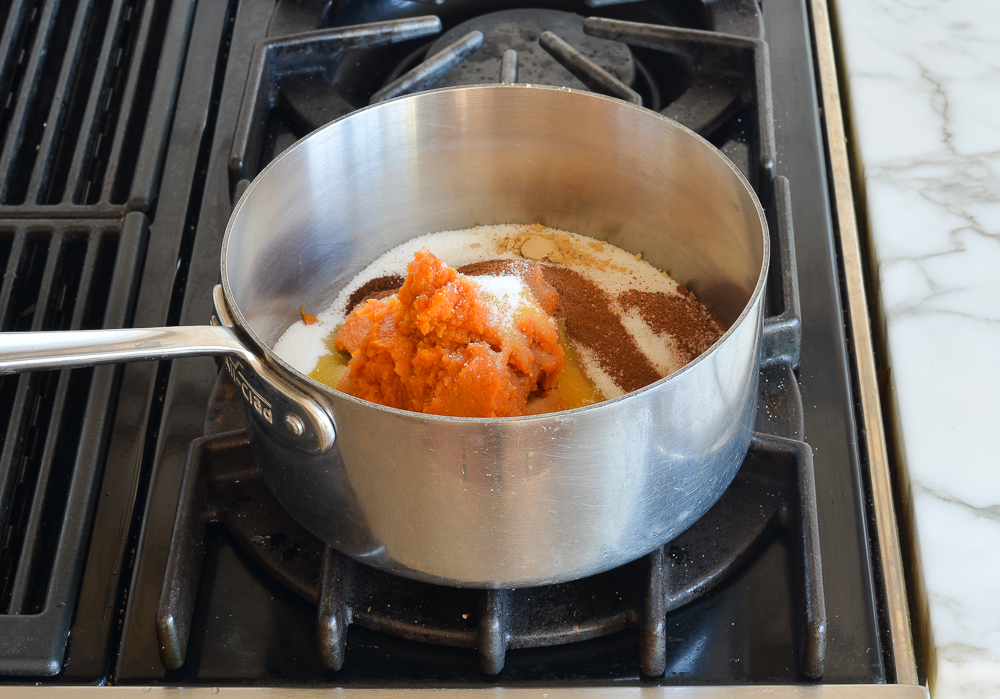
Pumpkin, sugar, and spices in a pan. Stir over medium heat until shiny, bronze, and thickened. This step, borrowed from Rose Levy Beranbaum’s recipe, both intensifies the pumpkin flavor and dries the pumpkin out.
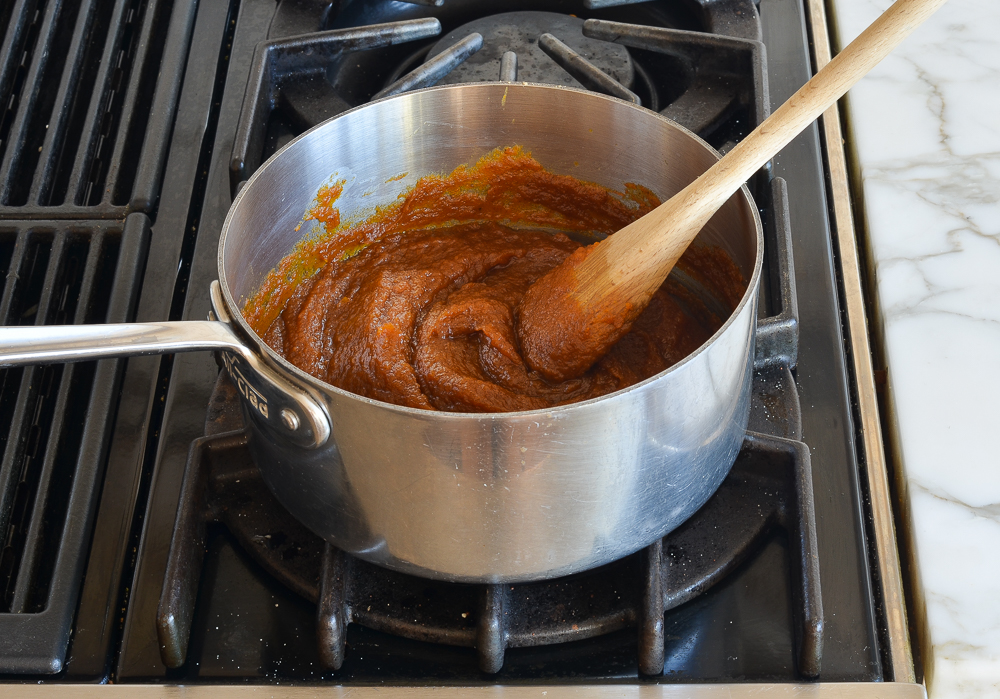
Wooden spoon mixing filling ingredients in a pan.

Next, transfer the pumpkin mixture to a food processor and run for one minute to smooth and cool the mixture.
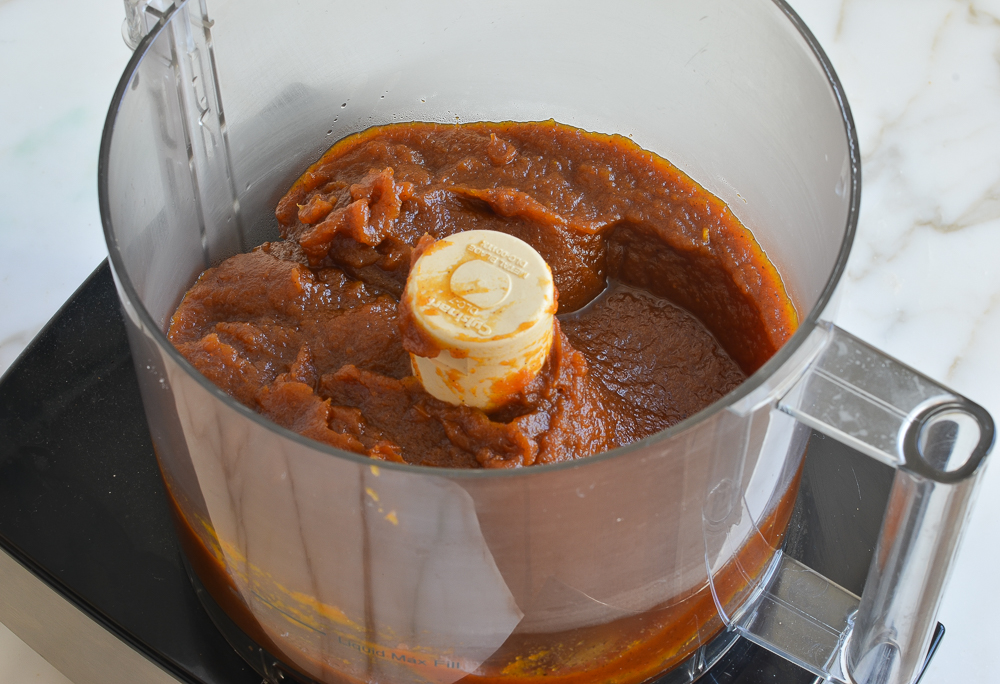
Pumpkin mixture in a food processor.

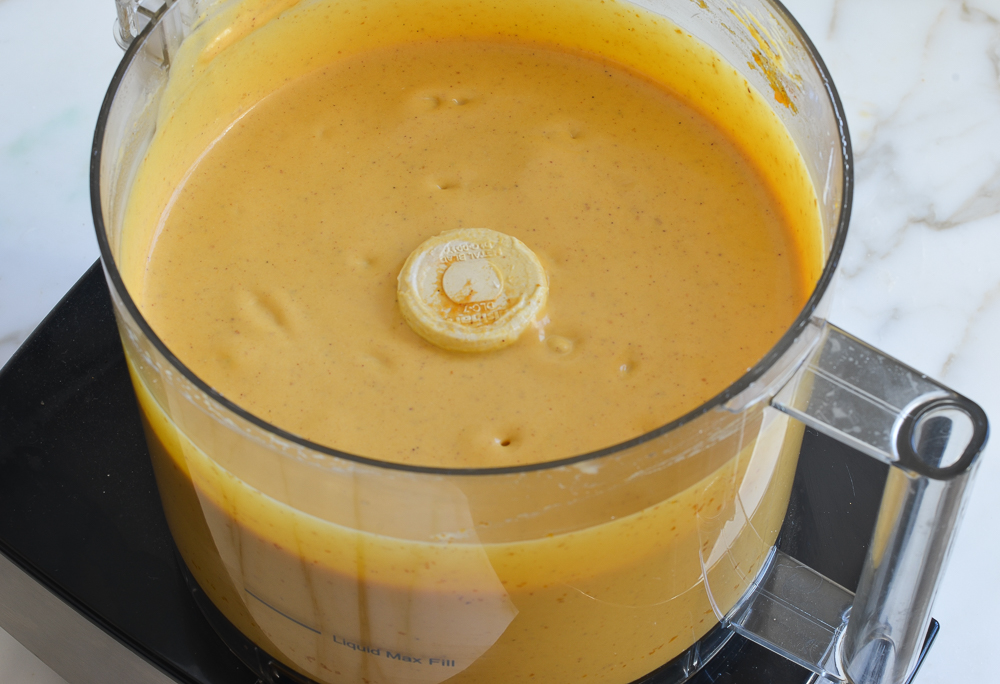
With the motor running, add the cold heavy cream. The mixture will look like this.
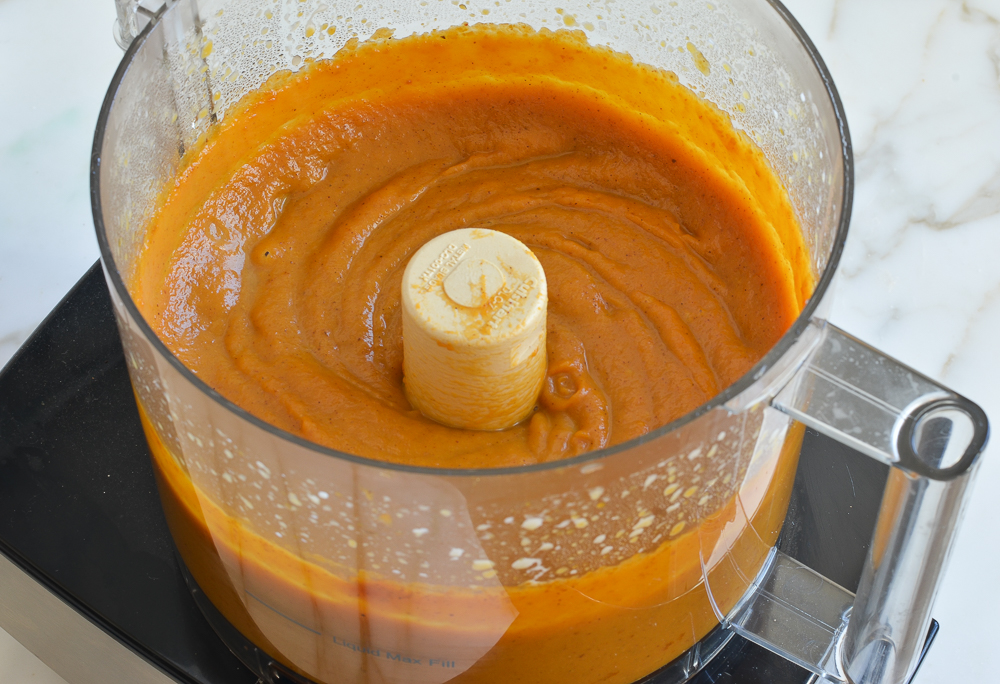
Burnt orange mixture in a food processor.

Add the cream cheese in large chunks.
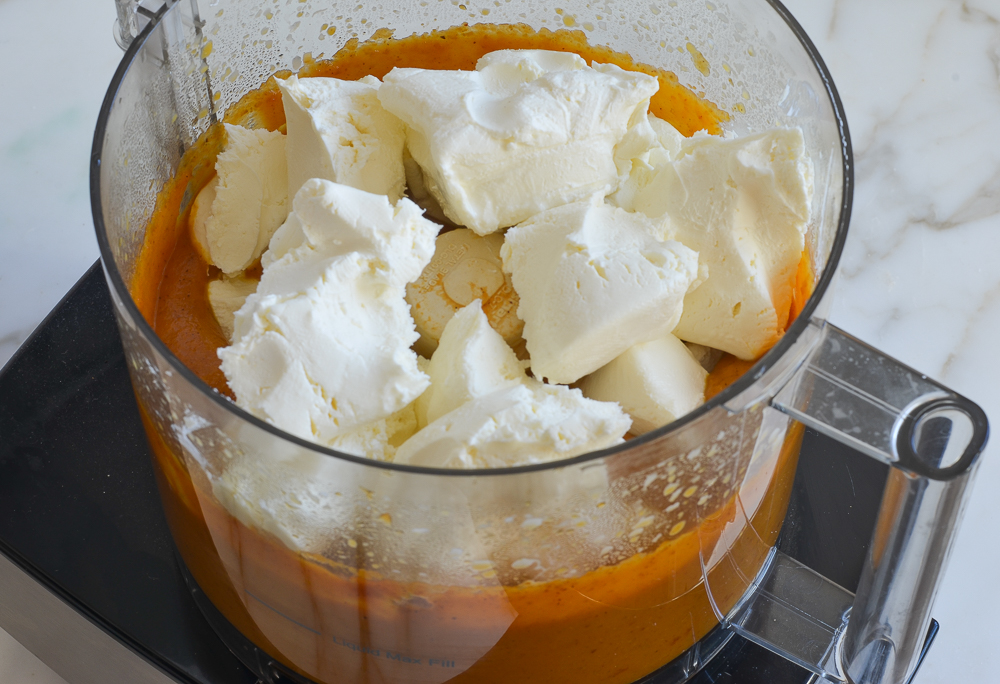
Chunks of cream cheese in a food processor.

Process until smooth.

Light orange mixture in a food processor.

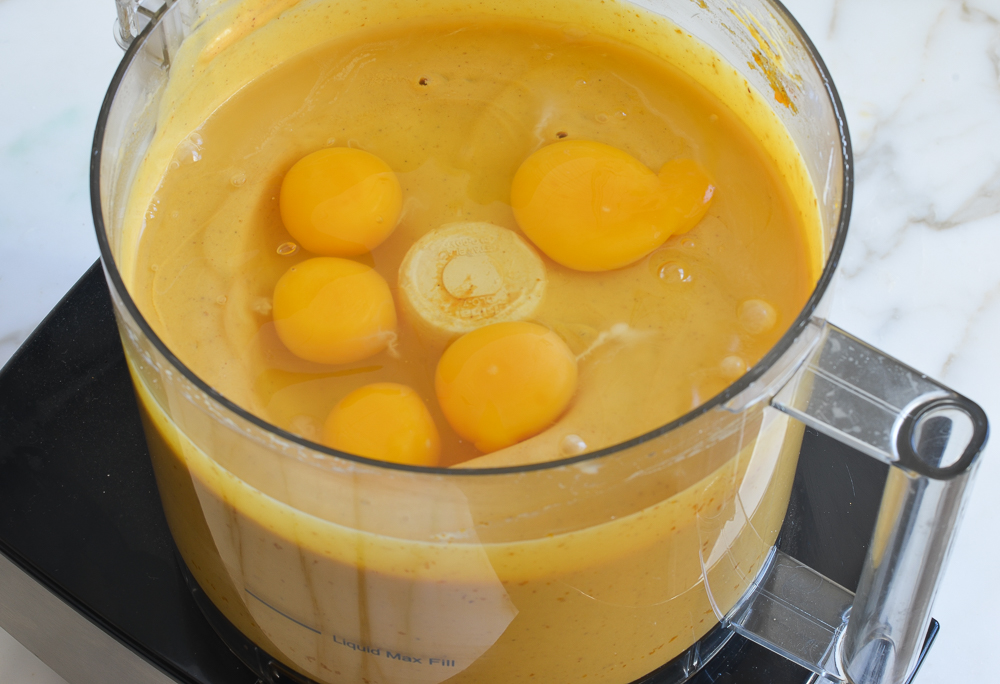
Finally, add the eggs.

Eggs on a light orange mixture in a food processor.Pulse until just combined. It’s important not to over-mix — if you incorporate too much air into the filling, it will rise and crack or fall when it bakes.
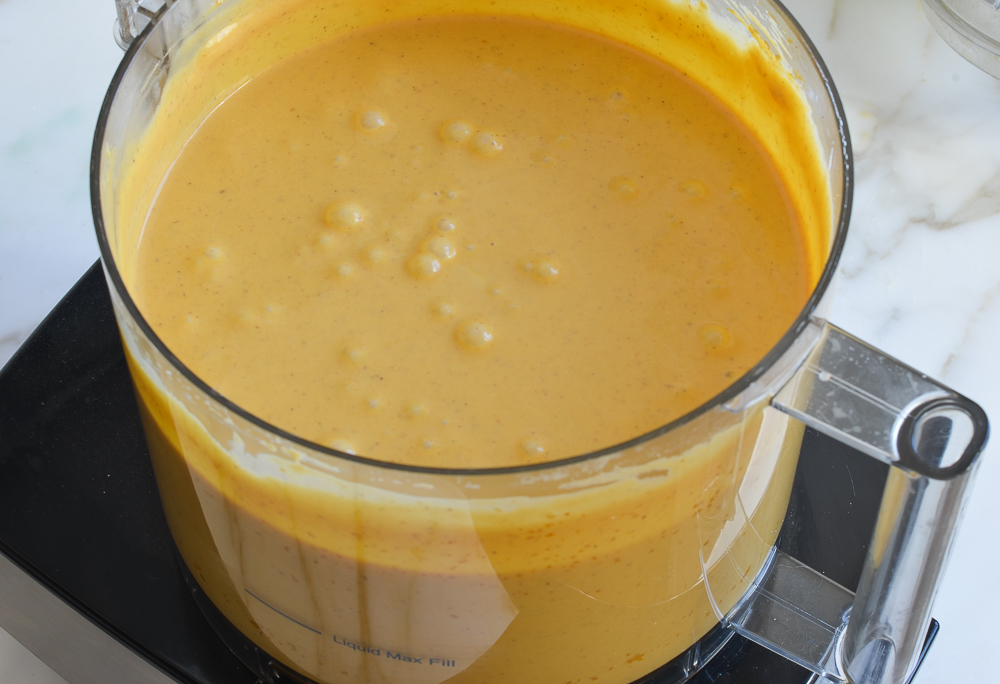
Light orange mixture in a food processor.

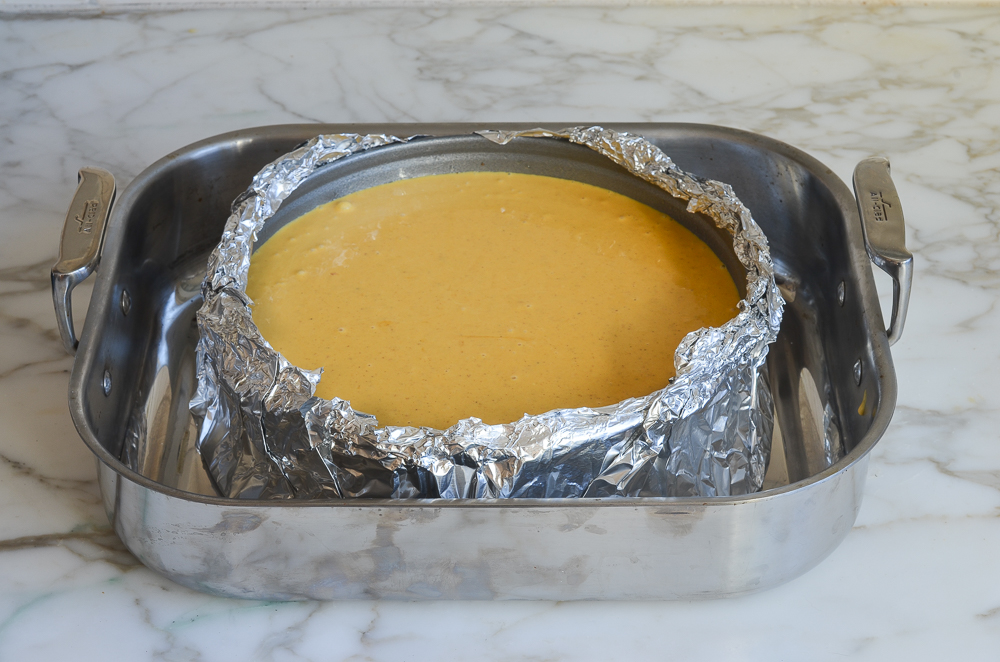
Set the cake pan in a large roasting pan, then pour the filling into the cooled crust.

Light pumpkin mixture in a foil-wrapped pan set in a roasting pan.

Next, pour hot water into the roasting pan until it reaches about halfway up the side of the springform pan.
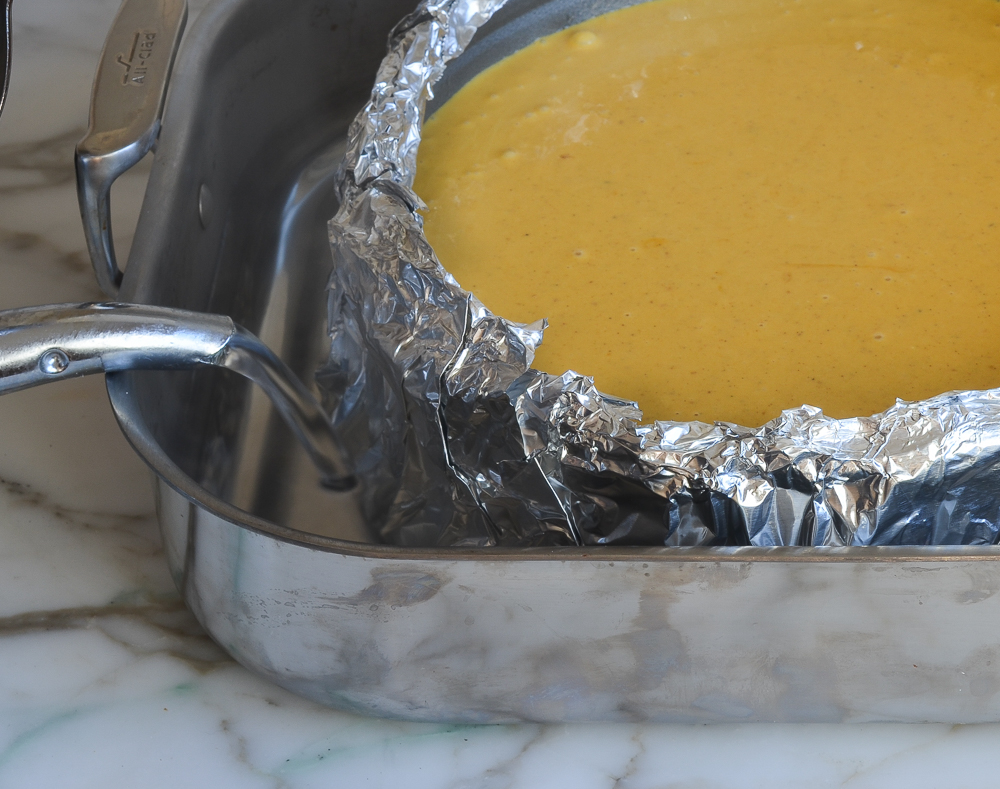
Foil-wrapped pan in a roasting pan with water.

Bake in a 325°F-oven until just set, about 1-1/2 to 1-3/4 hours. A properly cooked cheesecake will jiggle a bit when you nudge the pan, but if the center still seems liquidy, it’s not done.
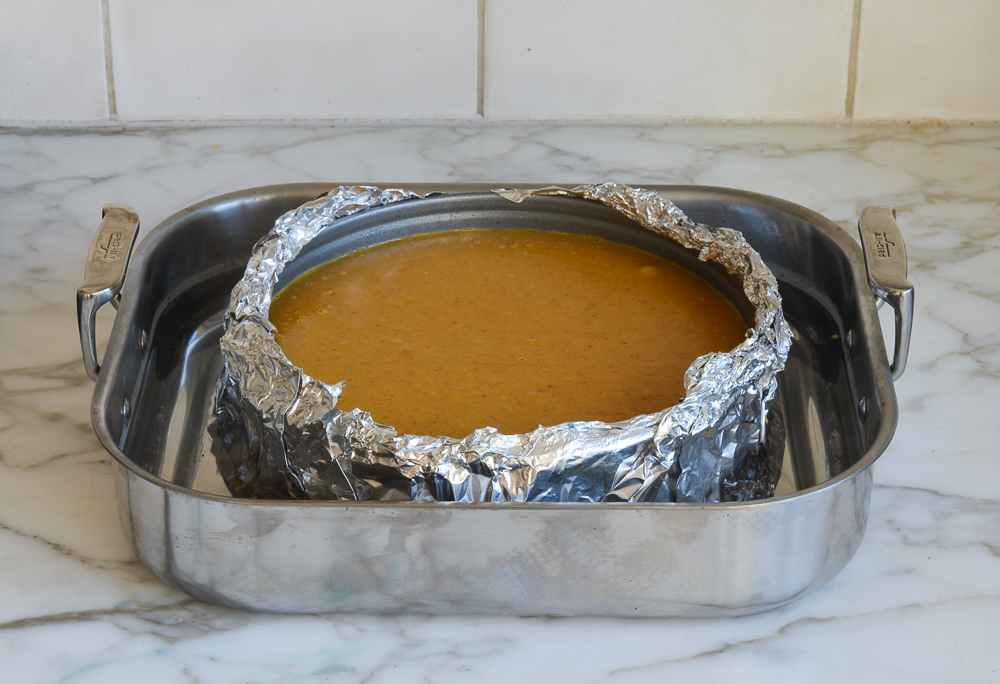
Pumpkin cheesecake in a foil-wrapped pan.

Let the cheesecake cool in the water bath, then leave it out on a rack to cool completely. Finally, cover and refrigerate until chilled — at least four hours or overnight. On that note, it’s a good idea to bake this cake a day ahead of time or early in the morning on the day you plan to serve it.
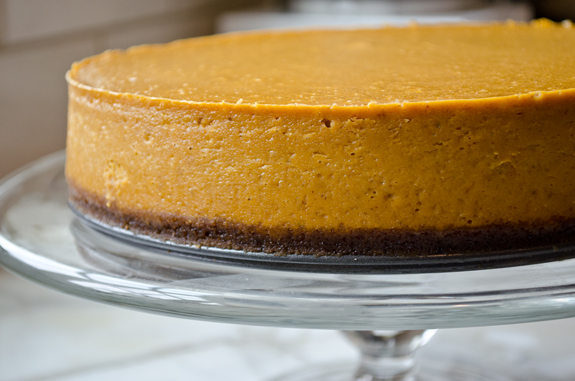
Pumpkin cheesecake on an elevated glass dish.

For the homemade caramel sauce — which is optional yet oh so good — I recommend a very simple recipe from Cooks Illustrated, which takes less than 10 minutes to make in the microwave and requires no fancy equipment or candy thermometers.

Begin by combining the sugar with the corn syrup, water and lemon juice in a microwave safe bowl or measuring cup. Be sure it holds at least 2 cups of liquid so the mixture doesn’t boil over.

Spoon in a measuring cup with a sugar mixture.

Microwave the mixture for 4-8 minutes, until the mixture is pale yellow in color. Check it frequently after four minutes; if it gets too dark, the caramel sauce will burn. It should look like this.

Pale yellow mixture in a measuring cup.

Let the caramel sit undisturbed for about five minutes and it will gradually darken to a rich amber color.

Amber mixture in a measuring cup.

At this point, stir in the hot heavy cream little by little. It will bubble up vigorously but shouldn’t overflow.

Spoon in a measuring cup with heavy cream.

Finally, stir in the butter.

Butter melting into a measuring cup with amber liquid.

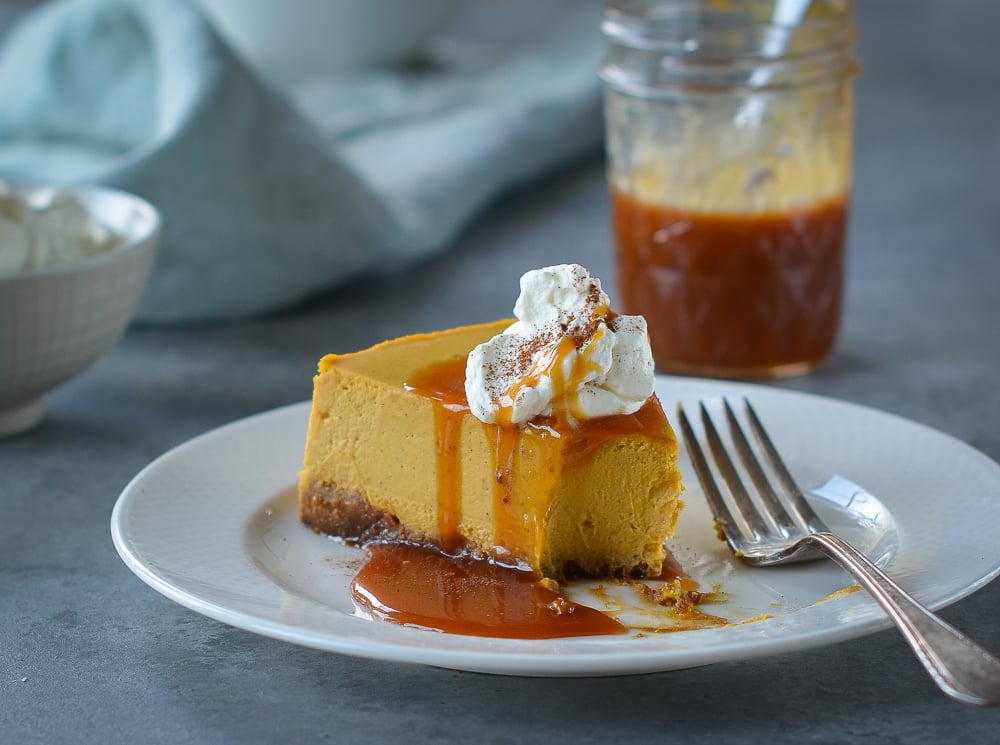
When you’re ready to serve the cheesecake, warm up the caramel sauce (it stiffens as it sits) and thin it with more heavy cream if necessary. Drizzle the caramel sauce over the each piece of cheesecake and top with a dollop of sweetened whipped cream and a light dusting of cinnamon if desired. Enjoy and Happy Thanksgiving!

Slice of pumpkin cheesecake topped with caramel.

You may also like

Pumpkin Cheesecake with Gingersnap Crust and Caramel Sauce

This pumpkin cheesecake is the ultimate sweet ending to your Thanksgiving feast — and no one will miss the pumpkin pie.

Servings: Makes one 9- or 10-inch cake, serving 12
Total Time: 2 Hours

Ingredients

For the Crust

  • 7½ ounces gingersnaps (or 1½ cups finely ground gingersnap crumbs)
  • ¼ cup granulated sugar
  • 4 tablespoons unsalted butter, melted

For the Filling

  • 1 15-ounce can pumpkin (such as Libby's)
  • 1⅓ cups granulated sugar
  • 1 teaspoon ground cinnamon
  • ½ teaspoon ground ginger
  • ¼ teaspoon ground nutmeg
  • ¼ teaspoon ground cloves
  • ½ teaspoon salt
  • 1 cup heavy cream, cold
  • 1½ pounds (three 8-ounce packages) cream cheese, room temperature
  • 5 large eggs, room temperature
  • Special equipment: 9- or 10-inch springform pan; 18-inch heavy-duty aluminum foil

For the Caramel Sauce

  • 1 cup granulated sugar
  • 2 tablespoons light corn syrup
  • 2 tablespoons water
  • ⅛ teaspoon lemon juice
  • ½ cup heavy cream, plus more if necessary
  • 1 tablespoon unsalted butter

Instructions

For the Crust

  1. Preheat the oven to 325°F degrees and set a rack in the lower middle position. Wrap a 9- or 10-inch springform pan with with one large piece of heavy-duty aluminum foil, covering the underside and extending all the way to the top so there are no seams on the bottom or sides of the pan. Repeat with another sheet of foil for insurance. Spray the inside of the pan with nonstick cooking spray. Pulse the gingersnaps, sugar, and melted butter in a food processor fitted with the metal blade until finely ground. Transfer the moistened crumbs into the prepared pan and press into an even layer. Bake until fragrant and set, about 15 minutes. Cool on a wire rack while you prepare the filling.

For the Filling

  1. Set a kettle of water to boil (this will be used for the water bath). In a small, heavy saucepan, stir together the pumpkin, sugar, cinnamon, ginger, nutmeg, cloves, and salt. Over medium heat, bring the mixture to a sputter, stirring constantly. Reduce the heat to medium-low and cook, stirring constantly, for 5 minutes, until thick, bronzed and shiny. Scrape the mixture into a large food processor fitted with the metal blade and process for 1 minute with the feed tube open.
  2. With the motor running, add the cold cream. Add the cream cheese (cut into chunks) and process for about 30 seconds, scraping the sides if necessary, or until smoothly incorporated. Add the eggs and process for about 5 seconds or just until incorporated (do not overmix!).
  3. Set the cake pan in a large roasting pan. Pour the batter into the cooled crust, and then pour enough boiling water into the large roasting pan to come about halfway up side of the cake pan. Bake until the cake is just set, 1½ to 1¾ hours. A properly cooked cheesecake will jiggle a bit when you nudge the pan, but if the center seems at all liquidy, it's not done. CAREFULLY remove the roasting pan from the oven and set on a wire rack. Run a sharp paring knife around the edges to loosen the cake from the sides of the pan. Cool until the water is just warm, about 45 minutes. Remove the springform pan from the water bath, discard the foil and set on a wire rack. Continue to cool at room temperature until barely warm, about 3 hours. Cover with plastic wrap and refrigerate until chilled, at least 4 hours or overnight.

For the Caramel Sauce

  1. Stir the sugar, corn syrup, water and lemon juice together in a 2-cup microwave-safe measuring cup or medium glass bowl. Microwave until the caramel is pale yellow, or just barely starting to take on some color, 4-8 minutes (depending on the strength of your microwave). It's fine to stop and open the microwave to check often; just don't let it get too dark or it will burn. Let the caramel sit for 5 minutes -- it will gradually turn a rich amber color. (If after five minutes, it's not dark enough, place it back in the microwave for thirty seconds or so, then let it darken again. If it gets too dark, start over.)
  2. In the meantime, heat the cream in the microwave until hot. Once the caramel reaches the right color, immediately stir in the hot cream a few tablespoons at a time. It will bubble up intensely, but it won't overflow. After you've added all the cream, stir to incorporate then add the butter. Add more cream if the mixture seems too thick. Once the caramel cools, you can store it in your fridge.

For Serving

  1. Remove the outer ring from the springform pan. Slide a thin metal spatula between the crust and pan bottom to loosen, then slide the cheesecake onto a serving platter. (Alternatively, you can keep it on the pan bottom.) If there is condensation on the top of the cheesecake, blot it gently with a flat paper towel. Let the cheesecake stand at room temperature for about 30 minutes, then cut it into wedges. Warm up the caramel sauce in the microwave (it stiffens in the fridge). If it's too thick, add more heavy cream to thin it out. Drizzle the caramel sauce over each piece of cheesecake and top with a dollop of sweetened whipped cream if desired.
  2. Note: You'll need a large food processor -- preferably with a 14-cup capacity -- to make the filling (you can also use an 11-cup, but you may have a bit of leakage). If you don't have one, it's fine to use a Kitchenaid Mixer or electric beaters for the filling and a small food processor for the crust.
  3. Freezer-Friendly Instructions: The cheesecake can be frozen for up to 3 months. To freeze: place the cake in the freezer briefly, unwrapped, to firm it up. Then double-wrap it tightly with aluminum foil or plastic freezer wrap, or place it in heavy-duty freezer bag. Thaw in the refrigerator the night before you plan to eat it.

Nutrition Information

Powered by Edamam

  • Per serving (12 servings)
  • Serving size: 1 slice
  • Calories: 643
  • Fat: 40g
  • Saturated fat: 23g
  • Carbohydrates: 66g
  • Sugar: 54g
  • Fiber: 1g
  • Protein: 8g
  • Sodium: 397mg
  • Cholesterol: 196mg

This website is written and produced for informational purposes only. I am not a certified nutritionist and the nutritional data on this site has not been evaluated or approved by a nutritionist or the Food and Drug Administration. Nutritional information is offered as a courtesy and should not be construed as a guarantee. The data is calculated through an online nutritional calculator, Edamam.com. Although I do my best to provide accurate nutritional information, these figures should be considered estimates only. Varying factors such as product types or brands purchased, natural fluctuations in fresh produce, and the way ingredients are processed change the effective nutritional information in any given recipe. Furthermore, different online calculators provide different results depending on their own nutrition fact sources and algorithms. To obtain the most accurate nutritional information in a given recipe, you should calculate the nutritional information with the actual ingredients used in your recipe, using your preferred nutrition calculator.

See more recipes:

Comments

  • What is the best way to slice a cheesecake? Many years ago I read a suggestion to use dental floss.

    • Hi Phyllis, I like to slice it with a sharp knife, wiping the knife clean between slices. (I’ve never tried it with dental floss so I can’t compare.)

  • Hi Jenn,
    I love your website and have your cookbook, you are definitely my go to for entertaining! I was wondering if I can make the cheesecake 2 days in advance, will I risk the crust becoming moist?
    Thank you
    Diane

    • Hi Diane, thanks for your sweet words about the recipes – so glad you like then! If made ahead, this should keep nicely in the fridge for a few days, but the crust does get a little soft after about 24 hours. That said, many cheesecakes have soft crusts, so it will still be tasty. Hope that helps!

      • What temperature do you bake this?

        • Hi Pam, it gets baked at 325°F/165°C. Hope you enjoy!

  • Made this last Thanksgiving. Very good. Highly recommend. I made no changes to recipe.

  • So I recommend not trying this recipe in college dorms… almost burned them down because the ovens are old and I tried it without a water bath. Overall the recipe is good but because I wasn’t able to actually make the complete cheesecake I can’t leave a proper review. Three stars because 1) you can’t do it in dorms lol 2) you can’t do it with a very old oven and springform pan and 3) you can’t do it without a water bath (in my experience)

  • This is my family’s favourite dessert and I make it once a year on (Canadian) Thanksgiving. What a great recipe!

  • I really want to try this recipe, but I want the cheesecake to have a marbled look as opposed to being a solid color. Would it work just as well if I combine the cream cheese, cream, and eggs, and then just swirl in the pumpkin mixture?

    • Hi Jess, I’d mix half of the cheesecake batter with the pumpkin mixture and leave the other half plain, then swirl the two together. I’d love to know how it turns out!

  • This is an excellent recipe as is, but after many years of experience baking cheesecakes, here are my changes. For the crust, I cut the sugar and the butter in half. For the filling, I use 3 packages of cream cheese, cut down to about 1 cup of sugar, and add about another half cup of pumpkin since I increase the cheese. I have tried the water baths and followed others suggestions for the baking with some success and some failures. What always works perfect for me is to preheat the oven to 400 and cook for 10 minutes. Next, I shut off the oven leaving the cake in with the door closed (no peeking) for 1 hour. Then, I crack the oven door and leave it in the oven for one more hour. Next, I cool completely on the counter top and then transfer with a cover to the refrigerator for 24 to 48 hours. I rarely have even a hint of a crack in the cake and it’s cooked just perfect every time!

    • Agree. I do likewise; have never used a water bath. Don’t have cracked cheesecakes. With a cheesecake, the eggs need to slowly cook; also, too much beating incorporating air makes the cake crack and sink. It is best to stir with a whisk. Good recipe; always enjoy all the once upon a chef recipes. Just reading the web page, gets me in the kitchen. Thanks, Jenn

      • This Cheesecake I’d delicious. I made my own puree as we have a pumpkin glut on the allotment. As a UK based cook I used fresh double cream and I think next time would use extra thick double cream. All in all it is a success.

  • I made this cheesecake for thanksgiving a couple years ago and now my family won’t stop begging me to make it every year lol. It’s that good! A new holiday staple.
    Jennifer Segal you have a true talent and I’m grateful that you have shared your talent with us!

  • This is perfect as is. I followed the recipe to a T and though it was a bit time consuming overall, it was worth it in the end. It was a hit at our family Christmas gathering!

  • Making this today. Do I have to use corn syrup? I don’t really use it for any other recipes so don’t want to get it and waste the rest.

    • Yes, Samia – you do need the corn syrup. Sorry!

  • i’ve been making a pumpkin cheesecake for the past 30 years. it has wow’d guests and hosts each and every time. periodically, i do a search for new recipes, assuming mine might be outdated, or there is a new, exciting twist. yours was the one i landed on. trying it for the first time this year, and can’t wait to serve it with the sauce.
    recipe is fairly similar and all was going well until i attempted the bath (mine bakes traditionally). i thought my standard foil wrap would work with seven layers. it didn’t, and luckily, after sitting in the bath for a min, i took it out to check, only to see the water seeped in. back to traditional baking and fingers crossed.
    my only other comment…i found the page confusing, as instructions toggle between recipe and illustrations (which i love, btw). as i was adding ingredients, i kept scrolling up and down to make sure i wasn’t missing an important note for each step.

  • I am interested in making this cheesecake, but have not had very good outcomes with the water bath method. Can this be made without cooking in water?

    • Hi Michelle, For best results, I recommend the water bath. Have you had issues with water seeping in from the water bath?

      • Yes. So bummed two years ago when I made a peppermint cheesecake with brownie crust. It was a soggy mess, a very tasty one, but unserve-able.

      • The key is to use 2 layers of 18-in heavy-duty foil. You won’t have any seams, so the water can’t seep in.

        • Thank you for the tips! I did a little more research too and found the tip of using a crock pot bag. Worked like a charm. Awesome cheesecake!!

          • — Michelle Oliver
          • Reply
  • I made this for my husband’s work pot luck – I also had the seepage from the ginger snaps (it may be the type of gingersnap cookies and the crust was a bit hard but I just wiped up the oil with a paper towel. The flavor of the crust was awesome. I’ll try with another brand of gingersnaps next time…yes, there will be a next time!) This cheesecake was the first to be demolished at the pot luck- everyone loved it and are asking if I am making it for the next pot luck!. Thanks for the great directions – I really like the concentrated pumpkin flavor by cooking it and reducing the liquid.

  • I made this for Thanksgiving. The cheesecake was silky and delicious. The ginger snap crust was the perfect compliment to the pumpkin flavor. This is definitely a keeper!

  • I try not to make recipes that require special equipment, like a food processor, but really wanted to make this for thanksgiving. I tried making this cheesecake with a stand mixer and I had a really hard time incorporating the cream cheese with pumpkin mixture. I ended up putting the mixture through a sieve to make it more consistent in texture. I should have read through more reviews ahead of time for feedback on how to execute this best with a stand mixer. I probably wouldn’t make this recipe without food processor.

  • Absolutely the best pumpkin cheesecake especially when adding the caramel sauce which put it over the top. Once upon a chef is my go to blog.

  • Made this for Thanksgiving. It was very rich and creamy.

  • I made this for our Thanksgiving dessert this year. I had to cook it slightly longer then stated.
    The flavor was oh so good!!!! This is a 100% a keeper.

  • Made this pumpkin cheesecake for Thanksgiving and was a big hit! Everyone loved it and I should have made two of these so at least I could have a bite myself..lol Very easy to make and using a food processor as mixer well was a first but made it fun! And by mixing the eggs in last this was the first cheesecake that I have made that did not crack on top!! Great tip!

  • Hi Jenn – before embarking on your delicious recipe for Christmas, wondering about the reason for cooking the pumpkin/sugar/spices beforehand? Have never encountered this is other pumpkin/cheesecake recipes but will do if important for the end result. Also, will use a Kitchenaid stand mixer – any specific tips for that vs. food processor? Finally, I’ve seen many recipes that direct after cake is baked, with the heat off, propping the oven door open and leaving the cake in the oven for 45 min to 1 hour (or turning off heat, letting some escape, and leaving in oven with door closed for same time) – your thoughts on this? Sorry for all the questions – many thanks!

    • Hi Leslie, Regarding cooking the pumpkin mixture, it helps to intensify the pumpkin flavor and dries the pumpkin out. Using a mixer will work – It will just take a little more effort to make the crust– you can crush the cookies by hand. And, last, I haven’t found that it’s necessary to keep the cheesecake in the oven while it cools, but you are welcome to do this for extra insurance. Hope that helps!

  • I made this for Thanksgiving. It was the most delicious silky pumpkin cheese cake I ever made. This is a keeper. For Christmas I will try your New York style cheesecake. Will be using your recipe because you bake your cheesecake in a water bath. I am sure it will have a silky texture also.

  • This cheesecake was time consuming but well worth it! The homemade Carmel and whipped cream added the extra touch. Made the cheesecake for Thanksgiving and everyone loved it! I will definitely make it again

    • — Victoria Elliott
    • Reply
  • I took a big chance on serving this on our very traditional family’s Thanksgiving Dessert Table. It was a hit, favored far above anything else (there was a lot of really good stuff). It was the only thing my parents wanted to take home with them, and fighting ensued over the leftovers! Will definitely keep this in the rotation. Thank you!!

    • Recipe calls for way to much salt. I had to throw out the batter and start again. I thought it was too much when reading the recipe. I reduced it to 1/8 tsp from 1/2 tsp.

  • Wow! This cheesecake is off the charts good. At first, we were like, hmm it weighs like, 8 pounds, and the caramel sauce seemed a bit over the top. Then, we tasted it with the caramel sauce and couldn’t believe how amazingly delicious the combination was — pure genius! I substituted gluten-free ginger cookies from Trader Joes, but other than that, followed the recipe exactly. I kept putting the caramel sauce back in the microwave for a few seconds until it was just right — that’s a great little recipe too. This is out of this world and definitely a new favorite dessert. Make this — you won’t believe how delicious it is!

  • It was my first cheesecake. The recipe was easy to follow and it turned out perfectly! I made mine in a large Pyrex bowl with a hand mixer. I pulverized the ginger snaps with a small food processor.
    What made it more interesting and impressive to my friends is that my oven isn’t working and I baked it on a very clean Weber BBQ! Everyone loved it and asked for the recipe!

    This will become an annual tradition for me, hopefully baked in a conventional oven!

  • For the second year in a row, this cheesecake was the star of the show at Thanksgiving. This was the first cheesecake I’d ever attempted when I made it last year and it came out amazing! I will note that it took closer to 2hr 15 min in my oven for only the center to jiggle and I used a blender instead of a food processor (I had to split the pumpkin filling and add the cream cheese in 2 batches before combining the filling back together).

  • Great recipe, reducing the pumpkin is a good way to intensify flavor…everyone loved it. Using my microwave for the caramel sauce worked out well , next time will go from 4 minutes to 5, not as dark as I would have liked, just need to remember to keep stirring once cream and butter are added so it doesn’t seize.
    Many thanks

  • I was inspired to find a recipe for Pumpkin Cheesecake after having an outstanding version at a restaurant here in New Orleans. Am I ever glad I found Jenn and this recipe!!!! If you have landed here, no need to look any further for a perfectly made and absolutely delicious pumpkin cheesecake. Wow – each and every person went crazy. I have to admit I cheated on the Caramel Sauce – already had a brand new jar of the one from Fresh Market (it’s great….). Added a dash of bourbon to it when heating. (Why not, it’s the South. ). I’m sure Jenn’s version is fabulous if this cheesecake recipe is any indication. And Jenn, great job on the very precise instructions and wonderful photos . You turned this into a no-brainer. A++++++

    • — French Quarter
    • Reply
  • I have never been a big fan of pumpkin pies, but oh my!! This cheesecake was so so yummy. Everybody loved this as a Thanksgiving dessert..I overlooked the caramel sauce and it came out with a burnt taste..I need to do better in future.. Thank you Jenn!!

    • — Geetanjali Reddy
    • Reply
  • A+ recipe, i made it for Thanksgiving, including the caramel, it’s a keeper! Oink oink

  • Filling is perfect–light and not overly sweet. The crust had “issues”. When I served the dessert it was very difficult to lift each slice from the springform base. The crust was compact (almost hard) and a lot of crust stayed behind stuck to the pan. I was light-handed when patting the crumbs to form the crust so that was not the cause. I did, however, experience a considerable amount of “seepage” from the filling during the baking process. When I removed the foil from my cooled cheesecake, I had to use paper toweling to “wipe off” sticky goo from the bottom of the pan. Have never experienced this before when making a cheesecake. Wondering if my pumpkin puree might have been overly moist or if it was a high butter to crumbs ratio that caused the problems.

    • Hi Ellie, sorry you had some problems with the crust. Depending on the gingersnap cookies you use, the butter can “seep” a little from the crust, so using a paper towel to clean that up was the right move. I’m not sure why you found the crust really hard. It can be challenging to remove from the bottom of the pan – you really need to get the spatula under there. You may want to try this graham cracker crust from my cheesecake recipe if you found this one to be challenging.

  • This was my very first cheesecake to make from scratch and out of all times i tried it for Thanksgiving day. Well I was really nervous but it came out very good. I got a lot of compliments all evening. This is definitely a do over and highly recommend this recipe.

  • Thanks for this great recipe. Just for anyone else who may be wondering, this can be done as individual cheesecake jars in a sous vide. I used the recipe without alteration, baked the crusts 10min@350F in 4oz Mason jars, added filling, then sous vide 90min@176F. Instead of the Carmel sauce, I also just made a can of dulce du leche from sweetened condensed milk. Only takes 50 min in a pressure cooker, and is done the same time as the cheesecakes.

    Overall though the flavor and texture of the cheesecake was fantastic. People are still asking for more.

  • This was the second best cheesecake I’ve made, but almost made first place.

    • — Tamera Parrish
    • Reply
  • My caramel sauce never darkened… instead it’s the color of melted butter lol. What did I do wrong? I followed the directions, except I initially had it warmed up in a ceramic bowl instead of a glass bowl…

    • Sorry to hear you had a problem with the caramel sauce, Tracee! Did you let it sit for about 5 minutes after microwaving it?

  • I had to bake it for about 2 hours and the top of the cheesecake isn’t burnt but now has brown spots as though it is…. how did you make yours so pretty??

    • Hi TDS, I’m guessing you cooked it a little too long – I know it’s very hard to tell when cheesecake is done. The good news is that it won’t affect the taste. I would just swirl some whipped cream on top before serving and no one will know. 🙂

  • It’s Thanksgiving eve at 10:45pm and I just took the cheesecake out of the oven. I still have to wait the 45 minutes to take it out of the water bath, but after that is it okay to leave on the wire rack to cool till the morning or do I need to stay up another 3 hours? Please note to those who bake at night, this recipe is best during the daytime.

    • No need to stay up, Angela – I would just put it in the fridge after the initial cooling in the water bath.

  • Hi there – About how long should the pumpkin cheesecake take to cool in the water bath?

    • Hi Annetta, It should cool in the water bath for about 45 minutes.

  • The instructions for this recipe say to bring 4 quarts of water to boil in a kettle. First of all, 4 quarts is a gallon, so it would make more sense to advise people to choose a pot large enough to accommodate a gallon of water. Because, I would imagine, a lot of people don’t own a tea kettle with a one gallon capacity.

    • Thanks for catching that, Jessica – it has been corrected. 🙂

  • Hi Jen — HELP!! I’m in the midst of a Thanksgiving marathon, baking so many of
    your delicious recipes! The bourbon pecan pie looks & smells delicious,
    and the apple pie bottom crust is blind-baking. But I have 2 urgent issues:
    (1) I’m considering whether to wait until tomorrow to fill the crust with your
    apple mixture that I’ve already prepared & bake it then, or just go ahead and
    finish baking it today & keep it out on the counter until tomorrow’s feast.
    (3)Your wonderful pumpkin cheesecake which I’ve made previously has for
    some reason developed a brown “skin” and cracks on the top — not too
    appetizing looking. I can’t figure out what caused that, or if there’s anything
    I can do about it, other than perhaps covering it up with whipped cream.
    And also, most frustratingly, after double wrapping the springform pan with
    large size heavy duty aluminum foil, when I removed it after cooking, I
    discovered water inside!!! Such a bummer! So surely the crust will be
    soggy…..These issues must obviously be caused by some error on my part —
    do you have any magic tricks to fix these issues? Thanks so much for your
    helpfulness!

    • Hi Toni, I would just make the apple pie today and leave it on the countertop. It will be just as good and you can cross it off your list. It sounds like maybe the pumpkin cheesecake was cooked a little too long or at too high of a temperature (ovens can fluctuate) but that’s not a big deal. Just swirl some whipped cream on top and sprinkle with cinnamon before bringing to the table…it will look pretty and no one will know. Don’t worry about the water seeping in — I can tell you from experience that it doesn’t make that much of a difference. The crust softens a bit overnight in the fridge anyway. Hope that helps and happy Thanksgiving!

  • So, I am about to make this Pumpkin Cheesecake and I wonder if I am missing something. The recipe calls for sugar, but is that amount divided into two parts? One for the crust and one part for the cheesecake?

    • Hi Jenny- You’re not missing anything; you’ll need 1/4 cup sugar for the crust, 1 & 1/3 cups for the filling, and 1 cup for the caramel sauce. Hope that clarifies!

  • I have a new steam oven, do you know if that will work in lieu of a water bath. Love this recipe I made it last year for Thanksgiving. Thank you

    • Hi Betty, I’ve never used a steam oven so I can’t say for sure. I googled it and found this video which makes it look like a water bath isn’t needed (but I can’t say for sure as I’ve never tried it)! Please let me know how it turns out. 🙂

      • Thank you for your quick response. The cheesecake is in the oven now. It has a small crack on the top but looks fine otherwise. I think there is a learning curve for the oven. I just had it installed last week, mine oven quit working and desperately needed one for Thanksgiving. Thanks for all of your great recipes we can trust. Betty

  • I made this recipe for a good friend for Thanksgiving. Everything fine but there was butter that oozed and the cheesecake pan bottom was greasy. I used the roaster pan and no water got through. Any ideas?

    • Hi Paula, Sorry to hear that — it can happen sometimes. I’d suggest cutting back on the butter just a bit next time.

  • Hi Jen!
    I’m planning to make this for Thanksgiving, but I don’t own a roasting pan (for the water bath). Can I use a rimmed cookie sheet or is it essential that the water go halfway up the side of the cake pan? This would be my first cheesecake (eek!).
    Thanks in advance! Excited to make 3 of your recipes this Thanksgiving. 🙂
    Flo

    • Hi Flo, You really do need a roasting pan – maybe try a disposable aluminum one? Hope that helps and Happy Thanksgiving!

  • If I made this on Sunday for Thanksgiving Thursday should it be frozen or can it just be refrigerated.

    Thanks in advance.

    • Hi Beth, I’d just refrigerate it. Happy Thanksgiving!

  • Hi — recipe looks fabulous! Can it be converted to a 10-inch springform pan?

    • — Erika Schleifman
    • Reply
    • Hi Erika, I’m afraid it can’t be easily converted to a 10-in pan. Sorry!

      • Hello! This looks amazing and I can’t wait to make this tonight! As per the instructions it states “Begin by wrapping a 9- or 10-inch springform pan” but I saw you commented that “it can’t be easily converted to a 10-in pan” please clarify.
        Thanks a bunch and Happy Thanksgiving!

        • Hi Angela, Sorry for the confusion! I originally wrote this recipe for a 9-in pan but I got so many questions about using a larger pan, I tested it with one and it worked out just fine…so I updated the recipe.

      • Wait, don’t your instructions call for a 9 or 10″ springform pan? I’m confused.

        • Hi Lisa, So sorry for the confusion! I originally wrote this recipe for a 9-in pan but I got so many questions about using a larger pan, I decided to test it this year and it worked out just fine…so I updated the recipe.

  • I decided to test a couple of pumpkin cheesecake recipes…this is my first one & I have the feeling I don’t need to keep searching☺
    I used to make cheesecakes for restaurant, to put me through school. I’m not too fond of pumpkin cheesecake but 2 people asked me to bake them one for thanksgiving, so here I am. Sitting here with your cheesecake & a glass of chardonnay loving every minute of it!

  • Hi,
    Please help me, I’m just baking the crust, and I cannot for the life of me figure out how much 1 15 ounce is in grams ????

    • Hi Mimi, are you referring to the canned pumpkin? If so, it’s the equivalent of 425 grams. Also, this recipe has conversions to metric measurements. To view them, scroll down to the recipe and immediately under the recipe title on the right side, you’ll see a little toggle. If you move it from “cup measures” to metric, you’ll see measurements that will work for you.

  • I made your pumpkin cheesecake to rave reviews. “So creamy,” “just the right amount of pumpkin flavor” etc. I have had a terrible relationship with caramel sauce, however, and thought your microwave version was going to be the answer but sadly it was not. I made it twice and both times the sauce was grainy. Do you have any ideas for what possibly could be the problem. I thought I followed the directions as given. Any suggestions would be welcome. I might add that it is the only recipe of yours that I’ve had problems with.
    Thank you.

    • Hi Sherwood, Sorry for the slow response. I know you wrote that you followed the directions – did you by any chance make any substitutions with the ingredients?

  • I cooked the cheesecake for over two hours waiting for it not to jiggle and eventually just bit the bullet and took it out. It cracked 🙁 what did I do wrong?

    I made your New York cheesecake and it was flawless.

    • Hi Vanessa, sorry to hear you struggled with this! Is there any chance you overmixed the eggs when you added them? It’s really important to that you just combine them (if too much air gets incorporated into the filling, it may rise and crack when it bakes).

Add a Comment

This site uses Akismet to reduce spam. Learn how your comment data is processed.