

This post may contain affiliate links. Read my full disclosure policy.
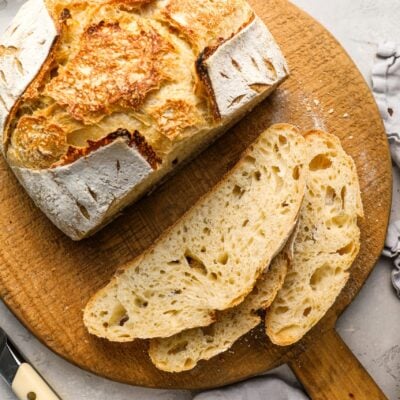
This sourdough bread recipe makes a beautiful loaf with a crisp, golden crust, chewy interior, and just the right amount of tang. Made with just four ingredients and no commercial yeast, it’s a great place to start if you’re new to sourdough baking.
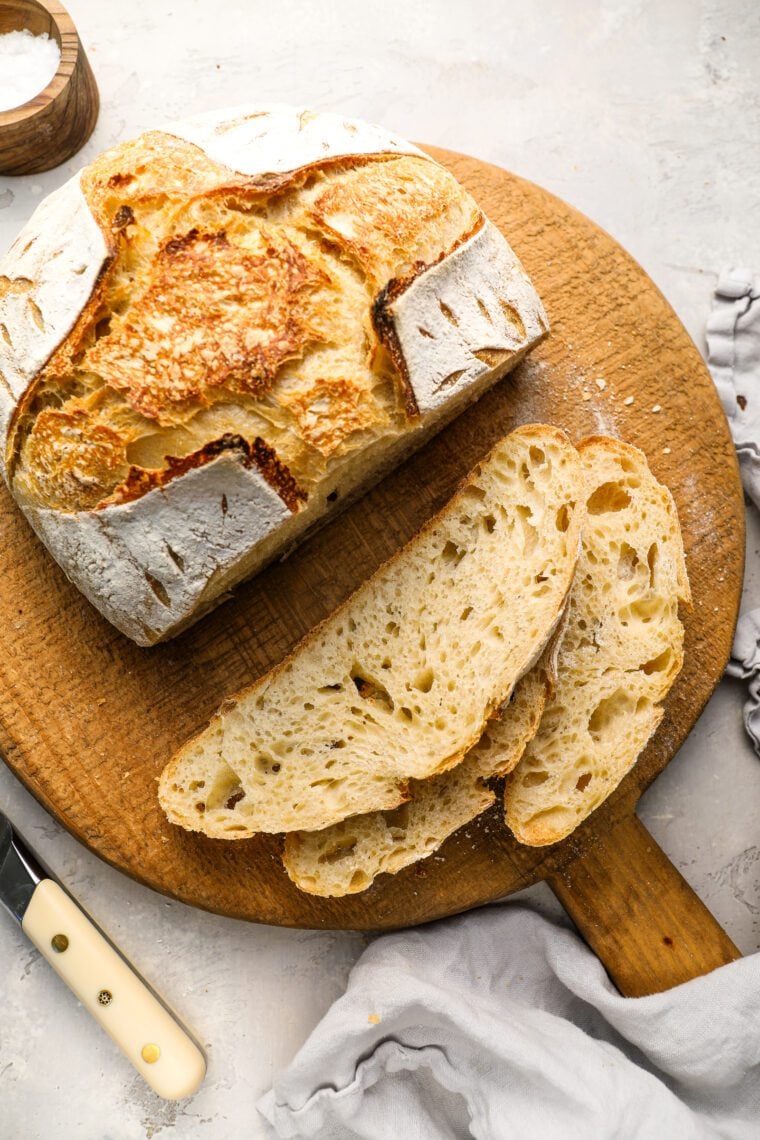
Sourdough baking can feel a little like science at first, but after making a few loaves, you begin to get a feel for the dough. I learned to make sourdough from my friend Jesse Gomory, an avid baker, and I’ve broken down the process into into manageable steps, with photos and tips to show you what to look for as you mix, fold, shape, and proof the dough. It takes time and a little patience, but most of that time is hands-off. And there’s something especially satisfying about pulling a crusty, homemade sourdough loaf out of the oven.
Starter or Levain: The Foundation of Sourdough
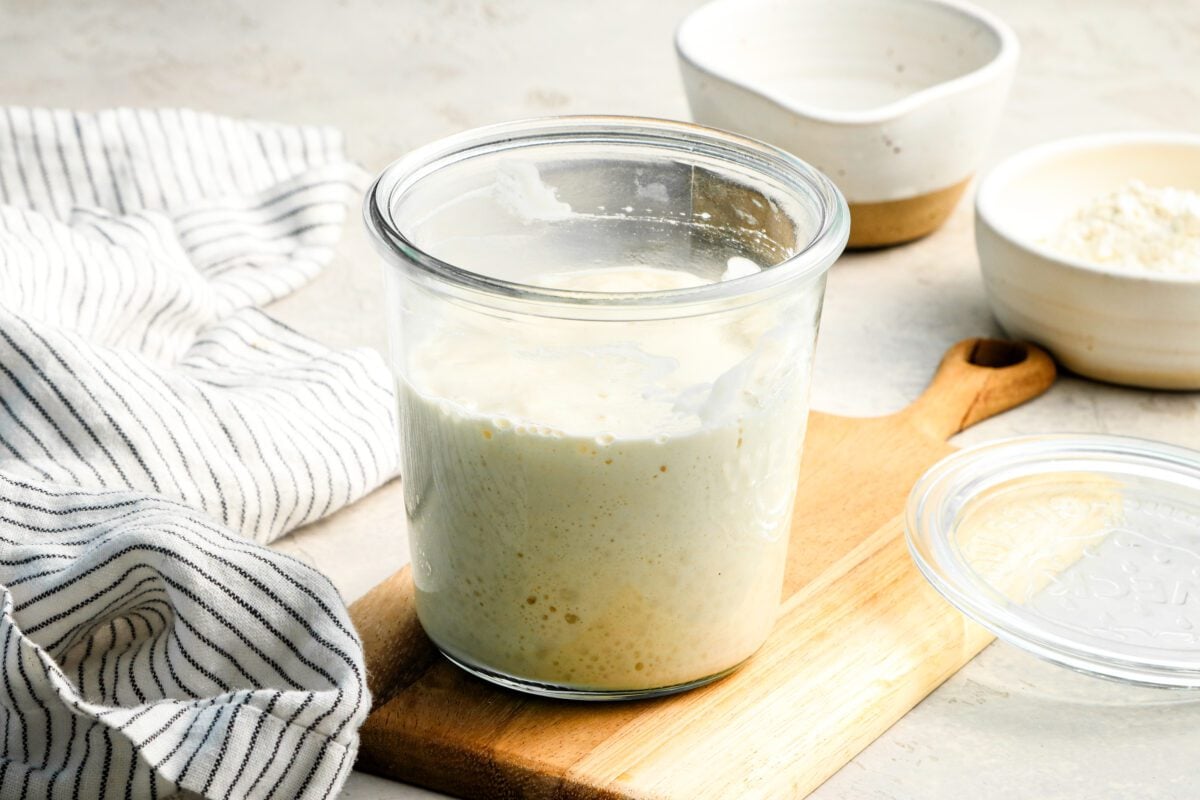
Sourdough bread gets its rise and distinctive tang from an active sourdough starter—a living culture of wild yeast and beneficial bacteria. A levain is simply a portion of that starter fed with fresh flour and water specifically for baking. You can use either one in this recipe, as long as it’s active and bubbly.
If you store your starter in the refrigerator between bakes: Make a levain using some of your refrigerated starter, fresh flour, and water. Let it rise until bubbly and active, usually 4 to 6 hours. You’ll find the exact quantities in the recipe card below.
If you store your starter on the counter and feed it regularly: Feed it about 4 to 6 hours before mixing the dough, until it’s bubbly and has risen noticeably.
From feeding your starter (or making your levain) to baking the bread, it’s a good idea to allow about 24 hours. You may finish sooner if you proof the dough at room temperature, but an overnight refrigerator proof will spread the process over two days.
Essential Tools for Sourdough Baking
You don’t need a lot of special equipment to make sourdough bread. A few basics will get you started, and some of the more specialized tools are helpful but not essential.
What You’ll Need
Digital Scale – A must-have for accurate measurements of flour, water, and starter. Baking by weight ensures consistency and better results.
Large Mixing Bowl: For mixing the dough and letting it rise. A clear, straight-sided container is especially helpful for seeing how much the dough has risen, but a regular mixing bowl works, too.
5- to 7-Quart Dutch Oven or Domed Bread Oven – Traps steam for a crisp crust and even baking. A 5-quart Dutch oven is the most versatile size for standard sourdough loaves.
Bread Sling or Parchment Paper – A heatproof sling or a piece of parchment makes transferring dough into a hot Dutch oven safer and easier.
Helpful Extras
Containers for Starter and Levain – Clear, wide-mouth glass containers make it easy to mix, maintain, and monitor fermentation.
Bread Proofing Basket (Banneton) – Helps the dough maintain its shape and structure during final proofing. A 9-inch round basket is ideal for boules; use an oval basket for bâtards.
Bench Scraper – Indispensable for shaping dough, lifting it cleanly from the counter, and keeping your work surface tidy.
Reusable Bowl Covers – A convenient alternative to plastic wrap for covering your bulk fermentation container.
Lame (Bread Scoring Tool) – A sharp razor blade or bread lame makes clean, controlled cuts that direct oven spring.
Glass Jar for Starter: A clear, wide-mouth jar makes it easier to feed your starter and monitor its activity.
Ingredients You’ll Need To Make Sourdough Bread
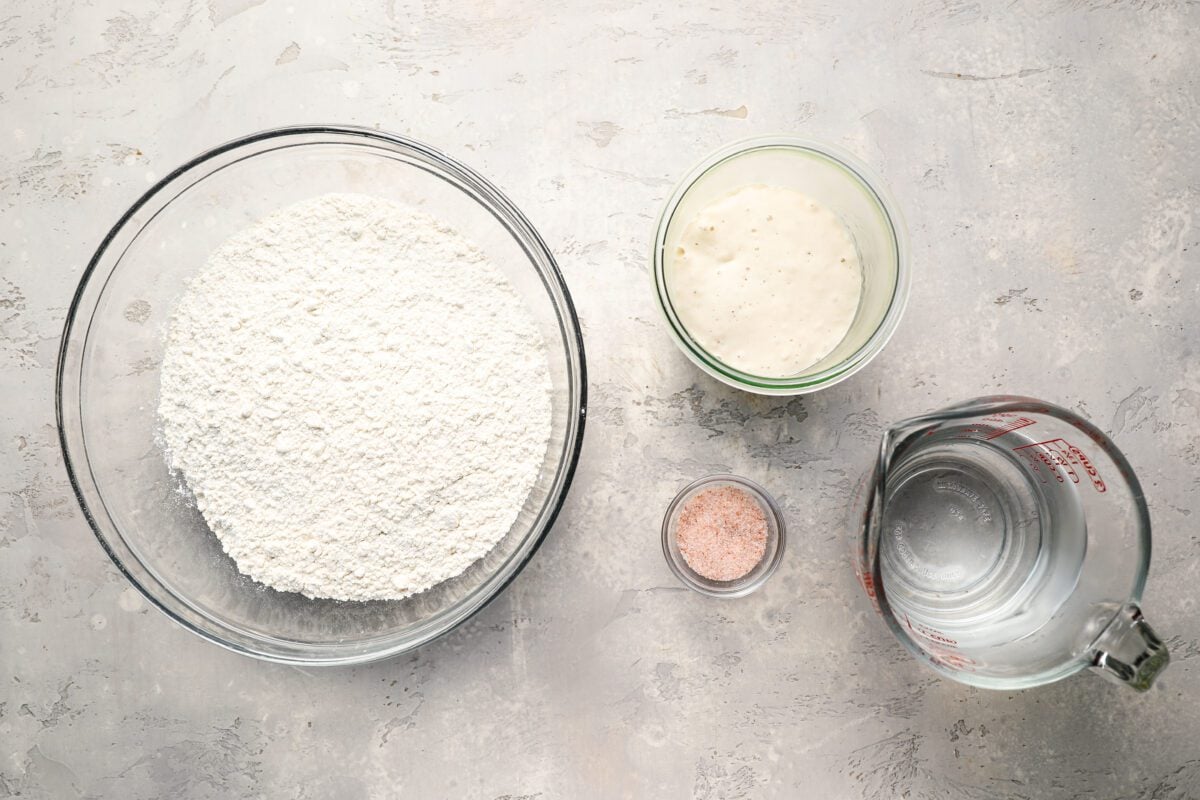
- All-purpose flour: I use all-purpose flour to keep this recipe simple, but the brand matters. Look for a higher-protein flour, such as King Arthur, which gives the dough the strength it needs as it ferments. For a slightly chewier loaf with more complex flavor, you can use a blend of 400 g bread flour, 60 g all-purpose flour, and 40 g rye flour. The bread flour adds extra protein, which strengthens the dough and gives the loaf a bit more structure and chew. The small amount of rye adds complexity and depth of flavor.
- Fine Sea Salt: Adds flavor and helps strengthen the dough so it can hold its shape as it rises.
- Warm Water: Use water that’s about 80°F (27°C). The warmth helps encourage fermentation without overheating the starter.
- Active Sourdough Starter or Levain: This is what makes the bread rise without commercial yeast. It should be bubbly and have risen noticeably before you mix the dough. See the section above for how to prepare it.
- Jump to the printable recipe for precise measurements
How To Make Sourdough Bread
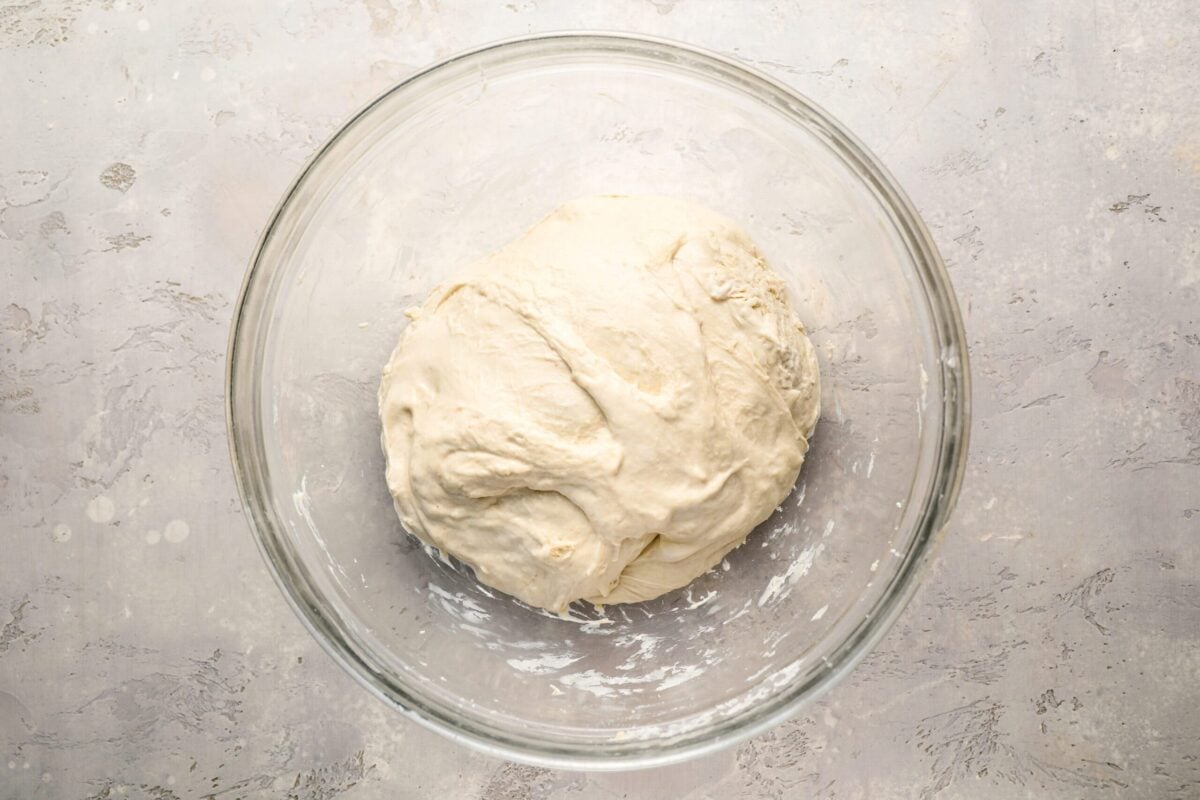
Mix the dough: In a large bowl, whisk together the flour and salt. Add the water and active starter (or levain), and mix by hand, with a dough whisk, or with a wooden spoon until no dry flour remains. The dough will look shaggy and feel sticky at this point—that’s exactly right.
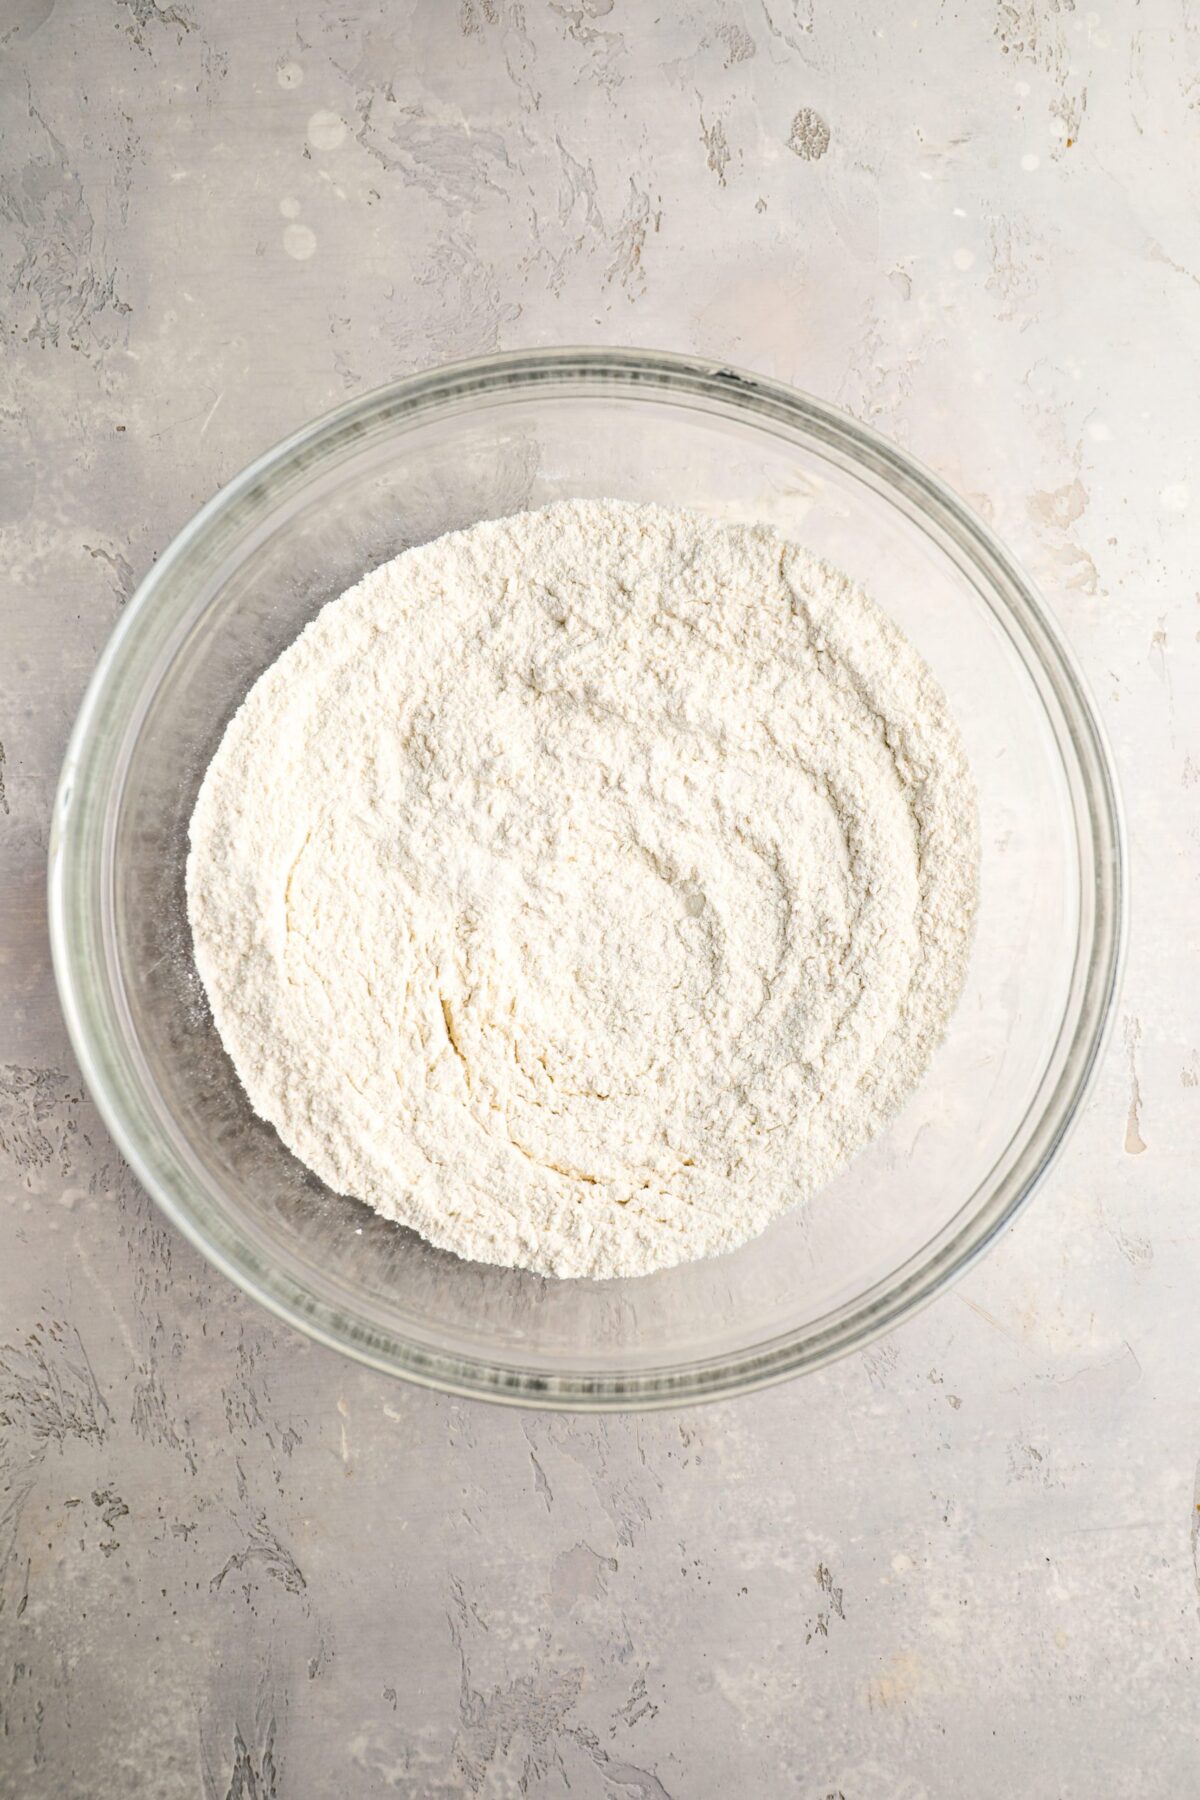
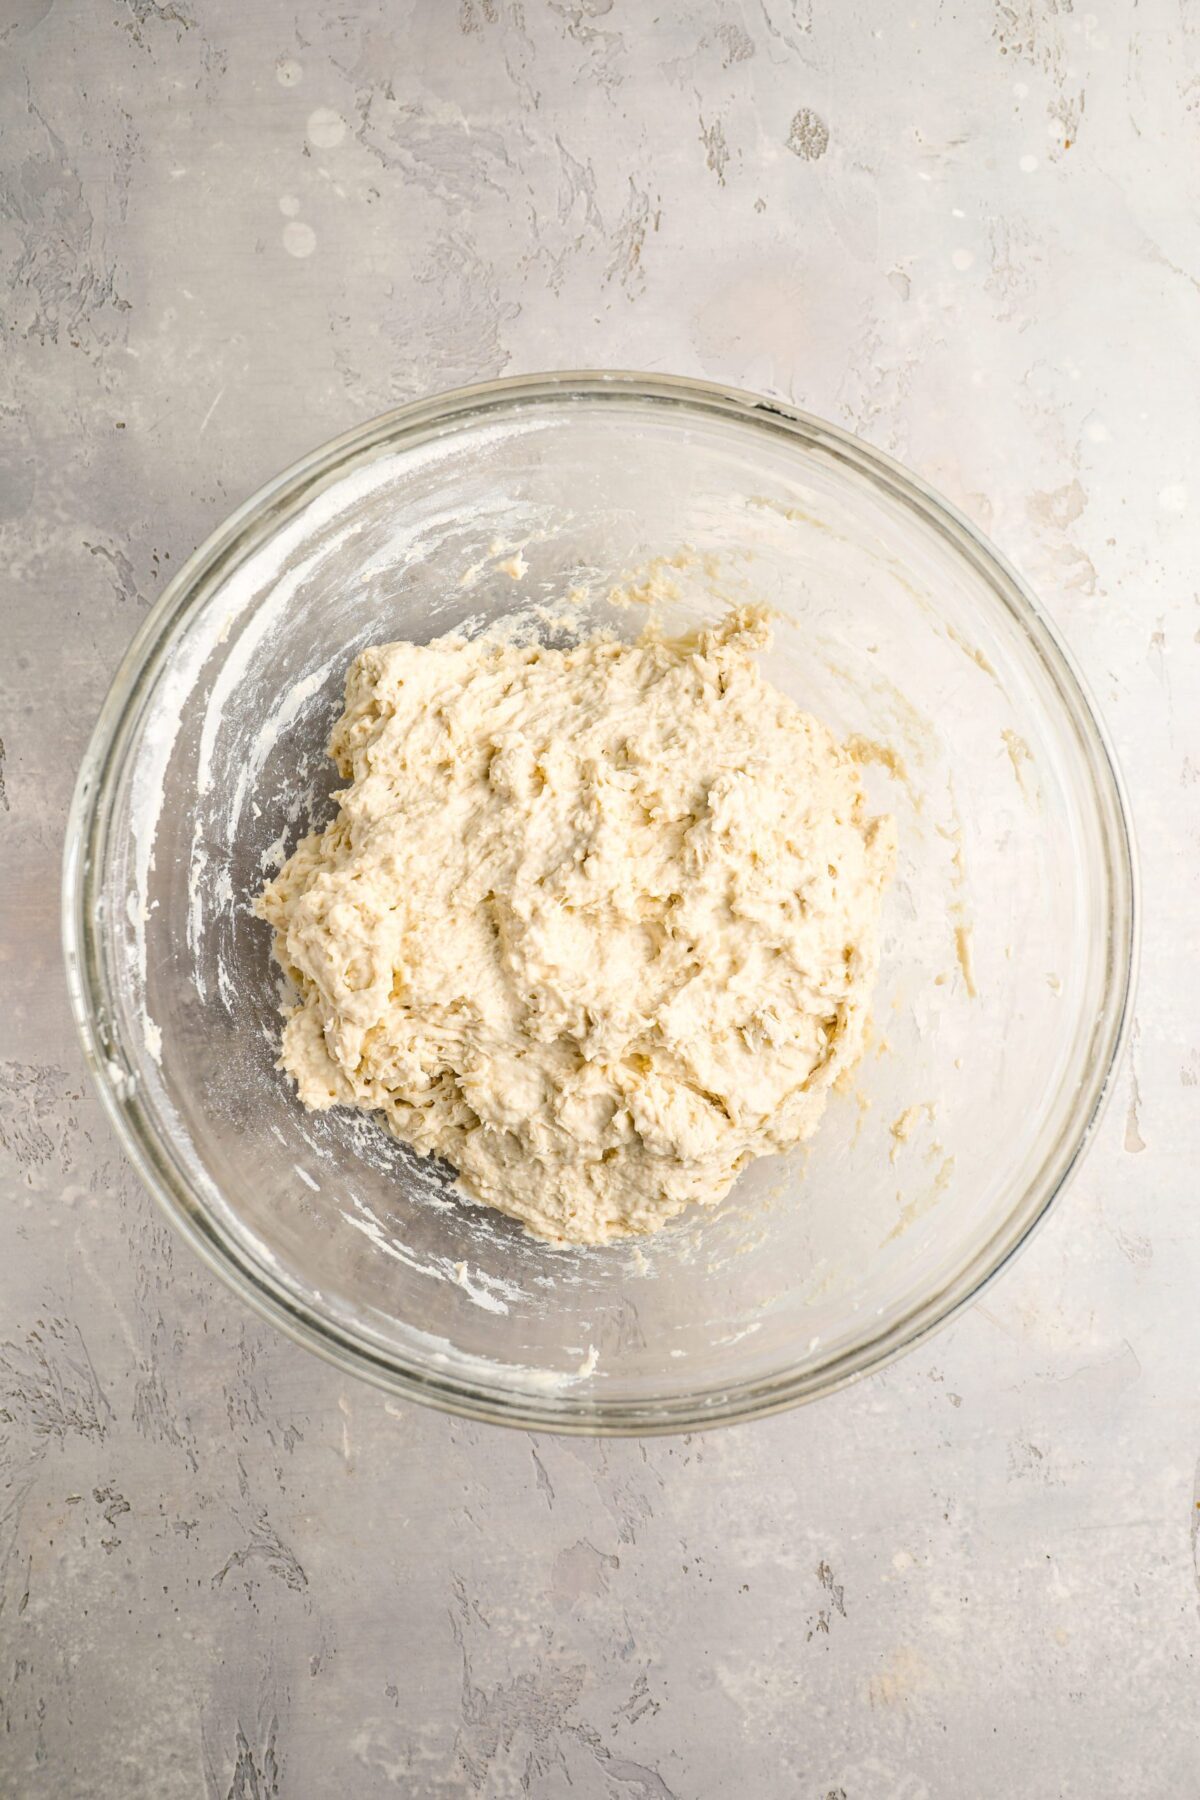
Let the dough rest: Cover the bowl loosely with a damp towel or plastic wrap and let the dough rest for about 1 hour. During this time, the flour absorbs the water and the dough begins developing gluten, making it easier to stretch and handle. It should look a little smoother and feel less rough than when you first mixed it.
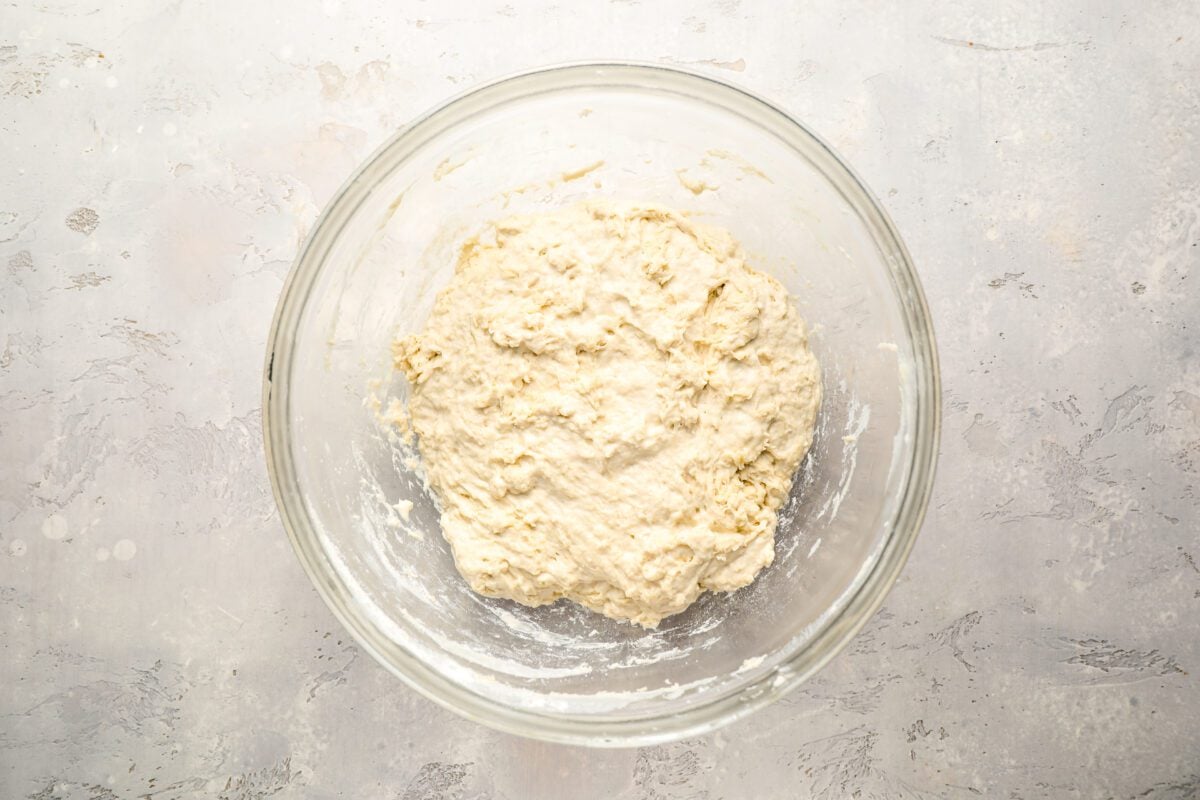
Stretch and fold: Instead of kneading, you’ll strengthen the dough with a series of stretch-and-folds during its first rise, known as bulk fermentation. Wet your hands lightly to prevent sticking, then lift one side of the dough, stretch it upward, and fold it over the center. Rotate the bowl and repeat on the other three sides to complete one set. Cover the bowl between sets and repeat every 30 minutes until you’ve completed four sets over about 2 hours.
The dough may resist stretching at first, but it should gradually become smoother, more elastic, and better able to hold its shape. Stretch gently rather than pulling so hard that the dough tears.
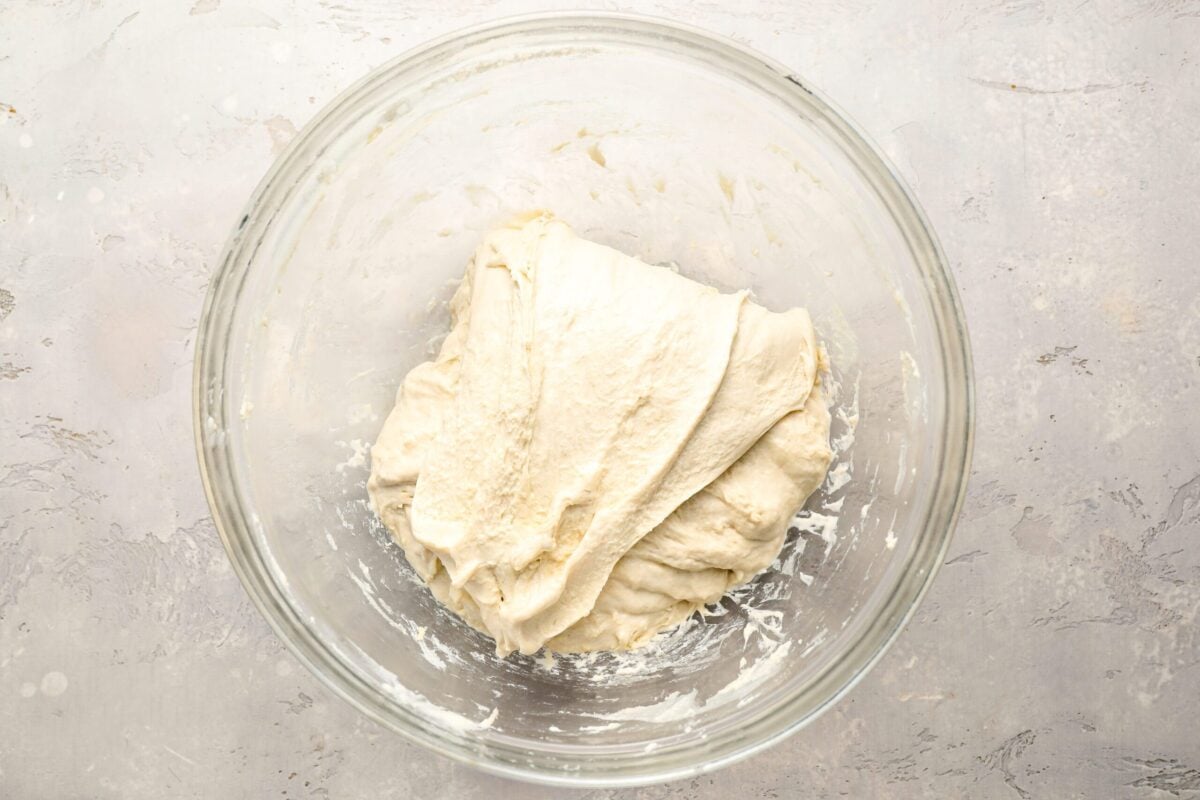
Let the dough finish its bulk fermentation: After the final stretch-and-fold, cover the bowl and let the dough rest undisturbed for another 2 to 3 hours. You’re looking for dough that’s noticeably puffier, slightly domed, and about 50 to 75 percent larger than when you started. Small bubbles should be visible beneath the surface, and the dough should jiggle slightly when you gently shake the bowl. It doesn’t need to double.
The timing can vary depending on the temperature of your kitchen and how active your starter is, so pay more attention to these signs than to the clock. If your kitchen is chilly, a turned-off oven with the light on can provide a warmer spot, but check that it doesn’t become too warm.
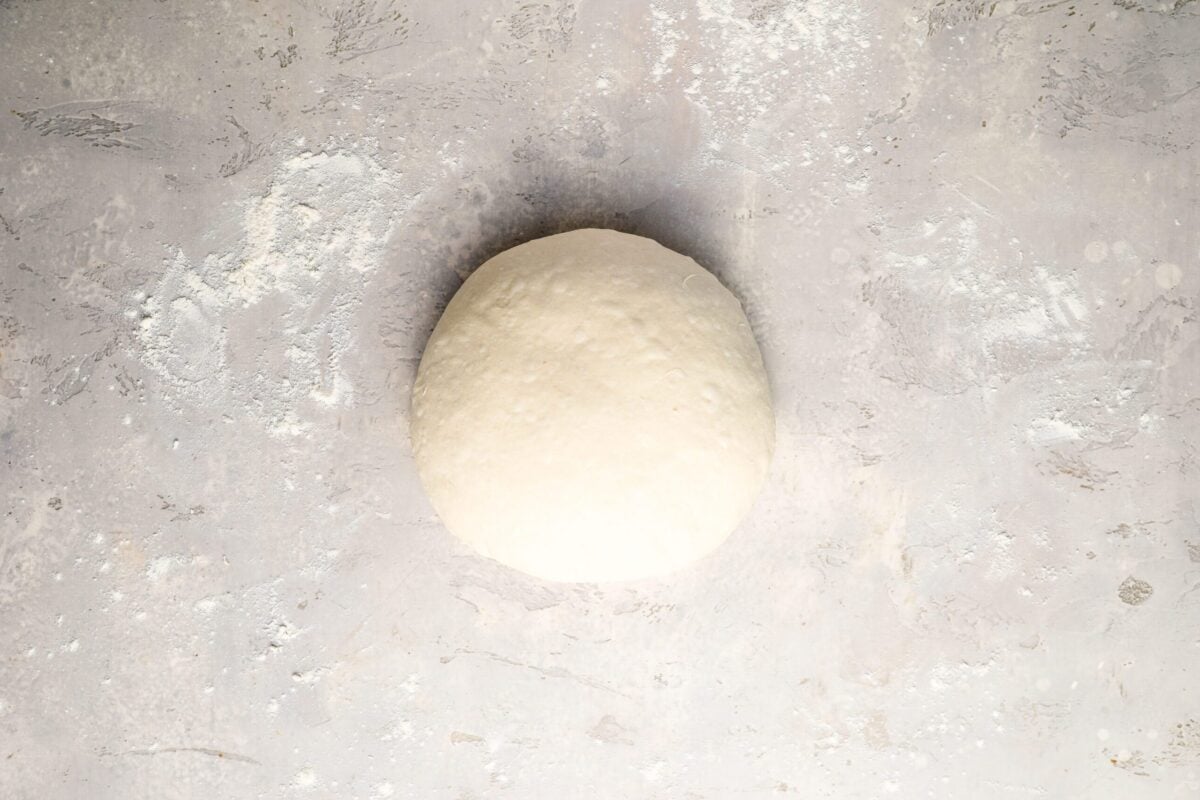
Pre-shape the dough: Lightly flour your work surface and gently turn out the dough, taking care not to knock out all the air you’ve developed. Using floured hands or a bench scraper, bring the edges toward the center and shape the dough into a loose ball. Cover and let it rest for about 15 minutes. This short rest allows the dough to relax so it’s easier to shape without tearing.
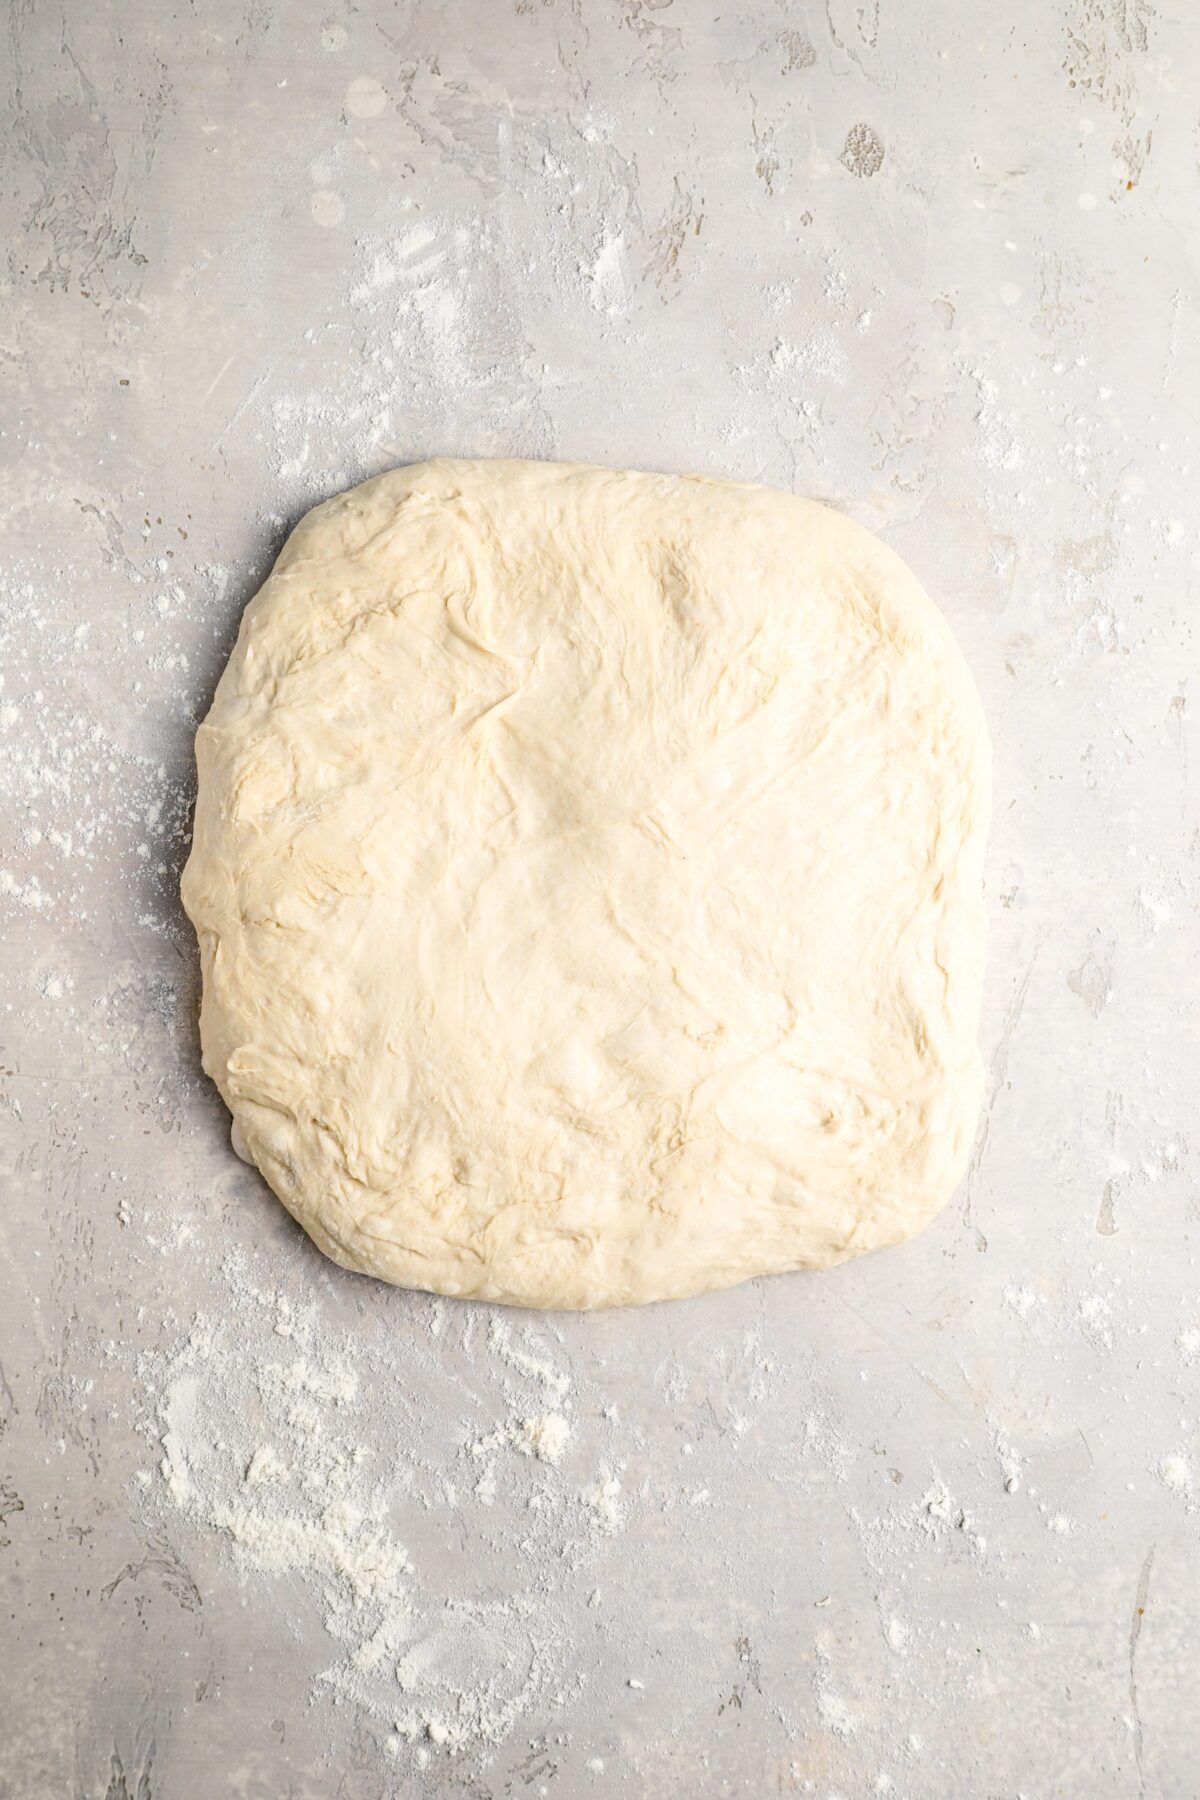
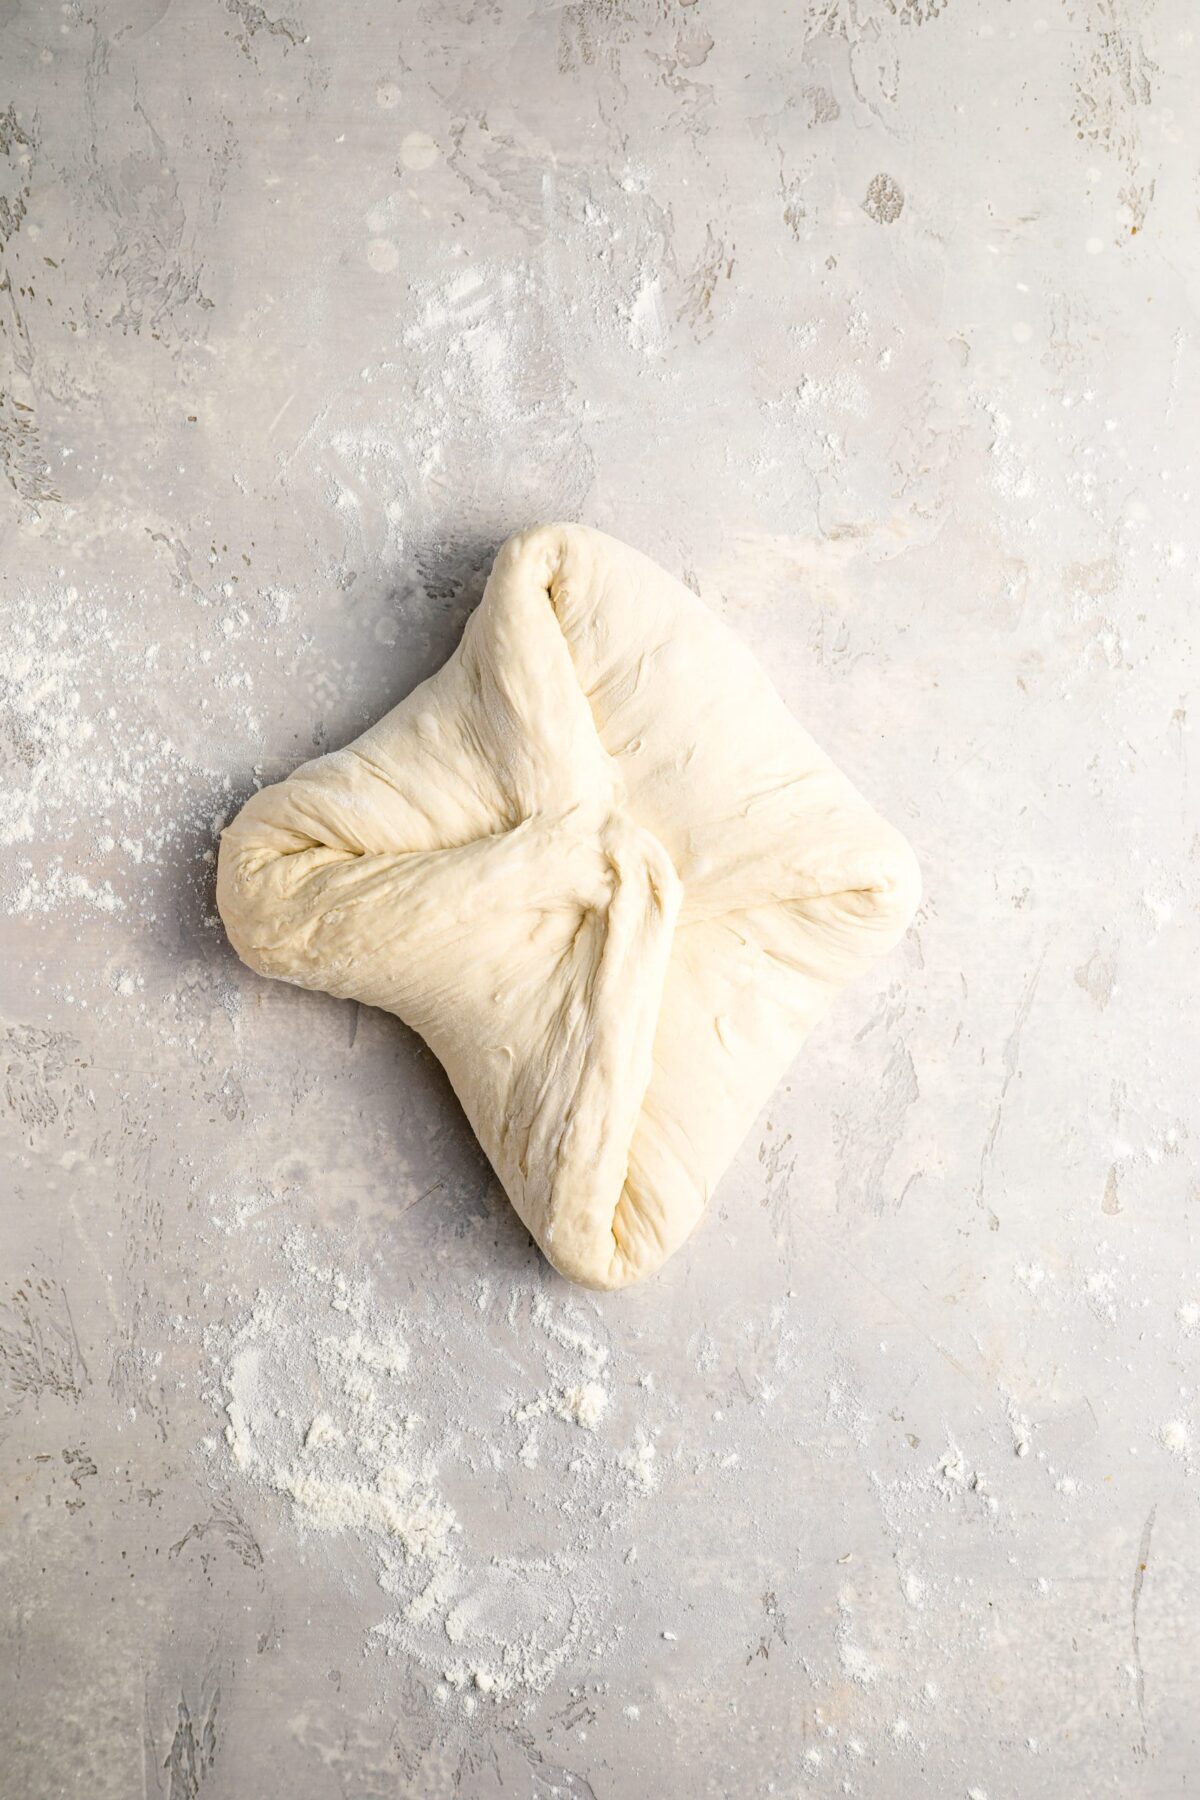
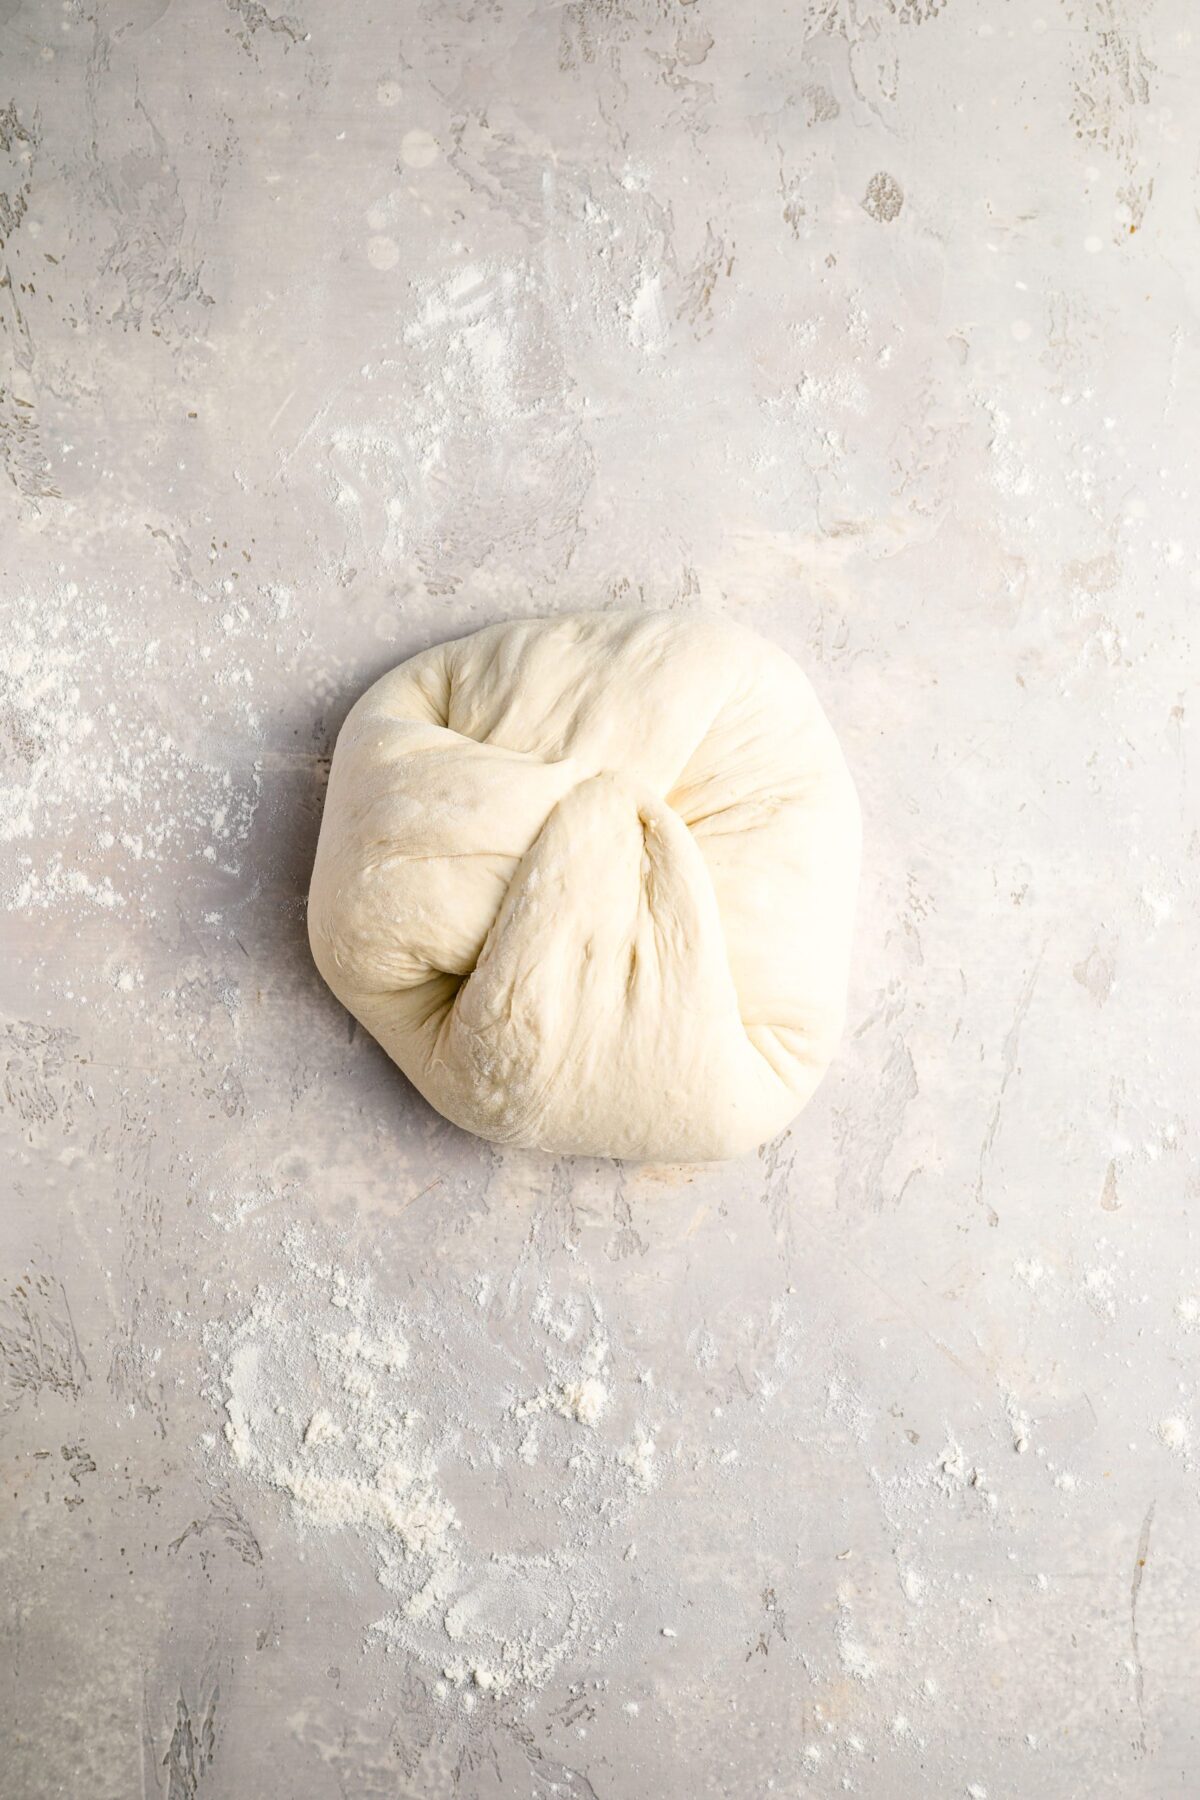
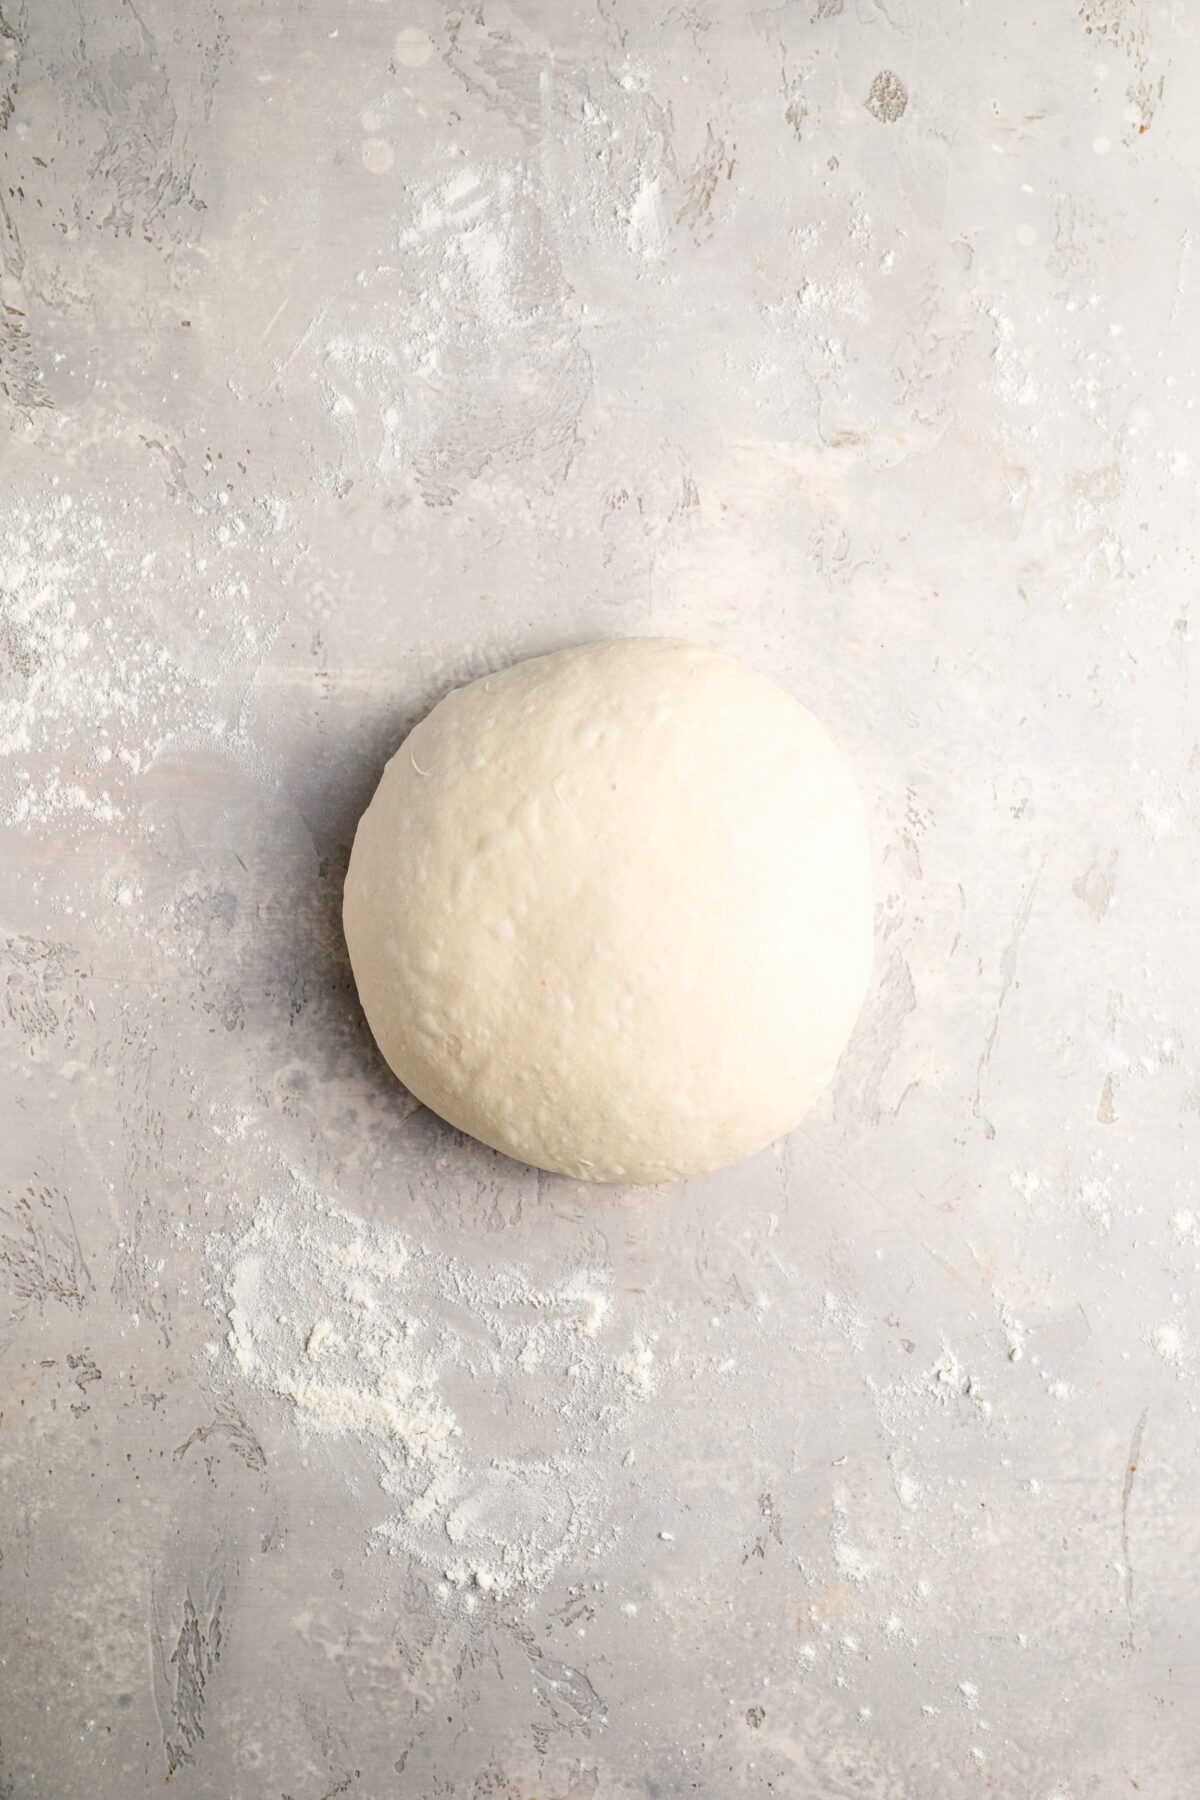
Shape the loaf: Lightly flour the top of the dough and flip it over so the floured side faces down. Gently stretch it into a rough square, then fold the corners toward the center and pinch the seams together. Turn the dough seam-side down and, using cupped hands, gently pull it toward you to tighten the surface.
The loaf should feel smooth and taut on top, but don’t pull so firmly that the surface tears. That gentle tension helps it hold its shape as it proofs and bakes.
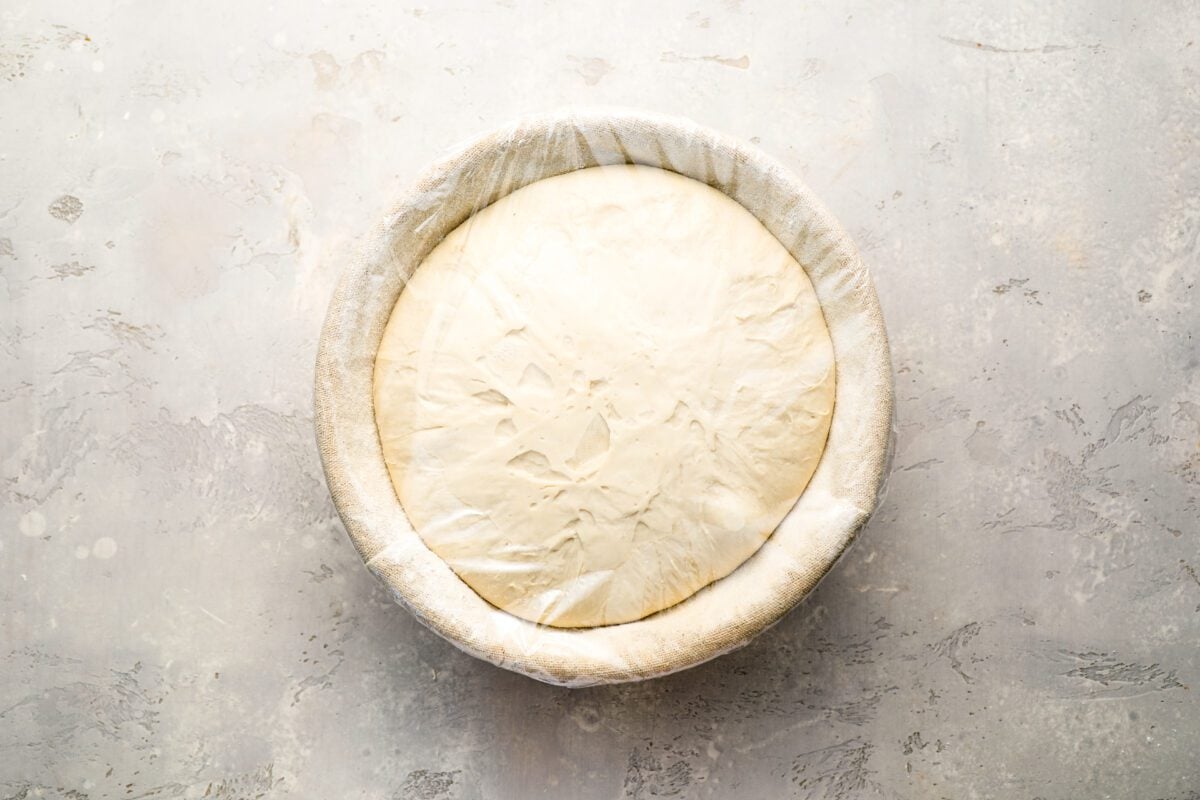
Proof the dough: Place the shaped loaf seam-side up in a well-floured proofing basket or a bowl lined with a floured kitchen towel. You have two options:
- Room-temperature proof (faster): Cover and let the dough rise at about 75°F (24°C) for 1½ to 3 hours, until slightly puffy. When gently pressed with a floured finger, the indentation should spring back slowly rather than disappearing immediately.
- Overnight refrigerator proof: Cover and refrigerate for 10 to 12 hours. The cold slows fermentation, develops flavor, and firms up the dough, making it easier to score and transfer to the oven.
The dough will rise slightly during this final proof, but not dramatically. You can proof it at room temperature for a quicker bake or refrigerate it overnight for better flavor and easier handling.
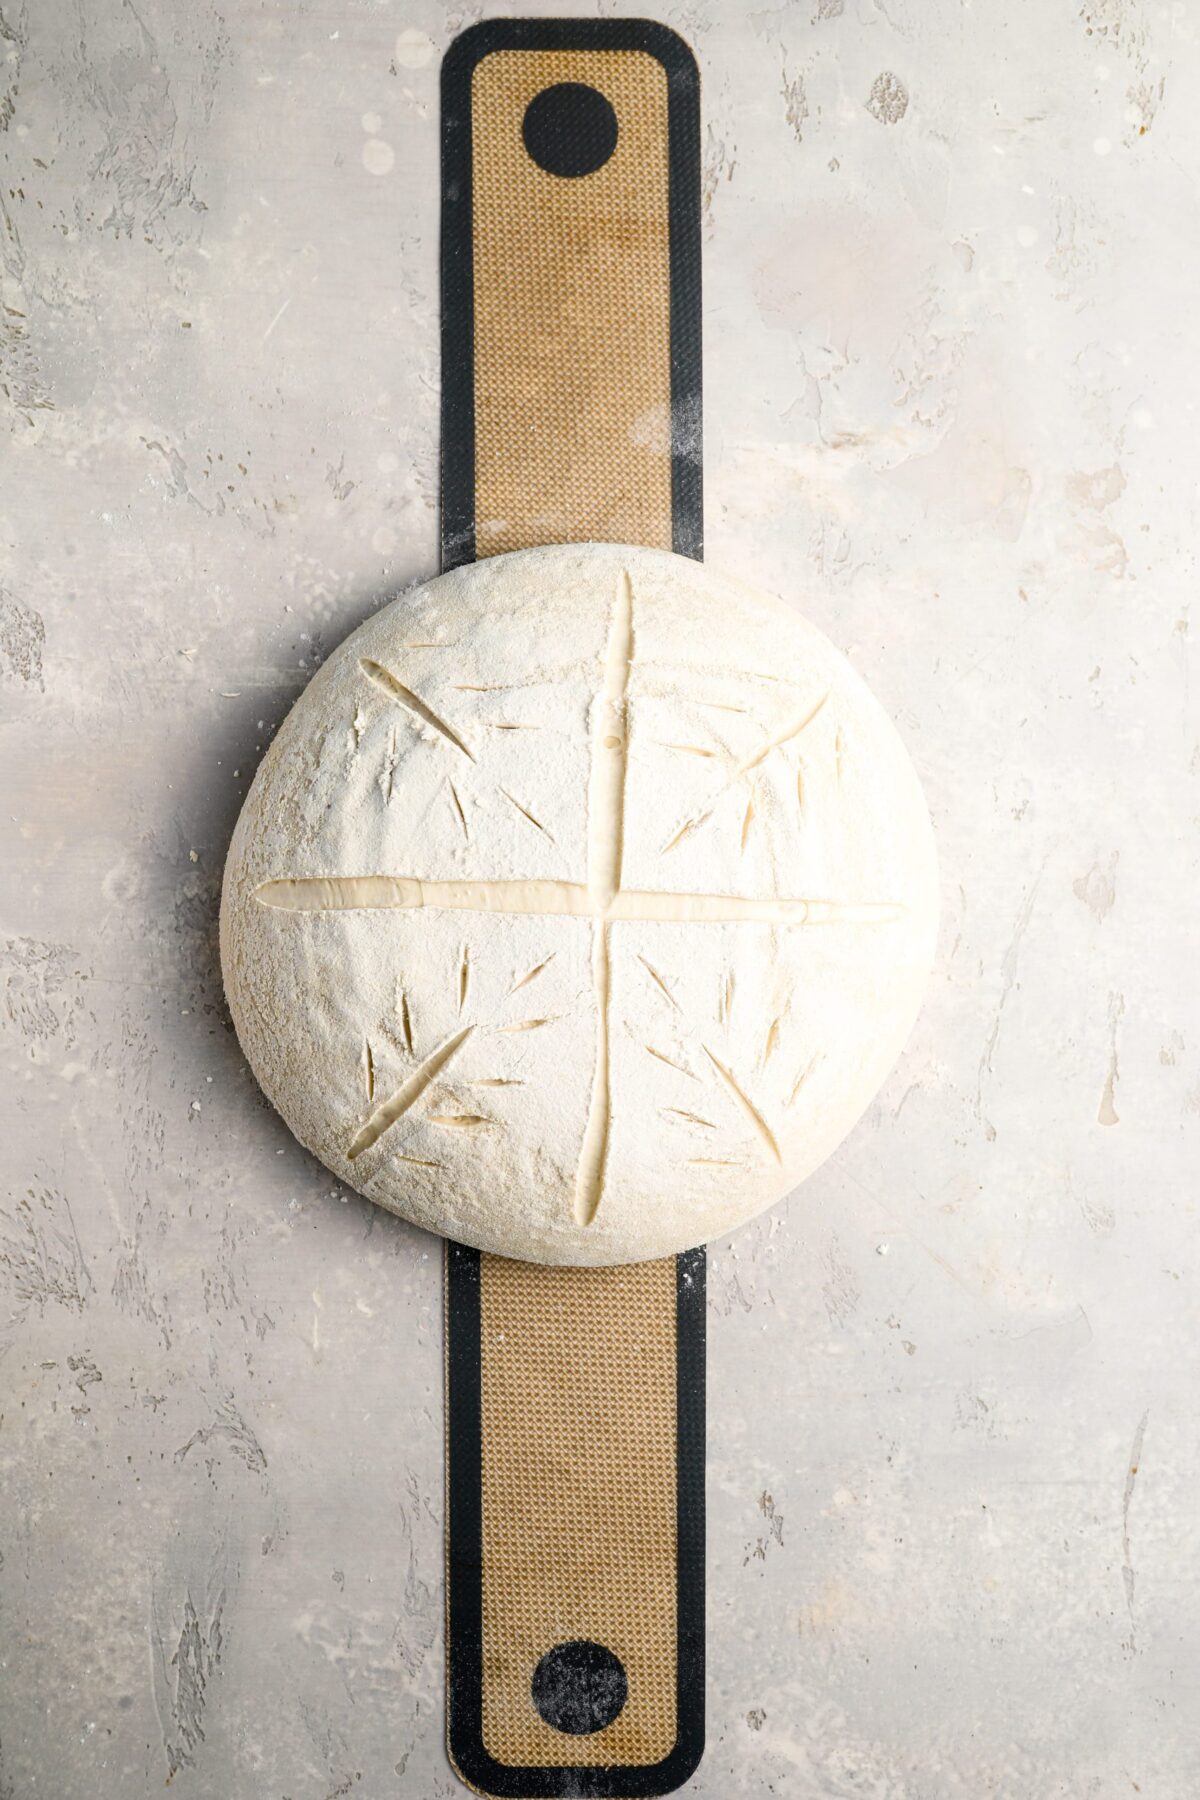
Bake the bread: Preheat the oven to 465°F (240°C) with a Dutch oven or domed bread oven inside. Place a sheet of parchment paper or a heatproof bread sling over the proofing basket, then carefully invert the dough onto it. Using a bread lame or sharp knife, score the top about ½ inch deep so the loaf can expand as it bakes.
Carefully lower the dough into the hot Dutch oven, cover, and bake for 30 minutes. Remove the lid and continue baking for another 10 to 15 minutes, until the crust is deeply golden and crisp. The loaf should sound hollow when tapped on the bottom.
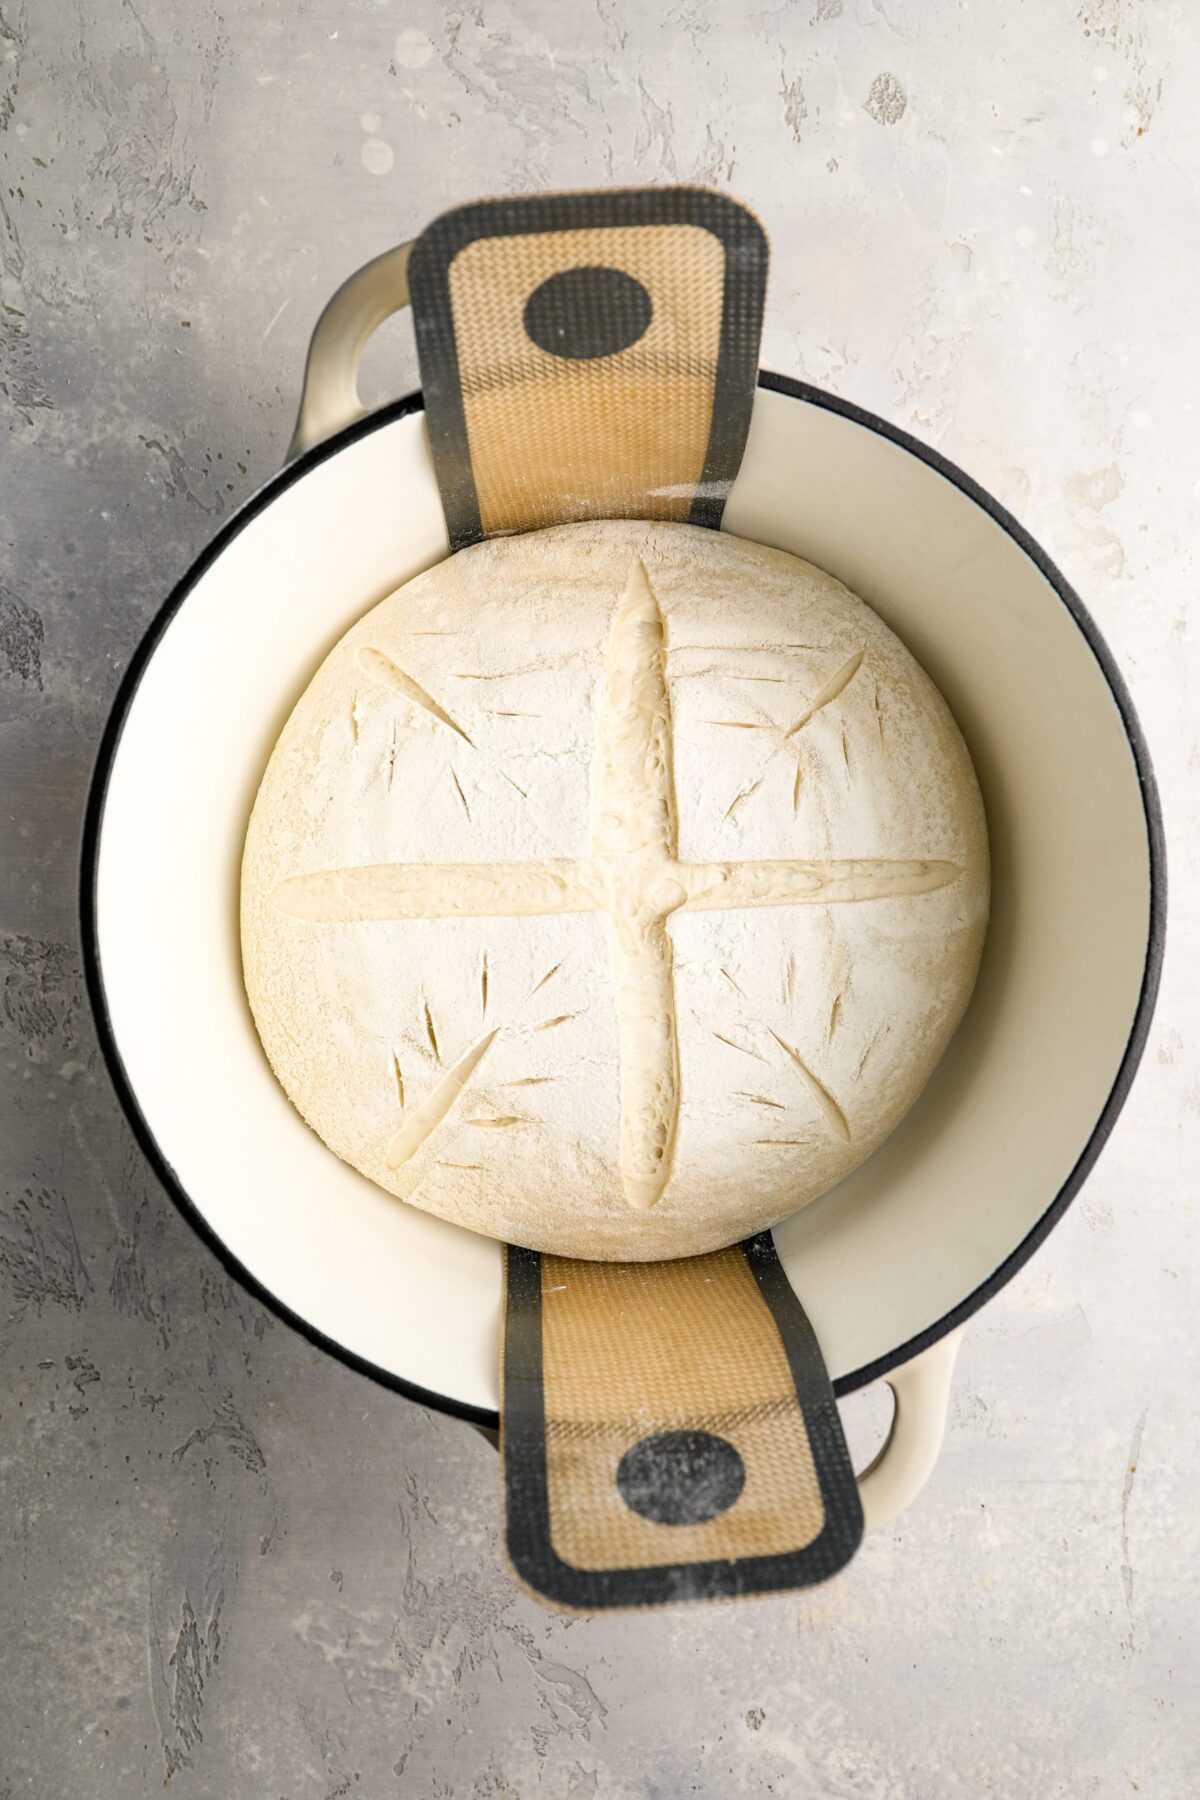
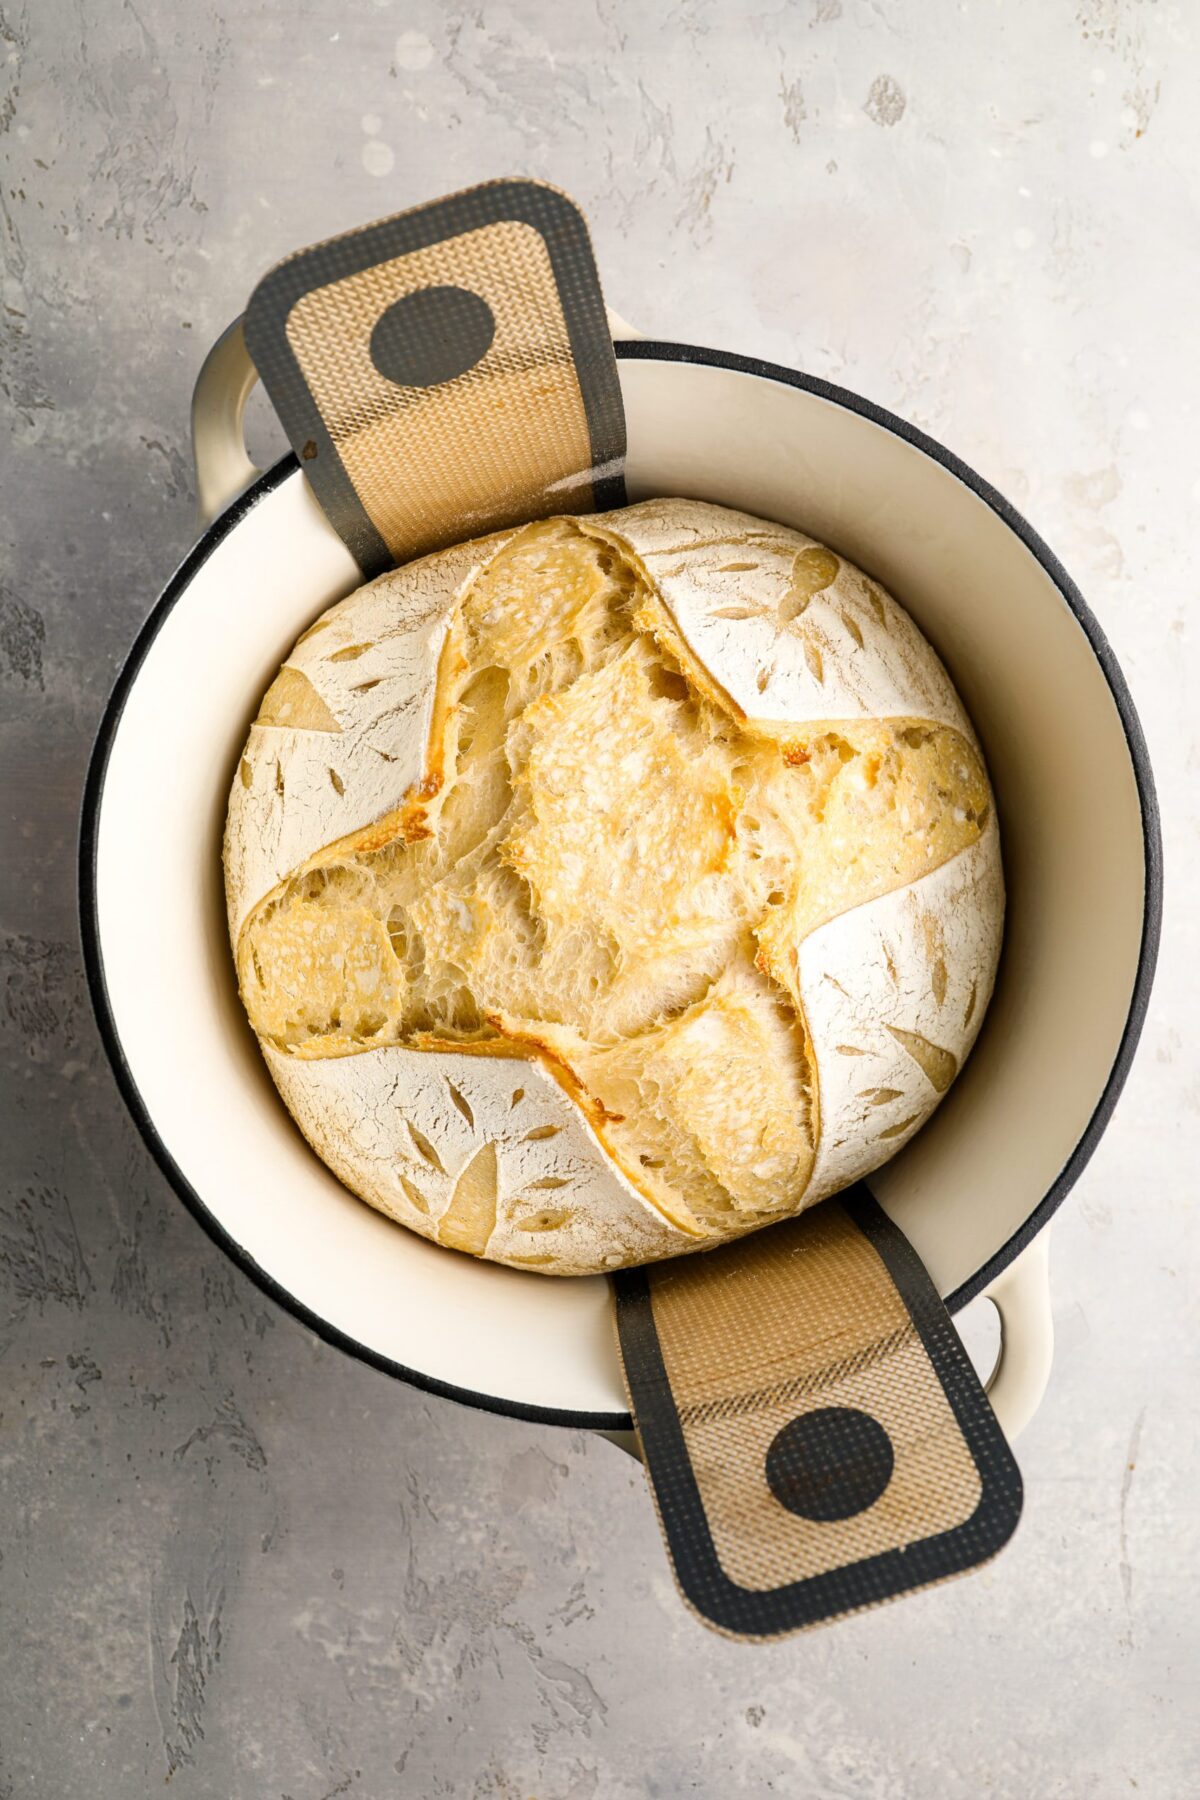
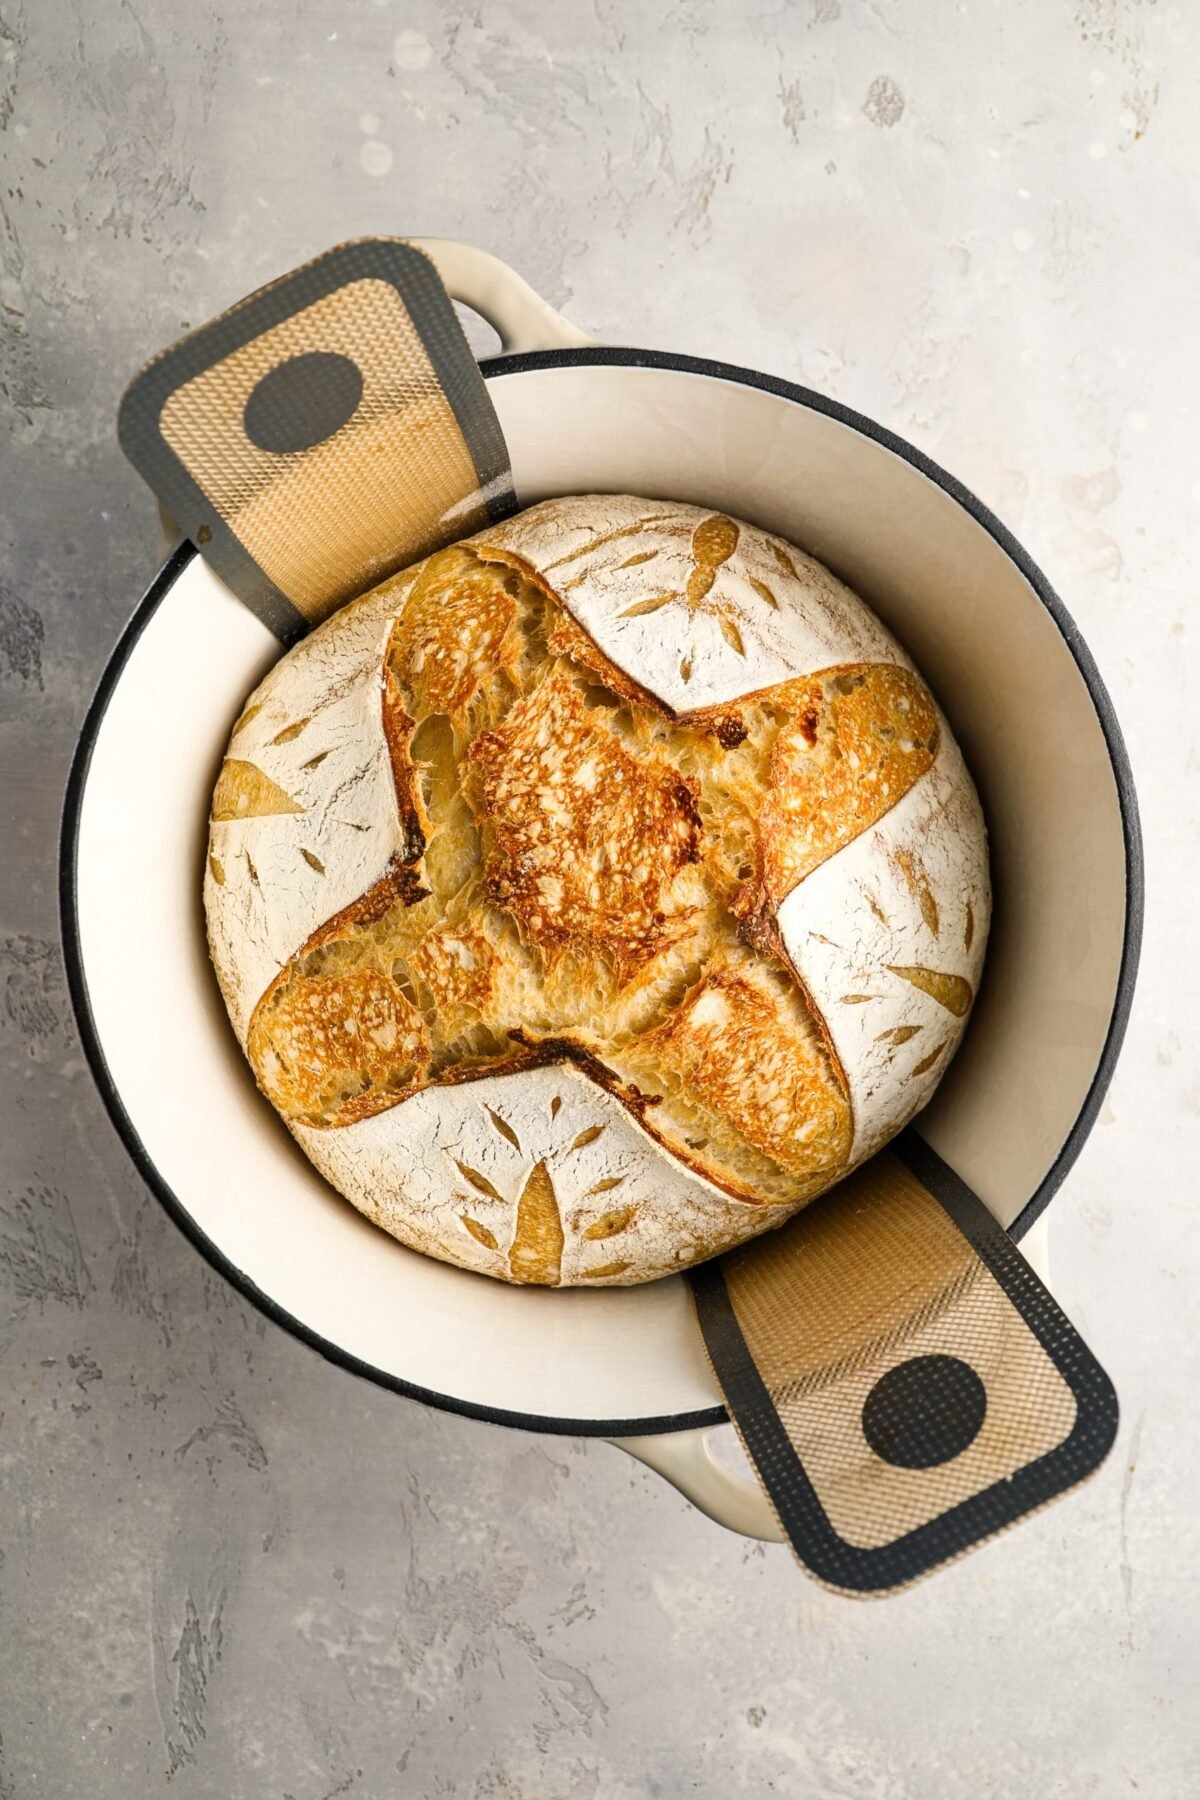
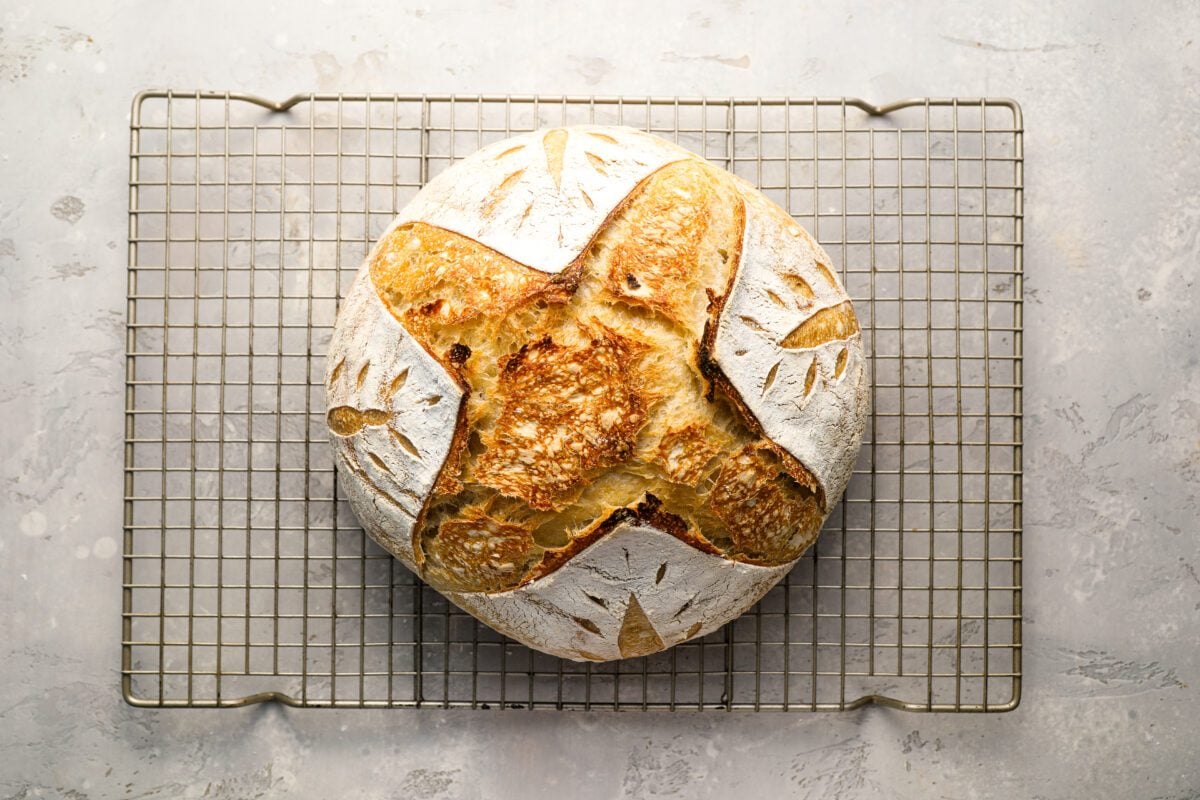
Cool before slicing: Transfer the bread to a wire rack and let it cool for at least 1 hour before cutting into it. The interior continues to set as the loaf cools, so slicing too soon can leave the crumb gummy—even when the bread is fully baked.
Video Tutorial
Beginner Sourdough Bread Recipe
Ingredients
- 500 g (3¾ cups + 2 tablespoons) all-purpose flour (preferably King Arthur)
- 12 g (2 teaspoons) fine sea salt
- 350 g (1½ cups) warm water (80°F/27°C)
- 100 g (½ cup) active sourdough starter (fed 4 to 6 hours ago, doubled in size, and bubby) OR levain (see instructions in the recipe notes)
Instructions
- Mix the Dough: In a large mixing bowl, whisk together the flour and salt. Add the water and 100g starter OR levain, then mix by hand, using a dough whisk, or a wooden spoon until no dry bits remain. The dough will feel shaggy, sticky, and rough. Cover loosely with a damp towel or plastic wrap and let rest for 1 hour—this allows the flour to fully absorb the water and begin gluten development, making the dough easier to handle later. (This process, called autolyze, helps create a better texture and structure in the final loaf.)
- Stretch and Fold: Moisten your hands with water to prevent sticking. With the dough in the bowl, lift one side, stretch it upward, and fold it over itself. Rotate the bowl and repeat on the other three sides. Cover loosely between rounds to prevent drying, and repeat 3 more times every 30 minutes over the next 2 hours (for a total of 4 stretch-and-fold sets).
- Bulk Fermentation: After the final fold, let the dough rest, still loosely covered and untouched, until it’s puffy, slightly domed, and has increased by 50 to 75% in volume. The surface should look smooth with bubbles underneath and jiggle slightly when the bowl is gently shaken. This typically takes 2 to 3 hours, depending on temperature and starter activity.
- Pre-Shaping: Lightly flour a clean work surface to prevent sticking. Turn the dough out gently onto the floured surface, being careful not to deflate the air pockets. Use lightly floured hands or a bench scraper to shape the dough into a ball.Slide the bench scraper (or your hands) under one side of the dough. Gently pull it toward you while rotating slightly, using the scraper or your hands to tuck the edges under. Continue this circular motion, pulling the dough along the surface to create tension and form a smooth, round shape.Cover loosely with a clean kitchen towel or plastic wrap and let it relax on the counter for 15 minutes before final shaping.
- Final Shaping: Lightly flour the top of the loaf, then use a bench scraper to flip it over so the floured side is down.Gently stretch and press the dough into a rough square. Take one corner and fold it toward the center, then repeat with the other three corners to form a loose package. Tuck and pinch any remaining seams into the center, then gently shape it into a ball. Flip the dough over (seam-side down). Using your hands, cup and roll the dough slightly toward you to create surface tension, keeping it tight but not tearing the skin. The dough should feel smooth, tight, and slightly tacky—not too loose or sticky.Transfer the dough to a lightly floured banneton basket for proofing.Pro Tip: If you don’t have a proofing basket, a medium mixing bowl (about 8 inches in diameter) lined with a clean kitchen towel works well. To prevent sticking, dust the towel generously with flour—rice flour is ideal because it doesn’t absorb moisture, creating a non-stick barrier. If you don’t have rice flour, use a blend of all-purpose and cornstarch or simply more all-purpose flour, though it may be slightly more prone to sticking.
- Proofing (Choose One Method – Room Temperature or Cold Proofing) Option 1: Room Temperature Proof (Faster)Cover with a lid or plastic wrap and proof at 75°F/24°C until slightly puffy but still firm, 1½ to 3 hours. It’s ready when it springs back slowly when pressed and has slight air pockets forming.Option 2: Cold Proof (Overnight for Better Flavor & Handling)Cover with a lid or plastic wrap and refrigerate for 10 to 12 hours.Pro Tip: If life gets in the way, a slightly longer cold proof—up 24 hours—is usually fine. The dough may ferment a bit more, but as long as it still holds its shape and hasn’t collapsed, it should still bake up beautifully.
- Bake the Bread: Preheat the oven to 465°F (240°C) and set a rack in the lower middle position. Place a 5-quart Dutch oven or domed bread oven inside the oven to preheat as well.Place a sheet of parchment or a silicone bread sling over the proofing basket, then flip the dough onto it for an easy transfer. Using a lame or sharp knife, score the top about ½-inch deep to control expansion during baking. You can use a single slash, cross, spiral, or decorative design.Carefully remove the hot Dutch oven and place it on a heat-proof surface.Lift the parchment paper or bread sling by the edges and lower the entire thing—parchment/bread sling and dough together—carefully into the hot Dutch oven. Cover with the lid and place in the oven (remember—it’s hot—handle with oven mitts). Bake for 30 minutes. Remove the lid and bake for about 10 minutes longer, until golden brown.When done, the crust should be crisp and crackly, and the bread should sound hollow when tapped. Let the bread cool on a wire rack for at least 1 hour before slicing.
Notes
50g sourdough starter (cold from fridge)
50g all-purpose flour
50g warm water (80°F/27°C) Mix and let rise for 4 to 6 hours at room temperature until bubbly, doubled, and slightly domed. Then use 100g of this levain in the recipe. Note: You’ll end up with a little more levain than you need—this gives you a bit of cushion in case some sticks to the jar or spatula. You can use the extra in other simple sourdough recipes like crackers, pancakes, or flatbread—or just discard or compost it. Storage Instructions: Sourdough bread is best enjoyed within 2 days, when the crust is crisp and the interior is at its freshest, but it will keep at room temperature for 3 to 5 days. Store it cut-side down on a wooden board and cover loosely with a towel or paper bag for the first couple of days. For longer storage, place it in a bread box or wrap it in a clean kitchen towel inside a partially closed plastic bag to slow staling while preventing moisture buildup. You can also freeze sourdough for up to 3 months—slice it first, wrap tightly, and reheat slices or the whole loaf in a 350°F (175°C) oven for 10 to 15 minutes to restore the crust.
Nutrition Information
This website is written and produced for informational purposes only. I am not a certified nutritionist and the nutritional data on this site has not been evaluated or approved by a nutritionist or the Food and Drug Administration. Nutritional information is offered as a courtesy and should not be construed as a guarantee. The data is calculated through an online nutritional calculator, Edamam.com. Although I do my best to provide accurate nutritional information, these figures should be considered estimates only. Varying factors such as product types or brands purchased, natural fluctuations in fresh produce, and the way ingredients are processed change the effective nutritional information in any given recipe. Furthermore, different online calculators provide different results depending on their own nutrition fact sources and algorithms. To obtain the most accurate nutritional information in a given recipe, you should calculate the nutritional information with the actual ingredients used in your recipe, using your preferred nutrition calculator.





I have made this recipe twice and it turned out perfectly both times! I would like to try making it in a baguette shape (rather than round). What adjustment would I make when shaping? I have a rectangular banneton and rectangular cast iron baker. Thank you!
Hi Sue, glad you’ve enjoyed it! To make a baguette-style loaf, skip the boule-style shaping and instead gently stretch the dough into a loose rectangle. Next, fold it like a letter to build structure and roll it into a long, even log, starting from the center and working outward until it fits your rectangular banneton. Keep the surface tight but don’t tear the dough, and lightly taper the ends if you want a more classic baguette look. Proof the shaped loaf seam-side up in your banneton, then bake it in your preheated cast-iron baker, just as you would with a Dutch oven. Please LMK how it turns out!
Thank you for the tips. My baguette turned out very well! Any tips on best tools or method to slice into even slices? I have a bread knife but I am not very good at getting the even slices. Thanks!
Glad to hear the baguette came out nicely! No, I don’t use a particular tool or have any special tips for how to slice the bread evenly – sorry! Sometimes I do it better than others. 😆
Is there a possibility to make this recipe with some white and some whole wheat flour? Thank you!!
Hi Nicole, while you may be able to do that, the dough might require a bit more water. I’d look for a recipe that contains whole wheat flour so you’re sure to get the ratios correct.
I was just about to ask the very same question!! Although I love this recipe, I want a slightly healthier loaf. I have done 1 cup of whole wheat flour and today I tried 1.5 cups of whole wheat. However it is so dry that I can barely stretch and fold. I have moistened my hands well with every stretch and fold but still dry. I am thinking next time I would add 400g of warm water. Can report back if anyone interested.
Laura
I made this today and it turned out perfect. Very easy recipe to follow. Jenn, I love all your recipes (and I’ve made quite a few of them). Do you have a sourdough pizza dough recipe you could share?
So glad you liked it! As of now I don’t have a sourdough pizza dough recipe – I’m sorry!
Hi Jenn. I still have a few questions before I feel comfortable attempting this recipe (can you tell I’m a perfectionist)? Like you had mentioned, I was able to get some starter from a local sour bread dough maker. I have it in my refrigerator right now. Should I let that get room temperature and then feed it before I use it in the recipe or just let it get to room temperature and use it as is? Also, do I need to let it warm up a bit when taking it out of the refrigerator before I bake it?
Thank you SO MUCH for your patience, expertise, and for sharing your well developed recipes. I am a devoted fan of yours and many of my friends and relatives are now fans too!!
Hi Lori, Happy to help! I would make a levain from your refrigerated starter — you combine 50g of the starter (cold from the fridge), 50g of all-purpose flour, and 50g of warm water (80°F/27°C). Mix and let rise for 4 to 6 hours at room temperature until bubbly, doubled, and slightly domed. Then use 100g of this levain in the recipe. Does that make sense?
Yes, that makes total sense.
Do I need to let the bread warm up before baking if I’m using the overnight refrigerator method?
Nope – it can go straight into the oven cold. 🙂
I have been making bread for a couple years now and tried all different methods. There isn’t one and only way to make sour dough bread. I made this recipe yesterday and this is going to be my number one, go to recipe. So much easier than all others I tried. Also it is so light and fluffy, like restaurant quality! I made a boule and now I will try a baguette style. Super easy!! Thank you Jenn for posting this.
Thank you Jenn for this recipe! I have been making sourdough for a while, but I think your steps are especially well laid out and explained. My loaf turned out great following your instructions! I would like to ask you about alternate flours. Do you have experience or advice to share about using bread flour, whole wheat flour or spelt flour? I have had some success adding a portion of whole wheat to a previously used sourdough recipe. I did not notice much difference with bread flour (again prior to using your recipe) and I have yet to try spelt, but I am eager to do so.
So glad to hear your loaf turned out great—and thank you for the kind words! I’m happy the step-by-step layout was helpful. I’ve played around a bit with alternate flours, too. For a more complex flavor, I like using a blend of about 400g bread flour, 60g all-purpose, and 40g rye. The bread flour adds strength and chew, and the small amount of rye gives the loaf a subtle depth of flavor. Whole wheat or spelt will work too—just keep in mind that they can make the dough a bit denser, so it’s best to start by swapping in a smaller amount.
Thank you! Trying out bread flour and some whole wheat today. 👍
I’ve recently purchased a dried sourdough and have made it active!! I have made about 6 or more loaves now so have some experience. It is just two of us in our household now. Do you think it is possible to divide the dough in half after the folding stage (prior to raising and proofing)? I have frozen the dough after proofing but it is hard not to deflate it.
Laura
Hi Laura, That’s great — it sounds like you’re really getting the hang of sourdough! You can divide the dough after the folding stage, but it’s actually best to bake the loaves first and then freeze them. Once baked, sourdough freezes beautifully and keeps its texture and flavor much better than raw dough, which can lose some lift after thawing. Just let the baked bread cool completely, wrap it well, and pop it in the freezer.
Where is the sourdough starter supposed to come from?
Hi Karen, You can get sourdough starter a few different ways, depending on how hands-on you want to be. You can make your own with just flour and water—it takes about a week to develop but lasts indefinitely once established (see my sourdough starter recipe). You can also ask a friend or neighbor; most sourdough bakers are happy to share. Some artisan bakeries sell small containers of their starter, and you can even order dried or live starter online from places like King Arthur or Etsy if you want to skip the wait. Hope that helps!
Hello
I realize the new thing is metric measurement, but please for us old folks, give the standard amounts also.
Thanx
Luke
Hi Luke, I just added the cup measurements for you. I typically include both in my recipes, but with sourdough, I really recommend using metric if you can—it gives the most accurate and consistent results. You can find inexpensive baking scales online, and once you try it, you may never go back!
I have recently gotten into Italian Flours. Would “0” flour be used for this sourdough?
Hi Ellie, I’d recommend sticking with regular all-purpose flour here.
I just read through the recipe and can’t wait to try it. What size proofing basket did you use? Do you have any preference to a specific one? Also, how long should the Dutch oven stay in the oven to get it as hot as it needs to be? Thank you so much!!
Hi Lori, I have a 9-inch basket (all of my equipment is linked above in the post if that’s helpful), and I just pop the Dutch oven in the oven while the oven preheats. Hope that helps!