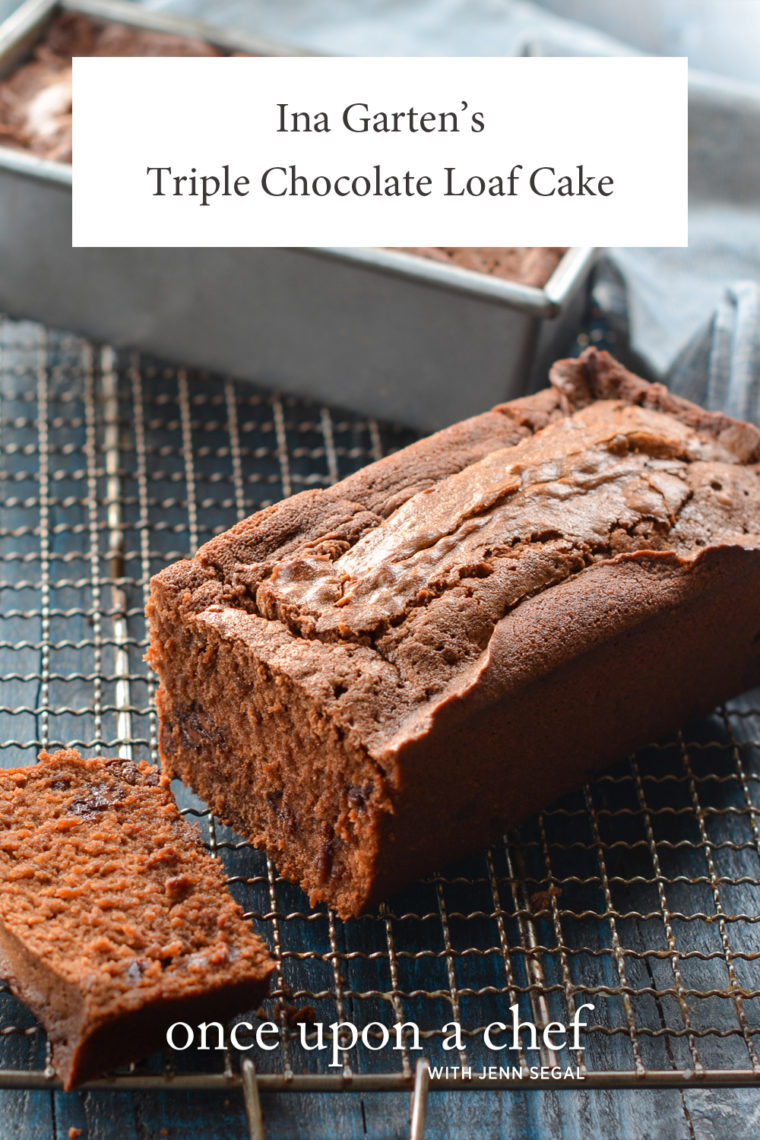
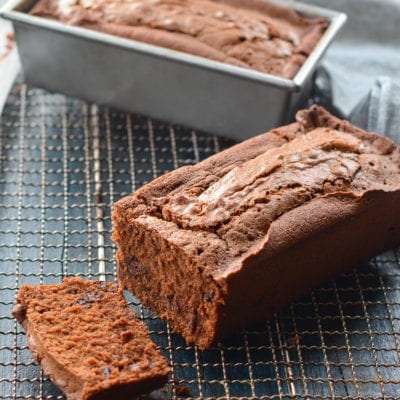
Chocolate Loaf Cake

This post may contain affiliate links. Read my full disclosure policy.
With a soft, fudgy crumb and three kinds of chocolate, this loaf cake is pure chocolate comfort. It’s the kind of treat you’ll be glad to have on the counter whenever a craving hits.
An everyday chocolate loaf cake seems easy enough to bake but, in cooking, the simplest things are often the hardest to get right. The challenge is that most chocolate cakes get their chocolate flavor solely from cocoa powder. This works well in a layer cake when you have a thick chocolate buttercream to add richness and flavor, but in a naked loaf cake, cocoa powder alone leaves you wanting.
This chocolate loaf cake recipe from Ina Garten’s latest cookbook, Cook Like a Pro: Recipes & Tips for Home Cooks (Clarkson Potter, 2018), calls not just for cocoa powder, but also bittersweet chocolate and chocolate chips. The result is a luscious snack cake that tastes as rich and chocolaty as a brownie and needs absolutely no frosting.
“My family is in heaven, saying it is “fancy bakery quality!””
What you’ll need To Make Ina Garten’s Chocolate Loaf Cake
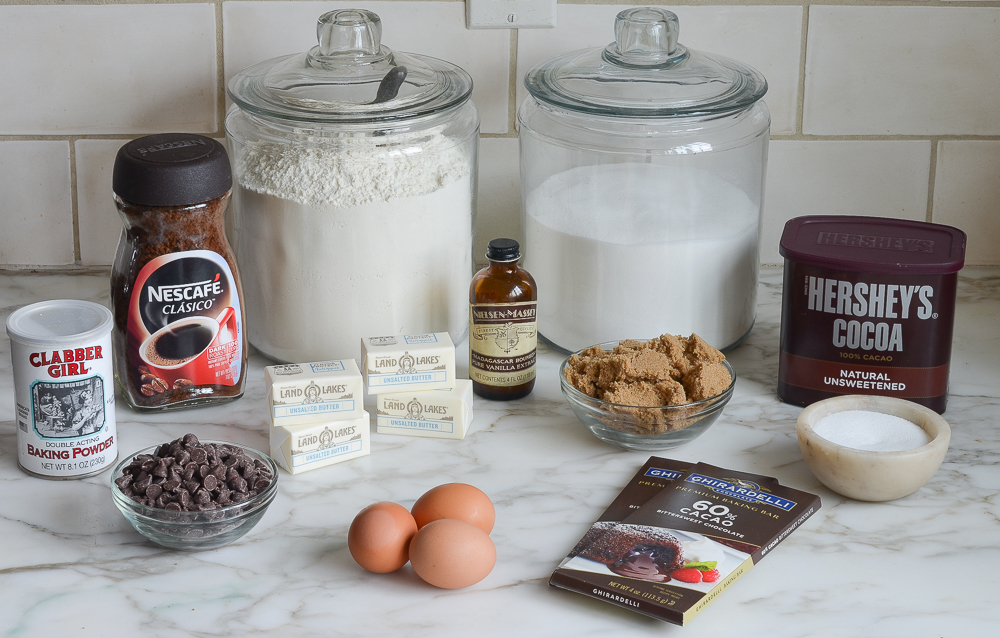
- Bittersweet chocolate, cocoa powder, coffee granules & chocolate chips: These ingredients work together to build deep, layered chocolate flavor.
- All-purpose flour, baking powder & salt: The dry base of the cake—flour provides structure, baking powder gives it lift, and salt balances the sweetness and rounds out the flavor.
- Unsalted butter, granulated sugar, brown sugar, large eggs & vanilla extract: This combination creates the moist, tender crumb—creamed butter and sugars add richness and sweetness, eggs bind the batter and add structure, and vanilla rounds out the flavor.
- Jump to the printable recipe for precise measurements
Step-by-Step Instructions
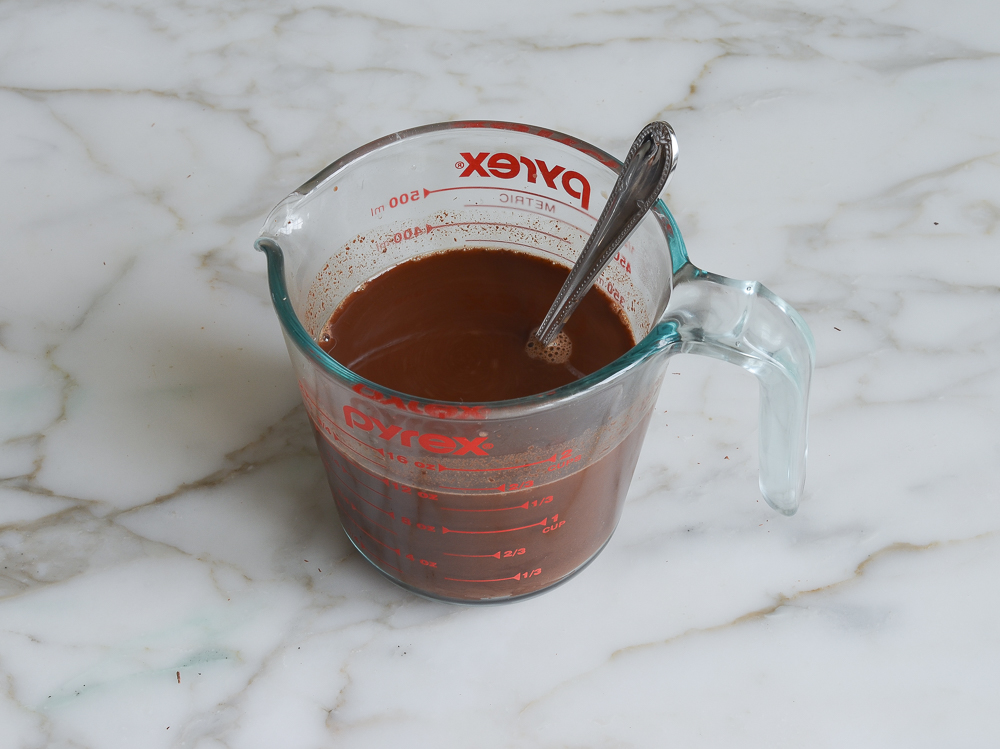
Step 1. Start the chocolate mixture. Pour the boiling water into a 2-cup glass measuring cup. Add the bittersweet chocolate, cocoa powder, and coffee granules, and stir until the chocolate melts. Set aside to cool.
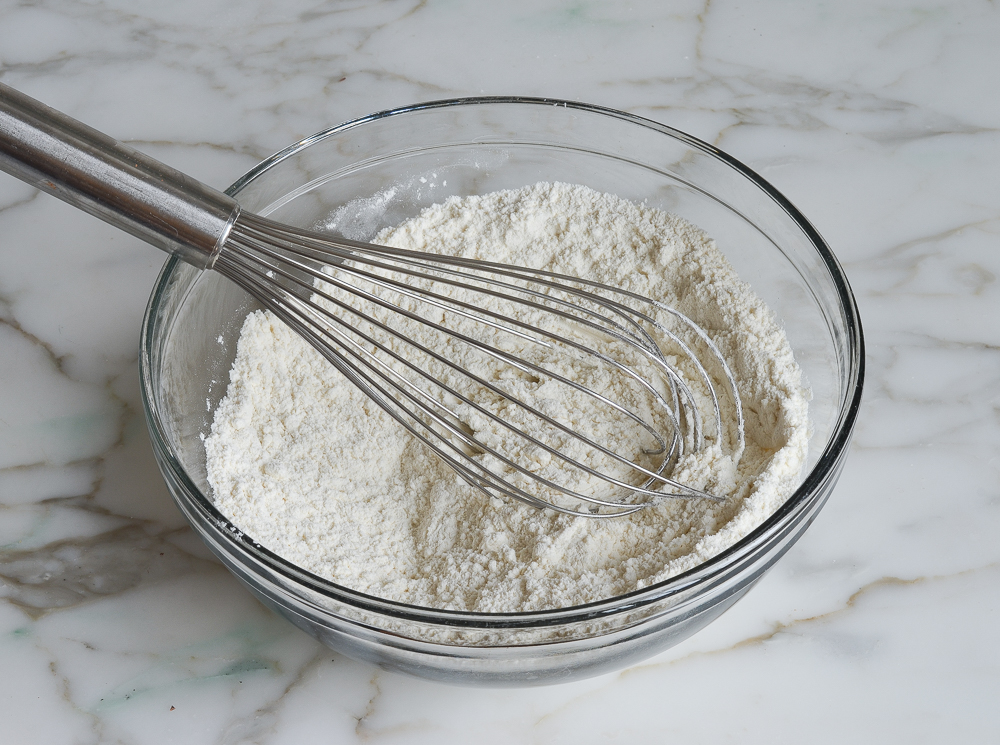
Step 2. Mix the dry ingredients. In a medium bowl, whisk together 2 cups of the flour with the baking powder and salt. Set aside.
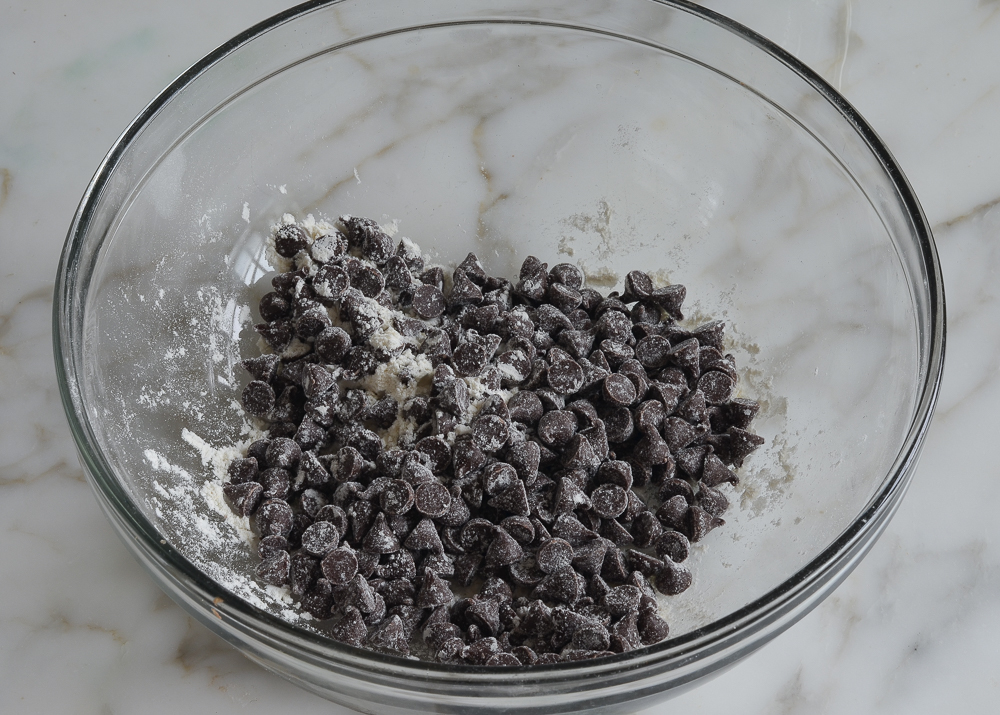
Step 3. Toss the chips. In a small bowl, toss the chocolate chips with the remaining 2 tablespoons of flour. This helps keep them from sinking during baking. Set aside.
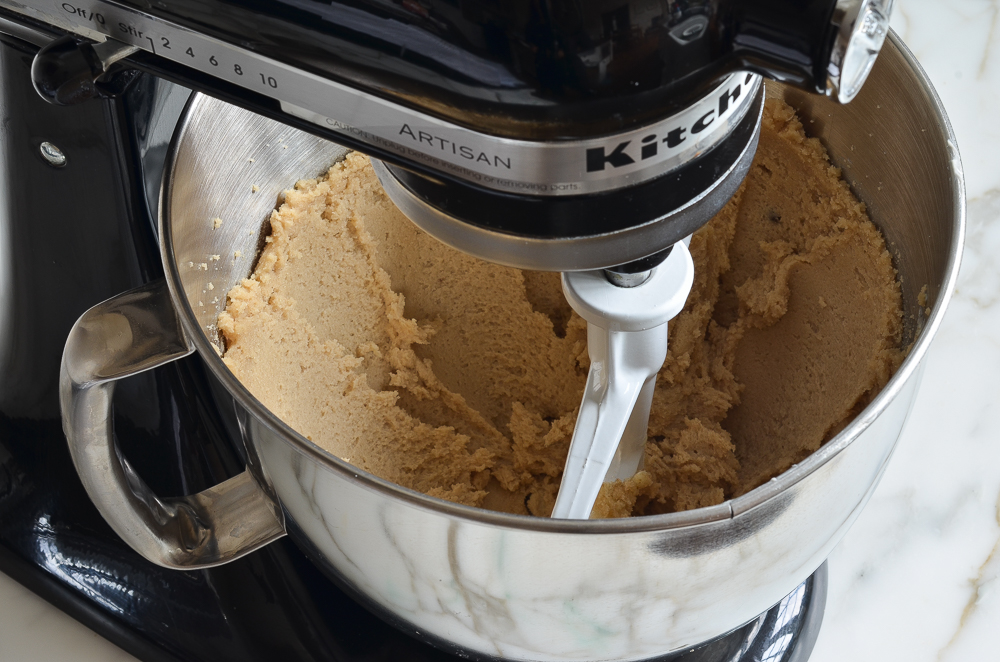
Step 4. Cream the butter and sugars. In the bowl of a stand mixer fitted with the paddle attachment, beat the butter, granulated sugar, and brown sugar on medium speed until light and fluffy, about 2 minutes.
Pro Tip: Make sure the butter is room temperature. It should be soft enough to press a finger in easily, but still hold its shape. This ensures proper creaming with the sugars.
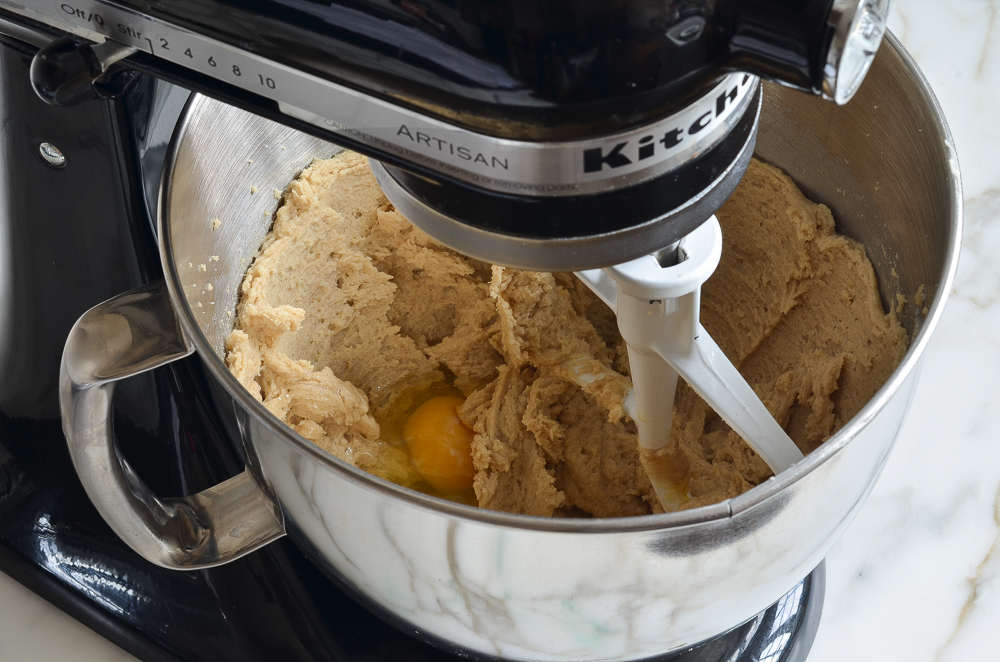
Step 5. Add the eggs and vanilla. With the mixer on low, add the eggs one at a time, mixing just until incorporated. Adding the eggs one at a time helps them incorporate smoothly into the batter and doesn’t break the emulsion. Add the vanilla and mix briefly to combine.
Step 6. Alternate the dry and wet ingredients. Add the flour mixture and the chocolate mixture in thirds, alternating between the two and beginning and ending with the flour.
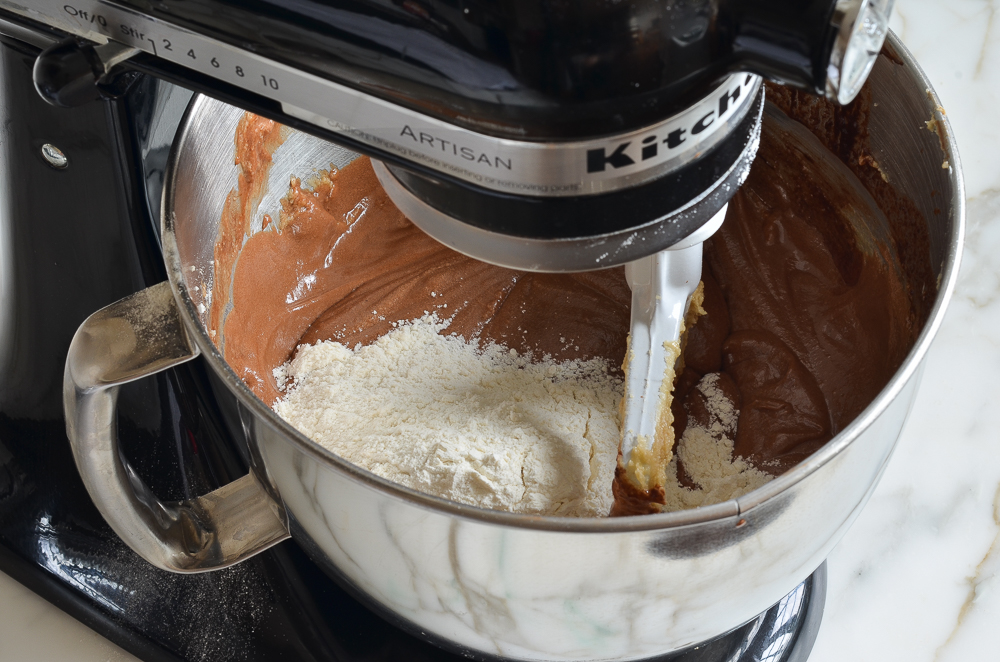
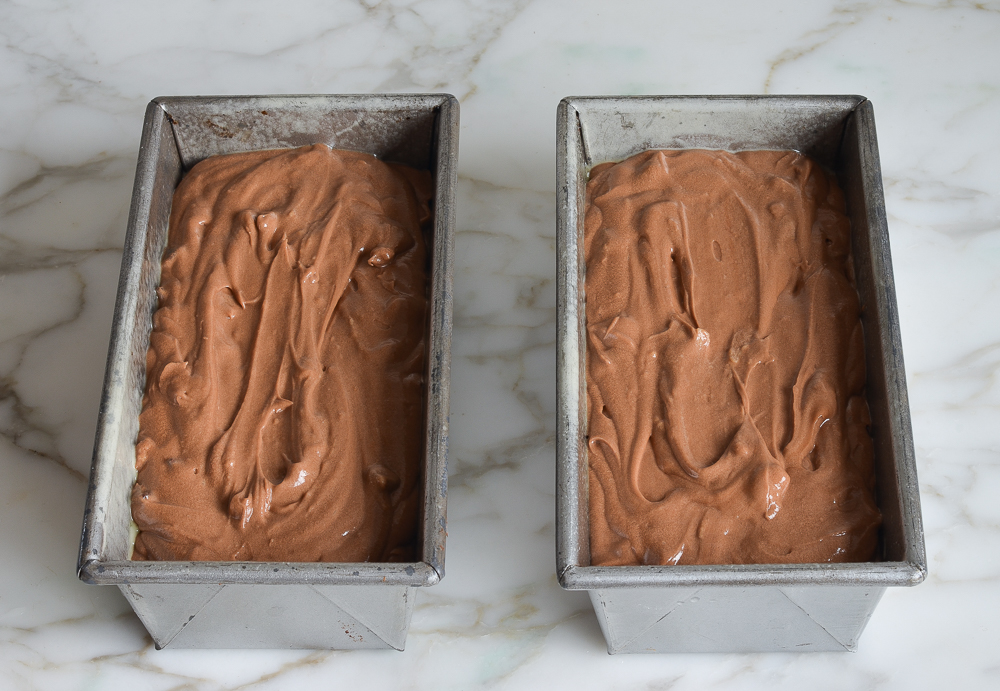
Step 7. Finish the batter. Fold in the chocolate chips with a rubber spatula, mixing until evenly distributed, then divide the batter equally between the prepared pans and smooth the tops.
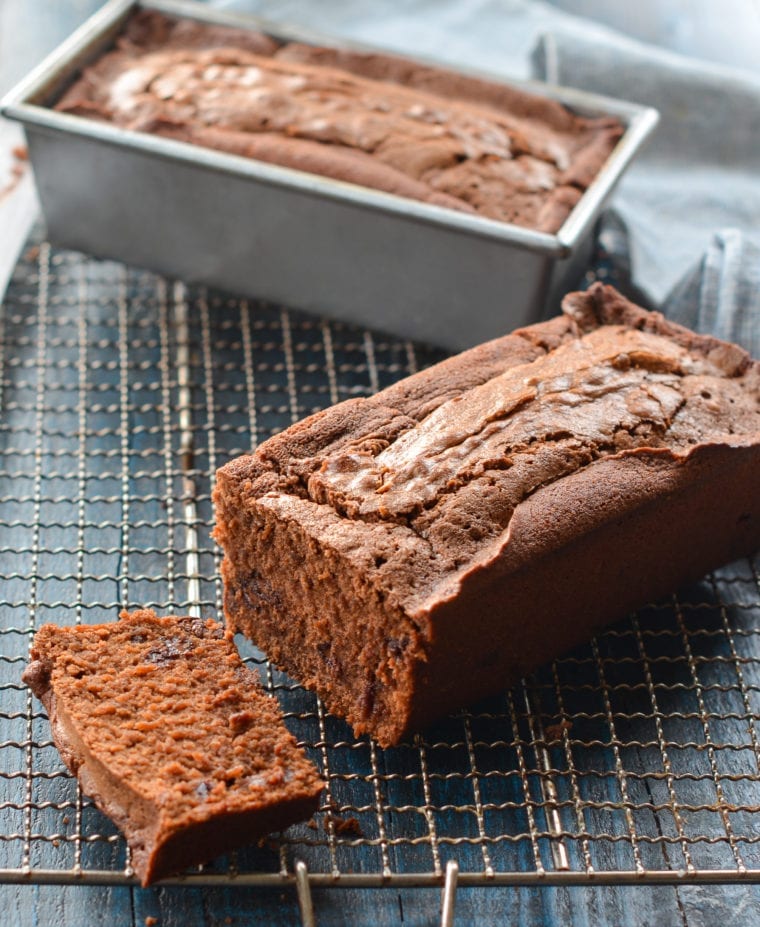
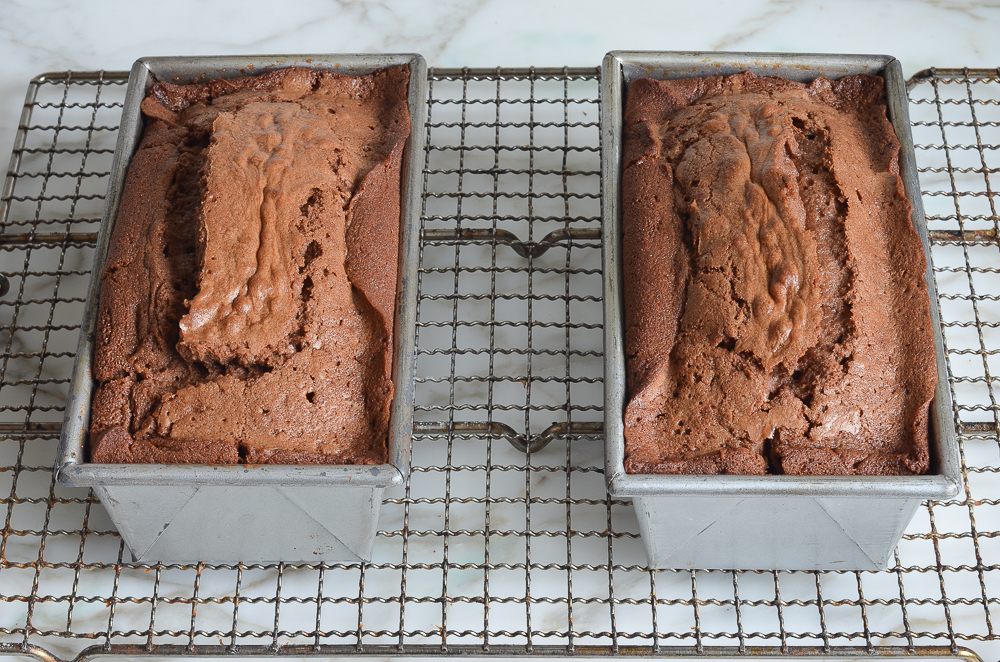
Step 8. Bake. Bake in a 350°F oven for 45 to 55 minutes, or until a toothpick inserted into the center comes out clean. Let the cakes cool in the pans for 15 minutes, then turn out on a wire rack to cool completely. When ready to serve, use a serrated knife for clean slices. The cakes will stay fresh for 2 to 3 days; freeze for longer storage.
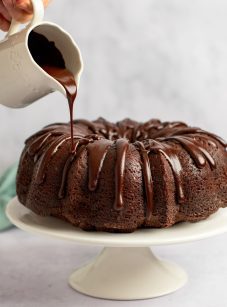
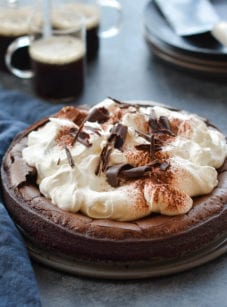
More chocolate Cake Recipes You May Like

Chocolate Loaf Cake
Ingredients
- 1 cup boiling water
- 5 ounces bittersweet chocolate, best quality best quality such as Ghirardelli
- 2 tablespoons natural unsweetened cocoa powder, such as Hershey's
- 1 teaspoon instant coffee granules, such as Nescafé
- 1 cup (2 sticks) unsalted butter, at room temperature
- 2 cups + 2 tablespoons all-purpose flour, spooned into measuring cup and leveled-off, divided
- 1 teaspoon baking powder
- 1 teaspoon salt
- 1 cup semisweet chocolate chips, best quality such as Ghirardelli
- 1 cup granulated sugar
- 1 cup (packed) dark brown sugar
- 3 extra-large eggs, at room temperature
- 2 teaspoons vanilla extract
Instructions
- Preheat the oven to 350°F (175°C) and set an oven rack in the middle position. Grease two 8 x 4-in (20 x 10-cm) loaf pans with nonstick cooking spray with flour, such as Baker's Joy or Pam with Flour.
- Pour the boiling water into a 2-cup (480-ml) glass measuring cup, add the bittersweet chocolate, cocoa powder, and coffee granules, and stir until the chocolate melts. Set aside to cool for at least 15 minutes.
- In a medium bowl, whisk together the 2 cups flour, the baking powder, and salt and set aside. In another bowl, toss the chocolate chips with the remaining 2 tablespoons flour and set aside.
- In the bowl of an electric mixer fitted with the paddle attachment or beaters, beat the butter, granulated sugar, and brown sugar together on medium speed for 2 minutes. With the mixer on low, add the eggs, one at a time, and then the vanilla, scraping down the bowl with a rubber spatula. The mixture may look at little curdled at this point; that's okay. Alternately in thirds, add the flour mixture and the chocolate mixture, beginning and ending with the flour. (Don't worry if there are a few bits of unmelted chocolate in the chocolate mixture.) Fold in the chocolate chips with a rubber spatula. Divide the batter equally between the prepared pans, smooth the tops, and bake for 45 to 55 minutes, until a toothpick inserted in the middle comes out clean. (Test in a few places because you might hit a warm chocolate chip.) Cool in the pans for 15 minutes, turn out on a cooling rack, rounded side up, and allow to cool to room temperature. Slice with a serrated knife.
Notes
Nutrition Information
This website is written and produced for informational purposes only. I am not a certified nutritionist and the nutritional data on this site has not been evaluated or approved by a nutritionist or the Food and Drug Administration. Nutritional information is offered as a courtesy and should not be construed as a guarantee. The data is calculated through an online nutritional calculator, Edamam.com. Although I do my best to provide accurate nutritional information, these figures should be considered estimates only. Varying factors such as product types or brands purchased, natural fluctuations in fresh produce, and the way ingredients are processed change the effective nutritional information in any given recipe. Furthermore, different online calculators provide different results depending on their own nutrition fact sources and algorithms. To obtain the most accurate nutritional information in a given recipe, you should calculate the nutritional information with the actual ingredients used in your recipe, using your preferred nutrition calculator.
This cake is perfection! Thanks for sharing another great recipe! Can you tell me if possible to make this cake in a 7×3 round cake pan? I want to make it in a different shape instead of a loaf pan. Thanks for any feedback!
Hi Jessica, so glad you like it! I think you could make this in a 7-inch round pan if you halve the recipe. The bake time will be shorter, so keep a close eye on it. I’d love to hear how it turns out if you try it!
Thank you! I tried it and it turned out great but…. the top was not as crispy and beautiful as your loaf pan style. I will stick to the loaf! Thank you again!!!
Thanks for reporting back! Good to know that the results were good, but you like the loaf version better. I’m sure other readers will find that helpful too. 😊