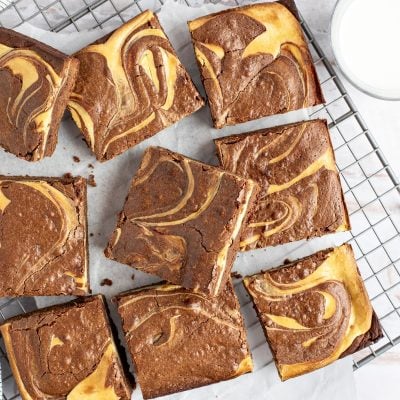
Baileys Cheesecake-Marbled Brownies

This post may contain affiliate links. Read my full disclosure policy.
Spiked with Baileys Irish Cream, these chocolate brownies with a swirl of tangy cheesecake are out of this world.

Spiked with Baileys Irish Cream, these brownies with a swirl of tangy cheesecake are truly out of this world. Think of them as a boozy cross between my go-to brownie recipe and cheesecake bars. They’re cakey on the bottom, fudgy and creamy in the center, and crisp on top. I’m especially proud of them—it took six tries and a full day in the kitchen to get them just right. For a real treat, enjoy them warm out of the oven with a scoop of vanilla ice cream. And be sure to cut them small; they’re incredibly rich!
“As big fans of Baileys, these are delicious, light and fluffy but still very rich.”
What You’ll Need To Make Cheesecake-Marbled Brownies

- Cream Cheese: Provides a rich and creamy base for the cheesecake layer.
- Granulated Sugar: Adds sweetness to the cheesecake mixture to balance the tanginess of the cream cheese. Additionally, it sweetens the brownies and helps create a shiny top.
- Egg Yolk: Adds richness and helps to set the cheesecake batter.
- Vanilla Extract: Enhances the flavor of both the cheesecake and brownies with its aromatic richness.
- Baileys Irish Cream: Infuses both the cheesecake and the brownie layers with a distinct creamy liqueur flavor.
- All Purpose Flour: Helps thicken the cheesecake batter for better texture and provides structure to the brownie batter.
- Butter: Adds moisture and richness to the brownies.
- Bittersweet or Semisweet Chocolate: Provides the primary chocolate flavor and fudginess for the brownies. (Bittersweet and semisweet chocolate differ primarily in their cocoa content, with bittersweet being slightly less sweet and more intense; they are typically interchangeable in recipes.)
- Eggs: Bind the ingredients together and contribute to the brownies’ structure.
- Light Brown Sugar: Adds moisture and a hint of caramel flavor. When measuring brown sugar, always pack it tightly to eliminate air pockets.
- Natural Unsweetened Cocoa Powder: Intensifies the chocolate flavor and adds depth to the brownies.
- Jump to the printable recipe for precise measurements
Step-By-Step Instructions
Step 1: Make the Cheesecake Mixture
Begin by combining all of the ingredients for the cheesecake filling. You’ll need warm cream cheese, an egg yolk, sugar, vanilla, Baileys and flour.

Beat until the mixture is smooth and set aside.

Step 2: Make the Brownies
For the brownie batter, begin by melting the butter in the microwave. Immediately add the chopped chocolate.

Stir until the chocolate is completely melted and smooth. If any bits of chocolate remain, you can pop the bowl back in the microwave for 20 seconds. Set aside.

In a separate bowl, combine the eggs, sugar, brown sugar, vanilla, Baileys and salt.

Beat until well combined.

Beat in the butter/chocolate mixture.

Then mix in the flour and cocoa powder.

Scoop out 1/2 cup of the brownie batter and set aside.

Pour the remaining batter into a greased 8-inch square pan.

Pour the cheesecake batter over top and gently spread to cover evenly. Then heat the reserved brownie batter in the microwave until warm and pourable, 15 to 20 seconds, then dollop it over top of the cheesecake layer.

Use a butter knife to swirl the batters together—don’t overdo it or the colors will get muddled.

Bake for 40 to 45 minutes, until puffed and set, and the edges are starting to brown. Don’t undercook them or they’ll be too wet in the center.

Let cool on a wire rack, then cut into squares. Note that the brownies will seem very fudgy when you cut them, but they will firm up as they sit out. Enjoy!

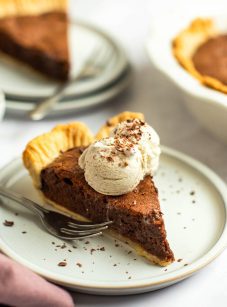
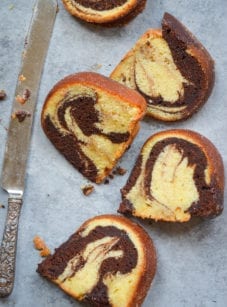
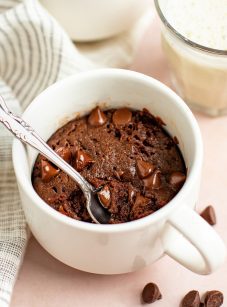
You May Also Like

Baileys Cheesecake-Marbled Brownies
Ingredients
For the Cheesecake Batter
- 8 ounces cream cheese, preferably Philadelphia brand
- ⅓ cup sugar
- 1 large egg yolk
- ¼ teaspoon vanilla extract
- 2 tablespoons Baileys Irish Cream
- 2 tablespoons all-purpose flour
For the Brownie Batter
- 5 tablespoons unsalted butter
- 4 ounces bittersweet or semisweet chocolate, finely chopped
- 2 large eggs
- ½ cup granulated sugar
- ½ cup (packed) light brown sugar
- 1 teaspoon vanilla extract
- ¼ cup Baileys Irish Cream
- ¼ teaspoon salt
- ¾ cup all-purpose flour, spooned into measuring cup and leveled-off with a knife
- 2 tablespoons natural unsweetened cocoa powder
Instructions
- Preheat the oven to 350°F (175°C). Grease an 8-inch (20-cm) baking pan with butter or nonstick cooking spray.
- Make the cheesecake batter: In a small bowl, microwave the cream cheese until soft, 20 to 30 seconds. In the bowl of an electric mixer, beat the softened cream cheese with the sugar, egg yolk, vanilla, Baileys and flour until smooth. Set aside.
- Make the brownie batter: In a medium bowl, melt the butter in the microwave, about 1 minute. Immediately add the chopped chocolate and stir until melted and smooth. (If bits of chocolate remain, place the mixture back in the microwave for 20 seconds.)In the bowl of an electric mixer, beat the eggs, granulated sugar, brown sugar, vanilla, Baileys and salt on medium speed until smooth. Add the chocolate/butter mixture and beat until well incorporated. Add the flour and cocoa powder and mix on low until just combined. Do not overmix.
- Transfer ½ cup (120 ml) of the brownie batter to a small microwave-safe bowl (it's fine to use the same bowl you melted the butter and chocolate in). Spread the remaining brownie batter in the prepared pan. Spread the cheesecake batter evenly over the brownie batter. Microwave the reserved ½ cup (120 ml) of brownie batter until warm and pourable, 15 to 20 seconds. Using a spoon, dollop the warm batter over the cheesecake layer, about 8 dollops (for the prettiest marble effect, leave as much space as possible between the dollops). Using a knife, swirl the brownie batter through the cheesecake batter, making a marbled pattern. Don't overdo the marbling, or the batters will get muddled.
- Bake until puffed, set in the center and just starting to brown around the edges, 40 to 45 minutes. (Don't undercook, or the brownies will be too wet in the center.) Let cool completely in the pan on a wire rack. Cut the brownies into 12 or 16 squares, wiping the knife clean between slices. The brownies will seem very moist and fudgy at first, but will firm up once cut and left out for a bit. (The brownies may also be served warm with vanilla ice cream; just let them cool at least 30 minutes after baking.)
Notes
Nutrition Information
This website is written and produced for informational purposes only. I am not a certified nutritionist and the nutritional data on this site has not been evaluated or approved by a nutritionist or the Food and Drug Administration. Nutritional information is offered as a courtesy and should not be construed as a guarantee. The data is calculated through an online nutritional calculator, Edamam.com. Although I do my best to provide accurate nutritional information, these figures should be considered estimates only. Varying factors such as product types or brands purchased, natural fluctuations in fresh produce, and the way ingredients are processed change the effective nutritional information in any given recipe. Furthermore, different online calculators provide different results depending on their own nutrition fact sources and algorithms. To obtain the most accurate nutritional information in a given recipe, you should calculate the nutritional information with the actual ingredients used in your recipe, using your preferred nutrition calculator.
This brownie recipe deserves 10 stars. It’s better than any I could find in a fine bakery. Because of your comment, I left it in the oven for an extra five minutes so it would set. My friends and family are becoming aware that I only use your recipes.. Does that make me a groupie? No I think it makes me a person that has found a Chef who makes cooking and baking easier and fun. You add little tips throughout your recipes that make it easier to understand. Thank you again for another wonderful recipe.
💜
Can I make these the night before they are needed?
Sure, Samantha, that should be fine. Enjoy!