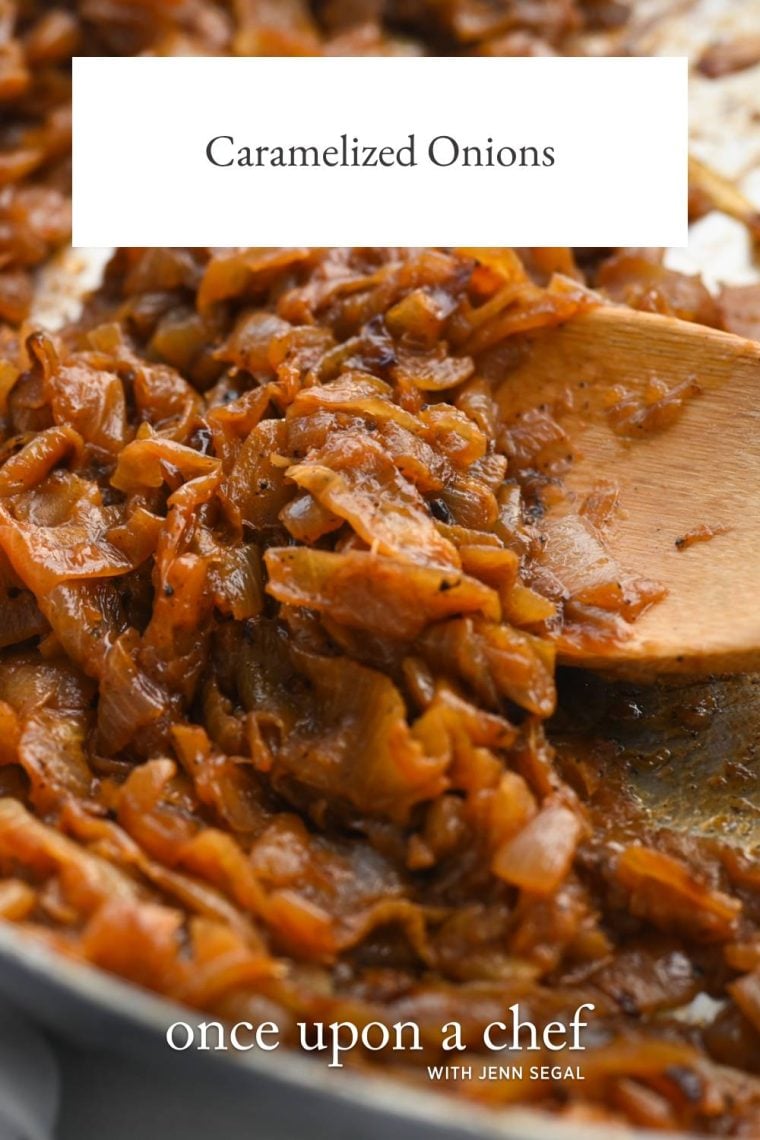
Caramelized Onions

This post may contain affiliate links. Read my full disclosure policy.
Sweet, savory, and deeply flavorful, these caramelized onions are a must-have to elevate your favorite dishes.

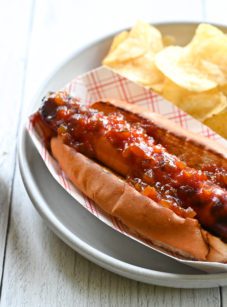
Caramelized onions are jammy, sweet wonders that have the power to elevate even the simplest of dishes—think grilled cheese, steakhouse burgers or French onion dip—into something truly “cheffy.” Starting with what seems like an enormous mountain of onions, you’ll be amazed to watch as they cook down to just 1½ cups of deeply flavored, richly browned goodness. Patience is absolutely key here. The caramelization process can take anywhere from 45 minutes to over an hour, largely depending on the size of your pan—the bigger the pan, the quicker the onions will caramelize.
Consider this a leisurely weekend cooking project that will fill your home with the most heavenly aroma. Once done, caramelized onions can be conveniently stored in the fridge for up to two weeks or frozen for up to 3 months, ready to be used whenever needed.
Ways To Use Caramelized Onions
- Burger or Grilled Cheese Topper
- Quiche, Omelette or Frittata Ingredient
- Stuffed Mushroom Filling
- Focaccia or Pizza Topping
- Steak Topping
- Risotto Flavoring
- Quesadilla or Wrap Filling
- Crostini or Bruchetta Topping
- Baked Potato Topping
- Hummus, Baba Ganoush, or Labneh Topping
- Rice Bowl Component
What You’ll Need To Make Caramelized Onions
- Butter and Vegetable Oil: This combination provides the best of both worlds—butter lends rich flavor, while the oil prevents the butter from burning.
- Yellow or Vidalia Onions: Thinly slicing the onions ensures they cook evenly and caramelize properly. While you can caramelize any type of onion, yellow onions are ideal for their balance of sweet and savory flavors. Sweet onions, like Vidalia or Walla Walla, can also be used and will result in a slightly sweeter dish. Feel free to use a mix!
- Salt: Enhances the flavor of the onions and helps in drawing out moisture, aiding in the caramelization process,
- Freshly Ground Black Pepper: Adds a subtle warmth.
- Sugar: A small amount enhances the onions’ natural sweetness.
- Water: As the onions cook and begin to stick to the pan, adding water helps deglaze the pan, lifting the flavorful browned bits (fond) from the bottom of the pan and incorporating them back into the onions, enriching their flavor.
- Jump to the printable recipe for precise measurements
Step-by-Step Instructions
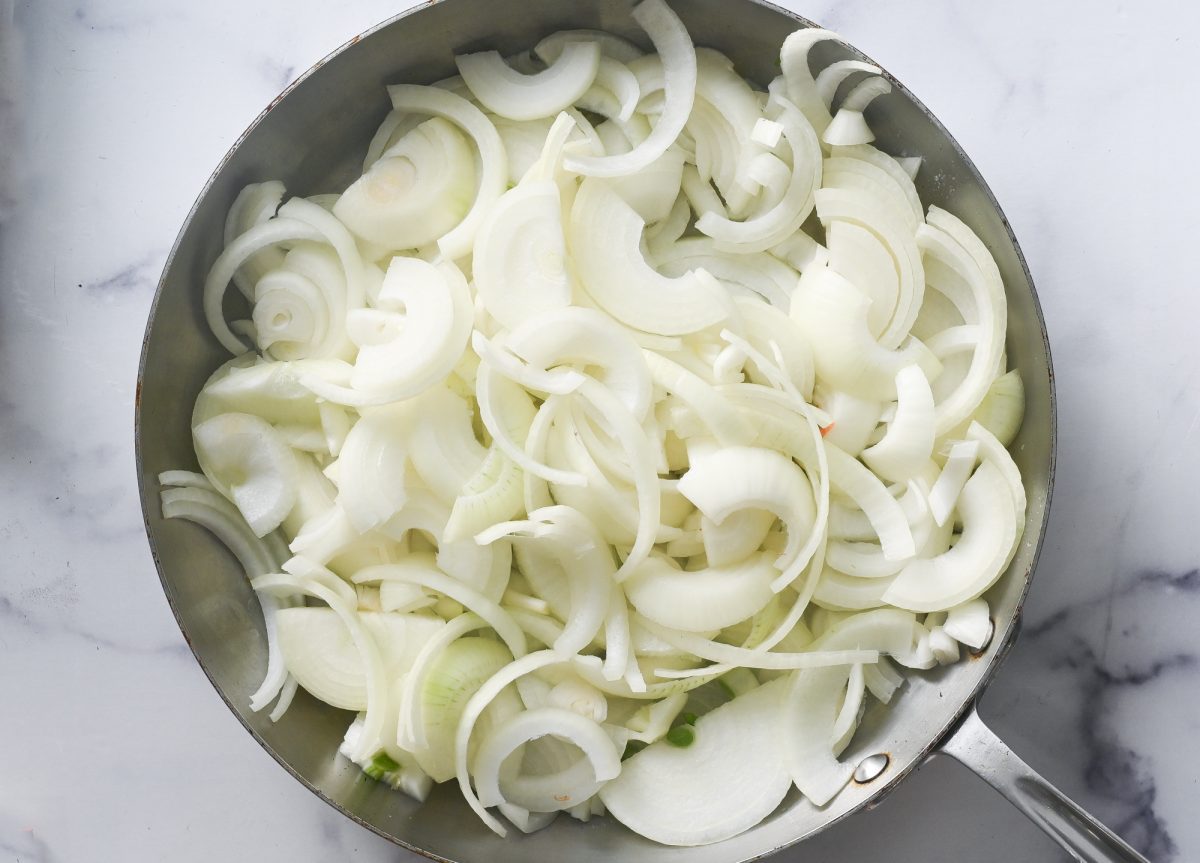
In a large, heavy-bottomed skillet, melt the butter with the oil over medium-high heat. Add onions to the skillet and season with salt, pepper, and sugar.
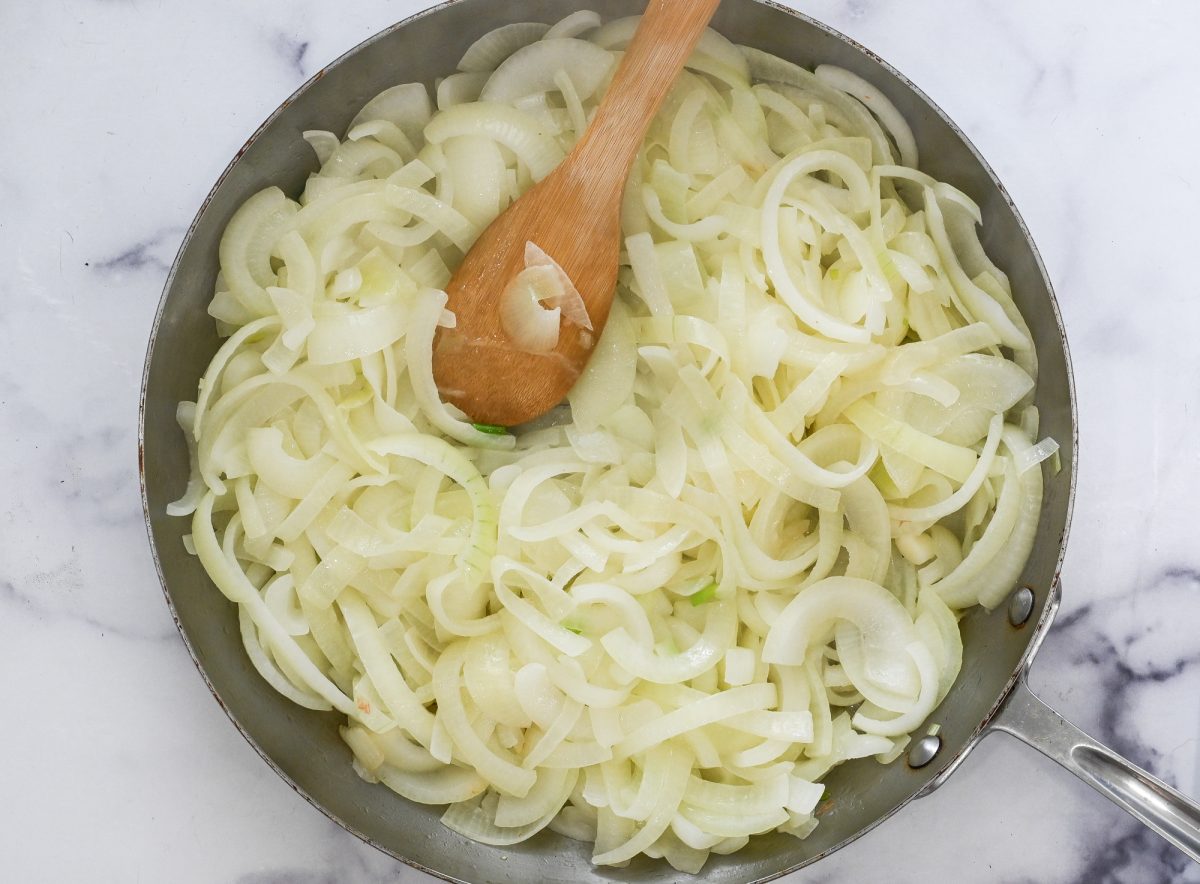
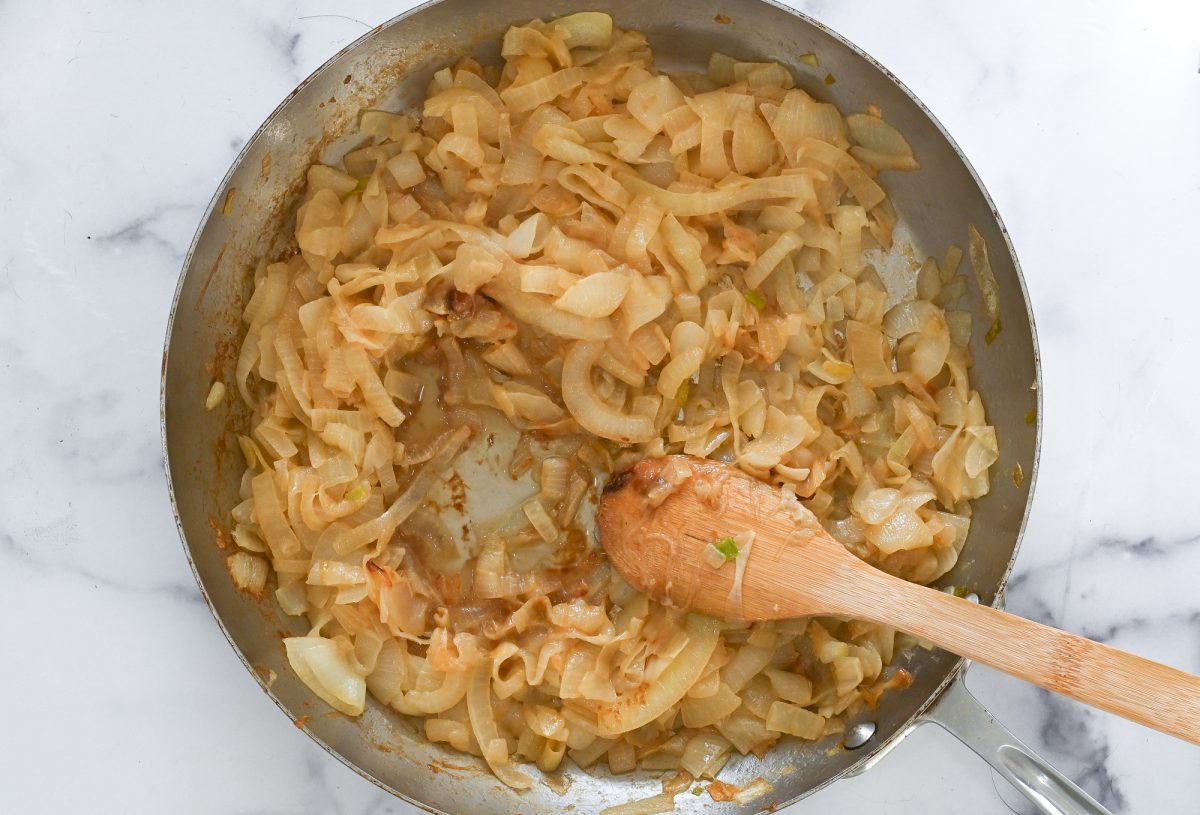
Cook, uncovered, stirring frequently with a wooden spoon, until the onions are slightly softened, 4 to 5 minutes.
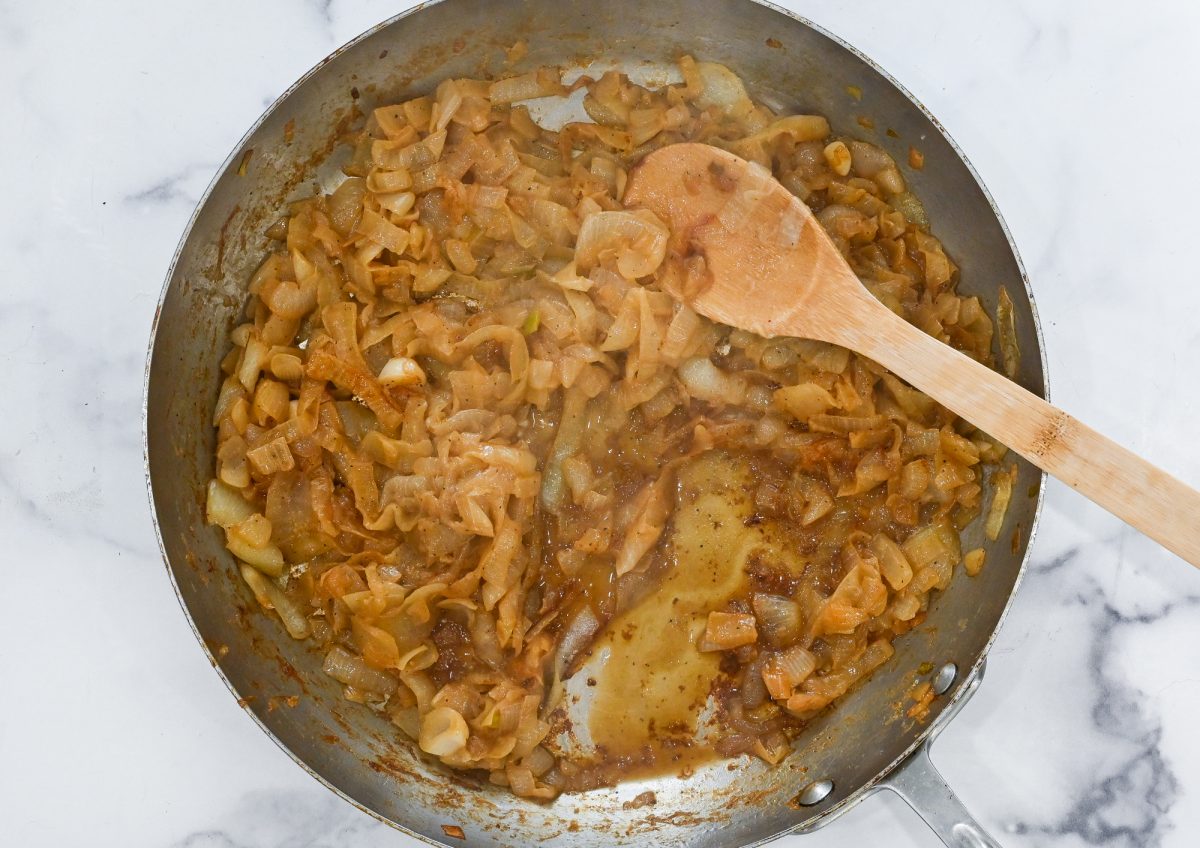
Turn the heat down to medium and keep cooking, uncovered, stirring occasionally, until the onions turn a rich golden brown. This can take anywhere from 45 to 75 minutes. At first, you’ll just need to stir the onions every so often, but as they cook down and start to brown, you’ll need to stir more often, scraping up the brown bits (called fond) from the bottom of the pan.
As the onions near the end of the caramelization process, the fond will start to stick to the pan. To prevent burning and ensure even caramelization, occasionally add a few tablespoons of water to deglaze the pan, using a wooden spoon to scrape up the fond.
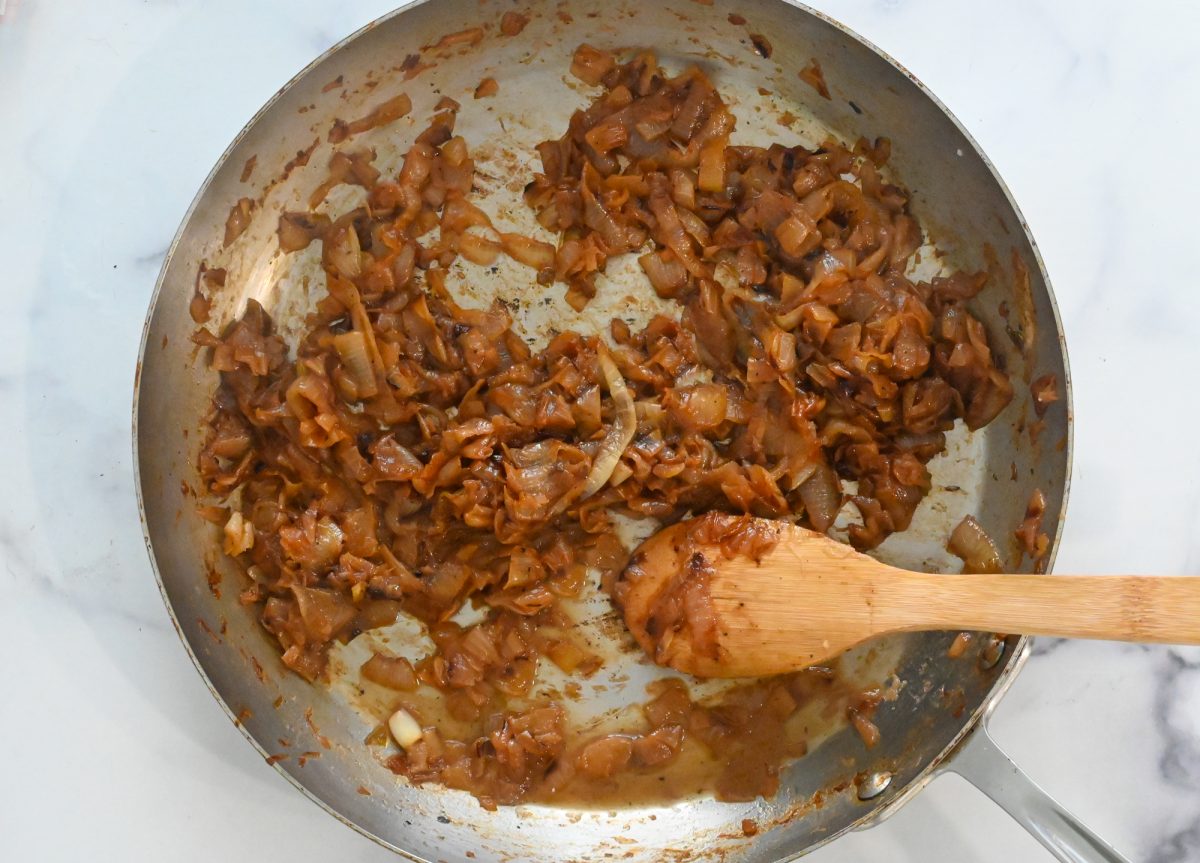
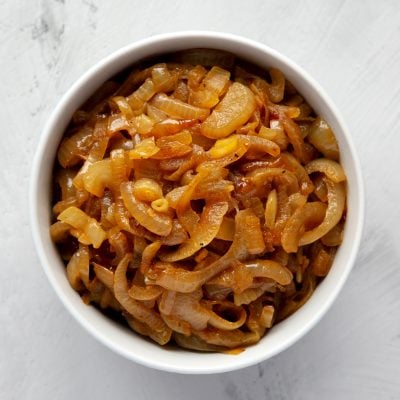
Repeat the deglazing process with the water as needed until the onions are fully caramelized—they need to be a deep golden brown. Once the onions have reached a rich golden brown color, remove them from the skillet and let them cool.
You May Also Like


Caramelized Onions
Ingredients
- 4 tablespoons unsalted butter
- 1 tablespoon vegetable oil
- 3 pounds yellow or Vidalia onions (or a combination), halved and thinly sliced
- ¾ teaspoon salt
- ½ teaspoon freshly ground black pepper
- ¾ teaspoon sugar
- About 1 cup water, as needed
Instructions
- In a large, heavy-bottomed skillet, melt the butter with the oil over medium-high heat. Add the onions, salt, pepper, and sugar. Cook, uncovered, stirring frequently with a wooden spoon, until the onions are slightly softened, 4 to 5 minutes.
- Reduce the heat to medium and continue cooking, uncovered and stirring occasionally, until the onions are a rich golden brown color. This process can take anywhere from 45 to 75 minutes. In the beginning, you will only need to stir the onions occasionally. However, as the onions cook down and begin to brown, you will need to stir them more frequently, scraping the fond (the brown particles) from the bottom of the pan. Towards the end of the caramelization process, the fond will start to stick to the pan, so you will need to occasionally deglaze the pan with a few tablespoons of water, scraping up the fond with a wooden spoon, to prevent burning and promote even caramelization. Repeat the deglazing process with the water as needed until caramelization is achieved. Once the onions have achieved the rich golden brown color, remove them from the skillet, let cool, and store in a covered container in the refrigerator.
Notes
Nutrition Information
This website is written and produced for informational purposes only. I am not a certified nutritionist and the nutritional data on this site has not been evaluated or approved by a nutritionist or the Food and Drug Administration. Nutritional information is offered as a courtesy and should not be construed as a guarantee. The data is calculated through an online nutritional calculator, Edamam.com. Although I do my best to provide accurate nutritional information, these figures should be considered estimates only. Varying factors such as product types or brands purchased, natural fluctuations in fresh produce, and the way ingredients are processed change the effective nutritional information in any given recipe. Furthermore, different online calculators provide different results depending on their own nutrition fact sources and algorithms. To obtain the most accurate nutritional information in a given recipe, you should calculate the nutritional information with the actual ingredients used in your recipe, using your preferred nutrition calculator.
Gluten-Free Adaptable Note
To the best of my knowledge, all of the ingredients used in this recipe are gluten-free or widely available in gluten-free versions. There is hidden gluten in many foods; if you're following a gluten-free diet or cooking for someone with gluten allergies, always read the labels of your ingredients to verify that they are gluten-free.
I soften my onions on medium for eight minutes, turn down to medium low and stir every five minutes. They do not ever stick. Takes from 45 to 60 minutes. No need for water. put in a little sherry at the end. SO GOOD
Best way to reheat these?
Hi Andrew, I’d microwave them. 😊
My second attempt at making caramelized onions (the first attempt was a different recipe and was not really successful). Thank you for the detailed instructions and I will be using your recipe from now on. I was making this for guests and some are vegans, so used only 4 Tbsps. oil which worked really well for me (no idea why I didn’t use 5 Tbsps. or just substitute vegan margarine for the butter!) It helped that I had other tasks which kept me in the kitchen, and it was easy to periodically stir the onions.
Thank you, thank you for this! I’ve struggled to carmelize onions just right and had no idea about adding a little water at a time. I can hardly wait to try again.