22 Quick and Easy Recipes in 30 Minutes (or less) + 5 Chef Secrets To Make You A Better Cook!

Crusty Artisan Bread

Tested & Perfected Recipes

This post may contain affiliate links. Read my full disclosure policy.

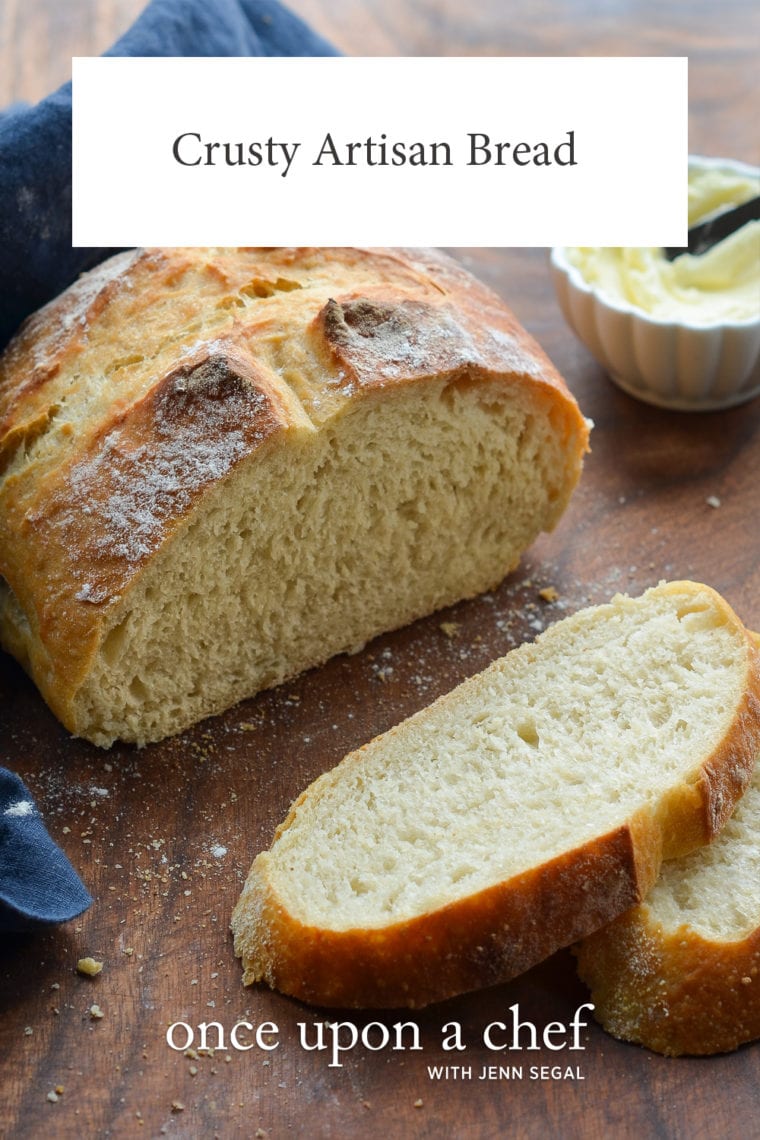
This crusty bread recipe is astonishingly easy — no kneading required — and makes three beautiful loaves, which you can bake as needed.

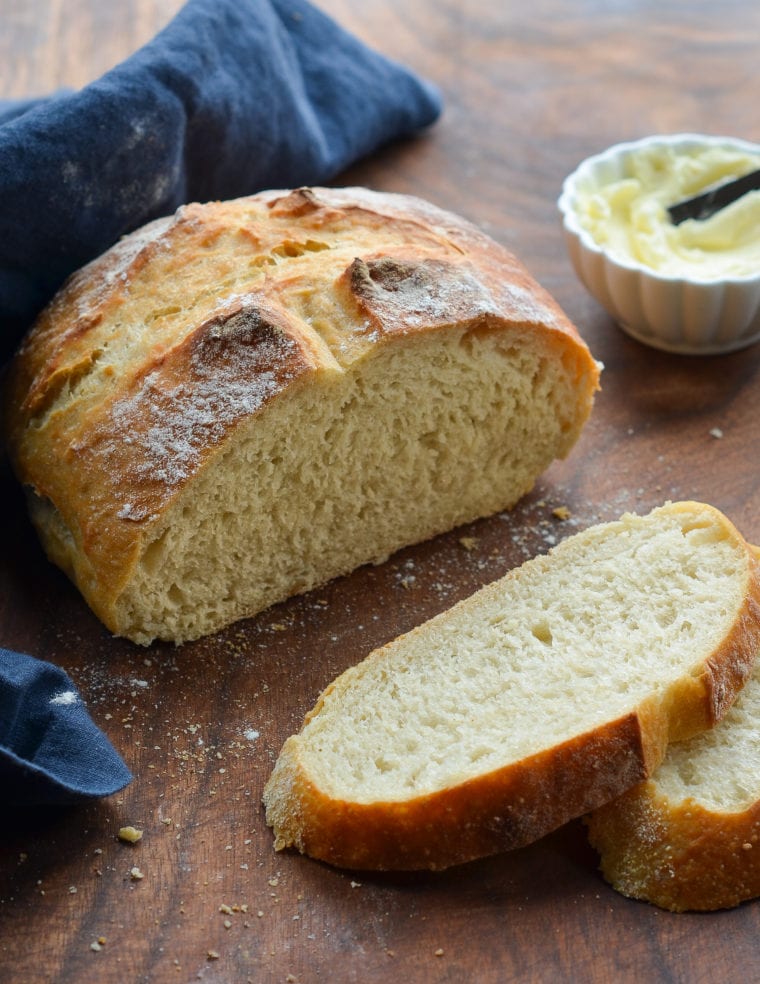
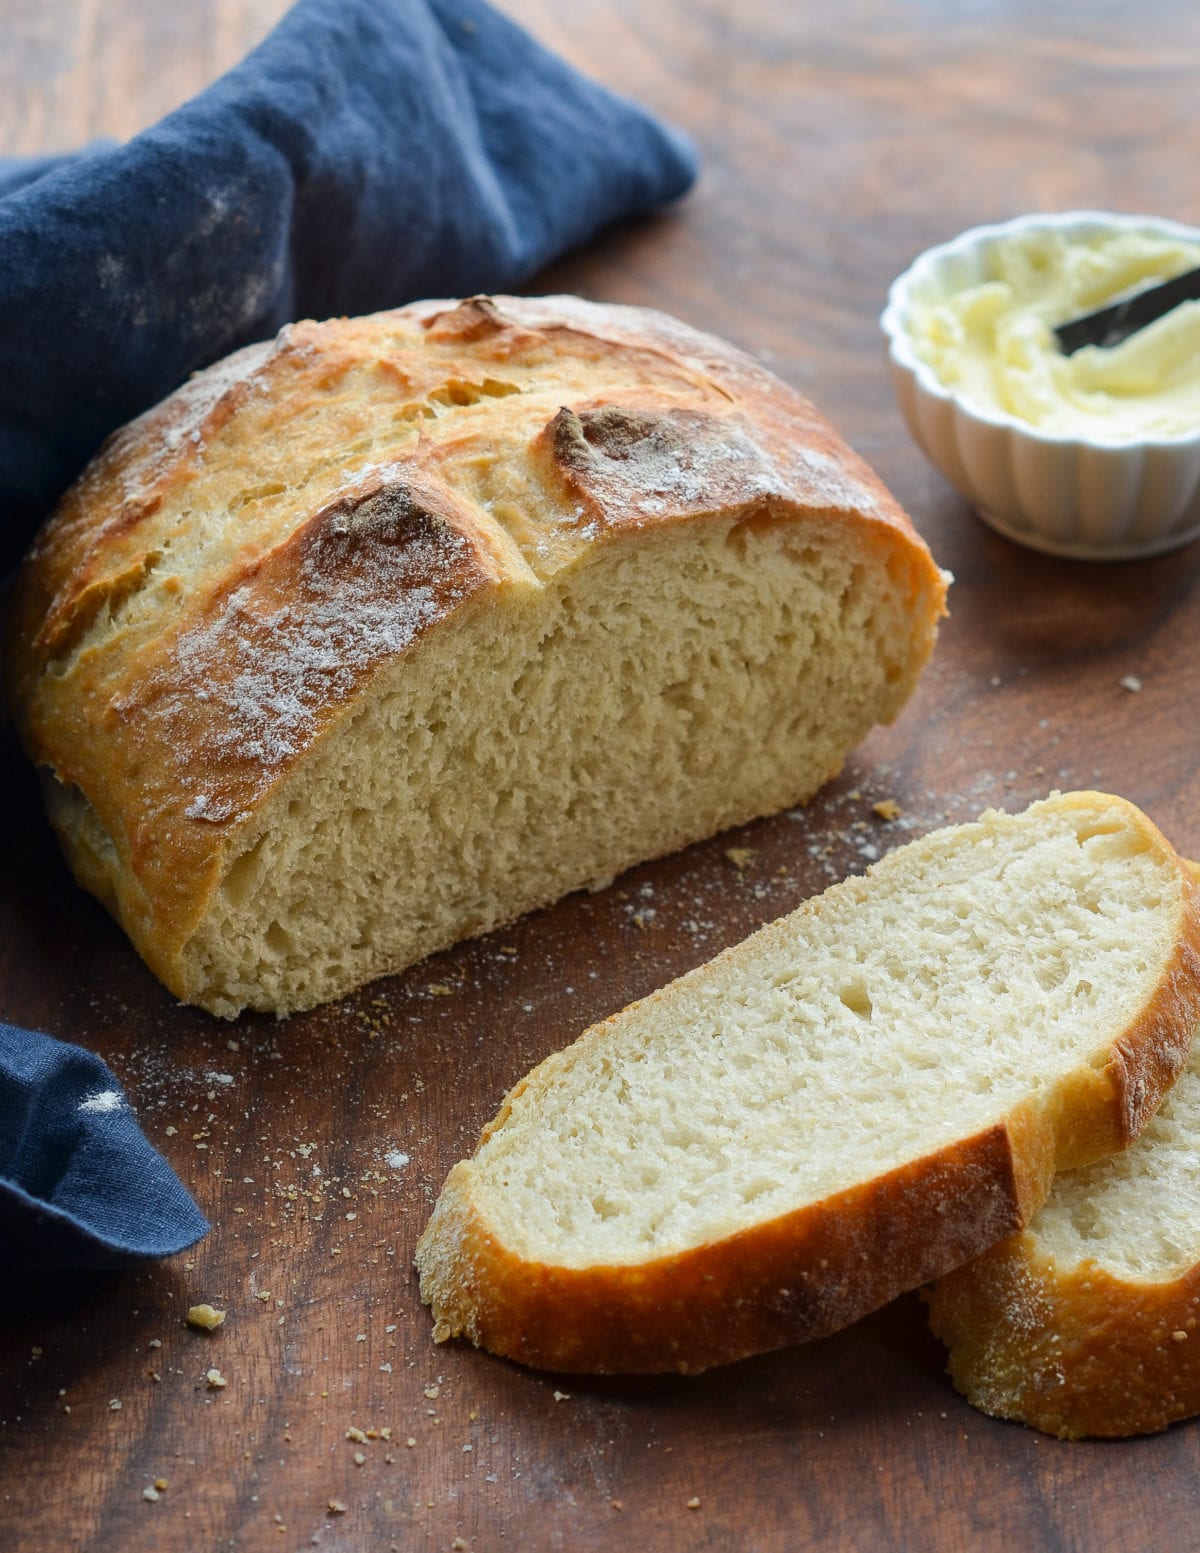
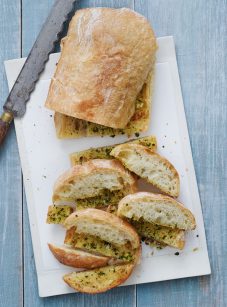
Partially-sliced loaf of crusty artisan bread.

This homemade artisan bread recipe is astonishingly easy, and it makes enough for three delicious loaves, which you can bake as needed. What’s more, the dough takes just five minutes to make, does not require kneading or any special equipment, and can rest in the fridge for up to two weeks (the flavor becomes more complex the longer it sits). The recipe is modestly adapted from one of my favorite baking books, Artisan Bread in 5 Minutes A Day by Jeff Hertzberg M.D. and Zoë François.

What You’ll Need To Make Crusty Artisan Bread
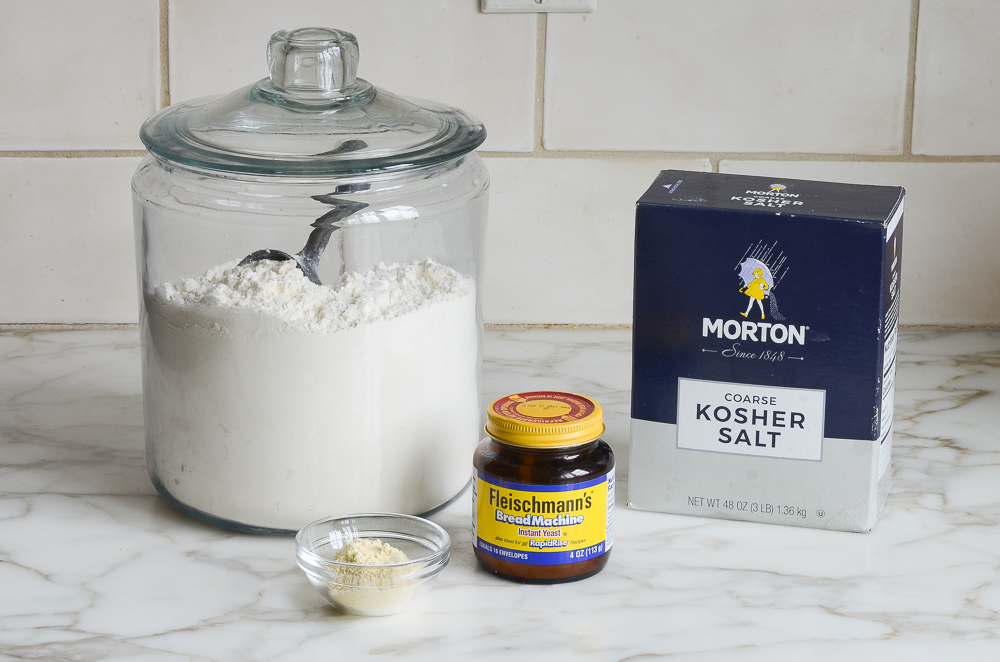
ingredients for homemade bread

This recipe has just four ingredients: all-purpose flour, instant yeast, kosher salt, and water. (The cornmeal is for dusting the pan.) As you can see, I use instant (or rapid-rise) yeast. Active dry yeast may be used instead of instant yeast, however, the dough will take longer to rise. To give active dry yeast a boost, you can dissolve it in the lukewarm water and let it sit until frothy, about 10 minutes. After that, add it to the flour and proceed with the recipe.

How To Make Crusty Artisan Bread

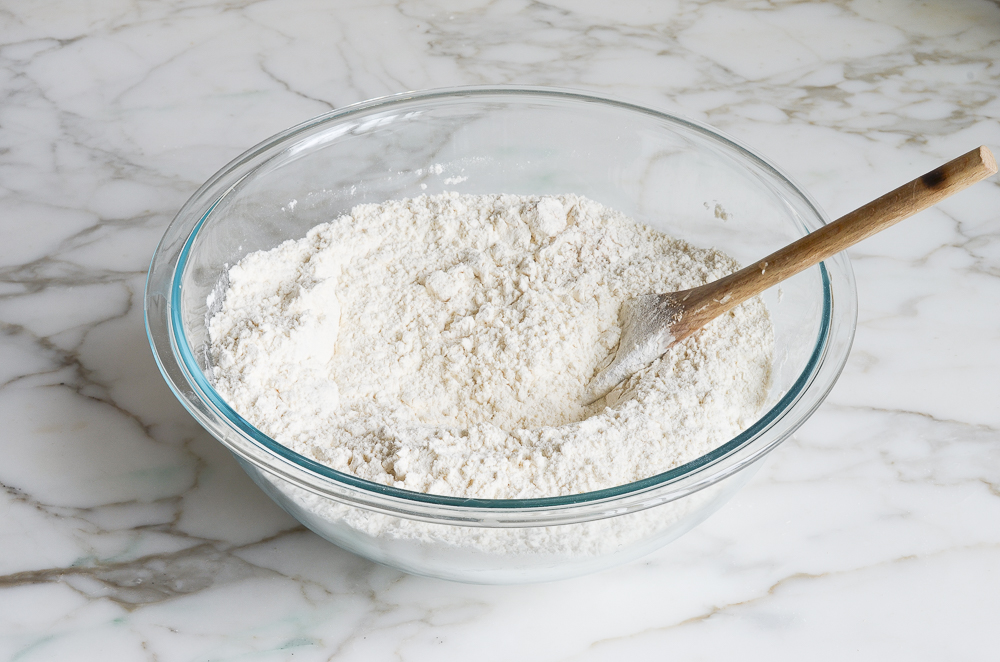
flour, yeast and salt in mixing bowl

In a very large (6-quart) bowl, combine the flour, salt, and yeast. Mix to combine.

mixed dry ingredients

Add 3 cups of lukewarm water (no need to be exact but lukewarm is about 100°F).

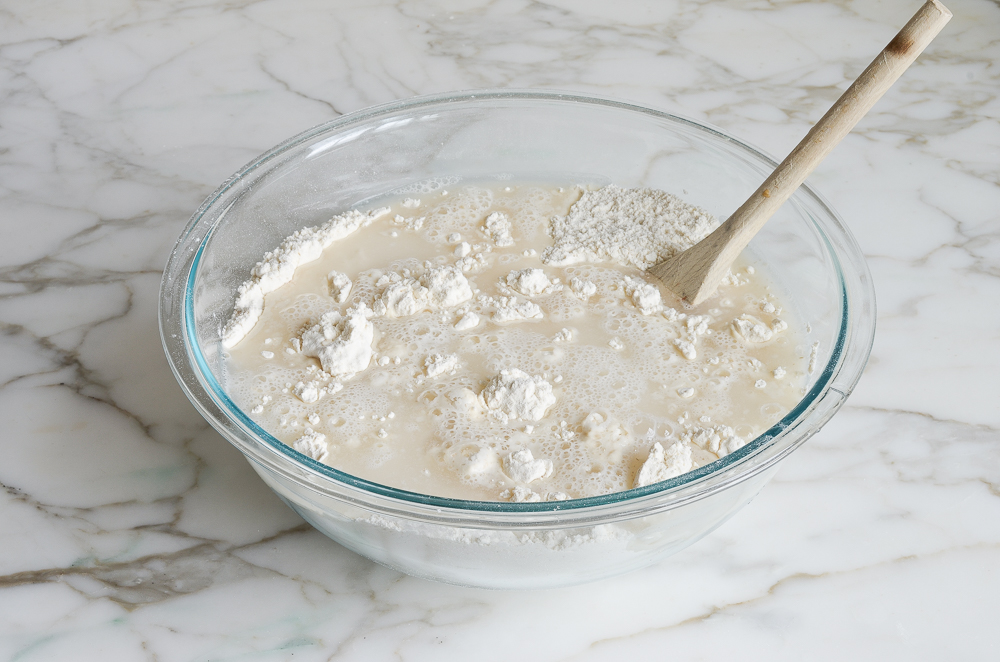
Water in a bowl with dry ingredients.

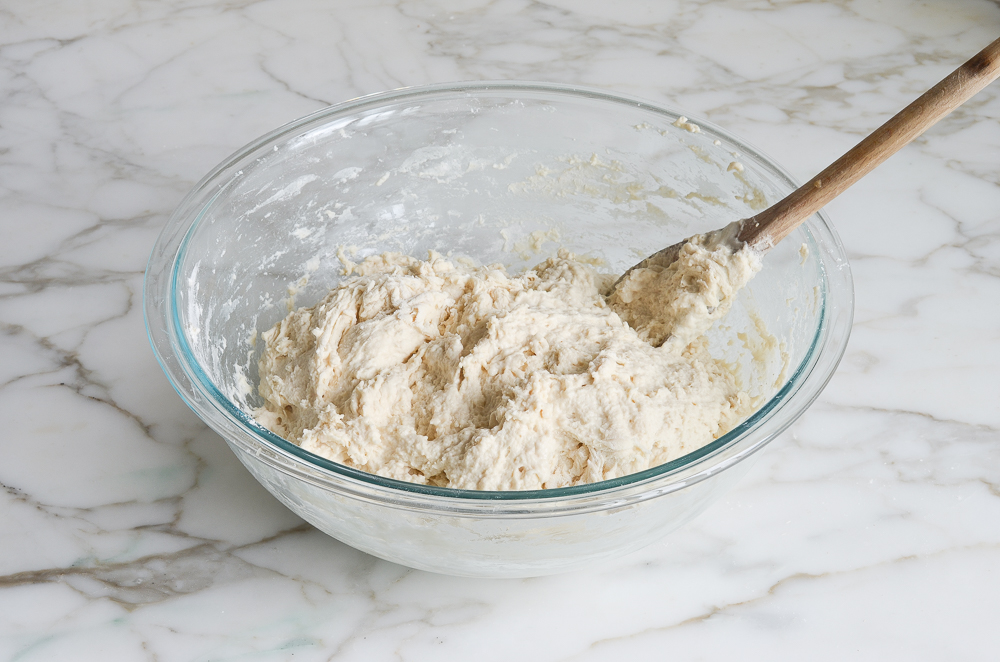
Stir with a wooden spoon until the mixture is uniformly moist, without any patches of flour.

Glass bowl of bread dough.

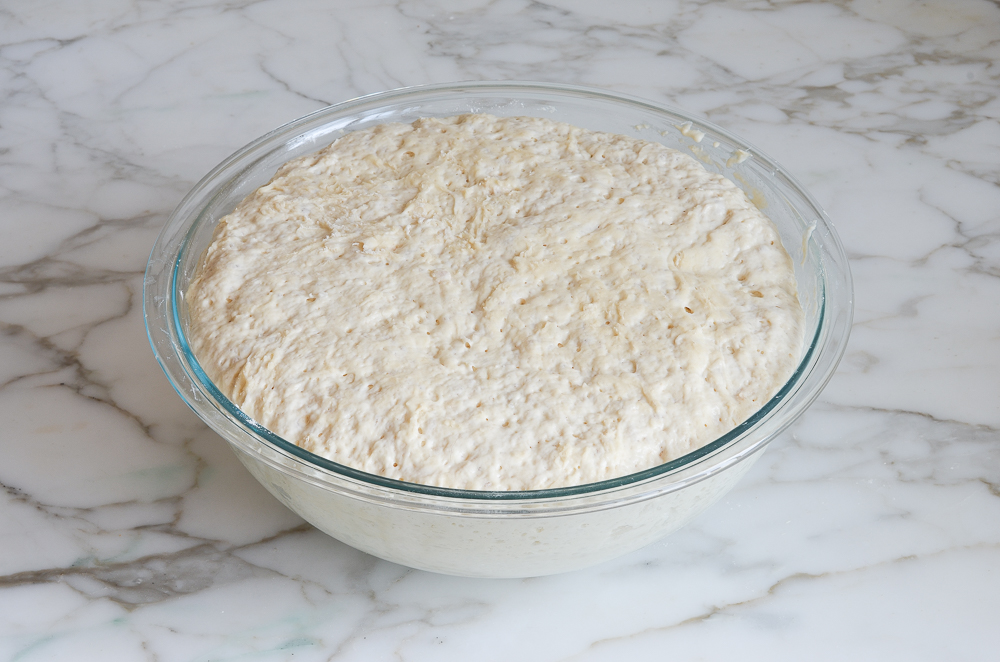
The dough should be sticky and conform to the shape of the bowl. If your dough is too dry, add a few tablespoons more warm water. If it’s too wet, add a few tablespoons of flour. Cover the bowl loosely with plastic wrap and let it sit on the counter in a warm spot for 2 hours. As you can see below, it will rise a lot!

dough after the first rise

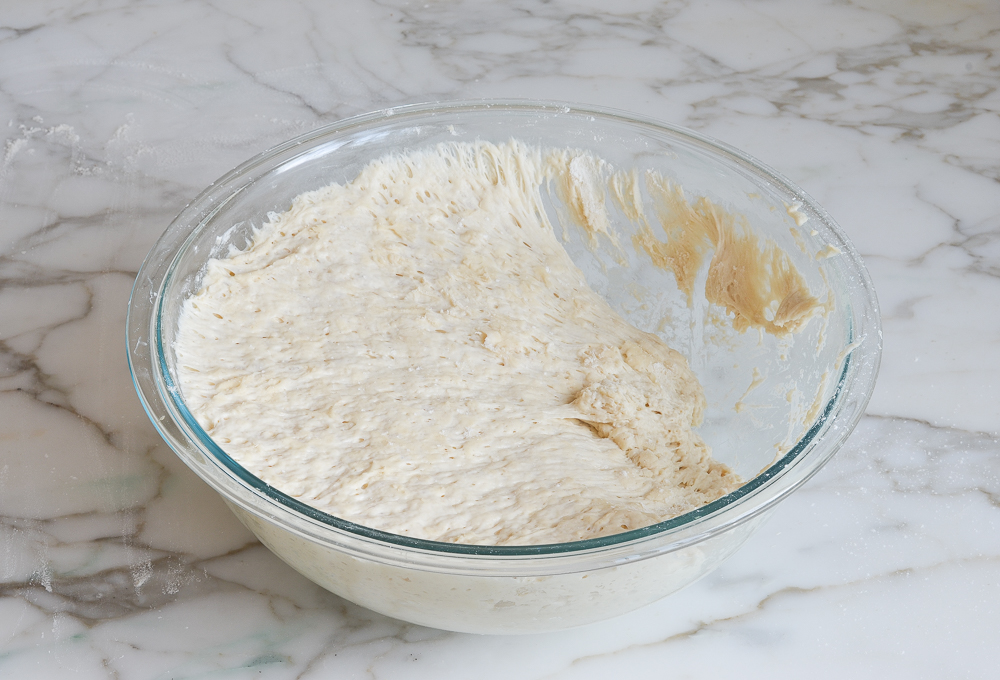
When you’re ready to bake a loaf, pull out one-third of the dough.

removing some of the bread dough from the bowl

Coat the outside lightly with flour (you don’t want to incorporate more flour into the dough, you just want to be able to handle it). Gently work the dough into a smooth ball, stretching the surface and tucking the ends underneath.

shaping the bread dough into a ball

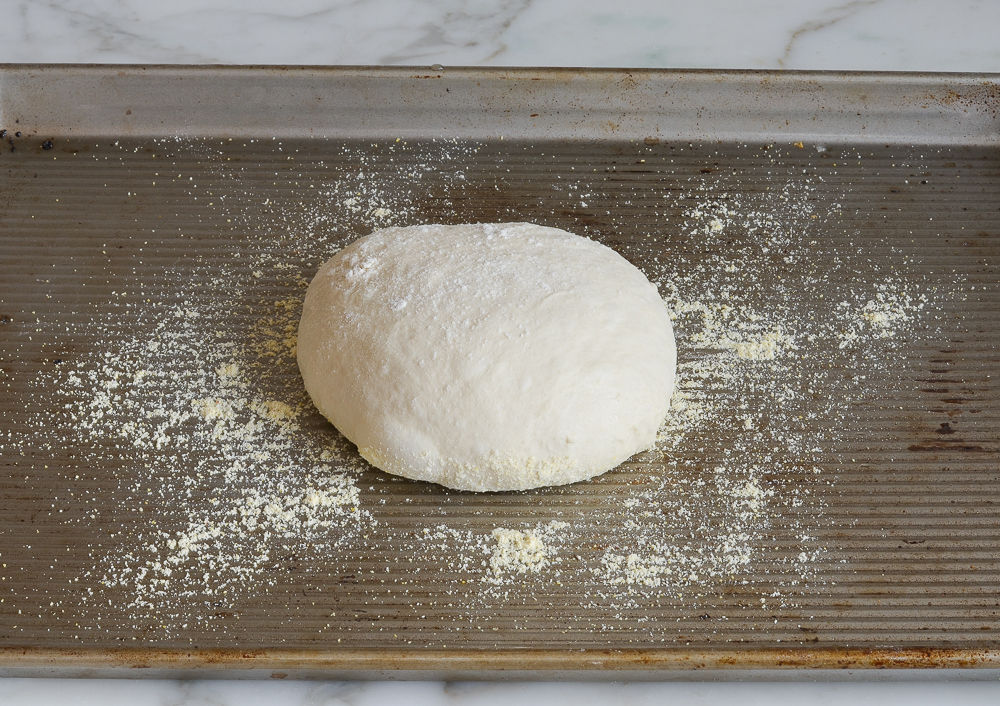
Put the dough ball onto a cornmeal-dusted baking sheet and let rest at room temperature, uncovered, for about 40 minutes. (If the dough has been refrigerated, allow it to rise for 60 minutes, or up to 90 minutes if you want a more open and airy crumb structure.) The dough will rise a bit. It may also spread/flatten a bit; that’s okay.

letting the bread dough rest on a baking sheet

The dough will rise a bit.

bread dough after second rise

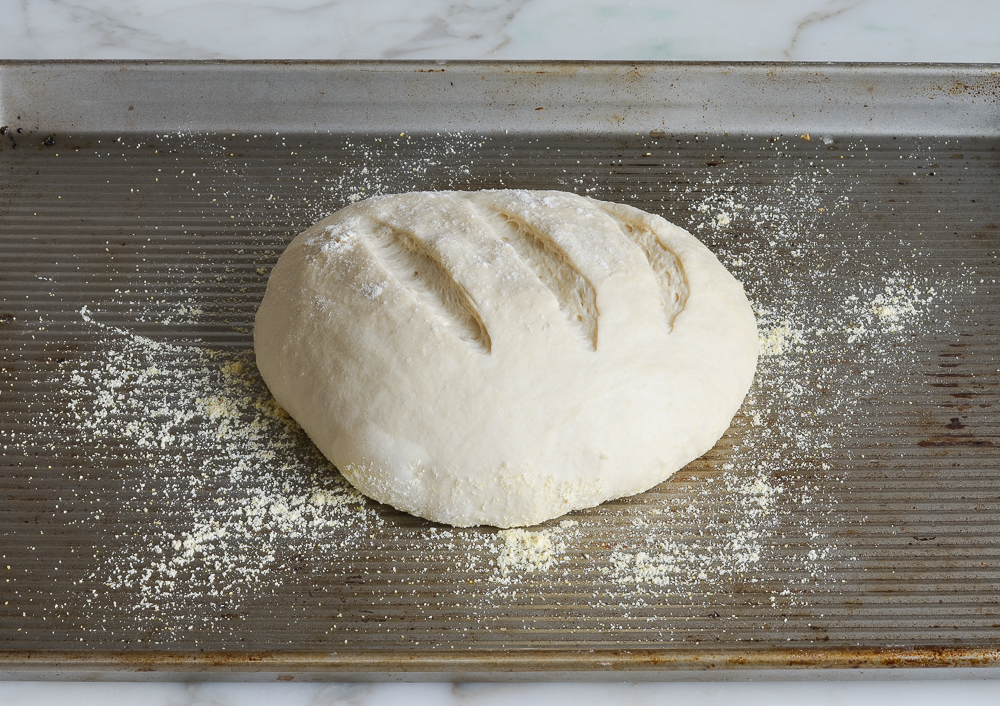
Generously dust the dough with flour. Using a sharp knife, make a few 1/2-inch-deep slashes in the dough — a scallop, cross, or tic tac toe pattern all look nice.

slashing the bread dough

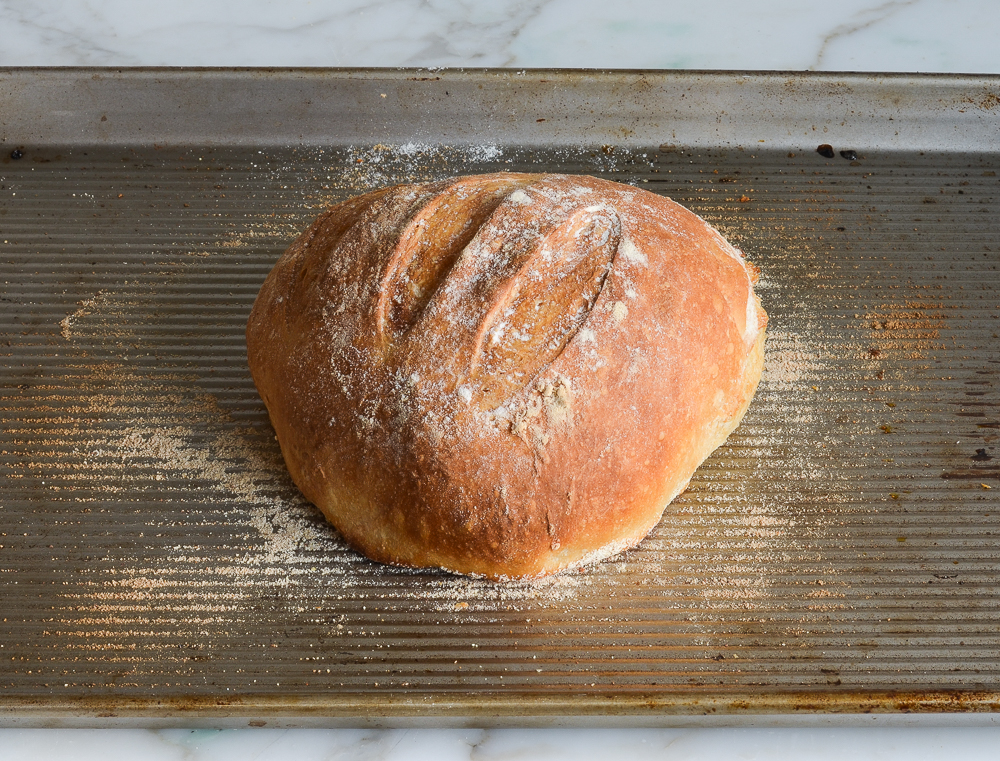
Set a metal pan on the bottom rack of a preheated 450°F-oven. Slide the baking sheet with the dough into the oven, and carefully fill the metal cake pan with one cup of hot tap water. This creates steam in the oven. (Try to do this quickly so as not to let heat out of the oven.) Bake until the loaf is golden brown, about 30 minutes. Cool completely on a wire rack.

Baked bread on a baking sheet.
This bread is best enjoyed fresh on the day it is made. Once sliced, place the loaf cut-side down on a cutting board or plate and leave it uncovered.

How To Freeze

The dough can be portioned into thirds and frozen in airtight plastic containers for up to 1 month. Defrost the dough in the refrigerator overnight, then shape, rest and bake as usual. The baked loaves can also be frozen whole or sliced. Wrap in a zip-top freezer bag and freeze for up to 1 month. To thaw, take the bread out of the freezer and let it come to room temperature, about 3 hours. Reheat in a 350°F oven until warmed through, about 10 minutes.

Partially-sliced loaf of crusty artisan bread.

You May Also Like

Crusty Artisan Bread

This crusty bread recipe is astonishingly easy — no kneading required — and makes three beautiful loaves, which you can bake as needed.

Servings: 3 loaves (about 10 slices per loaf)
Prep Time: 10 Minutes
Cook Time: 30 Minutes
Total Time: 40 Minutes, plus 2 hours and 40 minutes to rise

Ingredients

  • 6½ cups all-purpose flour, spooned into measuring cup and leveled-off (preferably King Arthur; see note)
  • 4 teaspoons kosher salt
  • 1½ tablespoons instant/rapid-rise yeast (see note)
  • 3 cups lukewarm water (no need to be exact but lukewarm is about 100°F)
  • Cornmeal, for dusting the pan

Instructions

  1. In a very large (6-quart) bowl, whisk together the flour, salt, and yeast. Add the water and stir with a wooden spoon until the mixture is uniformly moist, without any patches of flour. The dough should be sticky and conform to the shape of the bowl. If your dough is too dry, add a few tablespoons more warm water. If it's too wet, add a few tablespoons of flour. (See the step-by-step photos for guidance on what the dough should look like.) Cover the bowl loosely with plastic wrap and let it sit on the counter in a warm spot for 2 hours. If you plan to bake a loaf immediately, proceed to the next step. Otherwise, place the bowl of dough in the refrigerator to be used over the next 14 days. (Once refrigerated, the dough will shrink back a bit; that's okay. Do not punch down the dough at any point, and keep it loosely covered with plastic wrap.)
  2. Dust a sturdy baking sheet with cornmeal.
  3. Dust the surface of the dough and your hands lightly with flour. Pull out one-third of the dough and coat the outside lightly with flour (you don't want to incorporate more flour into the dough, you just want to be able to handle it). Gently work the dough into a smooth ball, stretching the surface and tucking the ends underneath, adding more flour as needed so it doesn't stick to your hands. (Don't overwork the dough; this process should only take about 30 seconds.) Put the dough ball onto the prepared baking sheet and let it rest at room temperature, uncovered, for about 40 minutes. (If the dough has been refrigerated, allow it to rise for 60 minutes, or up to 90 minutes if you want a more open and airy crumb structure.) The dough will rise a bit. It may also spread/flatten a bit; that's okay.
  4. Preheat the oven to 450°F. Set one rack in the lowest position of the oven and one rack in the middle position. Place a metal pan (any metal cake pan or broiler pan will work; just don't use glass) on the bottom rack. (You will fill this with water later to create steam in the oven).
  5. Generously dust the dough with flour. Using a sharp knife, make a few ½-inch-deep slashes in the dough -- a scallop, cross, or tic tac toe pattern all look nice.
  6. Slide the baking sheet with the dough into the oven, and carefully fill the metal cake pan with one cup of hot tap water. (Try to do this quickly so as not to let heat out of the oven.) Bake until the loaf is golden brown, about 30 minutes. Cool completely on a wire rack.
  7. This bread is best enjoyed fresh on the day it is made. Once sliced, place the loaf cut-side down on a cutting board or plate and leave it uncovered. (If it lasts beyond a day, I suggest slicing and freezing.)
  8. Freezer-Friendly Instructions The dough can be portioned into thirds and frozen in airtight plastic containers for up to 1 month. Defrost the dough in the refrigerator overnight, then shape, rest and bake as usual. The baked loaves can also be frozen whole or sliced: Wrap in a zip-top freezer bag and freeze for up to 1 month. (If you plan to use slices one at a time, place pieces of parchment between them so they don't stick.) To thaw, take the bread out of the freezer and let it come to room temperature on the countertop. Reheat in a 350°F oven until warmed through, about 10 minutes.
  9. Note: Active dry yeast may be used instead of instant/rapid-rise yeast, however, the dough will take longer to rise. To give active dry yeast a boost, you can dissolve it in the lukewarm water and let it sit until frothy, about 10 minutes. After that, add it to the flour and salt, and proceed with the recipe.
  10. Note: I use King Arthur flour, which is higher in protein than some other all-purpose flours. If using a flour with a lower protein content, such as Gold Medal, you will likely need to add a few more tablespoons of flour.

Nutrition Information

Powered by Edamam

  • Serving size: 1 slice
  • Calories: 100
  • Fat: 0 g
  • Saturated fat: 0 g
  • Carbohydrates: 21 g
  • Sugar: 0 g
  • Fiber: 1 g
  • Protein: 3 g
  • Sodium: 64 mg
  • Cholesterol: 0 mg

This website is written and produced for informational purposes only. I am not a certified nutritionist and the nutritional data on this site has not been evaluated or approved by a nutritionist or the Food and Drug Administration. Nutritional information is offered as a courtesy and should not be construed as a guarantee. The data is calculated through an online nutritional calculator, Edamam.com. Although I do my best to provide accurate nutritional information, these figures should be considered estimates only. Varying factors such as product types or brands purchased, natural fluctuations in fresh produce, and the way ingredients are processed change the effective nutritional information in any given recipe. Furthermore, different online calculators provide different results depending on their own nutrition fact sources and algorithms. To obtain the most accurate nutritional information in a given recipe, you should calculate the nutritional information with the actual ingredients used in your recipe, using your preferred nutrition calculator.

See more recipes:

Comments

  • I bought bulk yeast from Rapid Rise. It just says instant yeast. Is this different from the rapid rise Instant yeast (Fleischmanns). I just made the dough and didn’t mix the yeast with water first…should I have done so? I am waiting to put it in oven and my rounds are pretty flat.
    Thank you..love your recipes
    Nancy

    • Hi Nancy, So glad you enjoy the recipes! I think your yeast is the correct kind. The dough should rise in the oven. If the loaves seem flat after they are baked, you likely need to add a bit more flour next time.

  • are you just using dry yeast

    • Hi Sam, I use instant yeast (which is also referred to as rapid rise, quick, and bread machine yeast). You can use active dry yeast if that’s what you have. See the note under the recipe for guidance on that. Hope that clarifies!

  • This recipe is foolproof and the bread turns out amazing!

    A question for you Jenn: after refrigerating the dough for a few days, I let it sit on the counter for about 2 hours but it still doesn’t rise as well as the first fresh batch made the day of. Do you know why? Thank you!

    • Hi Maria, Glad you like it. When you say it didn’t rise as well as the first batch, are you referring to when it’s sitting on the counter after coming out of the fridge, or when it’s in the oven?

      • Hi Jenn – both! I let it sit on the countertop but it doesn’t really rise. So then when it comes out of the oven, it’s smaller and a little more dense than the first fresh batch.

        • Hmmm… That’s a bit of a head scratcher for me. Next time I’d try adding just a little bit more flour to the dough. Also, for what it’s worth, I really like king Arthur flour; it has a high protein content which helps to give the dough structure. Hope that helps at least a bit!

    • Maybe your kitchen is too cool? I always let my bread rise on my stove with the hot overhead lights on.

  • This bread is the bomb.Must have made 20 loaves now
    maybe more.Being handing out to as many mothers as
    I can since mothers day .Can’t beat the taste .Makes fabulous
    garlic toast (a little butter ,garlic butter) when bread gets couple
    days old (if it lasts that long) One problem : Bread always sticks to
    baking pan .I use medium texture corn meal on baking pan .Should i
    grease pan.What am i doing wrong ?

    • Glad you’re enjoying it, Ron. Not sure why you’re having issues with sticking…could be your pan. Going forward, I would suggest lining the pan with parchment paper (and I would still use the cornmeal for the nice texture it adds).

      • ok will give that a try. thanks for reply.

  • Absolutely delicious and easy. I’m so grateful for your recipes with detailed instructions and photos. Your recipes make my family so happy!

  • This was the first once upon a chef recipe I had a hard time with. After the 2 hours, it was impossible to shape the dough it was so sticky. Maybe I didn’t add enough flour in the beginning?

    • Hi Ali, So sorry you had trouble! Yes, you likely needed to add more flour. Are you in a humid climate? What brand of flour do you use?

  • Loved this bread! The recipe is quick and easy and makes 3 loaves! I didn’t have any corn meal so I ground up a little polenta and it worked perfectly. Also added some dried thyme to the flour mixture. Thanks Jen for another great recipe!

  • Hi Jenn just had a question regarding the recipe. Will the dough remain sticky up until you bake or will it become a little smoother?

    • Hi Joseph, Once you shape it into a ball, it shouldn’t be sticky on the exterior. It should be smooth, although the interior will still look like a wet dough when you slash it before baking.

  • This is a great recipe. I’m an experienced cook but don’t bake very often. Thanks to the detailed instructions and photos, it was was very easy and turned out beautifully. I served it with dinner tonight and my husband who is very disciplined about limiting carbs ate four pieces. It’s hard to believe that it was so easy to turn out a loaf of delicious crusty bread. I’ll be making this recipe a lot.

  • Hi Jenn! I’m curious why this uses all purpose rather than bread flour.

    • Hi MJ, This recipe is adapted from the Artisan Bread in 5 Minutes A Day cookbook. I’m honestly not sure why the authors chose all-purpose flour, but in the book they do say that you can use bread flour if you add about 1/3 cup more water. I use King Arthur all-purpose flour for all of my baking. It has a slightly higher protein content than many brands, which makes it a bit closer to bread flour. Hope that helps!

    • I’ve made this 3 times and it’s been great every time. The first time I halved the recipe because I was worried about having too much bread around for me and my husband. It was great. Second time followed directions exactly. I convection baked it and it was little too brown on the outside but still great. Today I made it with about half (2.5 cups) whole wheat flour. I also use all-purpose flour. I had to add about an extra 1/4 water. Cooked it as directed but only about 25 minutes. Perfect! Crispy outside soft inside. Sometimes it sticks to the pan a little and I think it depends how much cornmeal I use on the base. This is my favorite and forever go to bread recipe. Thank you!

  • Hi Jenn- I’ve had so much success with the recipes from this site and your cookbook. Thanks for all of the great recipes. I have very little room in my freezer right now. Can the extra dough be refrigerated for a period of time?

    Thanks,
    Kathy

    • Yes, you can refrigerate the dough for up to 14 days (and so glad you like the recipes)! 🙂

  • Made this bread twice. First time followed exactly. Wonderful! Second time subbed half King Arthur whole wheat flour and unintentionally hit convection setting on my oven. Also wonderful! Thanks Jenn

  • Can I bake part today, put the unbaked dough in the fridge and bake the rest tomorrow? Should I bring it to room temperature before baking?

    • Definitely! After removing the dough from the fridge, allow it to rise for 60 minutes, or up to 90 minutes if you want a more open and airy crumb structure.

  • I made this bread and wow! It was terrific, made loads of bread for the freezer (I froze it after cooking, not the dough), and reheated beautifully for a dinner with frozen and yet fresh bread. My only tweak for the next time I make this is to put a little more salt in the bread.
    This recipe is so easy and as usual, the instructions for preparing and cooking are detailed and very clear. I love Once Upon a Chef Recipes!!

  • This bread is great! Unlike an artisan bread that has a very thick and hard crust, this is a dense bread with a crispy crust. It slices beautifully. No modifications and it came out perfect. I have been baking a lot of different breads lately, and this one is the best. It’s perfect and easy.

    • Hi Jenn, I made this bread and it turned out fantastic. Everyone loved it and we ate 3 loaves in 2 days 😬. I am planning to make it again this weekend but I’m just wondering, is it possible to shape it and cook it as a baguette? If not, do you have a recipe for a baguette?

      • So glad you enjoyed it, Victoria! Yes, you can definitely shape the dough into a baguette. 🙂

        • I tried it today and it turned out perfect 👌

          • What kind of pan did you use? Did you just shape on a cookie sheet? How long? Thank you!

            • — Barbara Rektorik
  • Can you cook this in a heated dutch oven and then remove top to brown? I think that’s a much safer way to bake bread

    • — Kathy Z Rhodes
    • Reply
    • Yes, Kathy, that should work. Hope you enjoy! 🙂

  • Thank you so much for your recipe! I just tried for the very first time to bake bread and this recipe works for me!

    So happy to come across this recipe as many other recipes require equipment like a Dutch oven which I don’t have and I don’t intend to buy just so that I can try making bread.

    I also didn’t have a baking tray so I made one using aluminum foil to place it above a grill tray (which comes together with my microwave oven). And also my microwave oven can only reach 428 degrees fahrenheit but it still works on my bread. Just to share steps that I modified a little.

    I had some difficulties shaping it into a dough ball, the step before you put the dough on baking paper. In the end, after pulling the surface of the dough and tucking the ends towards the base of the dough, I turned the whole dough in a circular motion. End up it works too! And I had a dough ball in the end! Of course, flouring the hands works too to better handle the dough.

    I would really highly recommend this recipe to anyone new to baking. I can’t praise this recipe enough 🙂

  • Hi Jenny, here in the UK I’ve made quite a few of your recipes especially the breads but what I want to know is very important. Are your oven temperatures for fan assisted ovens? I’m sure this will be of use to everyone. Greetings from the UK and carry on baking! Thanks for the great recipes.

    • — Daniel Burridge
    • Reply
    • So glad you like the recipes! I always develop and publish my recipes using the regular setting on my oven (because many people don’t have convection settings on their ovens), so I’d go with the regular/non-fan setting.

  • Best bread ever! Perfect! I’m so glad I found this recipe. 2 loaves gone with minestrone soup tonight. Kids, grandkids all loved this bread. It was also the easiest bread I’ve ever made. Thank you for the recipe!

    • — Juanita Hartigan
    • Reply
  • This bread is addicting!!! It is one of the best recipes out there. I used Artisan flour and it turned out great. Make sure you stir every last bit of flour in. Delicious!!!

  • Amazing recipe & so easy! Thank you!

    • — Julie Jacobson
    • Reply
  • Oh my! Delicious! I too had a bit of a problem getting the dough off my hands but kept at it and while the loaves don’t look as beautiful as Jenn’s, they sure taste good! Next time, will be better. thank you Jenn for all you do. I have made soooooooooo many of your recipes, all with success. You and your family stay well.

  • Very easy to put together and has wonderful flavour.

    My dough out of the fridge did not rise again, and despite the “it may spread/flatten a bit, that’s okay” it baked flat, not risen like a nice loaf. More like a hockey puck.

    Should I have reworked it into a taller round before baking? Help, please!

    • Hi Jenna, Sorry you had a problem with this. It sounds like the dough was too wet. Can I ask what brand of flour you used as that can make a big difference.

  • Absolutely perfect bread. Thank you for the recipe. Can you make this with whole wheat flour?

    • So glad you liked it, Rakhi! I’ve only made this with all-purpose flour so I can’t confidently say how it will turn out with different kinds of flour. King Arthur has a variety of bread recipes that call for whole-grain flours if you want to check them out here. And if you have any interest in buying a cookbook, this recipe was adapted from cookbook authors Jeff Hertzberg M.D. and Zoë François and they also have a book that focuses on whole grain bread recipes.

  • Hi Jenn,
    This is excellent bread and very easy to make. I am cooking this almost every day this week my husband and I just love it. You could never go wrong with nice homemade bread. I cut the recipe into half. Just enough for two of us. Can you please send me the link of how to order your book. Thanks for the wonderful recipe. Rose

    • So glad you like the bread and thanks for inquiring about the cookbook! You can see where to purchase it here. 🙂

  • I don’t typically write recipe reviews but WOW. For as simple as this recipe is, I am pleasantly surprised at how delicious this turned out! I baked 2 and froze one just to test its freezer friendliness and I’m thankful because I could have easily devoured all 3 loaves tonight 😐 Thank you!

  • My husband is the dough guy in the family but I made this bread and was very impressed that it turned out! It was easy and delicious!

  • Hello Jenn,
    I have made this bread by exactly following the recipe and it was amazing. My kids said it was like they had in restaurants!
    I wanted to ask you, do you think I can add Cranberries and Walnuts to it?
    Thanks

    • So glad this was a hit! I’ve never added any “extras” to this dough, so I’d be hesitant to suggest it – sorry!

  • Help! This bread is amazing and after reading about two hundred great reviews, I know it was supposed to be easy, too. And it was so easy until I got to the part where I removed from the bowl after it had risen. That’s when it all when downhill….in slow motion! I couldn’t get the dough off of me or in any type of shape. I was about to give up but kept wrestling with it until it sort of resembled bread. I baked it….it came out perfect…crusty outside and soft, delicious inside. What did I do wrong? Should I have floured the board and my hands when removing from the bowl? I am determined to master this as it was that good. I served with manchengo cheese, pepper dew peppers and balsamic vinegar. Thank you…….love your recipes!

    • Hi Jackie, Glad it ultimately turned out well! It’s a very wet/sticky dough. Just flour your hands very generously so you can work with it, and do your best not to incorporate that flour into the dough. Hope that helps!

      • Dear Jenn:
        When I finally found yeast at an outdoor Farmer’s Market, I searched for easy bread recipes and found yours. I hit the jackpot!!

        It was my first time making bread and it turned out perfectly. I followed the instructions exactly as given and ended up with delicious, moist inner layers and crusty-on-the-outside loaves. I baked two, put one baked loaf and one unbaked loaf into the freezer. My husband and I ate the third entire loaf between us in less than two days!
        So, so good with spaghetti bolognese, fresh broccoli and a glass of Merlot! The next morning I sliced thinner and toasted for breakfast with butter and fresh, hot coffee! YUMMY! Not a habit I need to “feed” but rationalized it as OK because we’re stuck at home!
        Thanks for a simple recipe for a clumsy cook like me!

  • Hi Jenn,
    This recipe was the best bread I have ever made. A packet of yeast has 1 Tbsp in it, so we 2/3rd the recipe (is that a verb?). Quick question – have you ever made this with whole wheat flour? Tips for trying?

    Thanks for the ideas! Love from Texas…Pam

    • So glad you liked it!! I’ve only made this with all-purpose flour so I can’t confidently say how it will turn out with different kinds of flour. King Arthur has a variety of bread recipes that call for whole-grain flours if you want to check them out here.

  • My first attempt with yeast; followed directions, I believe, but used Gold Medal flour; waited over 2 hours and dough did not rise; total flop; what did I do wrong?

    • Hi Maggie, I’m so sorry you had trouble! Was your yeast fresh? What type of yeast did you use?

      • I didn’t even use the proper terminology! I used dry active yeast and believe I should have added water and sugar/salt before mixing with flour; instead I mixed everything together and then added water

        • That’s correct — that’s where you went wrong. I hope you have better luck the next time around!

          • Is the oven fan assisted?

            • — Adam Leatherbarrow
          • No, I always used the regular setting on my oven.

            • — Jenn
  • Very tasty bread, thank you–but a question: will reducing the amount of salt in the recipe be a problem? We thought the flavor was a bit salty for our tastes, but I wondered if reducing the salt would affect the rise. Thanks so much!

    • Hi Debbie, Reducing the salt is perfectly fine; it’s just to add flavor and will not impact the rise at all. 🙂

      • I made this bread today and it was great except. . . I used table salt instead of kosher salt and it was just a bit too salty. With a little investigative reading online I learned the size of the table salt crystals are finer so more salt fits in a teaspoon than a teaspoon of kosher salt. Teaspoon for teaspoon, table salt is saltier.
        I wondered if Maggie made the same mistake?

      • Salt is not just for flavor. It is critical for strengthening the gluten so without enough you’ll get dense and crumbly bread. The gluten structure must support the CO2 bubbles that expand before they can set during baking.

  • Yay, I survived – my first attempt at baking bread. My first proofing seemed over-sticky, but my breadmaking friend told me to hang in there until the second proofing. Followed directions, conquered my worst fears and had a lot of fun. Never thought I’d have so much joy witnessing the powers of yeast. The flavor is great, the crust divine, with a slightly chewy texture overall- pretty cool! It’s not quite as high as yours (“dough rise envy”), so I’ll wager it may have been the room temperature (pretty warm) and/or maybe a too-long first proofing (2 hours). After the explosion of flour, looking like a busted raid, I put the other two rounds in the freezer and called it a day.

    I’m so glad I found you (via curious google search: “bread recipe, ap flour, instant yeast”), and I can’t thank you enough, Jenn! I’ll be back and I’ll keep learning and practicing. 🙂

    • So glad you enjoyed it! 🙂

      • I made this bread a few days ago and it was seriously…phenomenal. It all went off without a hitch! I tried making it again today but when I was forming the loaves I felt the dough was really lumpy in some spots. I am still going to let them rise for 40 minutes and see what happens. I mixed it really well so I’m so confused as to why there are massive lumps. Is this going to ruin the final product?

        Thank you!

        • Hi T, sorry to hear you had problems with the dough this time around. Did you make any changes to the recipe? How did the bread turn out?

  • Could a Kitchen Air Mixer with dough hook be used instead of the wooden spoon? Thank you.

    • Hi Bettes, this is really easy to mix by hand, but you can use a mixer if you’d prefer. Hope you enjoy!

  • Just made the bread! I don’t have words to describe how good it was!! But then everything I have made from Jenn’s recipes tastes amazing.
    I have tried chicken, fish, baked goods everything is foolproof. Thank you Jenn for sharing your recipes with us and making us into confident cooks!!

  • This bread is absolutely fabulous! I particularly like the way the crust stays really crisp. That is hard to achieve in a homemade bread. It is so hard not to eat the whole thing! I have shared this recipe with several friends, and recommended your website. Jenn, every single recipe I’ve tried has been great! This is now my “go to” site when I want to find a recipe for something. Thank you so much!

  • Hi Jenn! Is it possible to cut this recipe in half?

    • Sure – enjoy!

  • I’ve been using the Hertzberg/Francois recipe that this is based on for years. I use it for pizza crust as well (usually making the dough more wet). It is even better if you leave the dough in the fridge for a few days or even longer. Develops more flavor! I tend to make it into small individual rolls/loaves, that I heat in the toaster oven and then dip in olive oil and salt. Yum, yum. For me that can be a whole meal, with some good sharp cheese, olives and a glass of red wine.

  • I am looking to make some grilled cheese sandwiches with this bread! Are the loaves big enough for sandwiches? Thank you!

    • Yep, definitely! 🙂

  • This bread is fabulous !! Followed recipe as directed. Bread is soft and airy in the middle and crusty on the outside. Made 3 loaves, shared with family. Great for toasting. This is my go to recipe from now on. Better than the bakery and enjoyed making. Thank you for the great recipe…

  • Jenn,

    I hope you and your family are doing OK during these challenging times.

    THANK you for another fantastic and so easy recipe!

    I once mentioned that you were going to cost Vie De France some business, I promise to continue going there just to support the business when we get back to some level normalcy … but no longer for bread 🙂

    In all seriousness, I want to let you know that your recipes have been keeping our family busy during these incredibly strange times and we appreciate your diligent work.

    I also want to encourage all, if possible, to purchase your book for themselves and gifting as I have done and plan to do again this holiday season. I am glued to the website thought and have our family copy of the book seating on the shelve for the few recipes that are exclusive to the book.

    Anyway, long review, but THANK you so much for your work and keep safe with your family …

    Are you ever going to have a book signing for those of us close by? It would great memories for my girls to gals with them when they turn to college age in many years 🙂

    Best

    • Aww thank you for the sweet note. I’m so happy that your family is enjoying the recipes — and that cooking is providing a happy diversion. I do hope to do more book signings once we can leave the house again (and I have another cookbook unofficially on the way). 💕

      • This totally made my day! Another cookbook, yay! Thanks for letting is know! 😍

        • — Frenchcookingmama
        • Reply
  • Hi Jenn,
    I have silly question.
    Regarding the measurements….is it 6 and a half cups of flour or 6x half cups of flour?

    • Hi Vas, Sorry for the confusion. It is 6 and a half cups of flour. 🙂

  • If I wanted to make the bread somewhat healthy, could I add flax meal to the dough? How much would I add and do you think it would be worth doing?

    • Hi Jeff, Honestly, this is such a perfect and foolproof recipe, I’d be nervous to mess with it. But I think you could probably get away with replacing about 1/2 cup of the flour with flax meal. I’d love to know how it turns out if you try it. 🙂

      • Hi Jenn, you bread is amazing. I have sent your recipe to a bunch of family and friends for them make it and they all loved your bread too.

        What I wanted to know was if I can use flour instead of corn flour When baking the bread as I have no more in my pantry.

        • So glad you enjoyed this enough to share the recipe with others! 🙂 I’m assuming you’re referring to cornmeal? If so, I wouldn’t recommend flour but you can line the baking sheet with parchment.

  • I cooked this and it turned out great! Very thorough instructions and the pictures definitely helped. My only complaint is that it makes ALOT of bread. I wish there had been measurements for only 1 or 2 loaves. But still a great recipe.

    • Good Morning,

      I would gladly take your left over bread … these are fantastic and my kids are killing the three we just made 🙂

      Keep safe

    • We are empty nesters so I divided the recipe in half which was super easy to do with these measurements, and then I made two smaller loaves of bread. These slightly smaller loaves were the perfect size for us.

  • Jenn
    There used to be a commercial on tv (you’re too young to remember) where a guy with an upset stomach says “Honey i can’t believe i ate the whole thing.” My wife had to stop us from eating this bread or we would never have had an appetite for dinner! The bread is incredible. I can’t believe it came out of my oven! Got tired of gardening so thought i would give this bread recipe a try. Have the second loaf in now. Wifey wants me to take it to our daughter’s house in case it won’t work out next time! Every recipe I have tried of yours is fantastic. no need to look elsewhere.
    ron
    Vancouver BC Canada

    • 🙂 So glad you enjoyed the bread!

  • Hi! Can I bake all three loaves at once? if so should i add another metal pan filled with water?

    thank you!

    • Hi Grace, if you bake all three loaves at the same time, they’ll take a bit longer. I’d start checking them at about 35 minutes and use the color as a visual cue–you’re looking for a golden brown. (And I don’t think you’ll need to add an additional pan with water. Please LMK how they turn out!

  • Wow – – I have tried making bread before including no knead overnight rise method recipes, but this one my co-worker recommended was AMAZING – as good as any bread from a bakery that specializes in bread! This would make a great hostess gift. I made it exactly according to the recipe but did 1/2 the quantity as I only had 1 packet of instant dried yeast, used my instant pot on Yogurt setting to halve the time for the first rise, sprinkled black sesame seeds on top before baking (next time I would press them into the dough a bit because they fell off when I sliced the loaf). Next time I’m going to try substituting half the flour with wholewheat bread flour which I see from another review means adding and extra 1/3 cup water. I’ll be thrilled if it turns out anywhere close to this one.

  • Thank you Jenn for sharing your wonderful recipe.
    This was my first time making Artisan bread and it was so delicious. I ended up making three batches and went around spreading cheer to many dear friends during these difficult times, with wrapped packages of bread on their doorsteps.
    I added Rosemary, Garlic and a pinch of Thyme to a few smaller loaves. Omg…Yummm!
    Thank you again.

  • Once upon a chef Artisan bread. Awesome, easy, tasty. Will make this again for sure.

  • Do you think I could add a bit of olive oil and dried rosemary to it as well, to make a crusty artisan rosemary olive oil loaf? And how much olive oil would you recommend?

    Thanks Jenn, fantastic recipes and cookbook!

    • Hi Thomas, Glad you like the recipes! I wouldn’t add olive oil to the dough (it’s already a very wet dough) but some rosemary would be fine. Hope you enjoy!

Add a Comment

This site uses Akismet to reduce spam. Learn how your comment data is processed.