22 Quick and Easy Recipes in 30 Minutes (or less) + 5 Chef Secrets To Make You A Better Cook!

Crusty Artisan Bread

Tested & Perfected Recipes

This post may contain affiliate links. Read my full disclosure policy.

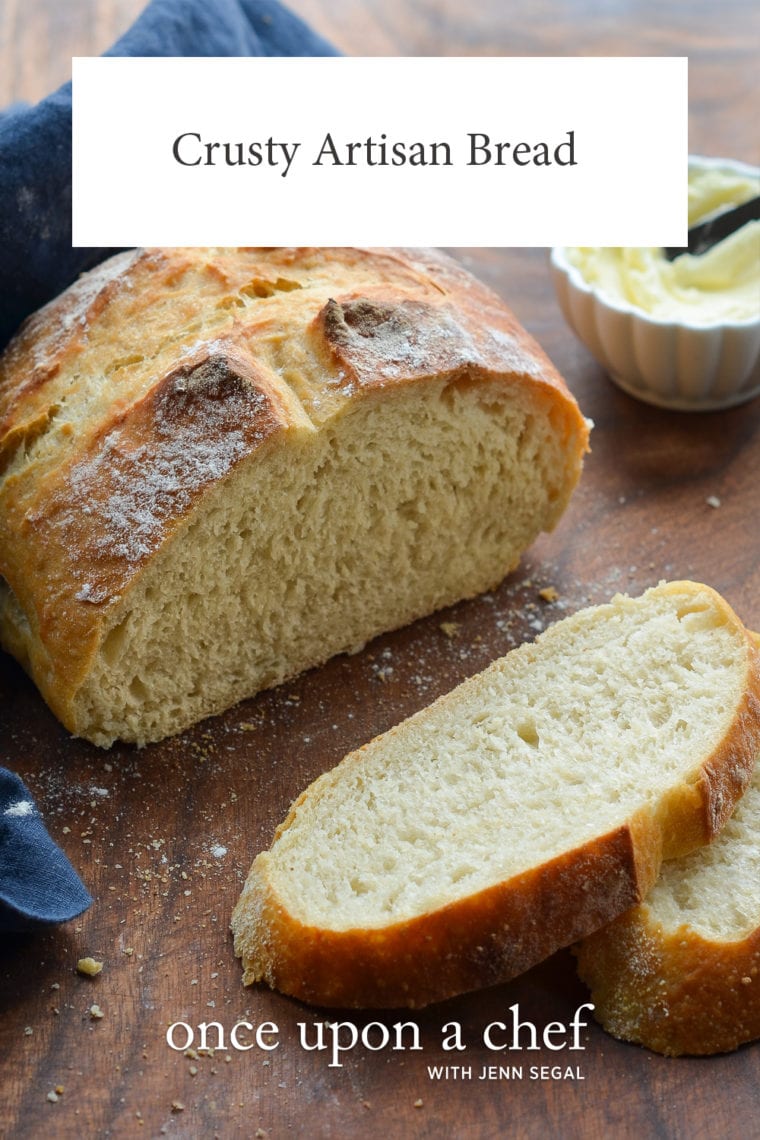
This crusty bread recipe is astonishingly easy — no kneading required — and makes three beautiful loaves, which you can bake as needed.

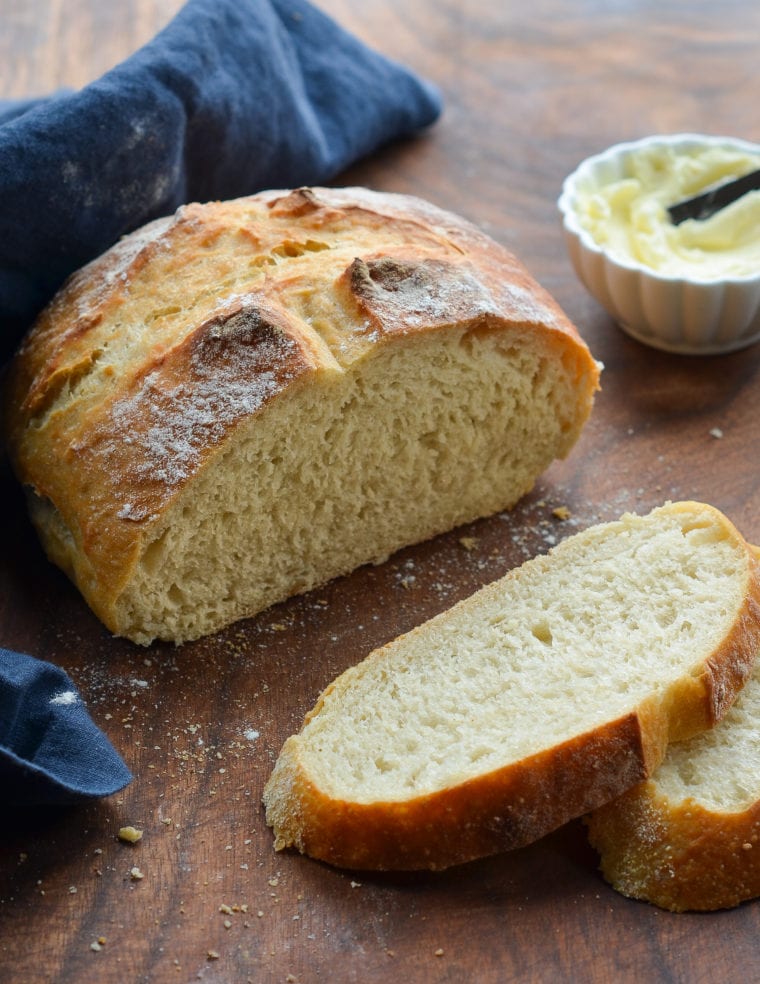
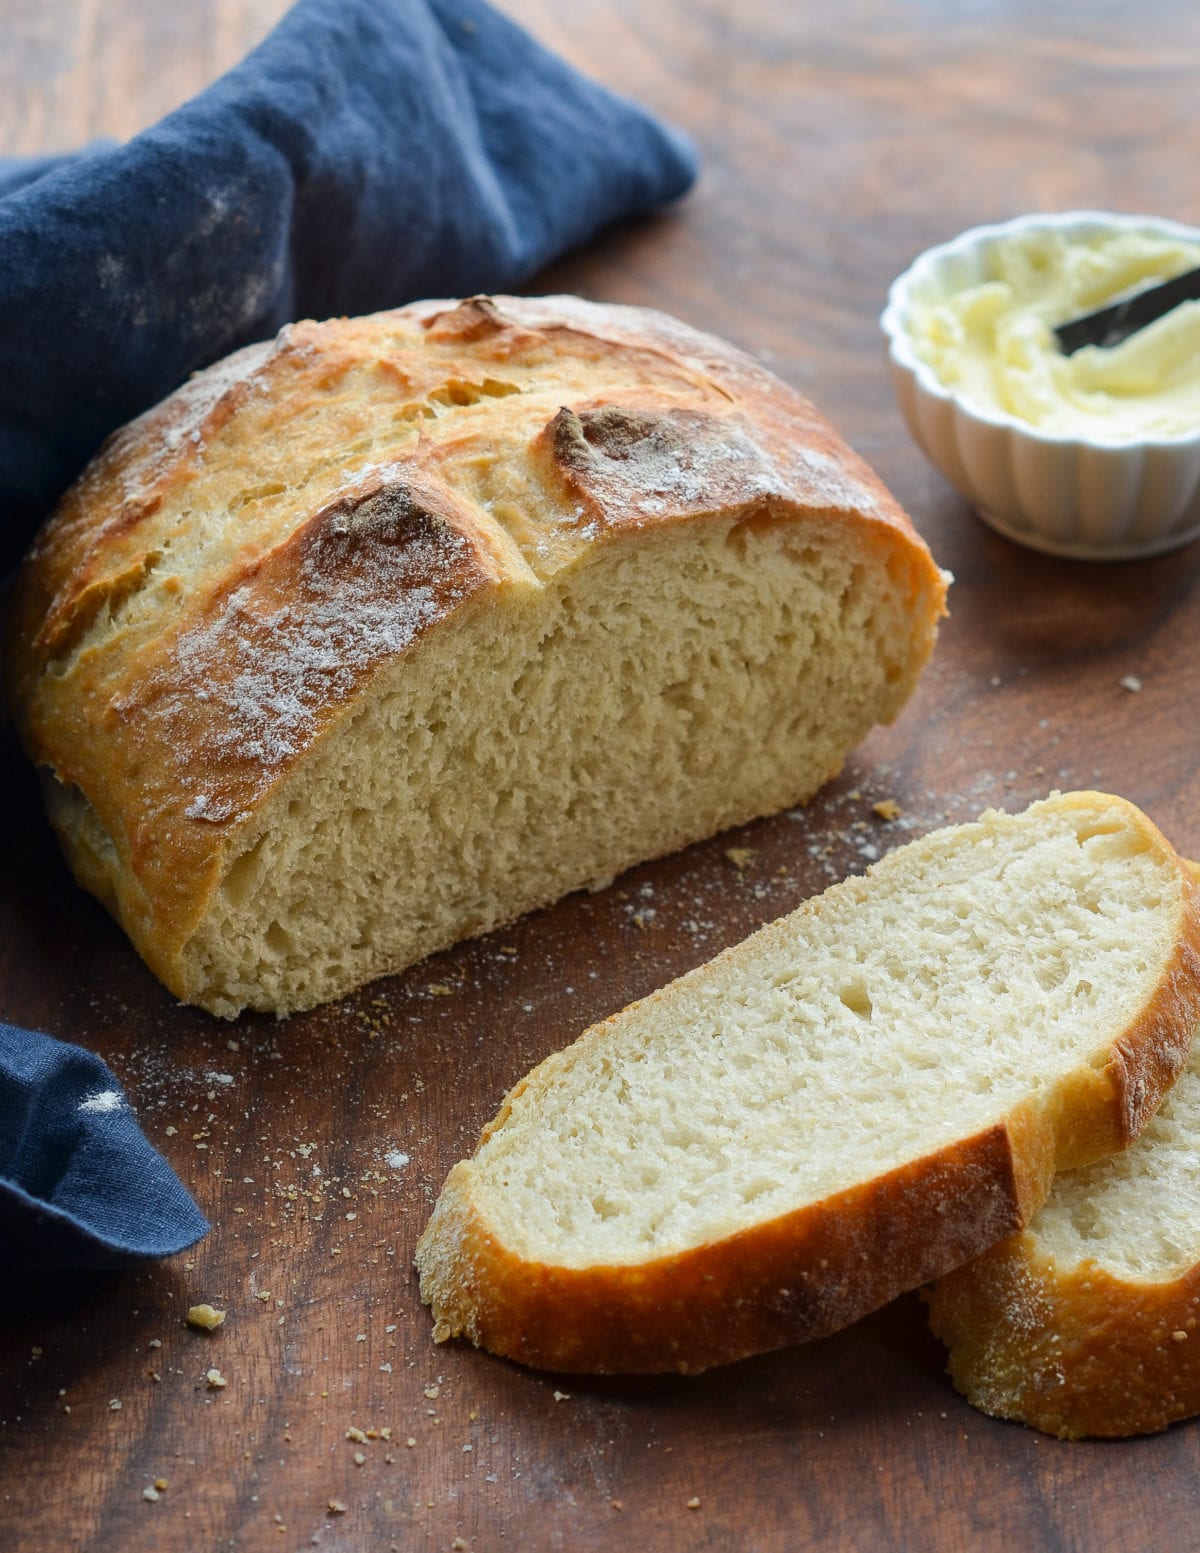
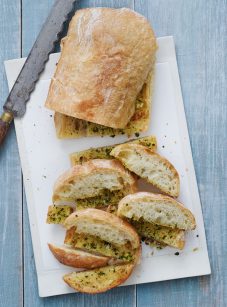
Partially-sliced loaf of crusty artisan bread.

This homemade artisan bread recipe is astonishingly easy, and it makes enough for three delicious loaves, which you can bake as needed. What’s more, the dough takes just five minutes to make, does not require kneading or any special equipment, and can rest in the fridge for up to two weeks (the flavor becomes more complex the longer it sits). The recipe is modestly adapted from one of my favorite baking books, Artisan Bread in 5 Minutes A Day by Jeff Hertzberg M.D. and Zoë François.

What You’ll Need To Make Crusty Artisan Bread
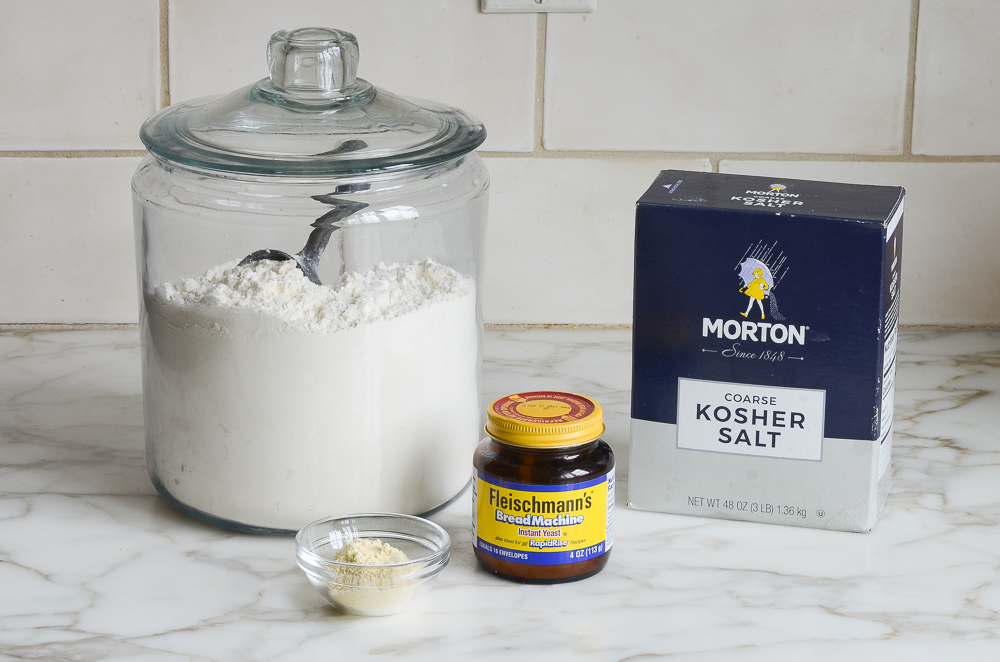
ingredients for homemade bread

This recipe has just four ingredients: all-purpose flour, instant yeast, kosher salt, and water. (The cornmeal is for dusting the pan.) As you can see, I use instant (or rapid-rise) yeast. Active dry yeast may be used instead of instant yeast, however, the dough will take longer to rise. To give active dry yeast a boost, you can dissolve it in the lukewarm water and let it sit until frothy, about 10 minutes. After that, add it to the flour and proceed with the recipe.

How To Make Crusty Artisan Bread

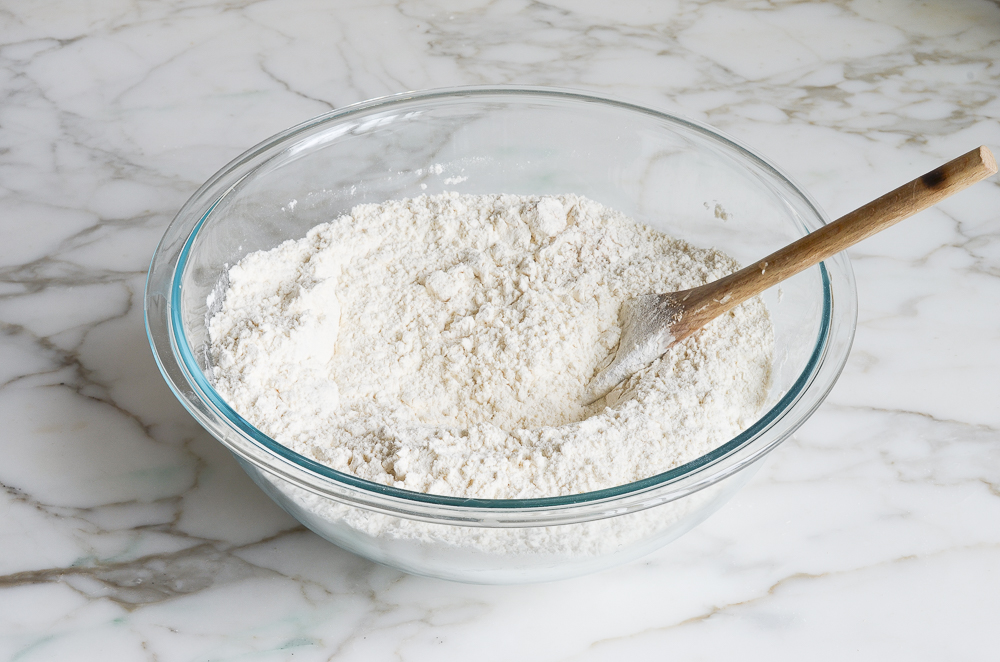
flour, yeast and salt in mixing bowl

In a very large (6-quart) bowl, combine the flour, salt, and yeast. Mix to combine.

mixed dry ingredients

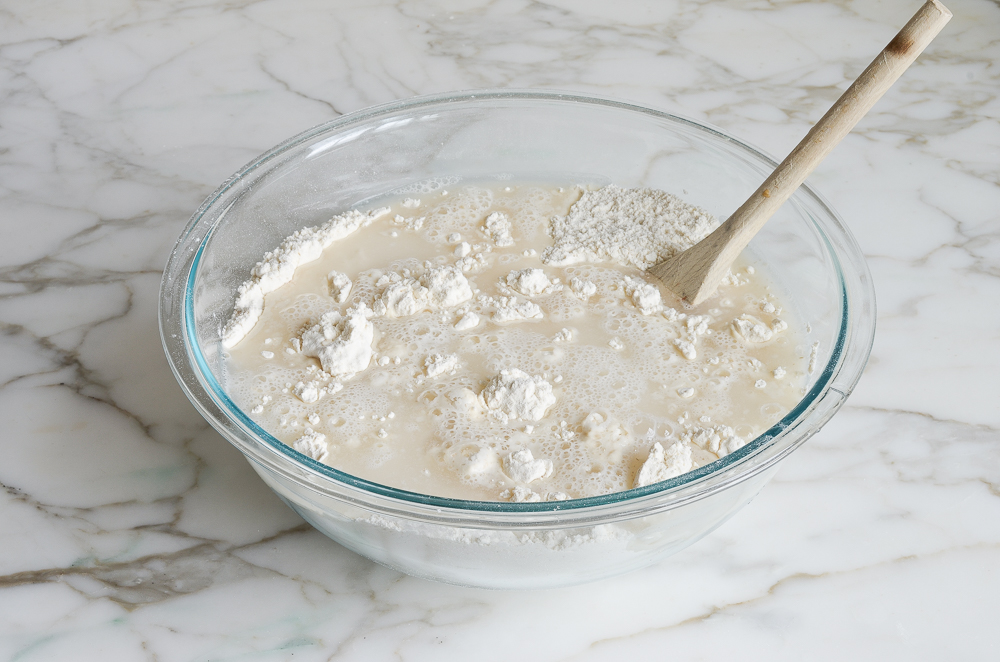
Add 3 cups of lukewarm water (no need to be exact but lukewarm is about 100°F).

Water in a bowl with dry ingredients.

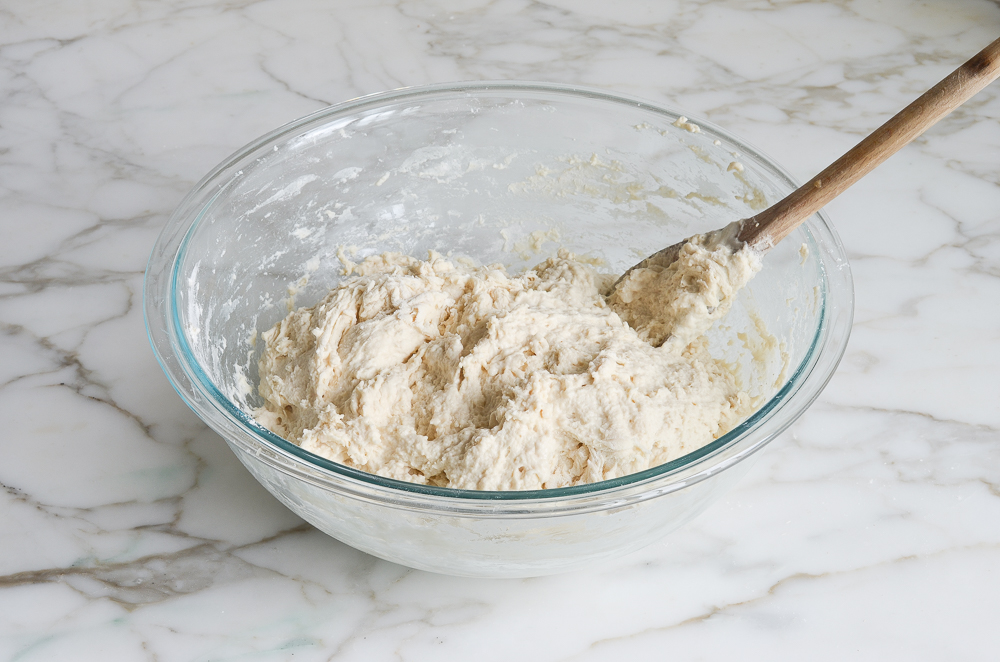
Stir with a wooden spoon until the mixture is uniformly moist, without any patches of flour.

Glass bowl of bread dough.

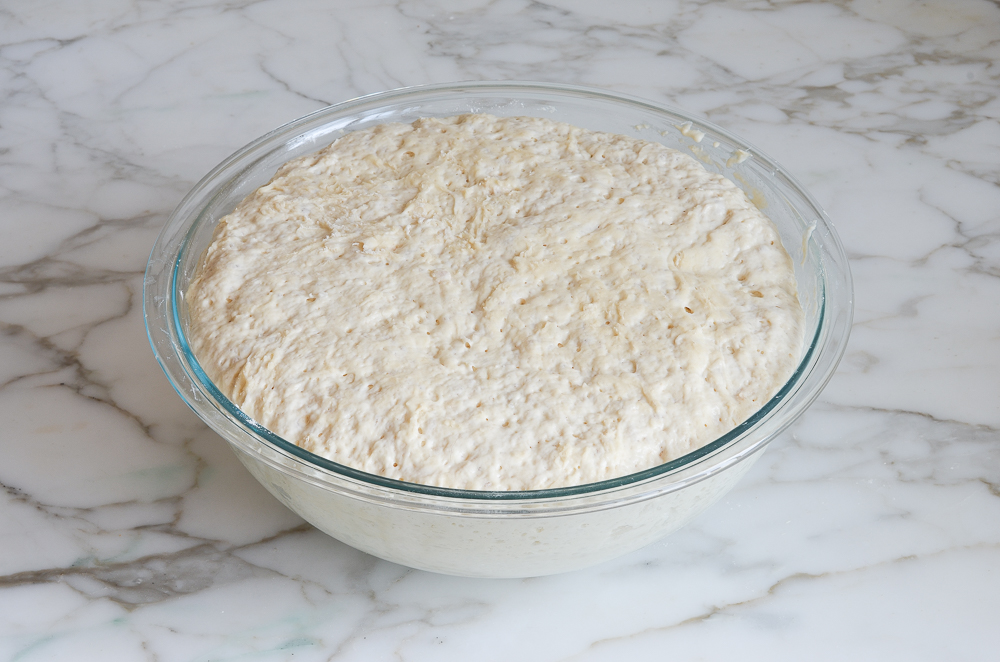
The dough should be sticky and conform to the shape of the bowl. If your dough is too dry, add a few tablespoons more warm water. If it’s too wet, add a few tablespoons of flour. Cover the bowl loosely with plastic wrap and let it sit on the counter in a warm spot for 2 hours. As you can see below, it will rise a lot!

dough after the first rise

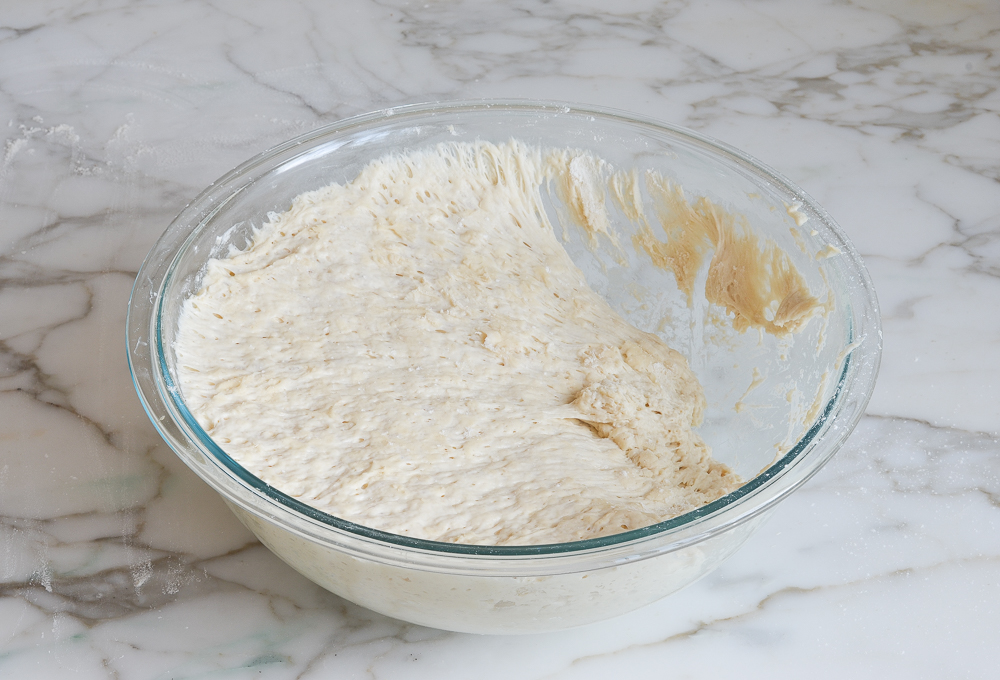
When you’re ready to bake a loaf, pull out one-third of the dough.

removing some of the bread dough from the bowl

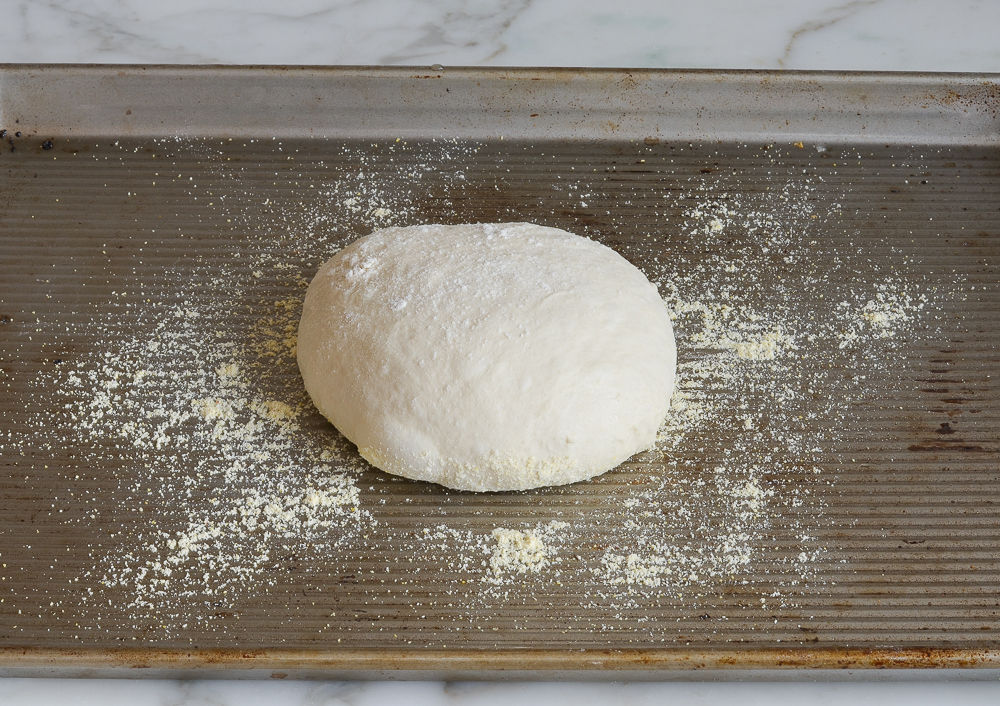
Coat the outside lightly with flour (you don’t want to incorporate more flour into the dough, you just want to be able to handle it). Gently work the dough into a smooth ball, stretching the surface and tucking the ends underneath.

shaping the bread dough into a ball

Put the dough ball onto a cornmeal-dusted baking sheet and let rest at room temperature, uncovered, for about 40 minutes. (If the dough has been refrigerated, allow it to rise for 60 minutes, or up to 90 minutes if you want a more open and airy crumb structure.) The dough will rise a bit. It may also spread/flatten a bit; that’s okay.

letting the bread dough rest on a baking sheet

The dough will rise a bit.

bread dough after second rise

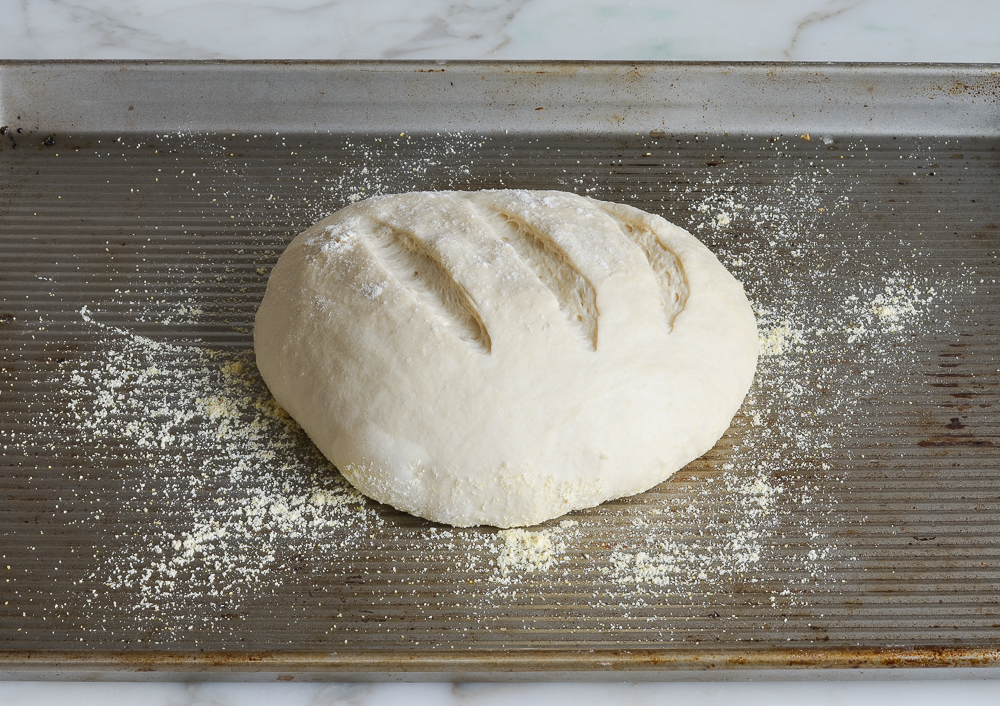
Generously dust the dough with flour. Using a sharp knife, make a few 1/2-inch-deep slashes in the dough — a scallop, cross, or tic tac toe pattern all look nice.

slashing the bread dough

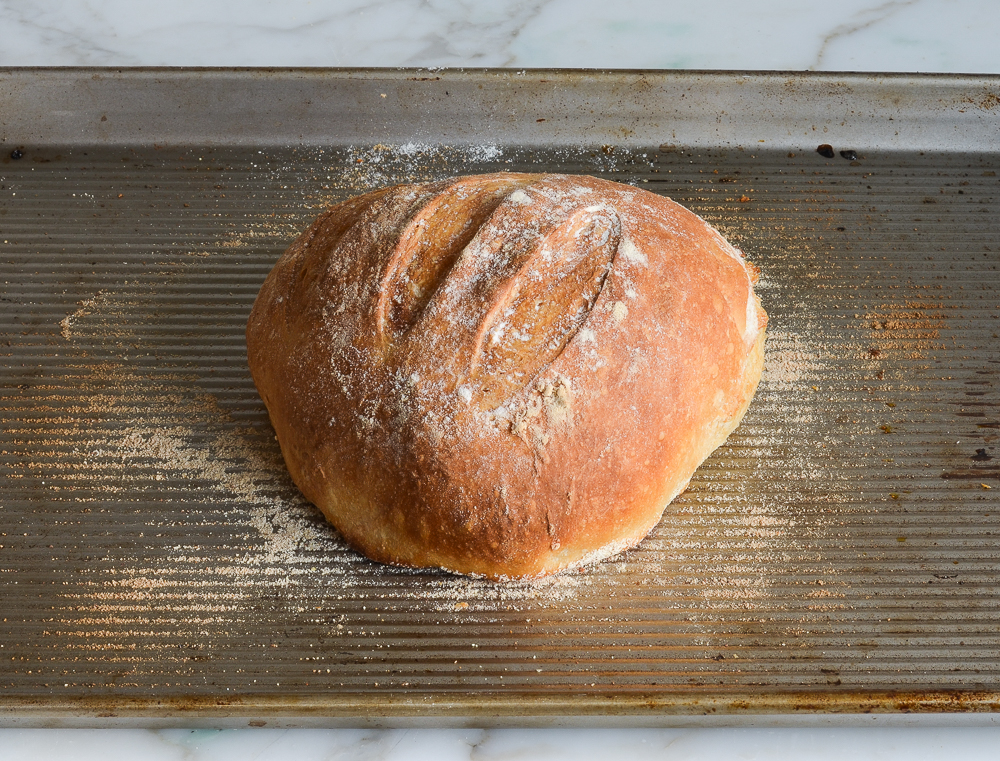
Set a metal pan on the bottom rack of a preheated 450°F-oven. Slide the baking sheet with the dough into the oven, and carefully fill the metal cake pan with one cup of hot tap water. This creates steam in the oven. (Try to do this quickly so as not to let heat out of the oven.) Bake until the loaf is golden brown, about 30 minutes. Cool completely on a wire rack.

Baked bread on a baking sheet.
This bread is best enjoyed fresh on the day it is made. Once sliced, place the loaf cut-side down on a cutting board or plate and leave it uncovered.

How To Freeze

The dough can be portioned into thirds and frozen in airtight plastic containers for up to 1 month. Defrost the dough in the refrigerator overnight, then shape, rest and bake as usual. The baked loaves can also be frozen whole or sliced. Wrap in a zip-top freezer bag and freeze for up to 1 month. To thaw, take the bread out of the freezer and let it come to room temperature, about 3 hours. Reheat in a 350°F oven until warmed through, about 10 minutes.

Partially-sliced loaf of crusty artisan bread.

You May Also Like

Crusty Artisan Bread

This crusty bread recipe is astonishingly easy — no kneading required — and makes three beautiful loaves, which you can bake as needed.

Servings: 3 loaves (about 10 slices per loaf)
Prep Time: 10 Minutes
Cook Time: 30 Minutes
Total Time: 40 Minutes, plus 2 hours and 40 minutes to rise

Ingredients

  • 6½ cups all-purpose flour, spooned into measuring cup and leveled-off (preferably King Arthur; see note)
  • 4 teaspoons kosher salt
  • 1½ tablespoons instant/rapid-rise yeast (see note)
  • 3 cups lukewarm water (no need to be exact but lukewarm is about 100°F)
  • Cornmeal, for dusting the pan

Instructions

  1. In a very large (6-quart) bowl, whisk together the flour, salt, and yeast. Add the water and stir with a wooden spoon until the mixture is uniformly moist, without any patches of flour. The dough should be sticky and conform to the shape of the bowl. If your dough is too dry, add a few tablespoons more warm water. If it's too wet, add a few tablespoons of flour. (See the step-by-step photos for guidance on what the dough should look like.) Cover the bowl loosely with plastic wrap and let it sit on the counter in a warm spot for 2 hours. If you plan to bake a loaf immediately, proceed to the next step. Otherwise, place the bowl of dough in the refrigerator to be used over the next 14 days. (Once refrigerated, the dough will shrink back a bit; that's okay. Do not punch down the dough at any point, and keep it loosely covered with plastic wrap.)
  2. Dust a sturdy baking sheet with cornmeal.
  3. Dust the surface of the dough and your hands lightly with flour. Pull out one-third of the dough and coat the outside lightly with flour (you don't want to incorporate more flour into the dough, you just want to be able to handle it). Gently work the dough into a smooth ball, stretching the surface and tucking the ends underneath, adding more flour as needed so it doesn't stick to your hands. (Don't overwork the dough; this process should only take about 30 seconds.) Put the dough ball onto the prepared baking sheet and let it rest at room temperature, uncovered, for about 40 minutes. (If the dough has been refrigerated, allow it to rise for 60 minutes, or up to 90 minutes if you want a more open and airy crumb structure.) The dough will rise a bit. It may also spread/flatten a bit; that's okay.
  4. Preheat the oven to 450°F. Set one rack in the lowest position of the oven and one rack in the middle position. Place a metal pan (any metal cake pan or broiler pan will work; just don't use glass) on the bottom rack. (You will fill this with water later to create steam in the oven).
  5. Generously dust the dough with flour. Using a sharp knife, make a few ½-inch-deep slashes in the dough -- a scallop, cross, or tic tac toe pattern all look nice.
  6. Slide the baking sheet with the dough into the oven, and carefully fill the metal cake pan with one cup of hot tap water. (Try to do this quickly so as not to let heat out of the oven.) Bake until the loaf is golden brown, about 30 minutes. Cool completely on a wire rack.
  7. This bread is best enjoyed fresh on the day it is made. Once sliced, place the loaf cut-side down on a cutting board or plate and leave it uncovered. (If it lasts beyond a day, I suggest slicing and freezing.)
  8. Freezer-Friendly Instructions The dough can be portioned into thirds and frozen in airtight plastic containers for up to 1 month. Defrost the dough in the refrigerator overnight, then shape, rest and bake as usual. The baked loaves can also be frozen whole or sliced: Wrap in a zip-top freezer bag and freeze for up to 1 month. (If you plan to use slices one at a time, place pieces of parchment between them so they don't stick.) To thaw, take the bread out of the freezer and let it come to room temperature on the countertop. Reheat in a 350°F oven until warmed through, about 10 minutes.
  9. Note: Active dry yeast may be used instead of instant/rapid-rise yeast, however, the dough will take longer to rise. To give active dry yeast a boost, you can dissolve it in the lukewarm water and let it sit until frothy, about 10 minutes. After that, add it to the flour and salt, and proceed with the recipe.
  10. Note: I use King Arthur flour, which is higher in protein than some other all-purpose flours. If using a flour with a lower protein content, such as Gold Medal, you will likely need to add a few more tablespoons of flour.

Nutrition Information

Powered by Edamam

  • Serving size: 1 slice
  • Calories: 100
  • Fat: 0 g
  • Saturated fat: 0 g
  • Carbohydrates: 21 g
  • Sugar: 0 g
  • Fiber: 1 g
  • Protein: 3 g
  • Sodium: 64 mg
  • Cholesterol: 0 mg

This website is written and produced for informational purposes only. I am not a certified nutritionist and the nutritional data on this site has not been evaluated or approved by a nutritionist or the Food and Drug Administration. Nutritional information is offered as a courtesy and should not be construed as a guarantee. The data is calculated through an online nutritional calculator, Edamam.com. Although I do my best to provide accurate nutritional information, these figures should be considered estimates only. Varying factors such as product types or brands purchased, natural fluctuations in fresh produce, and the way ingredients are processed change the effective nutritional information in any given recipe. Furthermore, different online calculators provide different results depending on their own nutrition fact sources and algorithms. To obtain the most accurate nutritional information in a given recipe, you should calculate the nutritional information with the actual ingredients used in your recipe, using your preferred nutrition calculator.

See more recipes:

Comments

  • This bread is AMAZING! I have made it numerous times now and my family loves it. Thank you do much for all your recipes. You’re my go-to girl! I have made many dishes from your cookbook and your blog and EVERY. SINGLE. ONE. Has turned out and us delicious. Thank you. A million times thank you.

    Stay safe!

    • 🙂 You’re so welcome!!

    • I made this with about 2/3 bread flour and 1/3 white whole wheat flour. Came out a little soft, but still delicious. Will try it as per the recipe next time.

  • This is the only recipe of Jenn’s that flopped for me. The dough rose just fine, but it was a goopy mess and in no way would hold a shape and bake into a loaf a bread.

    • So sorry you had a problem with this, Virginia! What brand of flour do you use? Do you weigh your ingredients or use cup measures?

  • Hi Jenn,
    Have you had any luck adding sour dough starter? I’m in CA, and sourdough bread is a regular purchase for us usually. Hope you and your family are well! This has been my go to website for years. Thank you!!

    • Hi Katie, Thanks for your note and nice words about the recipes — so glad you like them! I wish I could help, but full disclosure — I’ve never made sourdough bread — sorry!

  • I don’t have cornmeal. Could I substitute it for something else?

    • Hi Emma, You can use parchment paper to line the pan.

  • So I decided I needed me some comfort……homemade bread! I have made this recipe twice since we’ve all hunkered down. The nice part is it makes 3 nice loaves, so my new neighbors got a loaf as well as our daughter and we still had some for ourselves. It got great reviews. Everyone loved the taste, aroma and texture. Now for the bad part… It just didn’t last very long as it was hard not to keep eating it! Seriously, this is easy to make and so good

  • Hi Jenn,
    Can I use almond flour for this recipe instead of all purpose flour?
    Thanks,
    Rose

    • Hi Rose, Thanks for your note. I’ve only made this with all-purpose flour, so I can’t say confidently how it would work with almond flour, but I worry that it wouldn’t translate well. Sorry!

  • Hi Jenn,
    I decided to try this recipe with my 3 grandchildren, ages 7, 10, and 13 as a stay at home activity. They each had a specific job in the process. It seemed too easy. The hardest part is waiting through the rise time Well, I cannot begin to tell you how good this was!!! Amazing! They could not believe they made it! We ate one loaf and grudgingly parted with another for their parents. The third part of the dough is waiting in the fridge A great recipe to do with kids! Thank you so much!

  • The only bread I like is the crusty artesian kind so I buy La Brea at the market. NO more! This is so easy and so good I won’t be buying anymore bread. Who knew this was so easy after learning from my mother in law the old fashioned way of kneading, punching down, pans, etc. Sick of that I bought a bread machine a number of years ago. That’s a pain too. Now I have the solution thanks to your website. Can’t wait to find more of your recipes. Thanks again!

    • — LeAnne Fredrick
    • Reply
  • It was a great recipe. Easy as can be. I start to make in the morning as it requires 3 hours to rise. Was really good. I’m making it again as I write this.

  • Best bread everrrr!!! 🙂 The first time I made it, I had one packet of active dry yeast. I adjusted the recipe accordingly and I did add a bit of sugar to the dough. It was delicious! I bought a jar of the instant yeast the next day and I made it again following the exact recipe… no alterations. It was even more delicious!!! I did sprinkle some sesame seeds on top before baking because I love sesame seeds and it gave it a nice texture. 🙂 However, it wasn’t as golden brown as the first one. I just realized today that I forgot the water pan step the second time I made it. The bread was still awesome but is this a necessary step? And could it be why the bread didn’t turn a nice golden brown? I will make it again, of course! 😉

    Thank you for all of your recipes, Jenn… you are AWESOME! 🙂

    • Hi Katie, so glad you enjoyed the bread! With your second batch, I don’t think the lack of water in the oven would have caused the bread to brown less. If anything, it may have made the crust a little less crispy. The bread doesn’t brown until the very end, so perhaps it just needed another few minutes in the oven. Hope that helps!

  • Came out great! A big hit. I used parchment paper and a pizza stone

  • Wow! This was my first time making bread at home. I love bread but never thought I could make it at home. My family said it was the best bread they ever had, even better than our local French bakery! Who knew it was so simple. Thanks for the detailed instructions on what it should look like at each step, Jenn! They want to know when I’m making it again!

  • DELICIOUS! Loved it and was simple to make 🙂

  • I loved this recipe! Only thing I did was add about a tablespoon of sugar to the yeast to get it to rise more since I didn’t use a rapid rise yeast.

  • The crust on my first batch turned out crunchy. What type of texture should I be looking for?

    • Hi Bruce, It should be a bit crispy but not hard. If you found that it was a bit too browned or crunchy, next time you could lay a piece of foil over the loaf toward the very end of the baking time. Hope that helps! 🙂

  • Hi Jenn,
    Are you able to tell me how I can bake this in two loaf pans (5×9)? Should I do 1/3 of the dough each or 1/2? Also do you have an idea of what the baking time would be? I have it rising now. Not trying to change your recipe – just trying to make one plain and one with “everything” seasoning. Thanks very much! Hope your family is safe and well.

    • Hi Amy, I’d probably do 1/3 of the dough in each loaf pan. The cook time should be just a bit longer, but keep an eye on it. Be sure the pans are nonstick and grease them well. Also, if you have smaller loaf pans (8.5×4.5-in), those would be better.

  • I’m excited to try this and plan to do the half recipe with 1 packet of yeast as I saw you commented in another review. We’re a little short on flour and I’m wondering if bread flour or a combo with AP flour would work fine for this one?

    • Yes, you can use bread flour but you’ll need to increase the water by 1/3 cup to start and add more if needed. Hope you enjoy!

  • Hi Jen, I’m a little unsure about your directions when using the active dry yeast. Do you mean add the dry to the wet since dissolving it in water is the first step? Would appreciate if you clarify. Thank you for this wonderful recipe (and the many others you’ve shared that my family loves!) =)

    • Yes, that’s correct – you’ll add the flour to the yeast that’s been dissolved in the water and salt. Hope that clarifies and that you enjoy!

  • WoW!! if i knew making bread was this easy i would have made it years ago! My husband and i ate a whole loaf in one sitting, it was so warm and delicious. i let the dough sit in the refrigerator over night and then baked 3 loaves, one per day. Made it exactly as directed and it came out perfect. Great with butter or to dip in olive oil. Warm is best.
    i cant wait to make this again when we can have guests over for dinner. I like that it makes 3 loaves so if i have a dinner party there will be enough bread for all.
    I cant say enough about this site. i always look for new recipes to try, and since i found this site, i haven’t looked anywhere else. This is my go to. If Jen has a recipe for it, it will be good, no questions.

    • — CHRISTENE CARR
    • Reply
  • I’d love to make this with a whole grain flour. Suggestions?

    • Hi Jana, I’ve only made this with all-purpose flour so I can’t confidently say how it will turn out with different kinds of flour. King Arthur has a variety of bread recipes that call for whole-grain flours if you want to check them out here.

  • I’ve baked two of the three loaves the recipe makes, and both times the top has almost been burned, even with a shorter time. I’m wondering if the suggested oven temp is correct, 450 degrees. That seems awfully high for bread.
    I love your website and cookbook. I’ve given the cookbook to all the women in my family.

    • So glad you like the website! 🙂 Typically, bread is baked at a high temperature but if the loaves are browning too much, you could try reducing the oven temp by 25 degrees. And if you feel like the loaves are still getting too browned on top, you could gently lay a piece of foil on top of the loaf for the tail end of the baking time. Hope that helps!

  • This recipe looks amazing and awesome. I know you said specifically to use a wooden spoon, but is it ok to use a plastic or silicone one? I don’t have a wooden spoon (and with what is going on…).

    Thanks!

    • Yep that’s fine 🙂

  • Hi Jenn,
    First of all…You bring joy to our lives during this stressful time, by bringing our families together in the kitchen and at the dinner table. Thank you!
    I finally found, (way overpriced) a 3 pack of instant yeast online. Each little packet is 2 1/4 teaspoons yeast. This recipe calls for 1-1 1/2 Tablespoon yeast. How would I adjust the recipe to use just one or two packets, to prevent opening one packet to take a little out. Im afraid this coveted yeast would go bad opened, and I don’t want to waste any. Ideally, it would be great to have your recipe adjusted to accommodate using one packet of yeast.
    Maggie

    • Glad you like the recipes, Maggie! You can use 1 packet of yeast if you halve the recipe. Enjoy! 🙂

    • I am in the same boat- very few yeast packets and a hungry family of 6. Trying to stretch my supplies- I used 1 packet for the whole recipe- I used dry active yeast and I activated it 1st with water and a little sugar. Let it rise longer than recommended… it turned out great… got 3 loaves out of it- and they all went!

      • I love this recipe and that it makes three loaves. One for tomorrow and the next day. Making all this bread does take a lot of yeast so I was able to purchase a one lb bag from a local pizzeria for only $6.

    • Hi Jen,

      I I watch the video of the book you adapted the recipe from. They put the bread on a pizza stone. I have one, would you recommend that?

      I don’t have cornmeal. I have corn flour. Can I substitute that?

      • Hi Nidhi, Yes if you have a pizza stone, go ahead and use it. If you don’t have cornmeal, I would recommend parchment paper.

  • Easy and fantastic. My husband and kids could not eat it fast enough!

  • Good morning!

    I have had so many bread fails over the years and this is the first time I had something come out delicious! It was on the flat side, but still so tasty. Love your recipes online and in the cookbook. I have young kids and appreciate how dependable your recipes are. Thank you!

  • Lovely bread. I used regular yeast with 1 tsp. sugar for proofing BEFORE I read the instructions, and then followed the instructions. Oops. I was surprised to read that you are to proof the yeast with salt as I thought salt prevented or slowed the growth of yeast.

  • Hi Jenn, I’m excited to make this bread. I have fresh milled prairie gold wheat flour that I’d like to use for part of the flour. I’m wondering about proportions… would 50/50 wheat/white work? I’d love your thoughts.

    • Hi Gail, I’ve only made this with all-purpose flour so I can’t confidently say how it will turn out with different kinds of flour. King Arthur has a variety of bread recipes that call for whole-grain flours if you want to check them out here.

  • Hi jenn
    A quick question.
    Could I put oil on my hands instead of flour?
    Thanks so much .

    • I wouldn’t recommend it, Dagmar — sorry!

  • I am a terrible baker but the recipe is so fool-proof that even I made it work! Thank you for this amazing recipe Jenn!!

  • Hi Jenn, Would it be possible to leave the dough to rise overnight rather than just for two hours so that I can make the basic recipe at night and then, in the morning leave it for another 40 minutes before baking. Thank you so much it’s a great recipe!

    • Hi Barbara, You can let it rise at room temperature for up to 5 hours, but it needs to be refrigerated after that.

      • This recipe was a disaster. I have made bread many times, but I have never made any that didn’t require kneading. I measured carefully, and the dough rose quickly, but it was like glue – very runny. I couldn’t even scrape it off my hands. I had to add quite a bit more flour in order for it to form at all. I did manage to contrive round shapes, but then when it was baked, it was stuck to the pan so firmly that I couldn’t pry it off without leaving a layer behind. It tasted pretty good, but I don’t know what happened.
        I have tried several of your other recipes, and they have all been great.

        • It is a wet dough by design, but you should still be able to work with it by adding flour to your hands.
          Here is a video from the cookbook authors. This should give you a good idea of what the consistency of the dough should be. If your dough is wetter than the one in the video, you an add more flour until you get the right consistency.

  • I can’t ever remember having bread turn out well for me, but I tried it anyway. It didn’t rise nearly as high as Jenn’s picture shows, and instead spread out. Still, the bread was crusty on the outside, soft and springy on the inside, and tasted quite good. I’m having it now as avocado toast, only I didn’t toast the bread. It’s good. Maybe I’ll try it in a loaf pan and see if I get better height that way. I feel like I’m this close to a decent loaf.

    • Hi Harlond, Next time try adding a few more tablespoons of flour. 🙂

      • I followed your suggestion and it came out perfect, only decent loaf of bread I’ve ever made. I should have given you five stars, sorry!

  • Hi Jenn,

    I love all of your recipes and am excited to try this bread. It is hard to find yeast in the stores these days and I have “original,” not the fast-acting yeast called for in this recipe in my cupboard. Would it be possible to modify the recipe so I could use original yeast? Would appreciate any guidance or ideas you would have. Many thanks!

    • Yes, Kate, regular yeast will work here. Use the same amount but dissolve it with the lukewarm water and salt first, then add the flour. Hope that helps!

  • Hi Jenn, this bread is amazing – thank you for the fantastic recipe. I made 1/3 the recipe with no issues scaling down. Two questions: i) going forward would it be possible to include weights for things like flour measurements? I find my kitchen scale much more reliable than my flour-measuring ability 🙂 and ii) can you confirm that you don’t need to add any sugar to the yeast mixture (in the event that one has to use regular active yeast as opposed to instant yeast) – I had always thought that yeast needed sugar to activate/bloom. All grocery stores are completely out of baking supplies and I happen to have only regular yeast left in my pantry!
    Thanks Jenn!

    • So glad you liked this Sarah! The recipe does actually have the conversion to weight. To view them, scroll down to the recipe and immediately under the recipe title on the right side, you’ll see a little toggle. If you move it from “cup measures” to metric, you’ll see measurements that will work for you. And no need to use sugar with active dry yeast but dissolve it with the lukewarm water and salt first, then add the flour. Hope that helps!

  • This bread was so easy to make! This recipe makes 3 loaves, so I made 1 loaf per day for 3 days. The dough was pretty easy to work with on day 1, and became really easy to work with by day 3. It was fantastic several ways: dipped in herbed EVOO, sandwiches, french toast, and plain old toast. I highly recommend this recipe for anyone who is afraid to try making bread because you think it may be too complicated. You will be pleasantly surprised. I didn’t have the cornmeal so used parchment paper instead. The hardest part about this recipe right now is finding the yeast–it’s sold out everywhere!!! Thanks Jenn for a wonderful recipe.

  • I made this to share with some neighbors! Everyone loved the bread! So easy! Thanks, Jenn!

    • — Colette Dryden
    • Reply
  • Hi Jenn
    Wow! What a lot of questions. I hope you haven’t already answered these 2 I’m baking all 3 loaves together. Should I extend the baking time? And by how much?
    Also, you suggest adding water to the second pan after you put the dough into the oven. Why then, and not before? You wouldn’t lose any heat that way.

    • — Heather Paterson
    • Reply
    • Hi Heather, if you bake all three loaves at the same time, they’ll take a bit longer. I’d start checking them at about 35 minutes and use the color as a visual cue–you’re looking for a golden brown. And, it’s fine for you to add the water to the other pan in advance. I’ve done it both ways and it works either way. Hope you enjoy!

  • Hi Jenn, Thank you for all your delicious recipes! With your help we’re going to tackle bread. Can this be shaped into a baguette?

    • Yep, that’s fine. 😊

  • Thanks so much for this recipe. We have a flour and yeast shortage here in New Zealand, so not making as many loaves as we would like. I make it into 2 long loaves and bake at the same time. It is delicious toasted. It is super easy to make and makes a nice crusty loaf.

    Do you have a recipe for Hot Cross Buns for Easter?

    • So glad you like the bread! Unfortunately, I don’t have a proven recipe of my own for hot cross buns. I’ll have to add that to my list of recipes to potentially develop. In the meantime, this recipe looks good and gets positive reviews. (Please keep in mind that I haven’t tried it myself.) Please LMK how they turn out if you try them!

      • Thanks so much for the link. I will let you know if I do or if I find another great one.

      • Hi Jenn, I made the King Arthur Hot Cross Bun
        recipe and while it was nice it was more like a soft scone or muffin. Not a soft bun/roll. I also made the Hot Cross buns from Recipe Tin Eats which were much lighter and fluffier. Thanks so much and hoping you and your family have a lovely Easer.

        • Thanks for reporting back, Lianne! Sorry the first ones were a bit of a miss, but glad you found a recipe you liked! 🙂

  • As you say, Jenn, we all have more time at home these days. I had heard of this type of recipe but had never made bread this way. The results were delicious and attractive. Baked one loaf the first day, one loaf the next day, and have one waiting for me in the freezer. I shared the recipe with my son who promptly made a batch. And my sister in Mississippi. There seems to be a shortage of yeast so can’t bake again until I find some. Great recipe! I highly recommend!

  • I do not like a yeasty tasting bread but am very intrigued by this recipe…any suggestions or recipes that don’t taste yeasty

  • Hi Jenn,
    If I use my Dutch oven, what size & how much of the dough for one loaf? Thank you! Stay well! I love your recipes!

    • Hi Barb, Assuming 1/3 of the dough will fit in your Dutch oven with room to bake, I’d stick with the guidance in the recipe. Hope you enjoy!

  • I bake often but hadn’t tackled yeast bread since my children were born. (They’re now 21 and 18!) Extra time and a recipe this easy made an incredible loaf of bread. My kids could not believe only four simple ingredients made something so delicious. We paired the first loaf with an equally wonderful recipe, Jenn’s shakshuka, and tonight we will enjoy the second loaf with the crustless broccoli quiche.

    • — Jacquie Rohricht
    • Reply
  • WOW! Jenn, thank you so much for this fantastic recipe. I did not realize that I could make a wonderful loaf of bread so easily. The crust was nice and crisp and the inside a lovely texture.

  • Jenn – This is easy to make and good! The crust did get soft pretty quickly but I reheated it in the oven and was great. BTW – do you use the “bake convection” or just the “bake” setting on the oven for this? Thanks again for a great recipe! Kathy

    • Hi Kathy, Glad you enjoyed this! I always develop and publish my recipes using the regular setting on my oven (because many people don’t have convection settings on their ovens), so I’d go with the regular/non-fan setting.

  • I used this recipe today on my very first bread-making attempt. I also halved the recipe, as I only had 4 cups of flour in the pantry. (bold, I know) Well, it turned out spectacularly! We’ve already knocked off the first loaf and saving the second one for dinner. I also added oats to the second loaf. I cooked both of them in my dutch oven – it eliminates the need for a pan of water. 10 minutes with the lid on, 15 minutes off. Cooks very quickly. I’m saving this recipe and going to make this a staple in our home. Thank you for a simple recipe even a newbie could master!

  • 1st loaf of artisan bread just out of oven. Looks great, can’t wait to try. I used bread machine yeast. Made dough in my Granny’s bread mixing bowl, probably about 90 years old. Glad I discovered this recipe, as I do not have an oven proof Dutch oven that you need for other artisan bread recipes.

    • — ELIZABETH BROOMER
    • Reply
  • BEST. BREAD. EVER! The whole family loved it. My daughter even scrounged the crusts from the cutting board and complained bitterly that her dad got one more slice than anyone else. Another winner recipe from your site! THANK YOU! One question… the fam jam has requested burgers for dinner tonight. Is there any way the dough for the last two loaves could be baked as buns? Would it be as simple as reducing the baking time?

    • So glad it was a hit! They’d be really crusty, but I do think these could be shaped into burger buns. They will take less time to bake, so keep a close eye on them. Please LMK how they turn out!

      • I have all of these ingredients except cornmeal – any recommended substitutions ? Thank you!

        • Hi Beth, You can bake the loaves on parchment paper – works like a charm. 🙂

      • I made my last third of dough into rolls and used them for burgers. Delicious! They were crusty, but we liked that. Our first grill out of the season.

  • Delicious! Nice textured crust and soft interior. My 2 daughters and I had a remote “Chopped” contest to see how our use of your Crusty Artisan bread recipe turned out. All 3 tasted wonderful and looked like a professional baker’s work!

  • So good and easy! Kids and husband all loved it.

  • Wonderful!

Add a Comment

This site uses Akismet to reduce spam. Learn how your comment data is processed.