Easy Artisan Bread (No-Knead)
- By Jennifer Segal
- Updated July 15, 2025
- 855 Comments
- Leave a Review

This post may contain affiliate links. Read my full disclosure policy.
This easy artisan bread recipe takes the fuss out of bread-making—no kneading, no special equipment, just three golden, crusty loaves with hardly any effort.
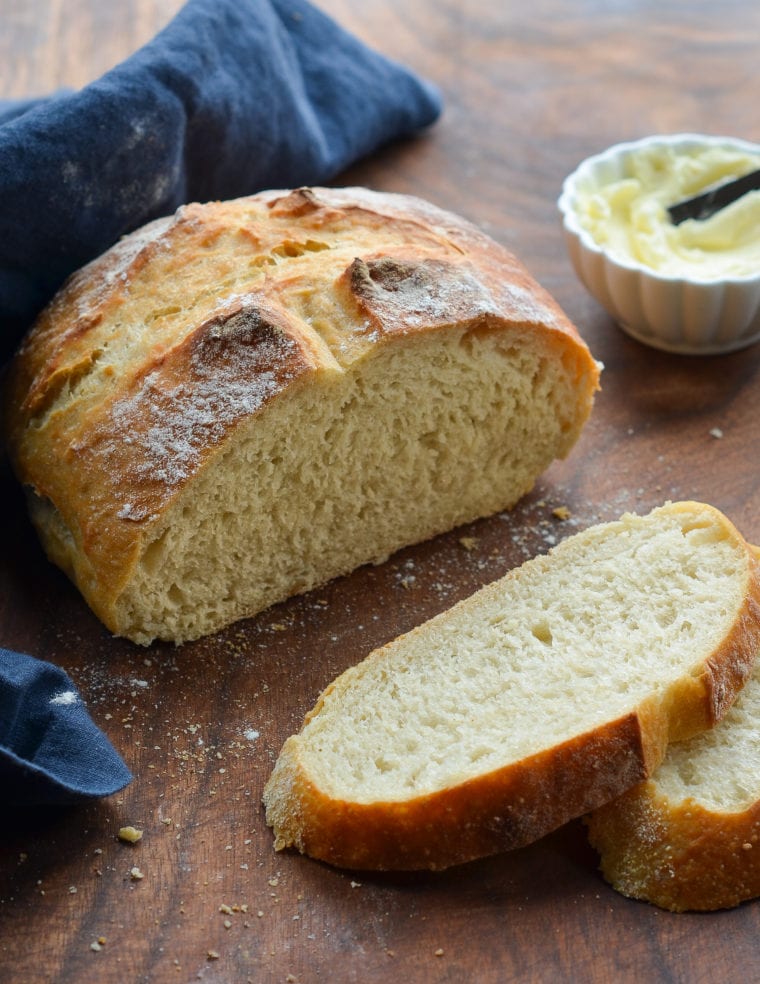
This crusty artisan bread recipe is astonishingly easy, and it makes enough for several loaves, which you can bake as needed. What’s more, the dough takes just five minutes to make, does not require kneading or any special equipment, and can rest in the fridge for up to two weeks—in fact, the longer it chills, the better it gets!
The recipe is modestly adapted from one of my favorite baking books, Artisan Bread in 5 Minutes A Day by Jeff Hertzberg M.D. and Zoë François.
“Absolutely one of our favorite bread recipes and so easy.”
What You’ll Need To Make Crusty Artisan Bread
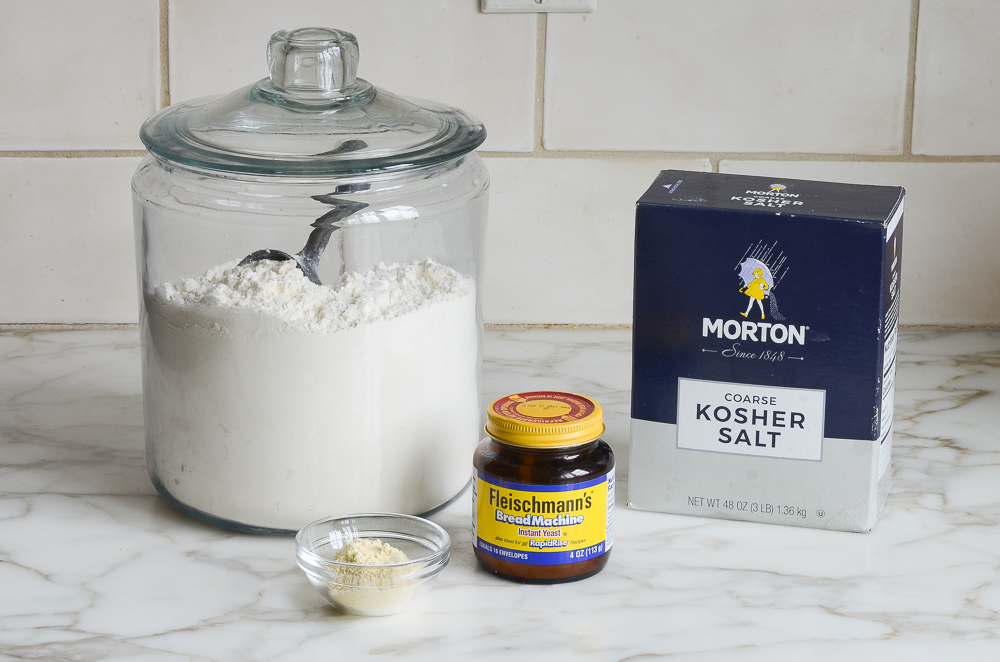
- All-purpose flour: The backbone of the dough. I recommend a high-protein flour like King Arthur for best results—if you’re using flour with less protein, you might need to add an extra spoonful or two.
- Kosher salt: Brings out the flavor of the bread and also helps regulate the yeast so the dough doesn’t rise too fast.
- Instant or rapid-rise yeast: The leavening agent. If you’re using active dry yeast instead, just plan for a longer rise time.
- Lukewarm water: Brings the dough together and helps activate the yeast. Aim for about 100°F—warm to the touch but not hot.
- Cornmeal: Sprinkled on the baking sheet so the dough doesn’t stick and to give the bottom crust a little extra texture.
- Jump to the printable recipe for precise measurements
Step-by-Step Instructions
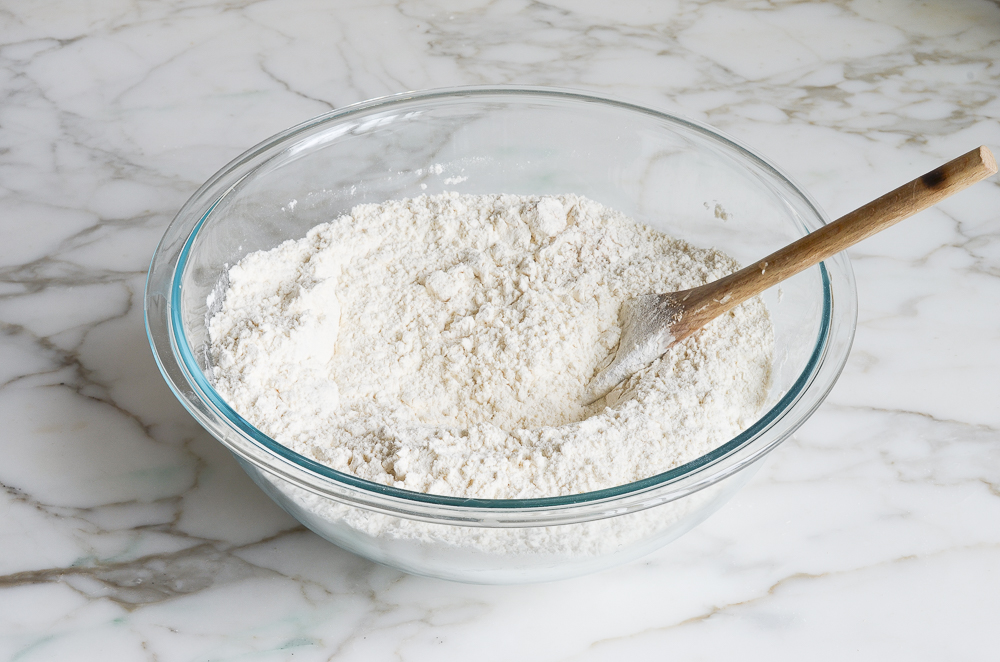
Step 1: Combine the dry ingredients. In a very large bowl (at least 6 quarts), mix together the flour, salt, and yeast with a wooden spoon.
Step 2: Add the water. Pour in 3 cups of lukewarm water (about 100°F). Make sure the water is warm but not hot—if it’s too hot, it can kill the yeast.
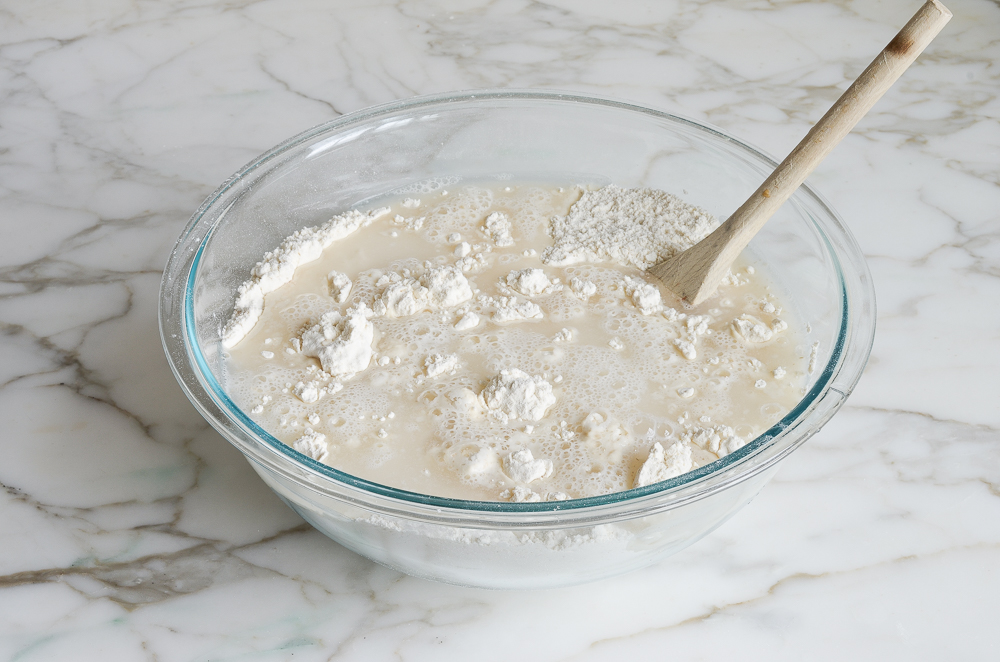
Step 3: Stir the dough. Mix with a wooden spoon until the flour is fully incorporated and there are no dry spots. The dough should be soft and a bit sticky (this helps create an open, airy crumb). If it seems dry, add warm water a tablespoon at a time; if too wet, add a little flour.
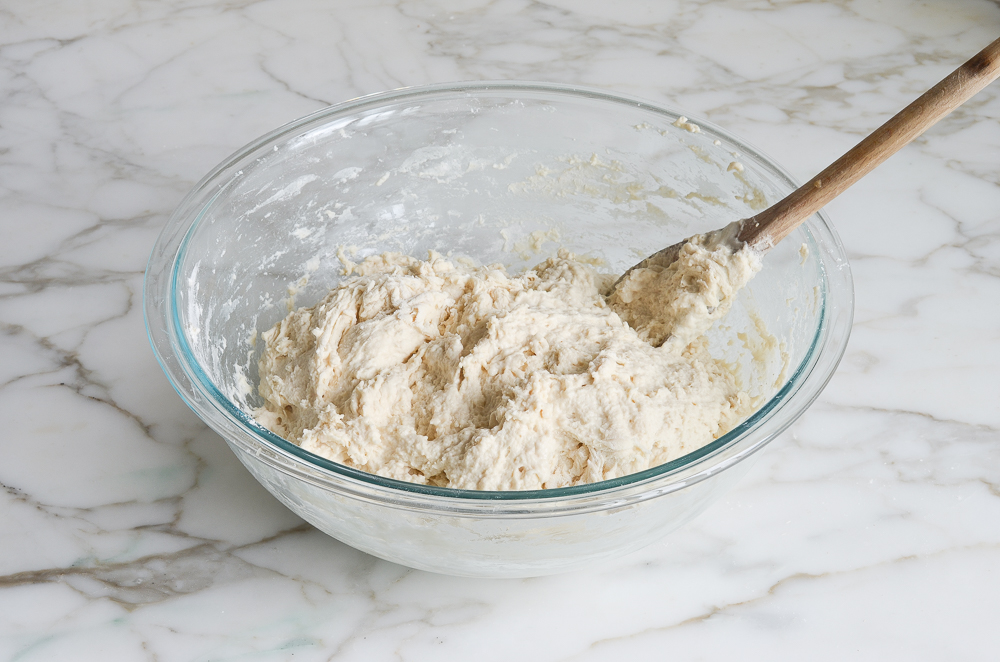
Step 4: Let the dough rise. Cover loosely with plastic wrap and let sit at room temp for about 2 hours, until risen and bubbly–it will rise a lot! (You can refrigerate the dough for up to 14 days or freeze for up to a month.)
Pro Tip: For a flavor boost, let the dough chill overnight—slow fermentation deepens the taste and makes it easier to handle.
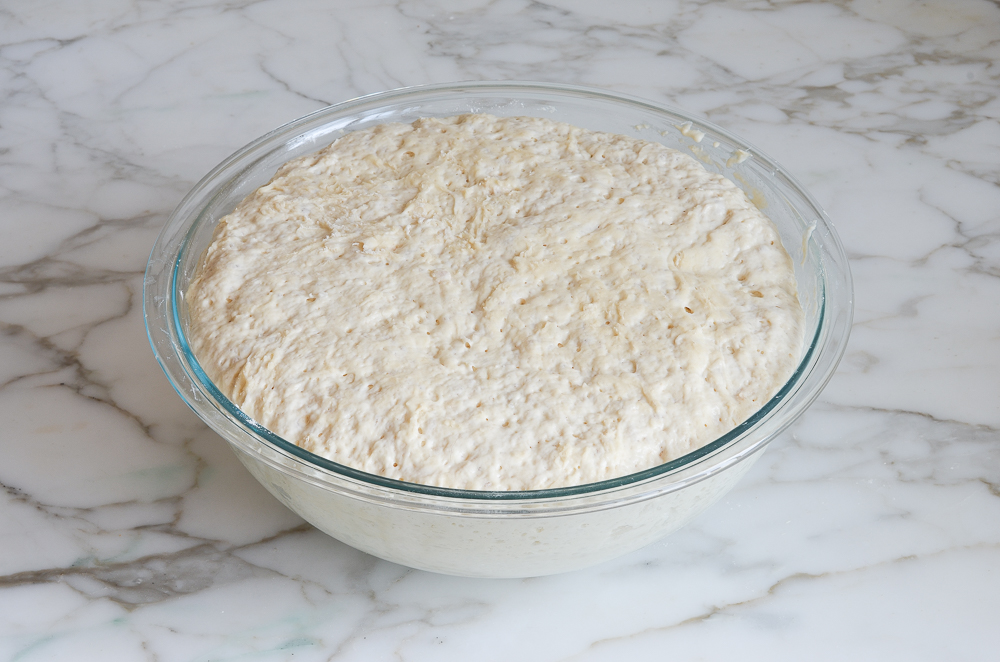
Step 5: Portion the dough. Dust the dough and your hands with flour, then pull out one-third of the dough—it will be sticky, and that’s normal.
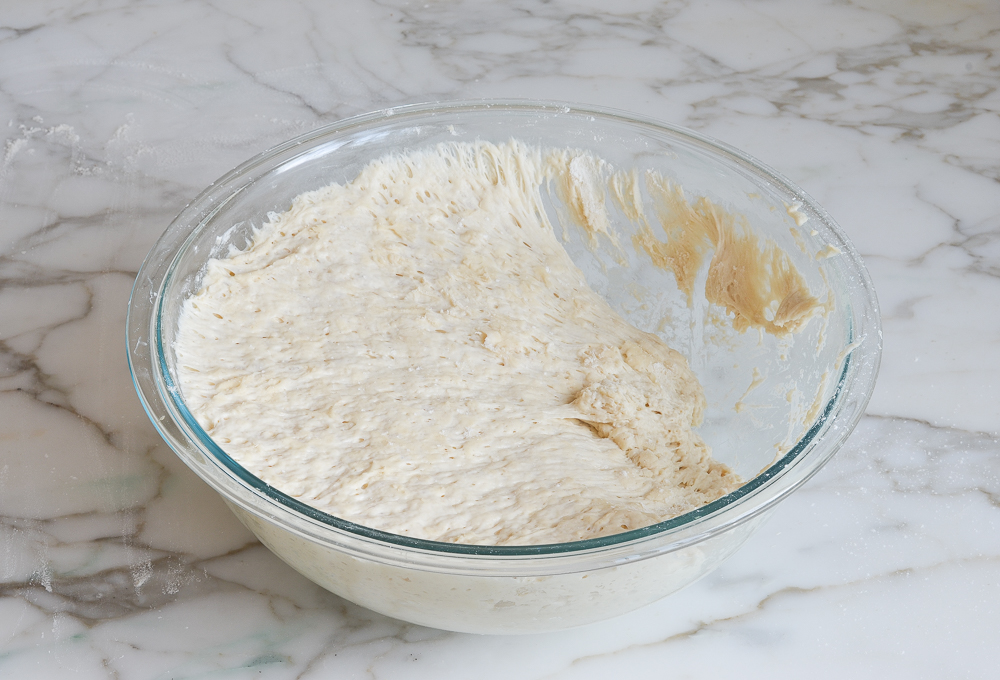
Step 6: Shape and rest the dough. Lightly flour the dough, shape it into a ball by tucking the edges under, and place it on a cornmeal-dusted baking sheet. Let rise uncovered for 40 minutes (or up to 90 minutes if chilled). The dough will rise slightly and may also spread out a bit.
Pro Tip: Resting uncovered helps the surface dry slightly, which encourages a better crust in the oven.
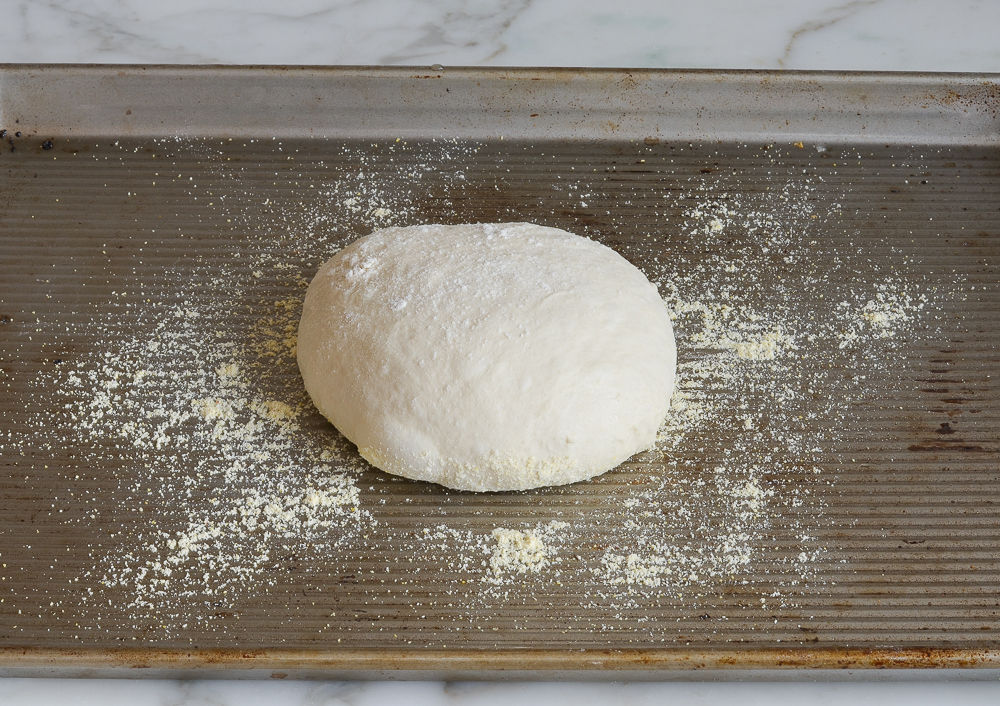
Step 7: Slash the dough. Lightly dust the loaf’s surface with flour and use a sharp knife to make a few ½-inch-deep slashes in any pattern you like (these let the bread expand as it bakes). Get creative! A scallop, a cross, or even a tic-tac-toe pattern will look great.
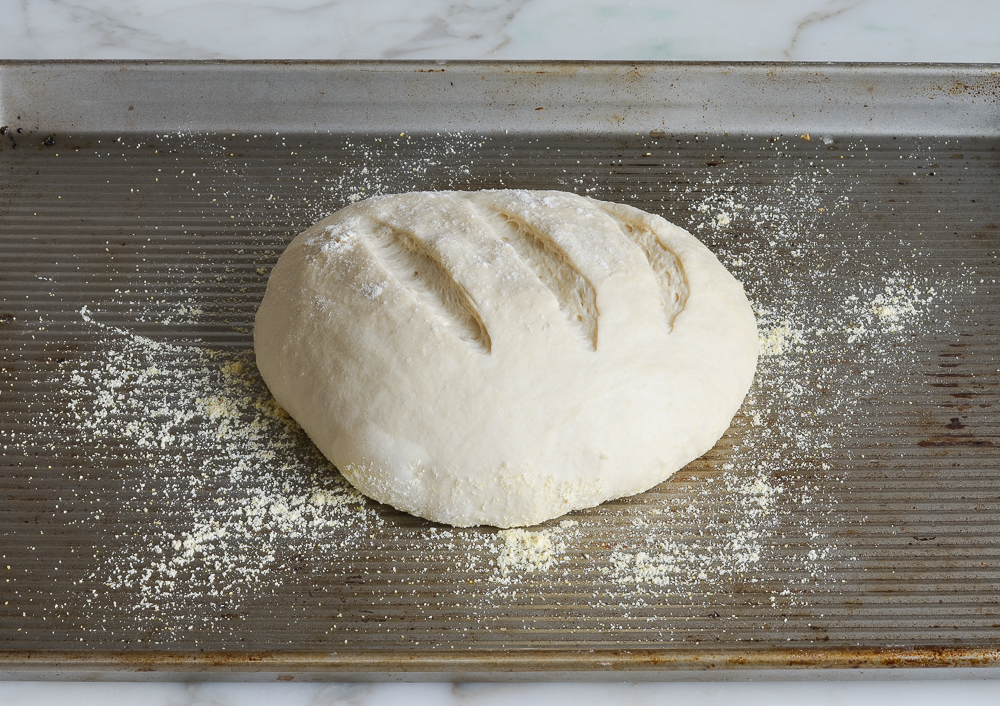
Step 8: Bake with steam. Preheat the oven to 450°F with a metal cake pan on the bottom rack. Slide in the baking sheet with the dough, pour 1 cup hot tap water into the cake pan, and bake for 30 minutes until golden-brown. (The steam generated by the water gives the loaf a crisp crust.)
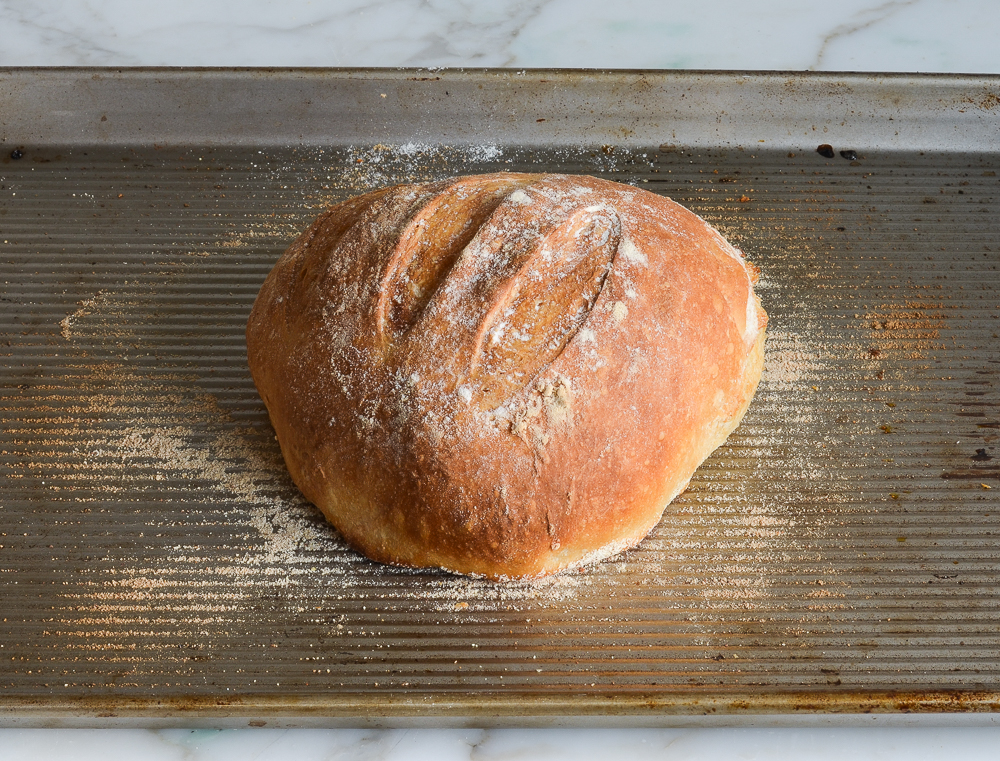
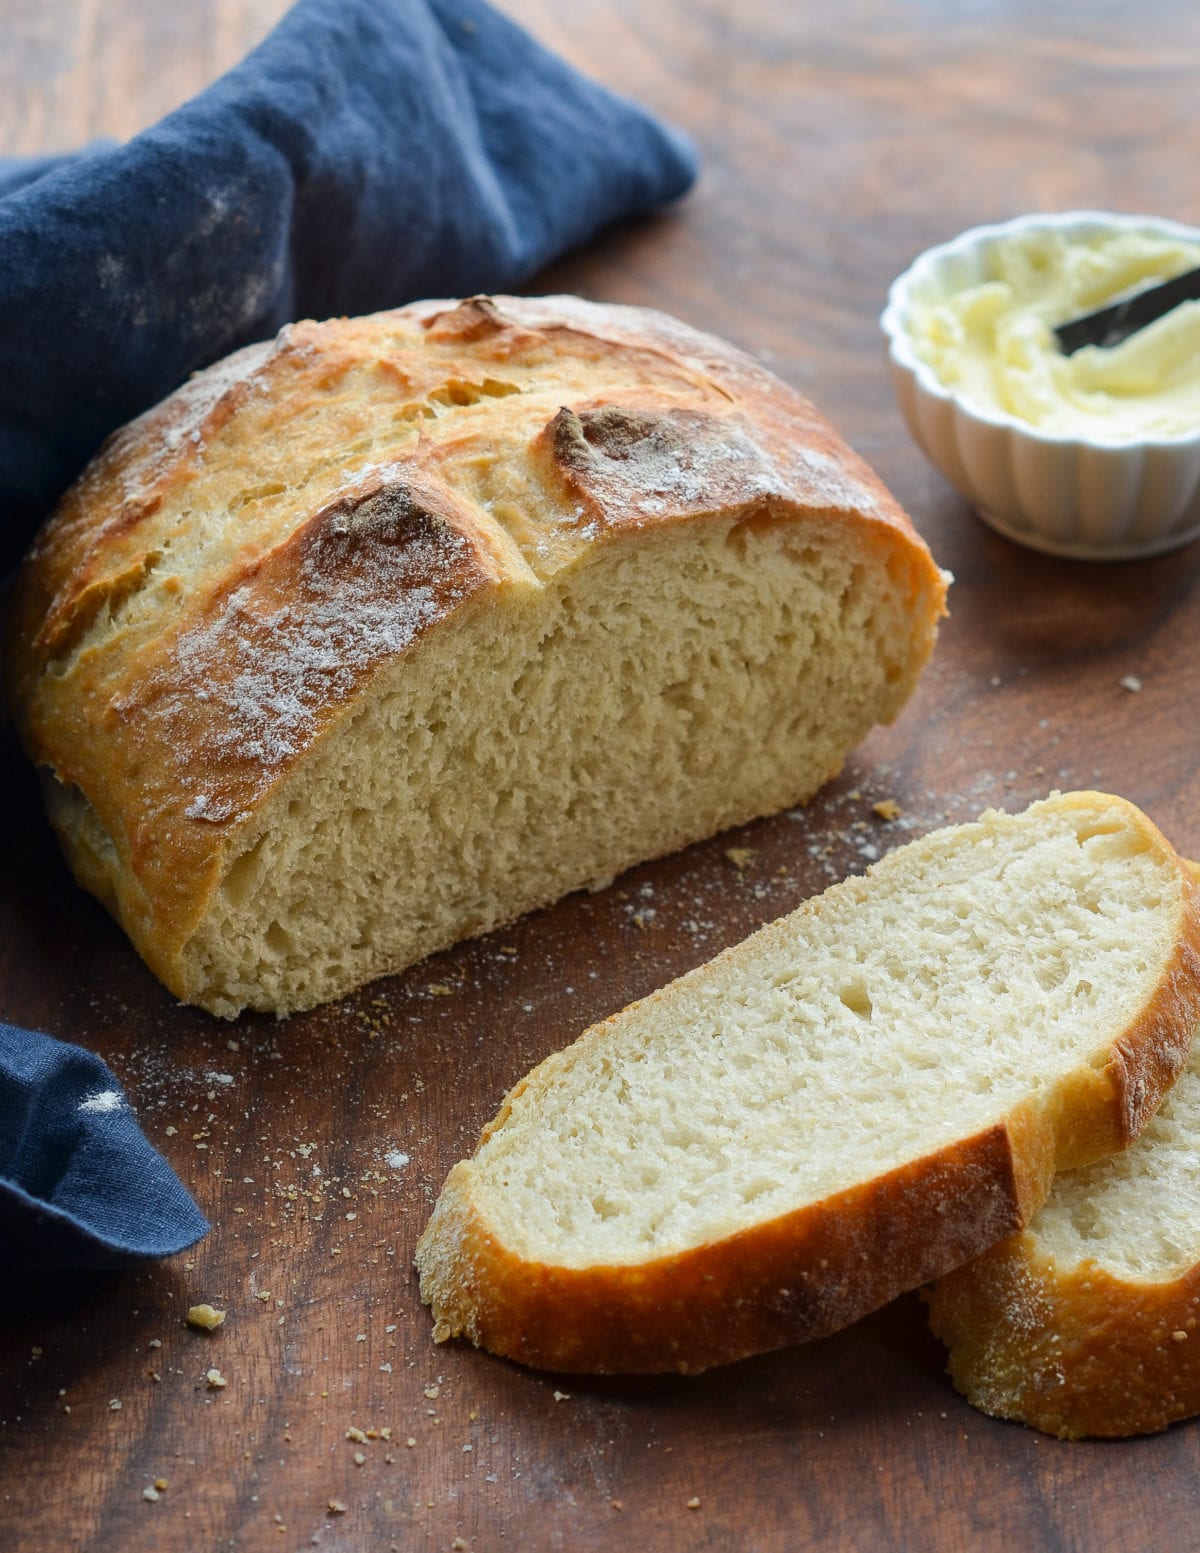
Step 9: Cool before slicing. Let the bread cool completely on a wire rack. It’s best the day it’s made, but can be frozen for longer storage.
Pro Tip: Don’t be tempted to slice it while warm; slicing too soon traps steam inside and can make the interior gummy. Cooling fully helps the crumb set properly.
Other Bread You May Like
Homemade Artisan Bread

The easiest artisan bread recipe—perfect for beginners and experienced bakers alike!
Ingredients
- 6½ cups all-purpose flour, spooned into measuring cup and leveled-off (preferably King Arthur; see note)
- 4 teaspoons kosher salt
- 1½ tablespoons instant/rapid-rise yeast (see note)
- 3 cups lukewarm water (no need to be exact but lukewarm is about 100°F)
- Cornmeal, for dusting the pan
Instructions
- In a very large (6-quart) bowl, whisk together the flour, salt, and yeast. Add the water and stir with a wooden spoon until the mixture is uniformly moist, without any patches of flour. The dough should be sticky and conform to the shape of the bowl. If your dough is too dry, add a few tablespoons more warm water. If it's too wet, add a few tablespoons of flour. (See the step-by-step photos for guidance on what the dough should look like.) Cover the bowl loosely with plastic wrap and let it sit on the counter in a warm spot for 2 hours. If you plan to bake a loaf immediately, proceed to the next step. Otherwise, place the bowl of dough in the refrigerator to be used over the next 14 days. (Once refrigerated, the dough will shrink back a bit; that's okay. Do not punch down the dough at any point, and keep it loosely covered with plastic wrap.)
- Dust a sturdy baking sheet with cornmeal.
- Dust the surface of the dough and your hands lightly with flour. Pull out one-third of the dough and coat the outside lightly with flour (you don't want to incorporate more flour into the dough, you just want to be able to handle it). Gently work the dough into a smooth ball, stretching the surface and tucking the ends underneath, adding more flour as needed so it doesn't stick to your hands. (Don't overwork the dough; this process should only take about 30 seconds.) Put the dough ball onto the prepared baking sheet and let it rest at room temperature, uncovered, for about 40 minutes. (If the dough has been refrigerated, allow it to rise for 60 minutes, or up to 90 minutes if you want a more open and airy crumb structure.) The dough will rise a bit. It may also spread/flatten a bit; that's okay.
- Preheat the oven to 450°F. Set one rack in the lowest position of the oven and one rack in the middle position. Place a metal pan (any metal cake pan or broiler pan will work; just don't use glass) on the bottom rack. (You will fill this with water later to create steam in the oven).
- Generously dust the dough with flour. Using a sharp knife, make a few ½-inch-deep slashes in the dough -- a scallop, cross, or tic tac toe pattern all look nice.
- Slide the baking sheet with the dough into the oven, and carefully fill the metal cake pan with one cup of hot tap water. (Try to do this quickly so as not to let heat out of the oven.) Bake until the loaf is golden brown, about 30 minutes. Cool completely on a wire rack.
- This bread is best enjoyed fresh on the day it is made. Once sliced, place the loaf cut-side down on a cutting board or plate and leave it uncovered. (If it lasts beyond a day, I suggest slicing and freezing.)
- Freezer-Friendly Instructions After the initial 2 hour rise, the dough can be portioned into thirds and frozen in airtight plastic containers for up to 1 month. Defrost the dough in the refrigerator overnight, then shape, rest and bake as usual. The baked loaves can also be frozen whole or sliced: Wrap in a zip-top freezer bag and freeze for up to 1 month. (If you plan to use slices one at a time, place pieces of parchment between them so they don't stick.) To thaw, take the bread out of the freezer and let it come to room temperature on the countertop. Reheat in a 350°F oven until warmed through, about 10 minutes.
- Note: Active dry yeast may be used instead of instant/rapid-rise yeast, however, the dough will take longer to rise. To give active dry yeast a boost, you can dissolve it in the lukewarm water and let it sit until frothy, about 10 minutes. After that, add it to the flour and salt, and proceed with the recipe.
- Note: I use King Arthur flour, which is higher in protein than some other all-purpose flours. If using a flour with a lower protein content, such as Gold Medal, you will likely need to add a few more tablespoons of flour.
Nutrition Information
Powered by ![]()
- Serving size: 1 slice
- Calories: 100
- Fat: 0 g
- Saturated fat: 0 g
- Carbohydrates: 21 g
- Sugar: 0 g
- Fiber: 1 g
- Protein: 3 g
- Sodium: 64 mg
- Cholesterol: 0 mg
This website is written and produced for informational purposes only. I am not a certified nutritionist and the nutritional data on this site has not been evaluated or approved by a nutritionist or the Food and Drug Administration. Nutritional information is offered as a courtesy and should not be construed as a guarantee. The data is calculated through an online nutritional calculator, Edamam.com. Although I do my best to provide accurate nutritional information, these figures should be considered estimates only. Varying factors such as product types or brands purchased, natural fluctuations in fresh produce, and the way ingredients are processed change the effective nutritional information in any given recipe. Furthermore, different online calculators provide different results depending on their own nutrition fact sources and algorithms. To obtain the most accurate nutritional information in a given recipe, you should calculate the nutritional information with the actual ingredients used in your recipe, using your preferred nutrition calculator.
See more recipes:
Comments
Add a Comment Cancel reply
This site uses Akismet to reduce spam. Learn how your comment data is processed.
I love this recipe! makes such a great loaf.. Can you add rye flour, what would the ratio be?
So glad you like it! I’ve only made this with all-purpose flour so I can’t confidently say how it will turn out with different kinds of flour. Sorry I can’t be more helpful!
I am confused by the instructions. In the section “what you will need to make artisan crusty bread” your instructions read “To activate, dissolve it in lukewarm water and let it sit until frothy before adding to the flour mixture.” Yet in step 1 in the recipe it says to whisk in the yeast with the flour, water, salt etc. (without dissolving it in water). I made it per recipe instructions (whisking in the yeast) and the bread is great but there is no way the same rise as your picture shows.
Can you clarify?
I love your recipes (from Toronto, Ontario)
Hi Laura, sorry for any confusion – the guidance for activating the yeast in lukewarm water is for cctive dry yeast (if you use that instead of an instant/rapid-rise yeast. Hope that clarifies!
Thanks for your reply. My yeast is active dry yeast which is what I can find in many Canadian stores. So next time I’ll activate the yeast in lukewarm water. Maybe that’s why others have had issues
Laura
I see I have active dry yeast which is what we find in most stores in Canada. Thank you for explaining My yeast is not out of date for sure. Maybe that is why I see others commenting on a rather low rising bread. I will make the change next time.
Again thanks as I love your recipes
Laura
Second loaf just baking and again flat as a pancake. Don’t know what I’m doing wrong – maybe too wet? I do have trouble forming it into a ball. Help!
Hi Jan, I’m sorry you’re struggling with this! If you’re having trouble forming it into a ball, it sounds like the dough may need a little more flour. Also, is it rising as I’ve described in the recipe? If not, you may want to check to see if your yeast is very old or expired. A third thought is to suggest King Arthur flour. This flour has a higher protein content than many other brands, which helps to give structure to breads/ baked goods.
Thanks Jen. Used in date rapid rise yeast and flour 10.4 protein. I’ll try a different brand of yeast I’m determined to get it right.
Sounds good, and you may want to give King Arthur flour a try; their all-purpose flour contains 12 g of protein per cup. Hope you have more success next time!
Could I add some fresh rosemary to the dough before shaping?
Hi Lori, I think it would work nicely – Enjoy!
Can I use gluten free flour
I’ve only made this with all-purpose flour, so I can’t say confidently how it would work with a gluten-free flour. I’m sorry I can’t be more helpful!
This is a very good recipe. I’ve been looking for a recipe that makes a larger loaf and this one gives that option. Instead of making 3 loaves, I made one large one and one smaller. Following the instructions, for the second rise, I put the dough in a taller round bowl (lined with parchment paper) to get a higher rise. I transferred the loaf in the parchment paper to a preheated Dutch oven and spritzed the top with water; I baked it with the lid on for 30 min (turned the pan once while baking) and with the lid off for an additional 10 minutes until it was a browned as I wanted it. The larger loaf looked perfect and it tasted great too. I baked the smaller loaf on a sheet as directed, but I wasn’t as happy with the results because it turned out too flat (the flavor, of course, was still very good). I’ve been making similar recipes that require a shorter rise time, but this recipe results in a more developed flavor and a better, more consistent crumb. I’m sticking with this recipe from now on! Next time I want to try refrigerating the dough for a day or so to see how that changes the flavor and texture. Thanks for a great recipe and detailed and clear instructions!
Can I use almond flour?
I don’t recommend it — sorry!
This was really delicious bread. The process was well communicated in the recipe instructions and turned out perfectly.
Is it possible to use this dough recipe for baguettes?
PS I LOVE your recipes! Thank you
So glad you like the recipes! You can shape this into a baguette. The bake time may be a bit different, so keep a close eye on it. Please LMK how it turns out if you try it!
Hi Jenn! Do you think King Arthur bread flour would work okay in place of the all purpose flour? Thanks!
Hi Becca, Yes, you can use bread flour, but you’ll need to increase the water by 1/3 cup to start and add more if needed. Hope you enjoy!
Hello, can I use fresh yeast (not dry) for this recipe? If so what would be the best quantities?
Hi Lilac, I’ve never used fresh yeast before. I think that should work here, but the rise time and quantities may be a little different. I read this on a website I trust: To convert from fresh yeast to instant dry yeast, multiply the fresh quantity by 0.33. Instant yeast can be incorporated into the dough without first rehydrating it; however, it is sensitive to ice or ice-cold temperatures, and if the water temperature of the dough is cold, it is best to mix the dough for a minute or two before adding the yeast. In order to maintain dough yield, most manufacturers suggest making up the weight difference between dry yeast and fresh with additional water. Hope that helps!