22 Quick and Easy Recipes in 30 Minutes (or less) + 5 Chef Secrets To Make You A Better Cook!

Crusty Artisan Bread

Tested & Perfected Recipes

This post may contain affiliate links. Read my full disclosure policy.

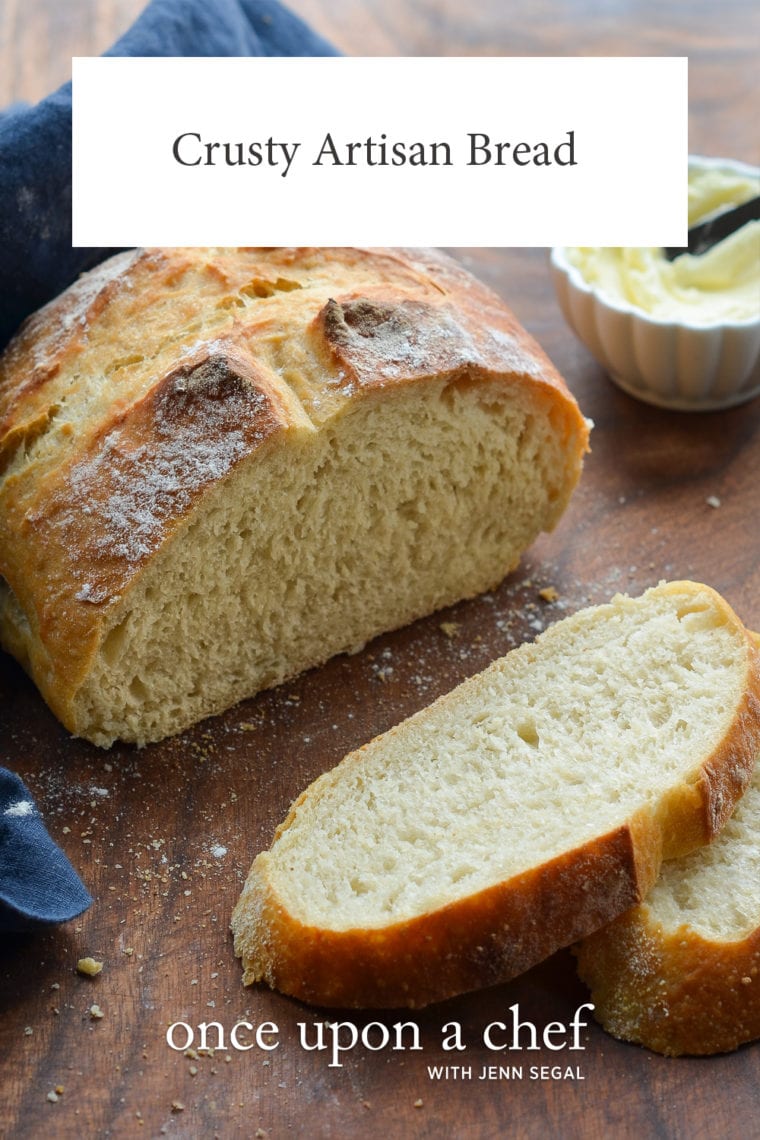
This crusty bread recipe is astonishingly easy — no kneading required — and makes three beautiful loaves, which you can bake as needed.

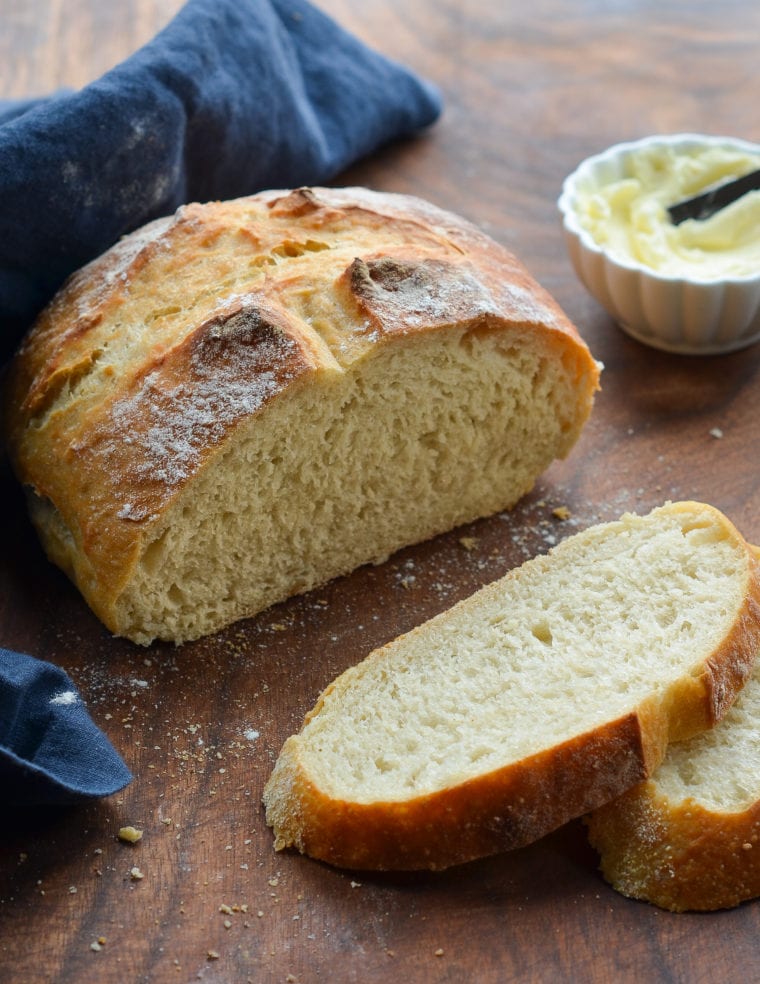
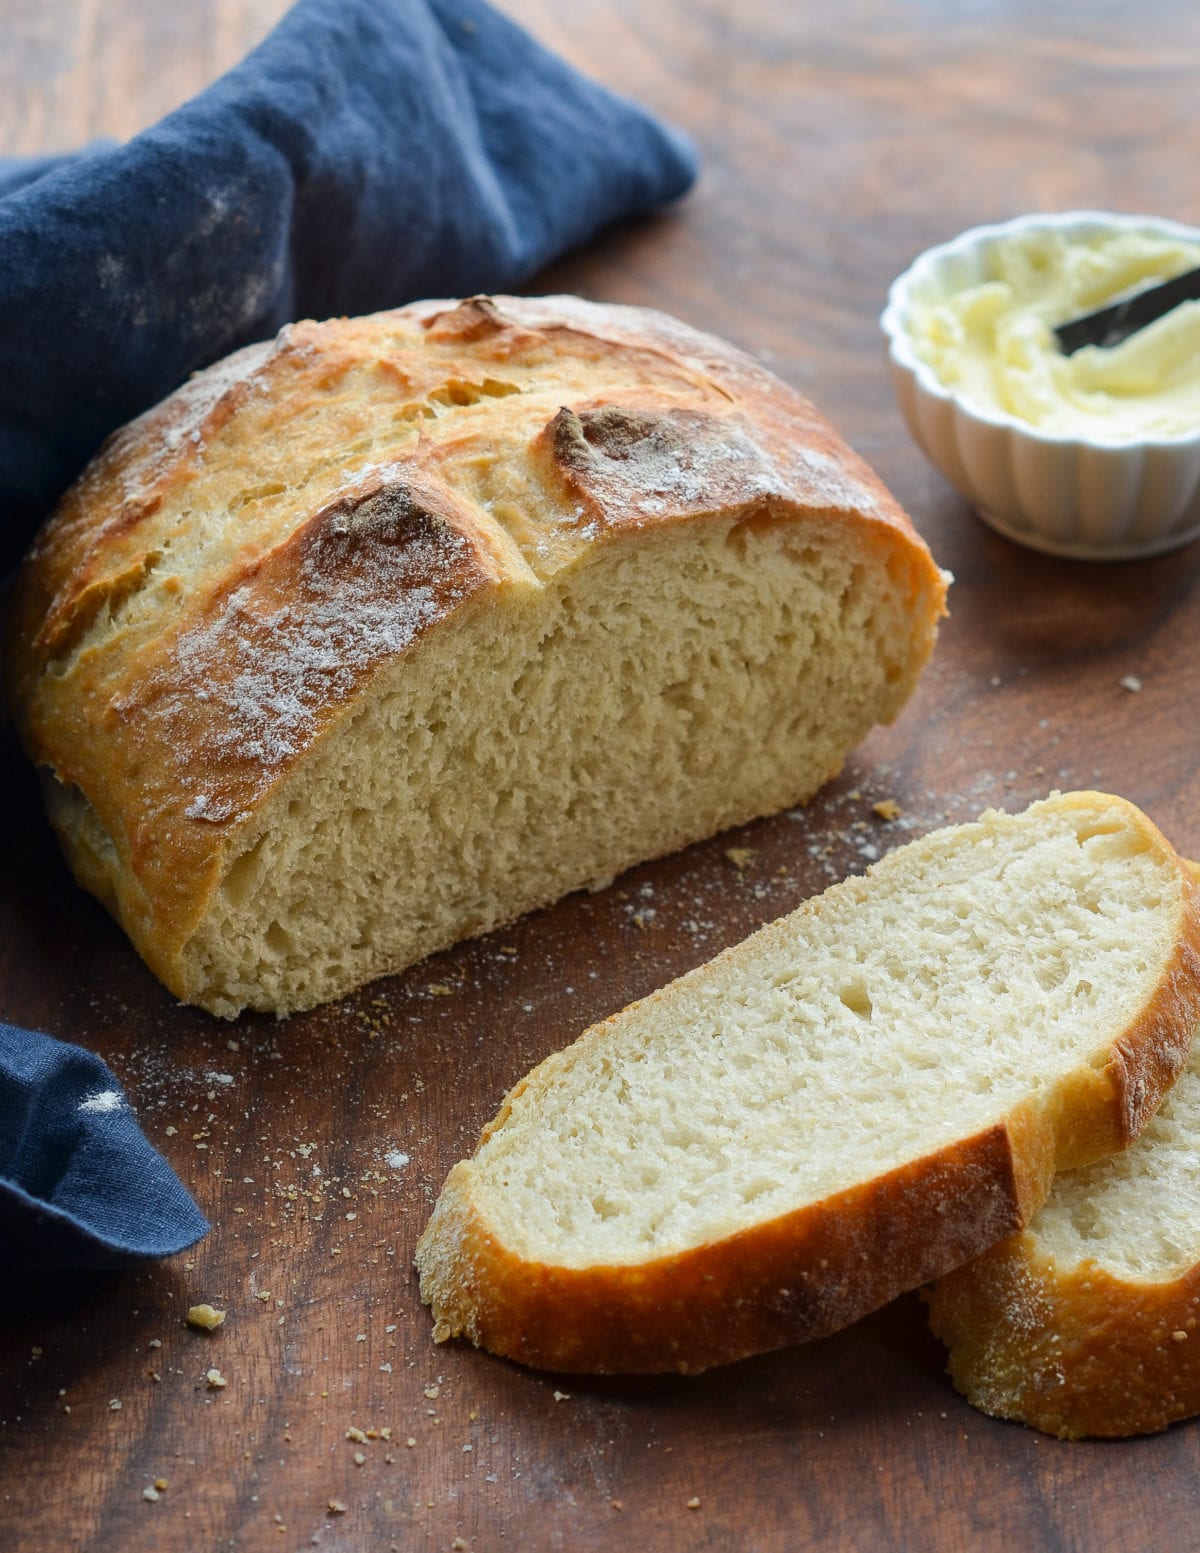
Partially-sliced loaf of crusty artisan bread.

This homemade artisan bread recipe is astonishingly easy, and it makes enough for three delicious loaves, which you can bake as needed. What’s more, the dough takes just five minutes to make, does not require kneading or any special equipment, and can rest in the fridge for up to two weeks (the flavor becomes more complex the longer it sits). The recipe is modestly adapted from one of my favorite baking books, Artisan Bread in 5 Minutes A Day by Jeff Hertzberg M.D. and Zoë François.

What You’ll Need To Make Crusty Artisan Bread
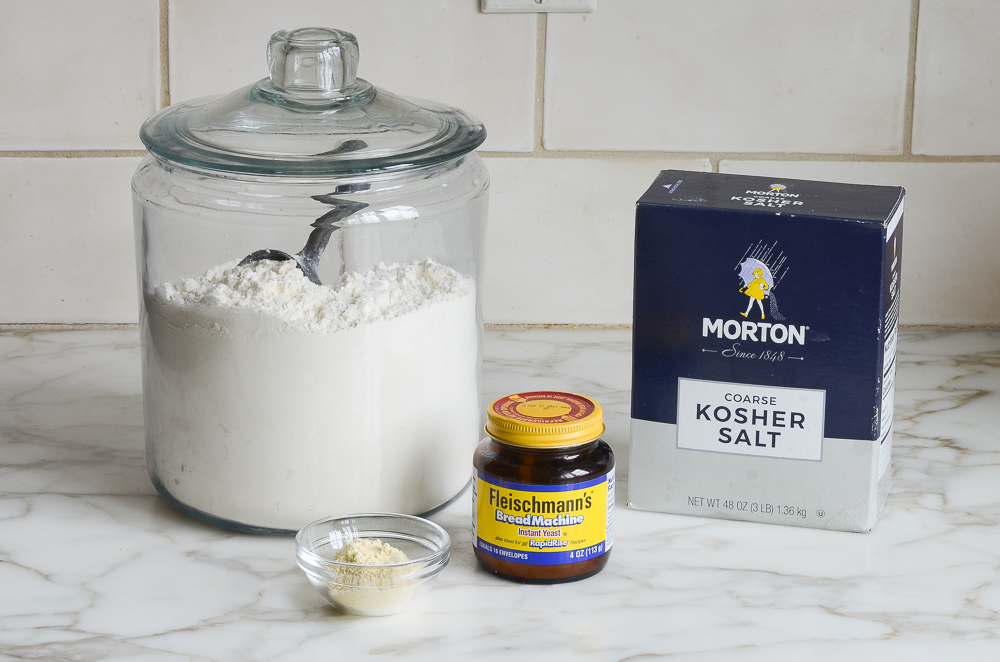
ingredients for homemade bread

This recipe has just four ingredients: all-purpose flour, instant yeast, kosher salt, and water. (The cornmeal is for dusting the pan.) As you can see, I use instant (or rapid-rise) yeast. Active dry yeast may be used instead of instant yeast, however, the dough will take longer to rise. To give active dry yeast a boost, you can dissolve it in the lukewarm water and let it sit until frothy, about 10 minutes. After that, add it to the flour and proceed with the recipe.

How To Make Crusty Artisan Bread

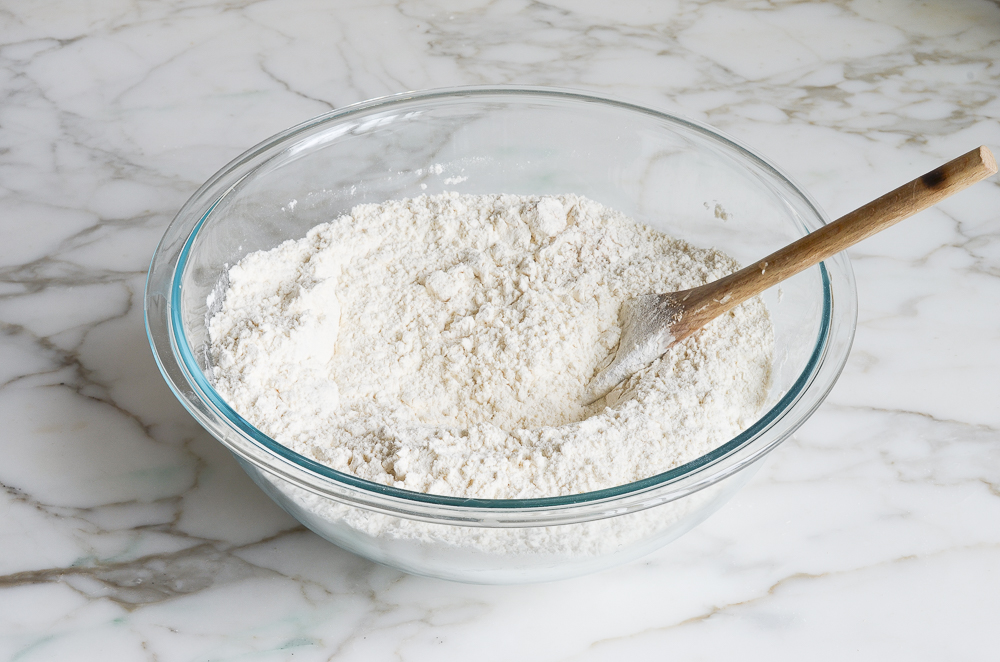
flour, yeast and salt in mixing bowl

In a very large (6-quart) bowl, combine the flour, salt, and yeast. Mix to combine.

mixed dry ingredients

Add 3 cups of lukewarm water (no need to be exact but lukewarm is about 100°F).

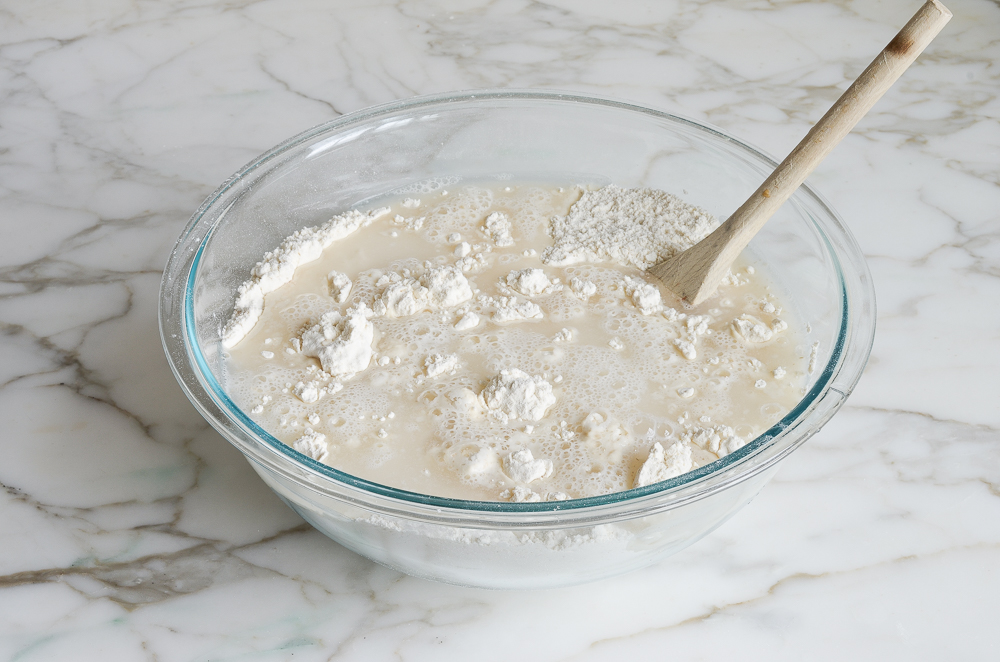
Water in a bowl with dry ingredients.

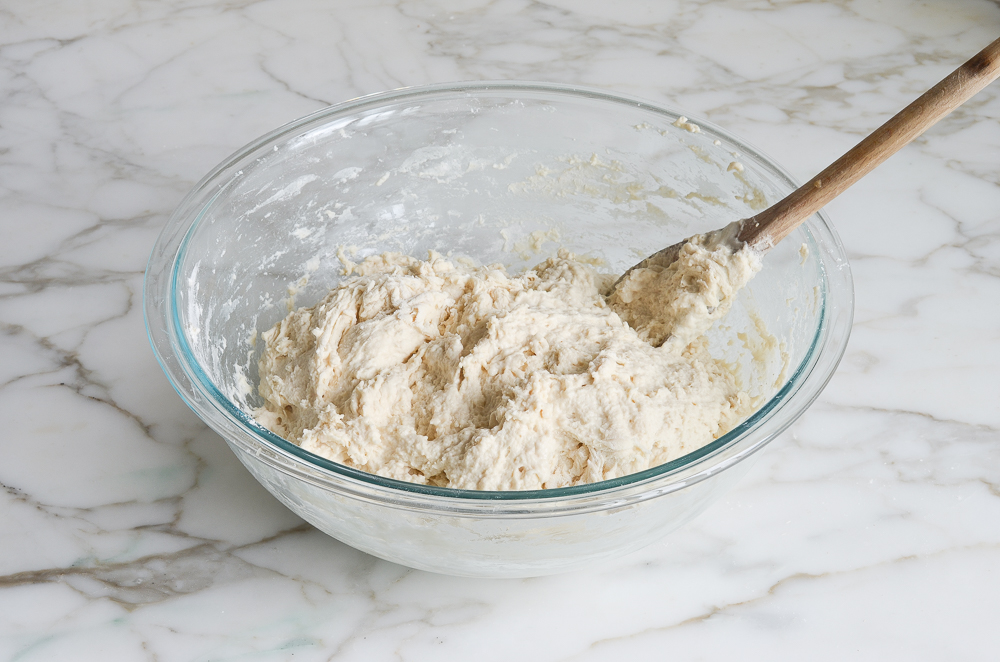
Stir with a wooden spoon until the mixture is uniformly moist, without any patches of flour.

Glass bowl of bread dough.

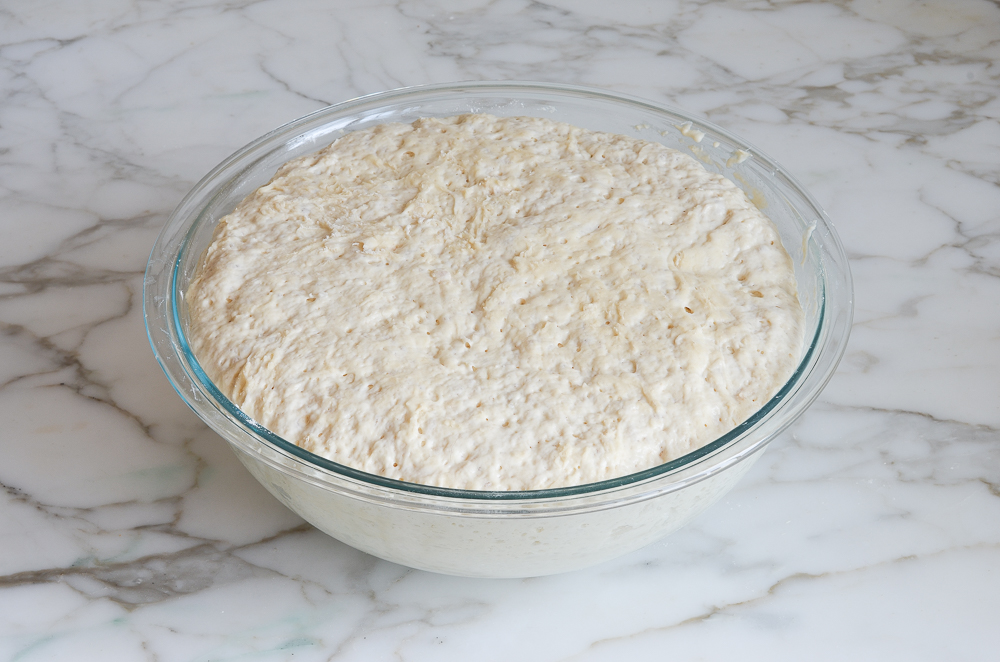
The dough should be sticky and conform to the shape of the bowl. If your dough is too dry, add a few tablespoons more warm water. If it’s too wet, add a few tablespoons of flour. Cover the bowl loosely with plastic wrap and let it sit on the counter in a warm spot for 2 hours. As you can see below, it will rise a lot!

dough after the first rise

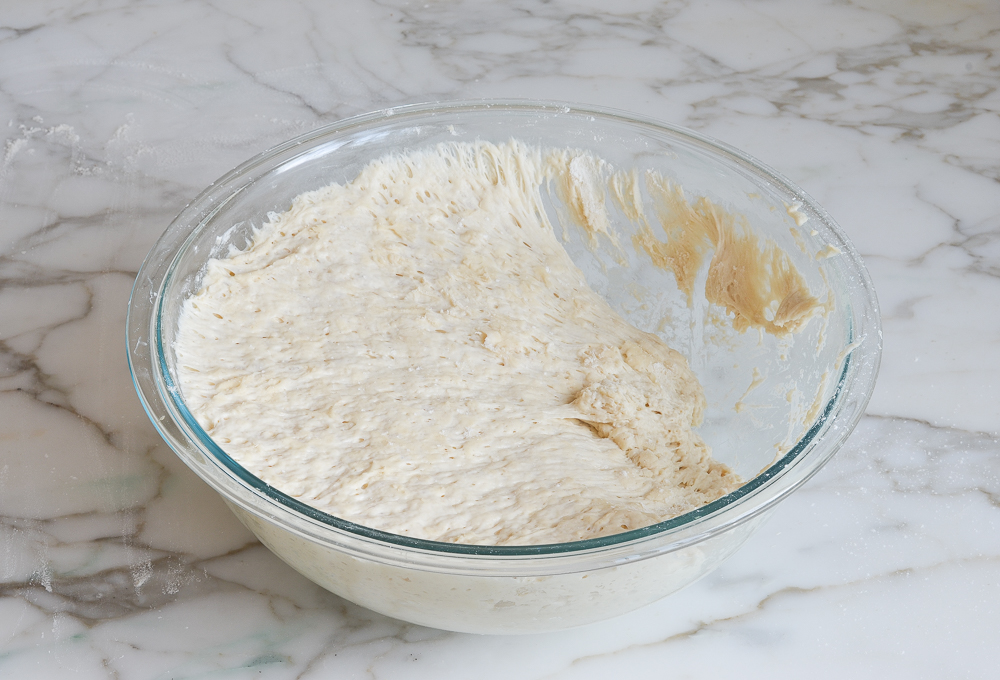
When you’re ready to bake a loaf, pull out one-third of the dough.

removing some of the bread dough from the bowl

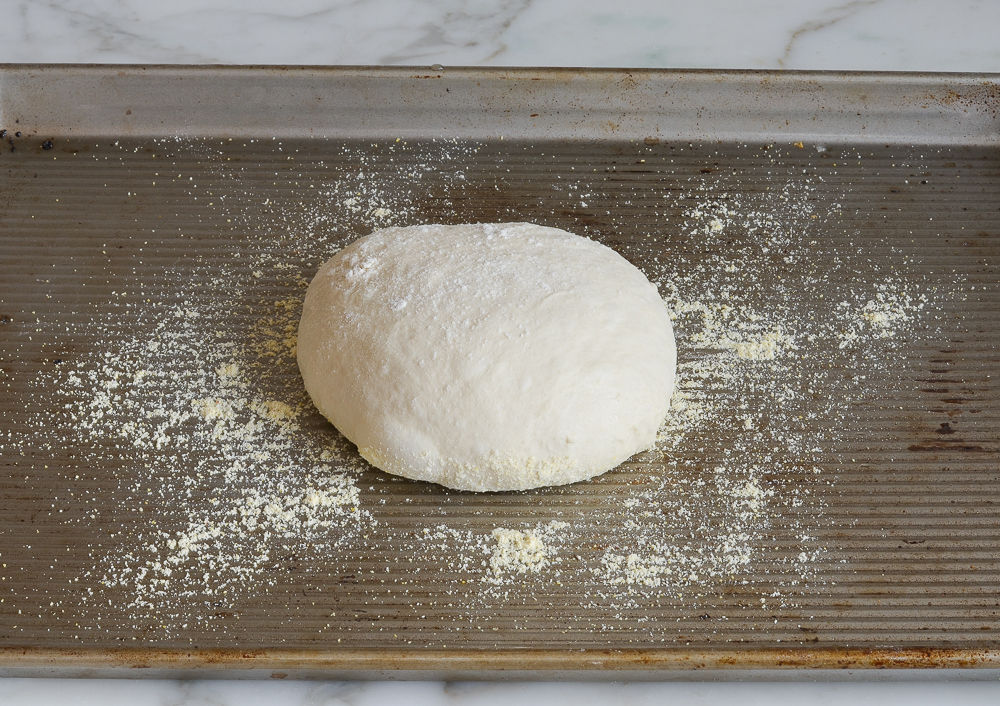
Coat the outside lightly with flour (you don’t want to incorporate more flour into the dough, you just want to be able to handle it). Gently work the dough into a smooth ball, stretching the surface and tucking the ends underneath.

shaping the bread dough into a ball

Put the dough ball onto a cornmeal-dusted baking sheet and let rest at room temperature, uncovered, for about 40 minutes. (If the dough has been refrigerated, allow it to rise for 60 minutes, or up to 90 minutes if you want a more open and airy crumb structure.) The dough will rise a bit. It may also spread/flatten a bit; that’s okay.

letting the bread dough rest on a baking sheet

The dough will rise a bit.

bread dough after second rise

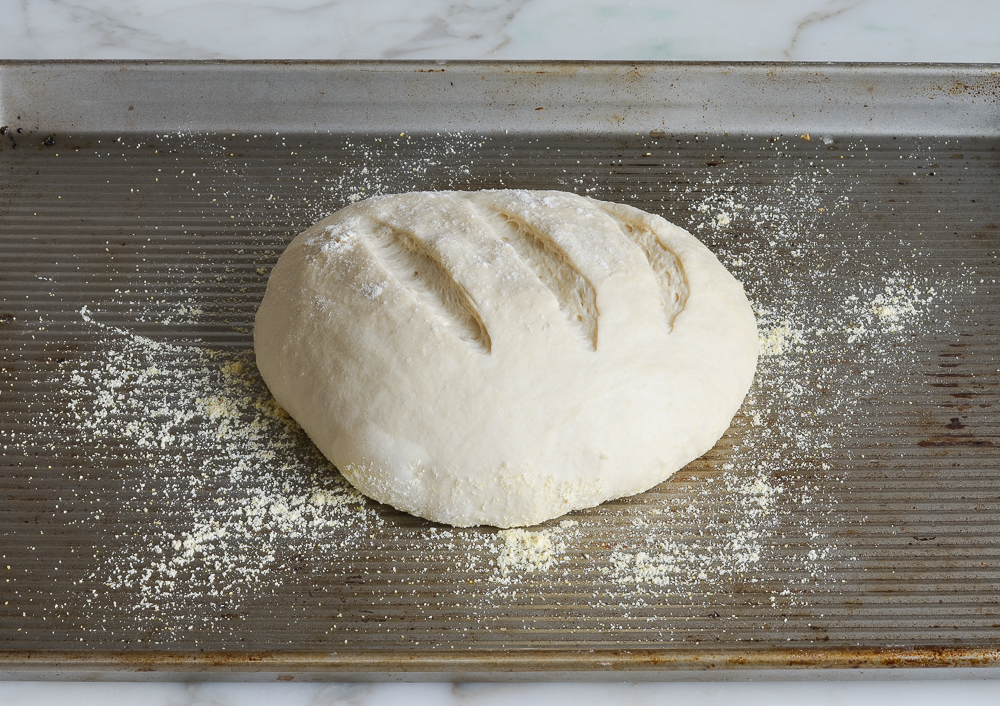
Generously dust the dough with flour. Using a sharp knife, make a few 1/2-inch-deep slashes in the dough — a scallop, cross, or tic tac toe pattern all look nice.

slashing the bread dough

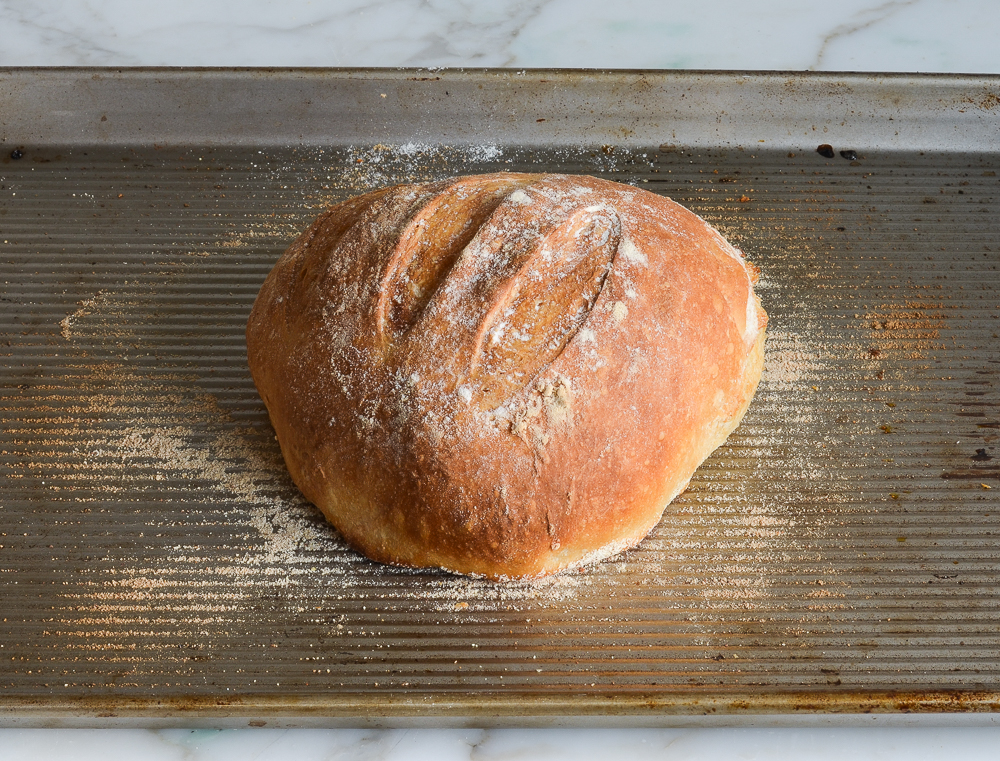
Set a metal pan on the bottom rack of a preheated 450°F-oven. Slide the baking sheet with the dough into the oven, and carefully fill the metal cake pan with one cup of hot tap water. This creates steam in the oven. (Try to do this quickly so as not to let heat out of the oven.) Bake until the loaf is golden brown, about 30 minutes. Cool completely on a wire rack.

Baked bread on a baking sheet.
This bread is best enjoyed fresh on the day it is made. Once sliced, place the loaf cut-side down on a cutting board or plate and leave it uncovered.

How To Freeze

The dough can be portioned into thirds and frozen in airtight plastic containers for up to 1 month. Defrost the dough in the refrigerator overnight, then shape, rest and bake as usual. The baked loaves can also be frozen whole or sliced. Wrap in a zip-top freezer bag and freeze for up to 1 month. To thaw, take the bread out of the freezer and let it come to room temperature, about 3 hours. Reheat in a 350°F oven until warmed through, about 10 minutes.

Partially-sliced loaf of crusty artisan bread.

You May Also Like

Crusty Artisan Bread

This crusty bread recipe is astonishingly easy — no kneading required — and makes three beautiful loaves, which you can bake as needed.

Servings: 3 loaves (about 10 slices per loaf)
Prep Time: 10 Minutes
Cook Time: 30 Minutes
Total Time: 40 Minutes, plus 2 hours and 40 minutes to rise

Ingredients

  • 6½ cups all-purpose flour, spooned into measuring cup and leveled-off (preferably King Arthur; see note)
  • 4 teaspoons kosher salt
  • 1½ tablespoons instant/rapid-rise yeast (see note)
  • 3 cups lukewarm water (no need to be exact but lukewarm is about 100°F)
  • Cornmeal, for dusting the pan

Instructions

  1. In a very large (6-quart) bowl, whisk together the flour, salt, and yeast. Add the water and stir with a wooden spoon until the mixture is uniformly moist, without any patches of flour. The dough should be sticky and conform to the shape of the bowl. If your dough is too dry, add a few tablespoons more warm water. If it's too wet, add a few tablespoons of flour. (See the step-by-step photos for guidance on what the dough should look like.) Cover the bowl loosely with plastic wrap and let it sit on the counter in a warm spot for 2 hours. If you plan to bake a loaf immediately, proceed to the next step. Otherwise, place the bowl of dough in the refrigerator to be used over the next 14 days. (Once refrigerated, the dough will shrink back a bit; that's okay. Do not punch down the dough at any point, and keep it loosely covered with plastic wrap.)
  2. Dust a sturdy baking sheet with cornmeal.
  3. Dust the surface of the dough and your hands lightly with flour. Pull out one-third of the dough and coat the outside lightly with flour (you don't want to incorporate more flour into the dough, you just want to be able to handle it). Gently work the dough into a smooth ball, stretching the surface and tucking the ends underneath, adding more flour as needed so it doesn't stick to your hands. (Don't overwork the dough; this process should only take about 30 seconds.) Put the dough ball onto the prepared baking sheet and let it rest at room temperature, uncovered, for about 40 minutes. (If the dough has been refrigerated, allow it to rise for 60 minutes, or up to 90 minutes if you want a more open and airy crumb structure.) The dough will rise a bit. It may also spread/flatten a bit; that's okay.
  4. Preheat the oven to 450°F. Set one rack in the lowest position of the oven and one rack in the middle position. Place a metal pan (any metal cake pan or broiler pan will work; just don't use glass) on the bottom rack. (You will fill this with water later to create steam in the oven).
  5. Generously dust the dough with flour. Using a sharp knife, make a few ½-inch-deep slashes in the dough -- a scallop, cross, or tic tac toe pattern all look nice.
  6. Slide the baking sheet with the dough into the oven, and carefully fill the metal cake pan with one cup of hot tap water. (Try to do this quickly so as not to let heat out of the oven.) Bake until the loaf is golden brown, about 30 minutes. Cool completely on a wire rack.
  7. This bread is best enjoyed fresh on the day it is made. Once sliced, place the loaf cut-side down on a cutting board or plate and leave it uncovered. (If it lasts beyond a day, I suggest slicing and freezing.)
  8. Freezer-Friendly Instructions The dough can be portioned into thirds and frozen in airtight plastic containers for up to 1 month. Defrost the dough in the refrigerator overnight, then shape, rest and bake as usual. The baked loaves can also be frozen whole or sliced: Wrap in a zip-top freezer bag and freeze for up to 1 month. (If you plan to use slices one at a time, place pieces of parchment between them so they don't stick.) To thaw, take the bread out of the freezer and let it come to room temperature on the countertop. Reheat in a 350°F oven until warmed through, about 10 minutes.
  9. Note: Active dry yeast may be used instead of instant/rapid-rise yeast, however, the dough will take longer to rise. To give active dry yeast a boost, you can dissolve it in the lukewarm water and let it sit until frothy, about 10 minutes. After that, add it to the flour and salt, and proceed with the recipe.
  10. Note: I use King Arthur flour, which is higher in protein than some other all-purpose flours. If using a flour with a lower protein content, such as Gold Medal, you will likely need to add a few more tablespoons of flour.

Nutrition Information

Powered by Edamam

  • Serving size: 1 slice
  • Calories: 100
  • Fat: 0 g
  • Saturated fat: 0 g
  • Carbohydrates: 21 g
  • Sugar: 0 g
  • Fiber: 1 g
  • Protein: 3 g
  • Sodium: 64 mg
  • Cholesterol: 0 mg

This website is written and produced for informational purposes only. I am not a certified nutritionist and the nutritional data on this site has not been evaluated or approved by a nutritionist or the Food and Drug Administration. Nutritional information is offered as a courtesy and should not be construed as a guarantee. The data is calculated through an online nutritional calculator, Edamam.com. Although I do my best to provide accurate nutritional information, these figures should be considered estimates only. Varying factors such as product types or brands purchased, natural fluctuations in fresh produce, and the way ingredients are processed change the effective nutritional information in any given recipe. Furthermore, different online calculators provide different results depending on their own nutrition fact sources and algorithms. To obtain the most accurate nutritional information in a given recipe, you should calculate the nutritional information with the actual ingredients used in your recipe, using your preferred nutrition calculator.

See more recipes:

Comments

  • This is by far my all-time favourite bread recipe! Super easy, no kneading required and the results are sensational! I sometimes divide the dough into two equal parts, to have two larger loaves instead of three smaller ones, with the same cooking time. Pure perfection!!

    • — Terry Rutledge
    • Reply
  • I’ve been experimenting with no-knead breads lately so was so happy to find that one from Jenn. However, I did not make exactly as written so here’s the story!

    I only had 3/4 teaspoon of regular active dry yeast so I “thirded” the recipe (enough for 1 loaf) and gave the first rise 3 hours instead of two. It rose perfectly. I shaped it into the ball and was happy that was not quite as sticky as some other recipes I tried, but was still hard to roll into perfect ball. Luckily it doesn’t seem to matter. I placed the ball in lightly floured 9″ cast iron skillet and baked as recommended. One other thing I did differently is I put the cake pan with water directly into the oven rather than trying to fill a hot pan in a hot oven.

    The bread came out GREAT! Lovely texture. I liked it even better the next day as I felt like the crust crisped up a little more. The third day we used the few slices left to make French toast. I would definitely make this again!

  • BEST BREAD EVER! I have been making this bread over and over for about a year now and it never disappoints. My 3 year old waits anxiously for the bread to come out of the over. There is nothing quite like hot, fresh bread. We eat this with Jennifer’s delicious egg salad and her asparagus soup. It also makes delicious sandwiches.

  • Never made anything other than soda bread before this recipe. I was always afraid of using yeast. This is so easy and turns out amazing. It won’t last long.

    • — Sheree Schlote
    • Reply
  • It is a great tasting recipe and very easy to make. I baked 1/3 of the batch, froze the remainder and can’t wait for an opportunity to try it again. The Gold Metal flour does require additional flour – I put in two extra tablespoons and will add more the next time because it was too sticky to handle easily. Bread is a journey not a destination.

  • I’ve tried a number of simple bread recipes with varying degrees of success. This one ,apart from being simple is also remarkably consistent, and a total crowd pleaser. It’s the perfect complement to a fresh pot of soup. Highly recommended!

  • Came out great. Love that it makes three loaves that I can bake on different days over a 14 day period. I get fresh bread every couple of days as needed.

  • This is an excellent bread, and I like that the dough can store in the fridge for 2 weeks. Add 2 tsp of dried Rosemary for a delicious addition to this recipe.

  • This was the first attempt at a fancy bread recipe I’d tried and it went so well! The bread tasted amazing and I’ve repeated this recipe. Bread making can be intimidating but this one was great!

  • This recipe is so easy to make and tastes wonderful! I love the crusty texture of this artisan bread!! I really like having extra dough in the refrigerator or freezer ready to bake a fresh loaf anytime.

  • Jenn,
    This bread exceeded my expectations! The crust is perfect and the texture and flavor are outstanding! I love the fact that you can just keep the dough in the refrigerator up to 14 days until you are ready to bake it. We enjoyed it with dinner last night and as toast this morning for breakfast.

  • Jen, thank you for this recipe!! This is my family’s favorite bread – it is crusty, the prefect balance of dense and fluffy, it toasts beautifully, is great for sandwiches, or just with a light bit of butter or hummus. My children LOVE it. We’ve tried other recipes from King Arthur and elsewhere, but your recipe wins the day! The recipe is so easy, and every time I bake this bread it consistently delivers perfection and happiness. Jen, you’ve made me feel like a real baker!

  • I just made this recipe for dinner and wow. It was amazingly simple and tasted wonderful.. I won’t be buying another loaf of bread from the store.

    • — Nicole McLaren
    • Reply
  • Delicious! Everything about this recipe was perfect! The ingredients were simple, the portion size of each loaf was ideal, and the freshness of the loaves paired lovely with a hearty soup for dinner. My kids were blown away when they found out it was homemade. Thanks for sharing the recipe!

  • My husband loves to make these loaves on cold Chicago mornings. He slices them and then wraps to freeze, we always have them on hand to pair with soups and stews. The crust and texture is perfect!

  • This bread was fantastic! It took no more than 5 min to mix and came together so easily…just like the pictures. I followed the instructions to a T and the bread was delicious with a great texture. My husband could not stay out of it and he’s not even a big bread person! Even my dog (who is super picky) came to the kitchen to see what the wonderful smell was. ha. I made one loaf and froze the other two. Can’t wait to have them again! Going forward, this will be my “go to” crusty bread recipe. I love your recipes and will be trying more bread selections soon (Challah is on my list)! Thank you!

  • This is simply one of the best bread recipes we have ever made! It was great right out of the oven and for a few days after that.

  • I would like to try baking this in a loaf pan – that way it should be more the right size for my husband’s sandwiches. Do I have to grease the pan or do anything different? Do I let it rise again in the pan? (I guess just the 40 min. that you have to let it rise after the first rising?)
    Thank you,
    Susie

    • Hi Susie, A loaf pan would be fine and yes, you should thoroughly grease it. You don’t need to do the second rise in the loaf pan, but you can if you’d like. Hope you enjoy!

  • Hi Jenn,
    I was looking for a bread recipe and found your site. I am very excited to try out all your recipes. ;)) I have just made half of the bread and can’t wait to dig in – it smells so delicious! 🙂 My bread spread a lot but that’s ok as long as it tastes good. My question though: I am making two breads out of this dough; can I keep the other half in the fridge for a couple days or do I need to freeze it? I know you have instructions for the freezer but I am fairly sure I can refrigerate it, right?

    • — Maria Rodriguez
    • Reply
    • Yes, you can refrigerate the dough for up to 14 days (and hope you enjoyed the bread)!

  • Absolutely delicious! What an easy wonderful recipe! I made this for the first time and it will be made many many times going forward. Thank you for the easy delicious recipe!

  • This recipe exceeded my expectations. So flavourful, with the perfect crust and chewy inside. And easy to make. I used unbleached all-purpose Robin Hood flour (Canada) and it was perfect!

  • Hello, I would like to try this recipe but the flour I use has 4g of protein per 30g of flour.
    This represents 13,3% flour content, how do you suggest I adjust the amount of flour? and remaining ingredients, if required…
    Thank you,
    Tina

    • Hi Tina, I think it should work with no adjustments. Hope you enjoy!

  • Hi Jenn,

    We have organic bakers flour at home. Can I use that instead of all purpose flour?

    Thanks

    • Hi Yoshiko, I am not familiar with Baker’s flour so I can’t say for sure – sorry I can’t be more helpful!

  • Hi, I make this bread all the time now, excellent recipe. I sometimes add a 1/4 cup of wheat germ, and flaxseed. Thank you for the excellent recipe.
    Judith

  • Jen, I’m so happy with all your recipes that I have tried and I have your wonderful book
    I really love this bread recipe, my husband reminds me when it’s time to replenish our supply. We eat one loaf and freeze the other two. I have been making this bread for several months now.
    I follow the recipe exactly and the bread comes out perfect every time.
    I would like to try using some whole wheat flour instead of all white flour
    What would the proportions be?
    Thanks Jen for helping me make such wonderful meals
    Nancy

    • So glad you like this and that it has become a staple in your house! I’ve only made this with all-purpose flour so I can’t confidently say how it will turn out with different kinds of flour. King Arthur has a variety of bread recipes that call for whole-grain flours if you want to check them out here. And if you have any interest in buying a cookbook, this recipe was adapted from cookbook authors Jeff Hertzberg M.D. and Zoë François and they also have a book that focuses on whole grain bread recipes.

  • First time I ever made bread…. what took me so long? This recipe is so easy and the bread is fantastic. My son only wants this bread from now on!

    • — Valerie Haddad
    • Reply
  • I don’t normally write reviews, but I had to comment on this! Your recipe is amazing!! The crust was crunchy, the inside soft and the taste was delicious!! I followed the recipe as written and my crusty bread couldn’t have been better! My husband and I ate the first loaf in one evening!

  • Hi Jenn,
    I sure hope you read this. First, to the bakers at home — this bread is amazing and easy to make. I use my kitchenaid mixer to incorporate the wet & dry ingredients – works lovely.

    Here’s my question that I’m dying to know. I’d really like to try to make a rosemary bread. Can I use this recipe as a base somehow? How might you tweak it? I was picturing something like a rosemary and sea salt combo, but I’ll take any wisdom you care to share.

    Many thanks! I don’t often post comments but we love your recipes.

    • Hi Pam, so glad you enjoyed the bread! I do think you could incorporate some rosemary into the dough and sprinkle some sea salt on top prior to baking. Please LMK how it turns out if you try it!

  • I love this makes a large amount of dough. If I use more than 1/3 in my dutch oven to bake, does the 30 minute time need to be adjusted? I usually bake 1/3 in the dutch oven for 30 covered and then an additional 10-15 uncovered to brown. Comes out perfect but not sure with a larger amount.

    • Yes, I do think it will take some additional time in the oven, but not sure by how much so I’d just keep close eye on it. 🙂

  • I made two loaves and am saving one for later – thank you!!! 2 quick questions:

    1. The loaves I made came out a bit more “spongey” than I’d like, and I let it cool down fully before cutting into it. I used bread flour instead of all-purpose – maybe this is why? If anything, the raw dough was pretty sticky and flat when it was setting – maybe I needed more flour?

    2. I portioned the dough into 3 parts, cooked two of them but left the last one to keep rising. It was probably laying around for about 3-4 hours in total. The outer layer was pretty dry already. I threw it into the fridge for a couple hours thinking I could cook it later, but ended up running out of time so I threw it into the freezer…. is it still useable? haha

    THANKS SO MUCH!!!! 🙂

    • Hi Amanda, I’m not 100 percent sure if the bread flour would cause the bread to be spongey, but for the most predictable results, I’d stick with all-purpose flour. And again, I’m not sure if the dough that sat for longer will be problematic, but I definitely think it’s worth baking to see how it comes out.

  • Hi ,

    If no cornmeal around . Is there any other substitute ?

    Thanks,
    Winnie

    • Hi Winjie, You can bake the bread on parchment paper (keep in mind the paper will brown from the high heat).

  • I have taken to baking bread again. I am still a novice. I went by your instructions to the letter. However when it came time 3 hrs to roll the dough out of the dish it was tremendously wet and sticky. I tried to do the fold over knead but the dough was sooo sticky I had to add flower. I know that is the wrong thong to do but I had no choice. It never got to a smooth ball. I put it in the dutch oven still very wet and sticky. Needless to say the loaf looked pretty but was very heavy probably to my own doing trying to wrestle with the sticky dough.

  • Jenn, I bought a pack of fresh east and would like to make your cinnamon swirl bread from your book. How do I start baking with fresh/wet east?

    • Thank you.that helps!

  • Hello Jen!

    Thank you for your great recipes!

    I made this bread a few months back and it had the lovely crunchy crust but the last couple of times I’ve made it, the outside turns soft and I don’t think I did anything differently. What do you think is causing it to soften and what can I do to keep the outside crust hard and crunchy?

    • Hi Victoria, When does it soften? Is it after you remove it from the oven? How have you been storing it?

      • Hi Jen! It’s after I pull it from the oven. Last nights bread was baked just before dinner and by the time I served it (maybe 15-20 minutes) the crust was no longer hard. It was when I pulled it out because I recall tapping the top and thought it was great then when it was time to slice it was soft. Not as soft as the inside of the bread but definitely not crunchy.

        • Hi Victoria, It sounds like it could have used a few extra minutes in the oven.

        • same for me – tasted great but after it sat out and cooled completely it got soft.

  • Why not a glass pan?

    • I’ve never made this in a glass pan — the baking sheet works very nicely. Hope you enjoy if you make it!

  • Amazing! I was surprised by how easy this was to make (but then again, I have never had one of your recipes cease to amaze). It is delicious! My son said, “this tastes like the fresh bread at our favorite restaurant.” I only baked one loaf – love that the dough can stay in the fridge for awhile – fresh bread for a few days! THANK YOU!

    • — Julie Jennings
    • Reply
  • Thank you Jenn for this recipe! It is the 4th bread recipe I have tried and FINALLY — the crust and texture we love!

  • Hi! Made this today in my le Creuset dutch oven and it is great! Question, could I make one large loaf in my large 7.25 quart round dutch oven?

    • Hi Anne, I haven’t tried it, but I think it should fit. Please report back if you try it!

  • Hi Jen

    Could you explain what you mean by cover loosely with plastic wrap? Do I leave gaps in the plastic covering along the edge of the bowl to let air circulate?

    Thanks so much

    • Hi Nancy, what I mean is you can just lay a piece of plastic wrap on top of the bowl; you don’t need to form a tight seal. And it’s OK if there’s a little gap between the edge of the plastic wrap and the ball in a spot or two. Hope that clarifies!

  • Jenn, can I make this with white whole wheat flour? If so, any adjustments to the amount of flour or the baking time? Thanks!

    • Hi Elizabeth, I’ve only made this with all-purpose flour so I can’t confidently say how it will turn out with different kinds of flour. King Arthur has a variety of bread recipes that call for whole-grain flours if you want to check them out here. And if you have any interest in buying a cookbook, this recipe was adapted from cookbook authors Jeff Hertzberg M.D. and Zoë François and they also have a book that focuses on whole grain bread recipes.

  • Another stand out recipe, Jenn! A non-recipe related question – any tips you can share on how to cut it neatly? My serrated knife made a mess of the beautiful bread. Thanks, Jenn!

    • Glad you liked it! Did you wait until it was fully cooled to slice it?

  • Hi Jenn,

    I have just come across this recipe and am wondering if you could give me the nutritional value per serving?

    Thanks

    • — Debbie Tomkins
    • Reply
    • Hi Debbie, I just added the nutritional information to the recipe. Hope you enjoy the bread if you make it!

  • This was so easy, delicious and great. So glad I’ve found your blog – every recipe is truly worth its 5 stars! Thank you for all your effort and for sharing them with us all.

    Regarding the recipe, I added roasted garlic and herb paste and it was incredible – going to try other variations soon. 🙂

  • I never knew I could make crusty bread at home! My family loved this bread (I made it into smaller buns). The only question I have is this: Anytime I make a dough with yeast (bread, pizza crust, etc.), the finished product always has a yeasty smell…it’s not overpowering, I just don’t like it. Bread from a bakery doesn’t have this yeasty smell, so I wonder why I get it when I bake bread at home? Is there anything I can add to the dough to mask this smell?

    • Hi Ann, I can’t say I’ve experienced that smell in bread that’s been baked but I did look online and found this article that you may find useful. Hope it helps!

  • Hi Jenn. My first time making bread – never used yeast before and super intimidated. The only yeast I found is called ‘fast rise yeast’. Is that the right kind to use?

  • Made bread for the first time using this recipe. I’ve always been intimidated by yeast, but found this recipe to be super easy and absolutely delicious!

  • I tried the bread in the pan and it made a beautiful loaf of bread. Because the pan is for a 1 1/2 pound loaf of bread I used half of the dough. My family loved it. My son has already requested for me to make it again. A new family tradition. Jenn, thank you for wonderful recipe.

    • Kimberly, I want to try baking it in a pan also; that way it should be more the right size for my husband’s sandwiches. Did you have to grease the pan or do anything different? Did you let it rise again in the pan? (I guess just the 40 min. that you have to let it rise after the first rising?)

      Thanks,
      Susie

      • — Susie Rotscheid
      • Reply
  • Crusty Artisan Bread Recipe: I’m concerned about the metric measurement in the recipe of 845 grams for 6 3/4 c AP flour. The info on the bag of my King Arthur Unbleached Flour shows it is 110 grams per cup. Using that figure, I compute total grams to be 748 for a full recipe, almost 100 grams less than the recipe indicates.

    I’m making the dough for the first time and I found the dough when combined using 710 ml to be quite stiff and not easily mixed. Can you confirm the 845 grams or should it be the 748 grams? Thank you so much for your feedback, sure appreciate it.

    • Hi Linda, I know there’s some variability out there in terms of how many grams one cup of flour is. I use the spoon and level method for measuring flour and have weighed it many times. I consistently come up with 130 grams per cup so that’s where that number comes from. If you found that the dough is too stiff/dry, then I would trust your gut and cut back on the flour a little (but the recipe has worked well for me with the 845 grams of King Arthur flour). Hope that helps at least a bit!

      • Hi Jenn: Thank you so much for your thoughtful response, sure appreciate it. Perhaps the difference is in the all purpose flour. I am using KA unbleached all purpose flour so maybe that has something to do with it. I’ll be baking my first loaf tomorrow morning and looking forward to having the butter ready as soon as it’s cool enough to enjoy.

  • Hi Jenn and fellow followers on Jenn!
    Last evening I made this Artisan Bread into buns to go with “Autumn Carrot and Sweet Potato Soup” (or a version of it anyway😊)!
    Here’s what I did for the buns: I halved the recipe, basically, using 1 envelop of Instant/Quick Rise Yeast (8g or 2 1/4 tsp or 11ml). Followed your recipe Method as you wrote it but instead of making 1 or 2 loaves, I pulled the dough into 8 decent-sized individual buns, dusted them with flour, cut into the tops and let them rise as the oven heated up. They baked beautifully in 450 oven on the middle shelf with the water bath on the lower shelf, in about 25-30 mins.
    They were crusty on the outside and beautifully soft and light in texture on the inside!
    Thanks Jenn, for ALL your great recipes……I have passed your website link on to family and friends, everyone gets hooked😊👍

    • — Mary in BC Canada
    • Reply
  • Tried this bread with a portion of whole wheat flour (King Arthur) because I wanted to try more than just “white bread” (although my friend made this with just all purpose flour and it was great). I don’t really know anything about making bread but a bit of internet research made it seem possible so I gave it a try. I used 4 1/2 cups generic all purpose flour and 2 cups King Arthur white whole wheat flour (13% protein) and it worked! More dense which was fine by me and the flavor was great (more robust). Took some photos but don’t know how to share them.

    • — Mary Van Haren
    • Reply
    • Glad you liked it and good to know it worked with the tweaks! Unfortunately, the blog isn’t set up to receive pictures but if you’re on Instagram, you can share it there; be sure to tag me @onceuponachef!

Add a Comment

This site uses Akismet to reduce spam. Learn how your comment data is processed.