22 Quick and Easy Recipes in 30 Minutes (or less) + 5 Chef Secrets To Make You A Better Cook!

Crusty Artisan Bread

Tested & Perfected Recipes

This post may contain affiliate links. Read my full disclosure policy.

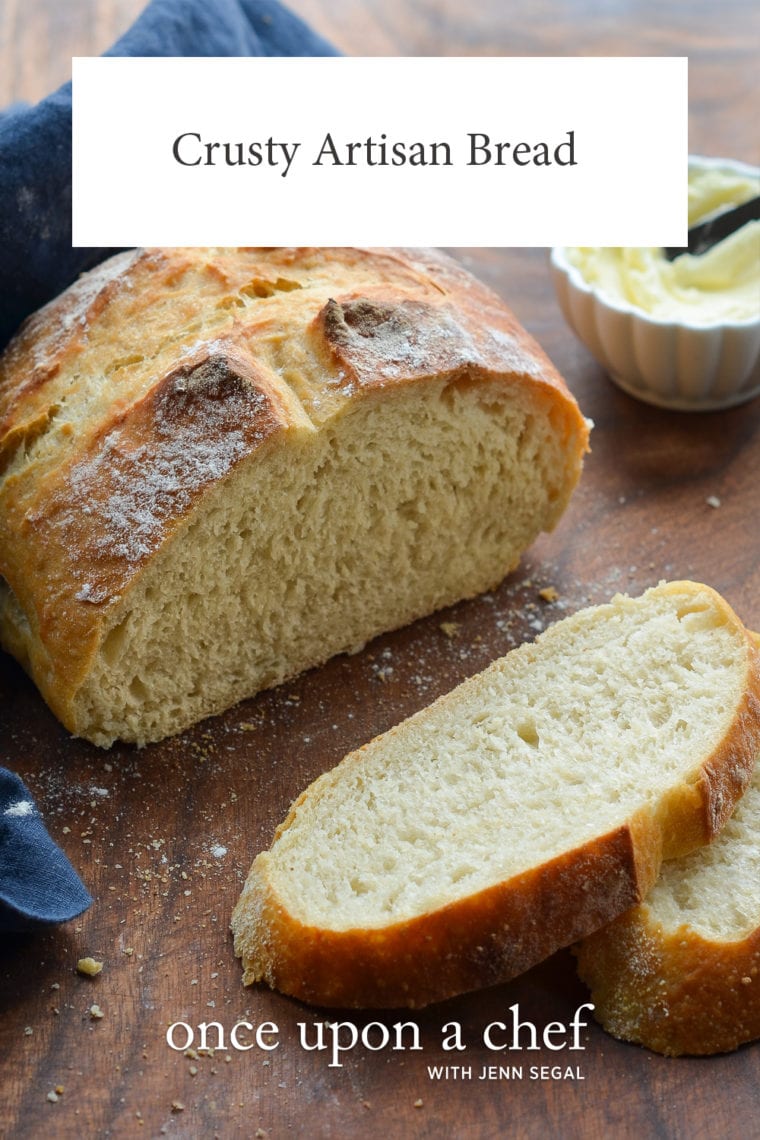
This crusty bread recipe is astonishingly easy — no kneading required — and makes three beautiful loaves, which you can bake as needed.

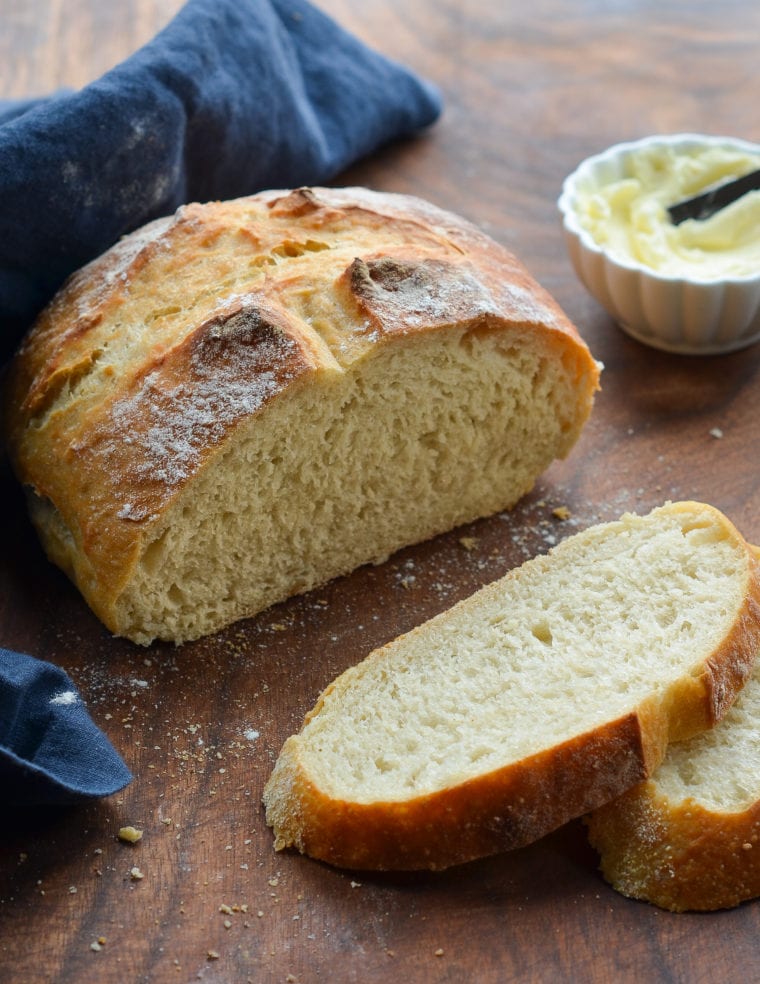
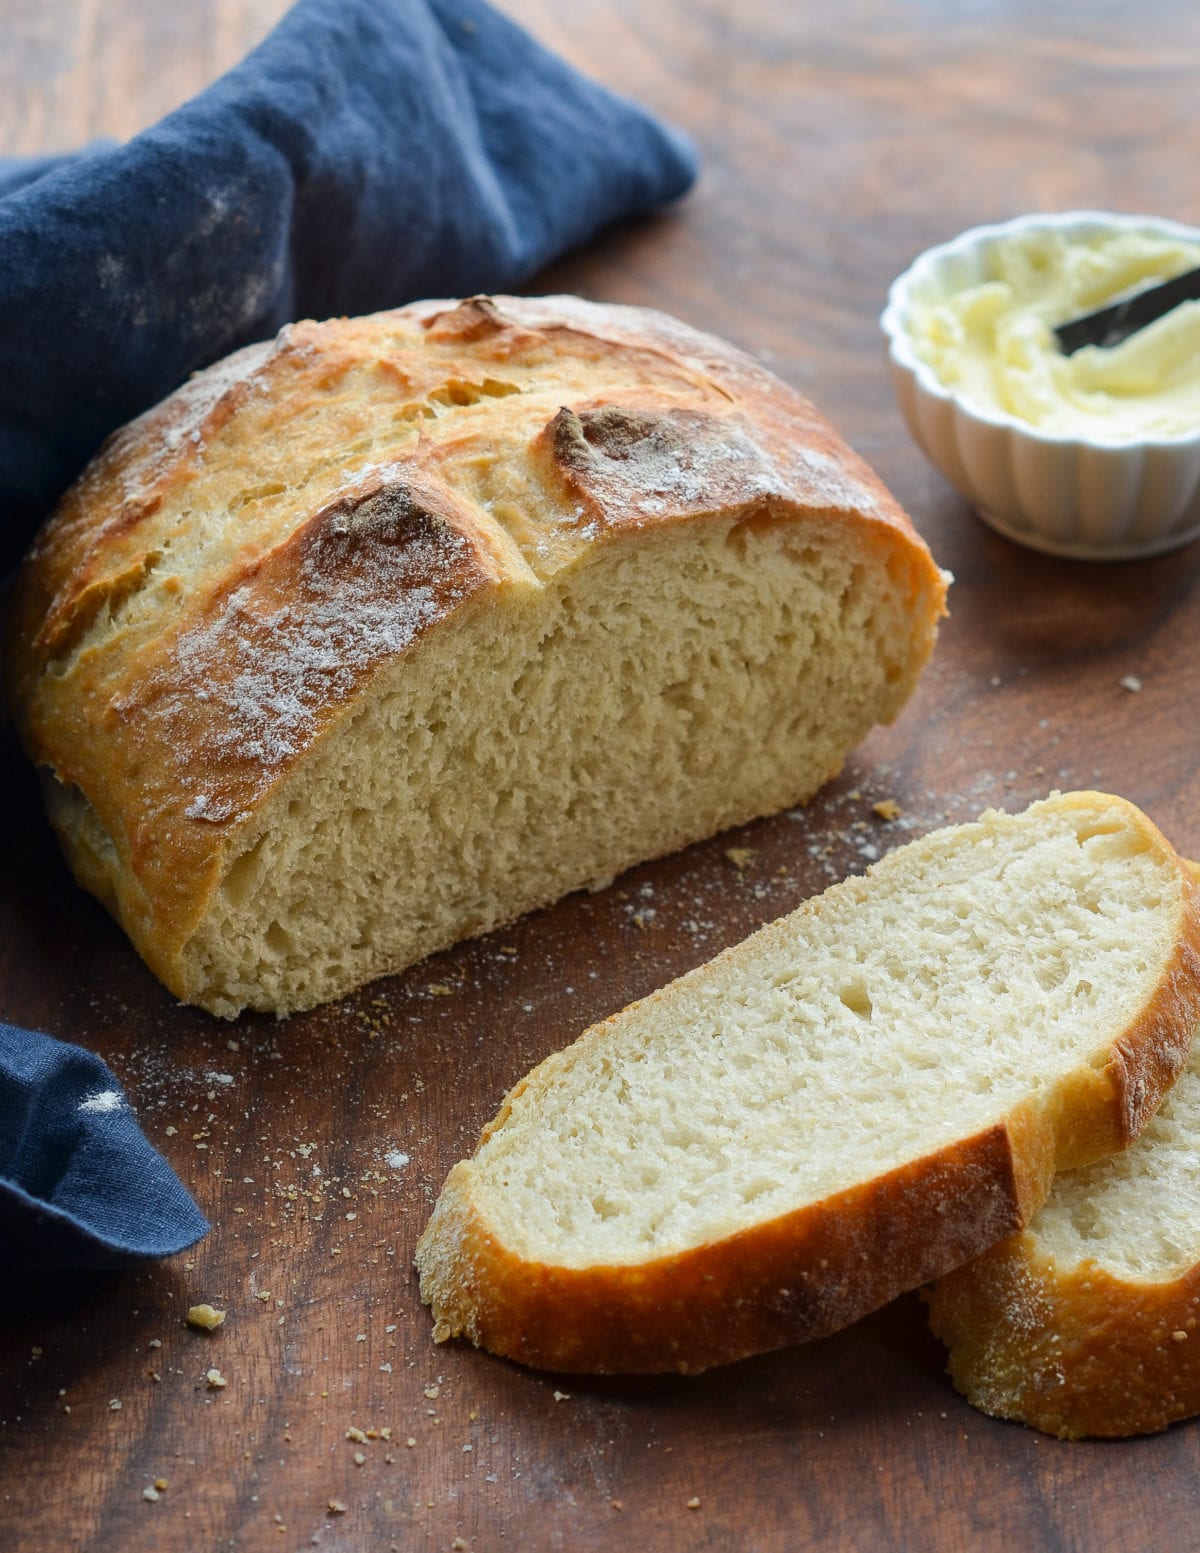
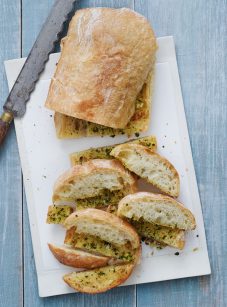
Partially-sliced loaf of crusty artisan bread.

This homemade artisan bread recipe is astonishingly easy, and it makes enough for three delicious loaves, which you can bake as needed. What’s more, the dough takes just five minutes to make, does not require kneading or any special equipment, and can rest in the fridge for up to two weeks (the flavor becomes more complex the longer it sits). The recipe is modestly adapted from one of my favorite baking books, Artisan Bread in 5 Minutes A Day by Jeff Hertzberg M.D. and Zoë François.

What You’ll Need To Make Crusty Artisan Bread
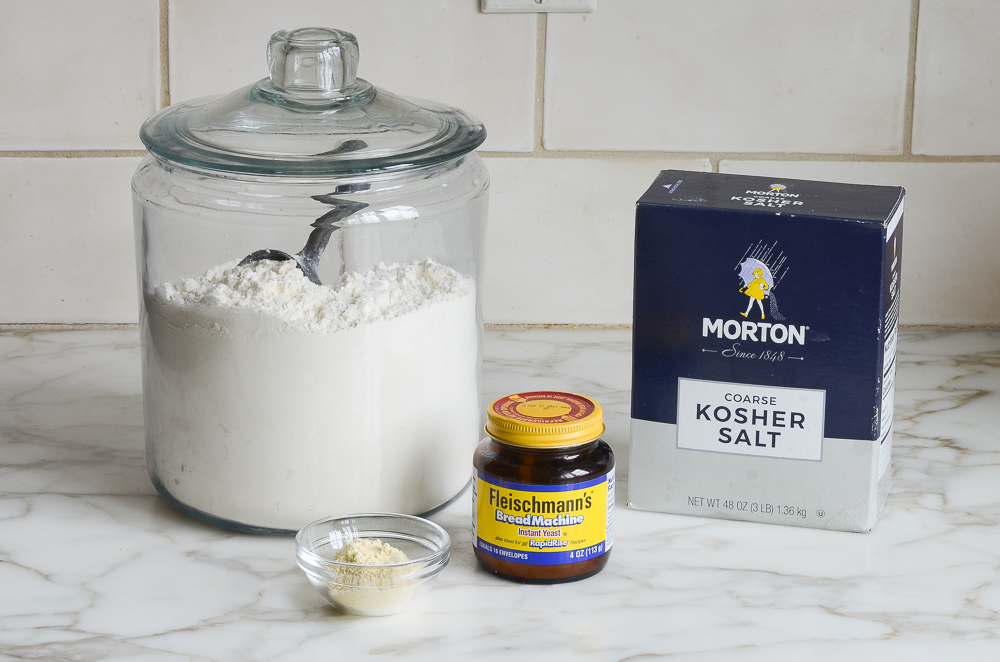
ingredients for homemade bread

This recipe has just four ingredients: all-purpose flour, instant yeast, kosher salt, and water. (The cornmeal is for dusting the pan.) As you can see, I use instant (or rapid-rise) yeast. Active dry yeast may be used instead of instant yeast, however, the dough will take longer to rise. To give active dry yeast a boost, you can dissolve it in the lukewarm water and let it sit until frothy, about 10 minutes. After that, add it to the flour and proceed with the recipe.

How To Make Crusty Artisan Bread

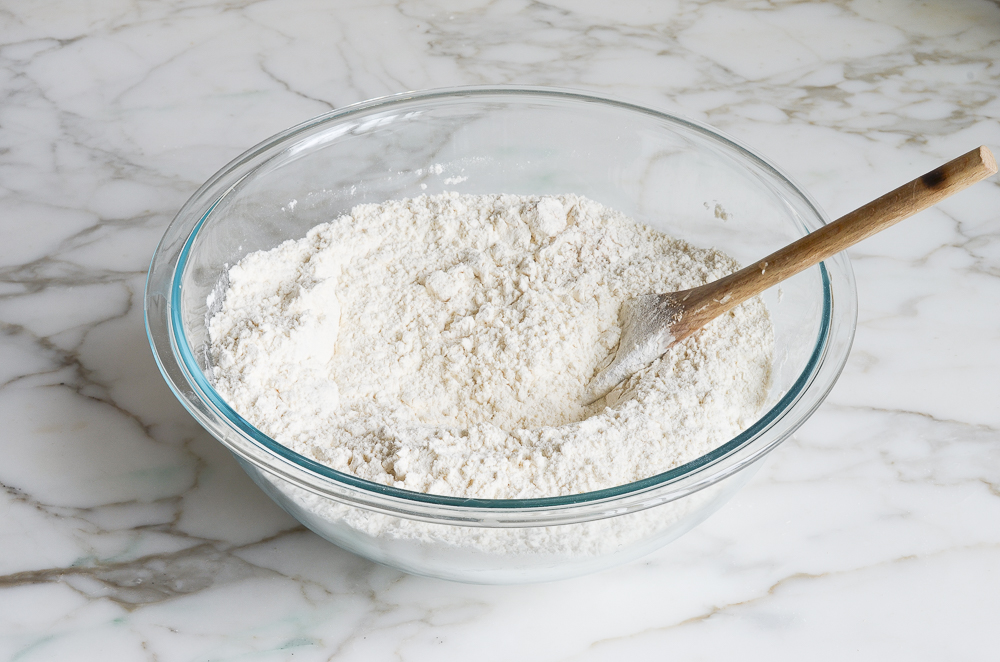
flour, yeast and salt in mixing bowl

In a very large (6-quart) bowl, combine the flour, salt, and yeast. Mix to combine.

mixed dry ingredients

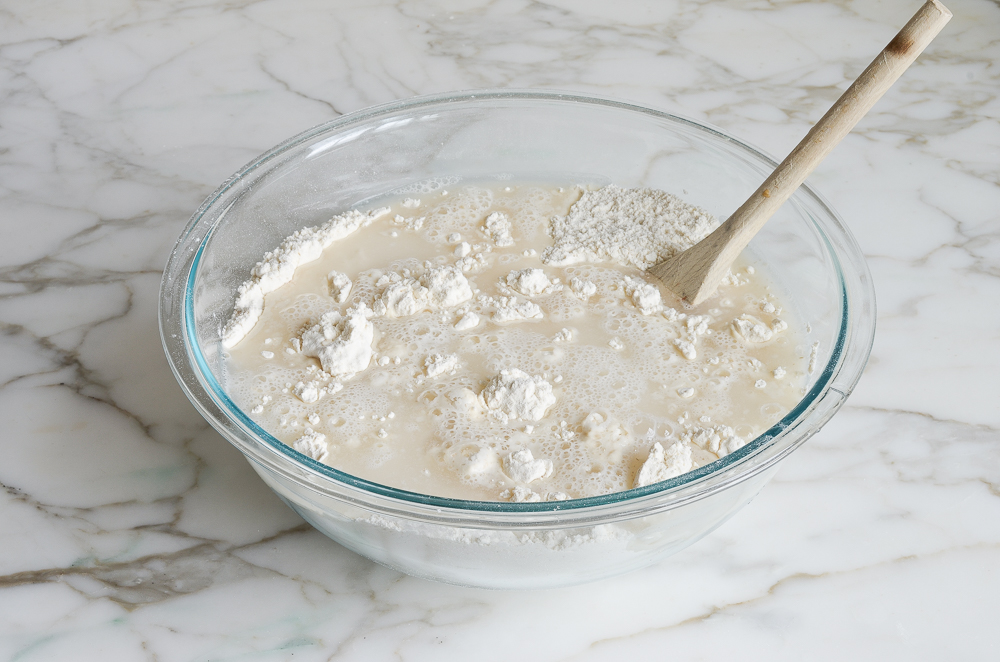
Add 3 cups of lukewarm water (no need to be exact but lukewarm is about 100°F).

Water in a bowl with dry ingredients.

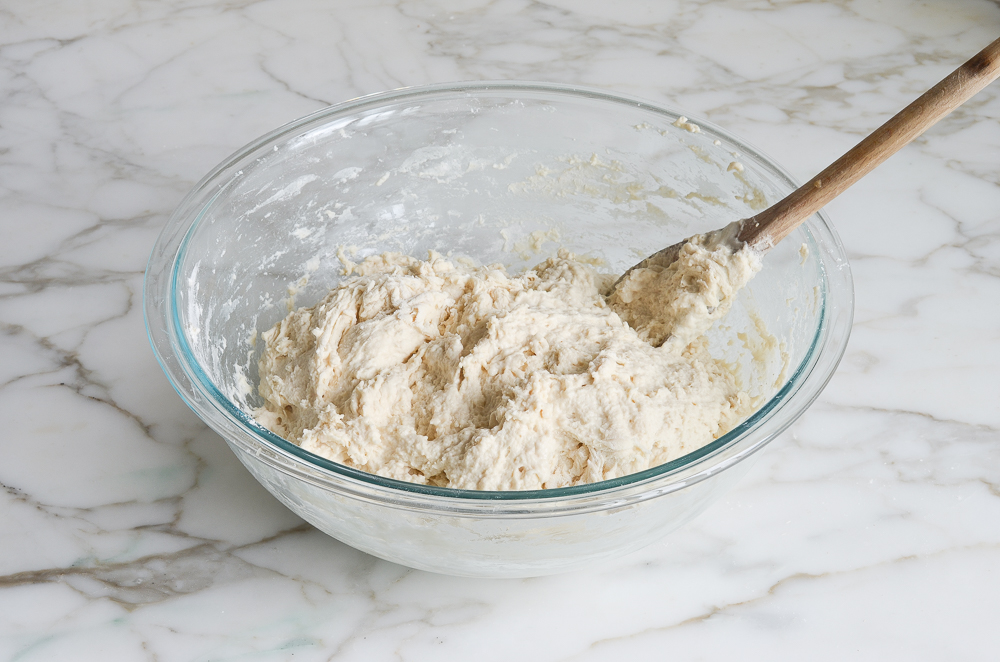
Stir with a wooden spoon until the mixture is uniformly moist, without any patches of flour.

Glass bowl of bread dough.

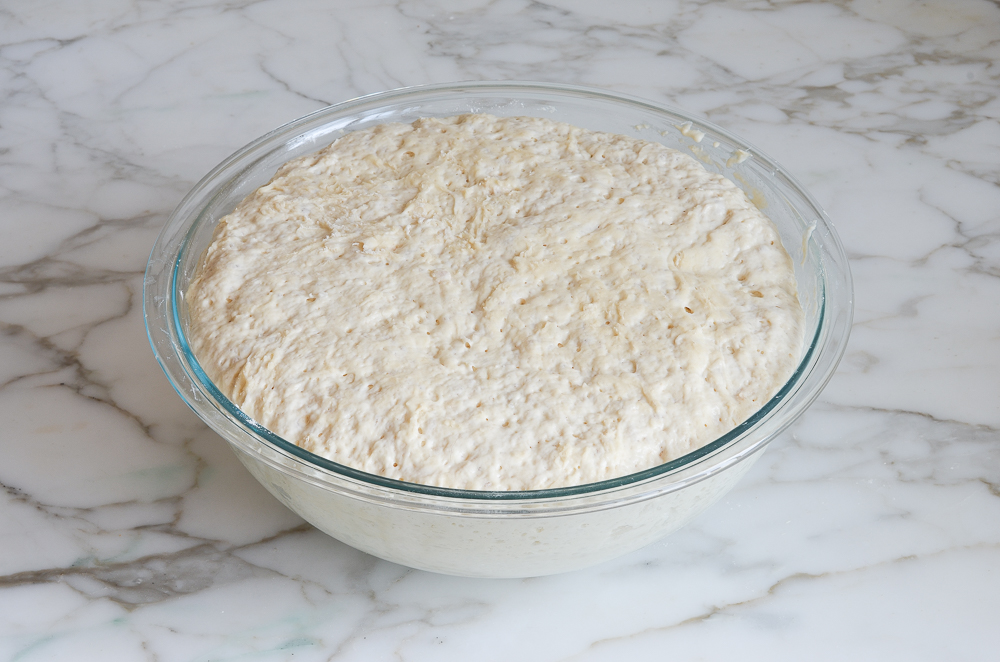
The dough should be sticky and conform to the shape of the bowl. If your dough is too dry, add a few tablespoons more warm water. If it’s too wet, add a few tablespoons of flour. Cover the bowl loosely with plastic wrap and let it sit on the counter in a warm spot for 2 hours. As you can see below, it will rise a lot!

dough after the first rise

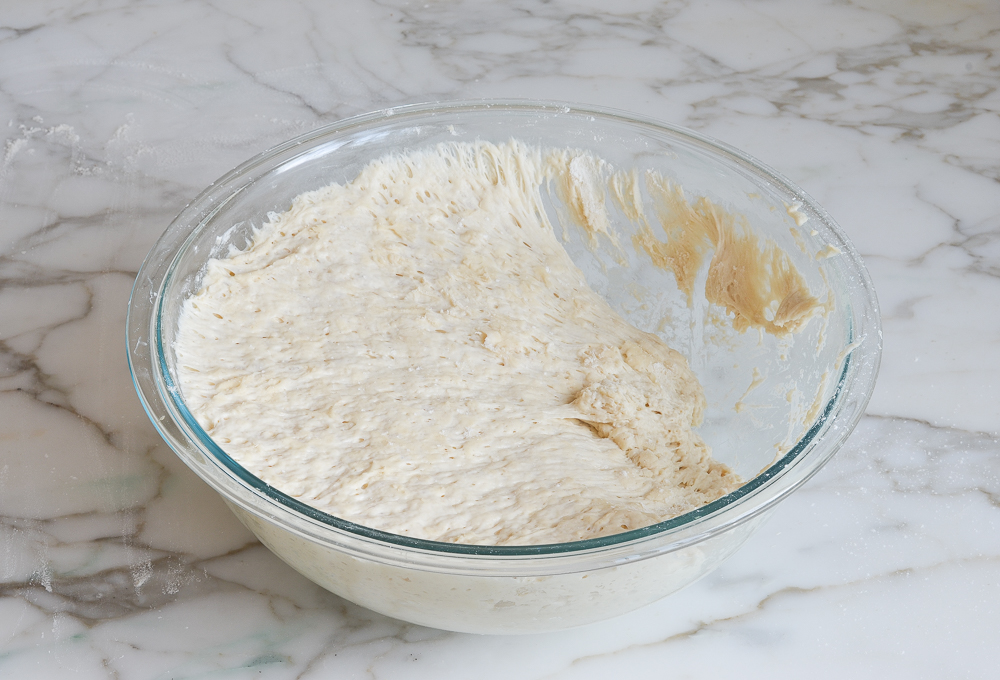
When you’re ready to bake a loaf, pull out one-third of the dough.

removing some of the bread dough from the bowl

Coat the outside lightly with flour (you don’t want to incorporate more flour into the dough, you just want to be able to handle it). Gently work the dough into a smooth ball, stretching the surface and tucking the ends underneath.

shaping the bread dough into a ball

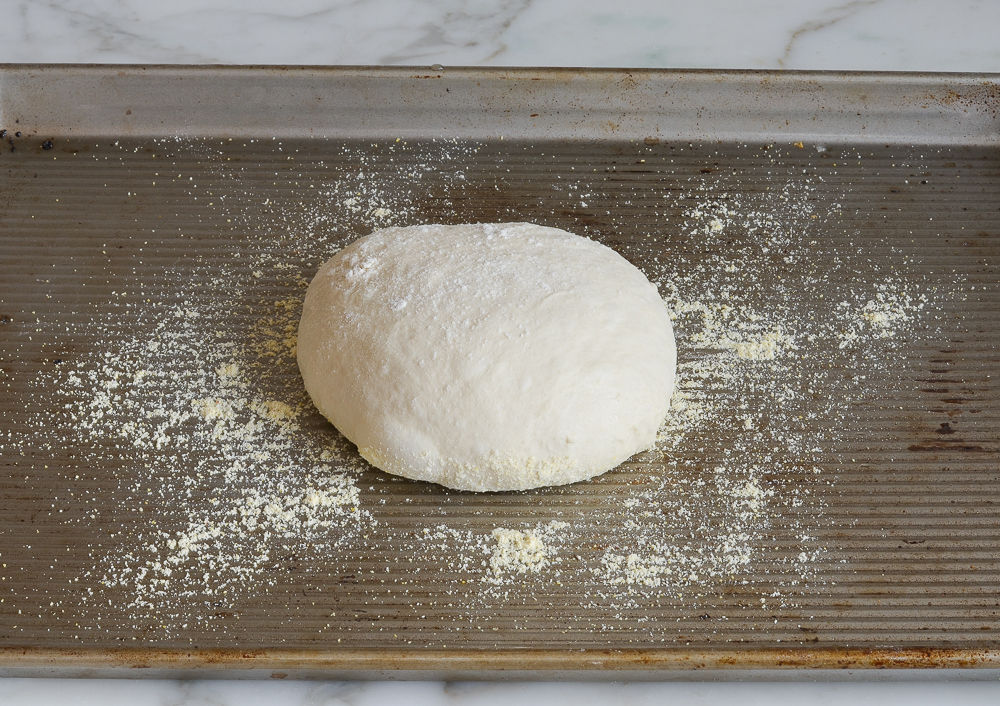
Put the dough ball onto a cornmeal-dusted baking sheet and let rest at room temperature, uncovered, for about 40 minutes. (If the dough has been refrigerated, allow it to rise for 60 minutes, or up to 90 minutes if you want a more open and airy crumb structure.) The dough will rise a bit. It may also spread/flatten a bit; that’s okay.

letting the bread dough rest on a baking sheet

The dough will rise a bit.

bread dough after second rise

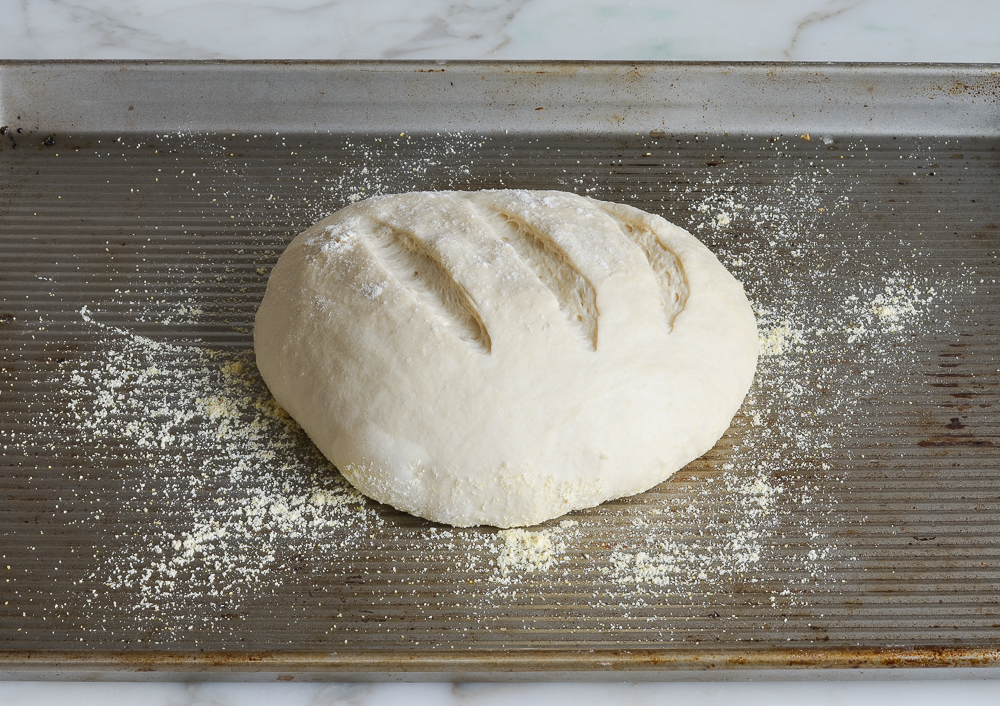
Generously dust the dough with flour. Using a sharp knife, make a few 1/2-inch-deep slashes in the dough — a scallop, cross, or tic tac toe pattern all look nice.

slashing the bread dough

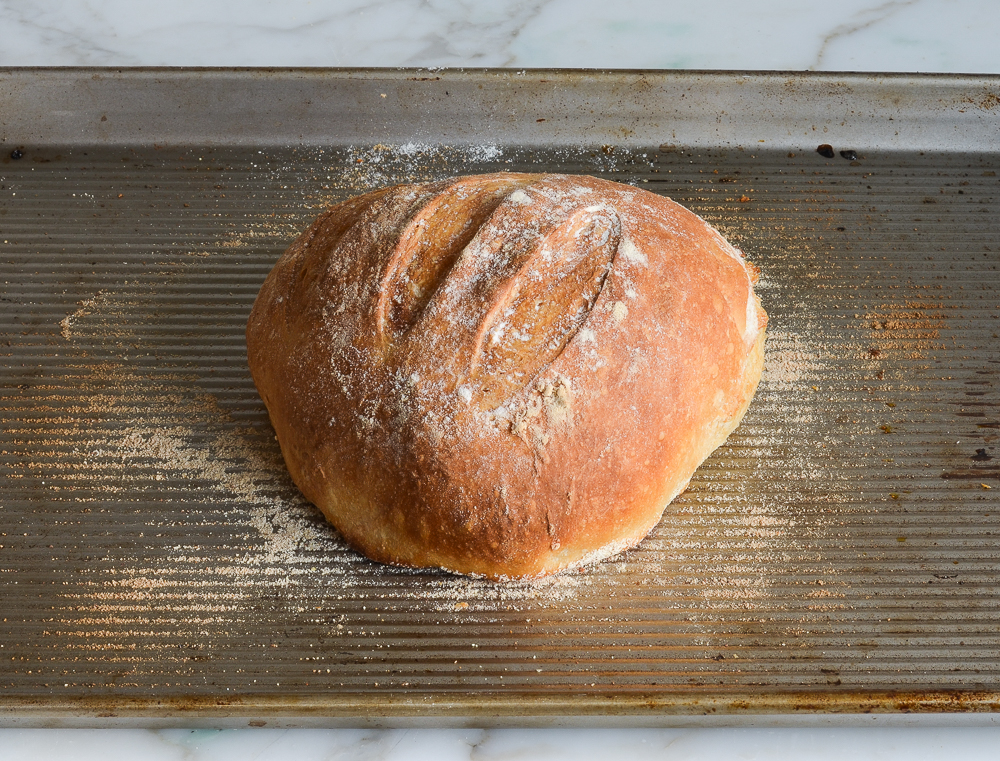
Set a metal pan on the bottom rack of a preheated 450°F-oven. Slide the baking sheet with the dough into the oven, and carefully fill the metal cake pan with one cup of hot tap water. This creates steam in the oven. (Try to do this quickly so as not to let heat out of the oven.) Bake until the loaf is golden brown, about 30 minutes. Cool completely on a wire rack.

Baked bread on a baking sheet.
This bread is best enjoyed fresh on the day it is made. Once sliced, place the loaf cut-side down on a cutting board or plate and leave it uncovered.

How To Freeze

The dough can be portioned into thirds and frozen in airtight plastic containers for up to 1 month. Defrost the dough in the refrigerator overnight, then shape, rest and bake as usual. The baked loaves can also be frozen whole or sliced. Wrap in a zip-top freezer bag and freeze for up to 1 month. To thaw, take the bread out of the freezer and let it come to room temperature, about 3 hours. Reheat in a 350°F oven until warmed through, about 10 minutes.

Partially-sliced loaf of crusty artisan bread.

You May Also Like

Crusty Artisan Bread

This crusty bread recipe is astonishingly easy — no kneading required — and makes three beautiful loaves, which you can bake as needed.

Servings: 3 loaves (about 10 slices per loaf)
Prep Time: 10 Minutes
Cook Time: 30 Minutes
Total Time: 40 Minutes, plus 2 hours and 40 minutes to rise

Ingredients

  • 6½ cups all-purpose flour, spooned into measuring cup and leveled-off (preferably King Arthur; see note)
  • 4 teaspoons kosher salt
  • 1½ tablespoons instant/rapid-rise yeast (see note)
  • 3 cups lukewarm water (no need to be exact but lukewarm is about 100°F)
  • Cornmeal, for dusting the pan

Instructions

  1. In a very large (6-quart) bowl, whisk together the flour, salt, and yeast. Add the water and stir with a wooden spoon until the mixture is uniformly moist, without any patches of flour. The dough should be sticky and conform to the shape of the bowl. If your dough is too dry, add a few tablespoons more warm water. If it's too wet, add a few tablespoons of flour. (See the step-by-step photos for guidance on what the dough should look like.) Cover the bowl loosely with plastic wrap and let it sit on the counter in a warm spot for 2 hours. If you plan to bake a loaf immediately, proceed to the next step. Otherwise, place the bowl of dough in the refrigerator to be used over the next 14 days. (Once refrigerated, the dough will shrink back a bit; that's okay. Do not punch down the dough at any point, and keep it loosely covered with plastic wrap.)
  2. Dust a sturdy baking sheet with cornmeal.
  3. Dust the surface of the dough and your hands lightly with flour. Pull out one-third of the dough and coat the outside lightly with flour (you don't want to incorporate more flour into the dough, you just want to be able to handle it). Gently work the dough into a smooth ball, stretching the surface and tucking the ends underneath, adding more flour as needed so it doesn't stick to your hands. (Don't overwork the dough; this process should only take about 30 seconds.) Put the dough ball onto the prepared baking sheet and let it rest at room temperature, uncovered, for about 40 minutes. (If the dough has been refrigerated, allow it to rise for 60 minutes, or up to 90 minutes if you want a more open and airy crumb structure.) The dough will rise a bit. It may also spread/flatten a bit; that's okay.
  4. Preheat the oven to 450°F. Set one rack in the lowest position of the oven and one rack in the middle position. Place a metal pan (any metal cake pan or broiler pan will work; just don't use glass) on the bottom rack. (You will fill this with water later to create steam in the oven).
  5. Generously dust the dough with flour. Using a sharp knife, make a few ½-inch-deep slashes in the dough -- a scallop, cross, or tic tac toe pattern all look nice.
  6. Slide the baking sheet with the dough into the oven, and carefully fill the metal cake pan with one cup of hot tap water. (Try to do this quickly so as not to let heat out of the oven.) Bake until the loaf is golden brown, about 30 minutes. Cool completely on a wire rack.
  7. This bread is best enjoyed fresh on the day it is made. Once sliced, place the loaf cut-side down on a cutting board or plate and leave it uncovered. (If it lasts beyond a day, I suggest slicing and freezing.)
  8. Freezer-Friendly Instructions The dough can be portioned into thirds and frozen in airtight plastic containers for up to 1 month. Defrost the dough in the refrigerator overnight, then shape, rest and bake as usual. The baked loaves can also be frozen whole or sliced: Wrap in a zip-top freezer bag and freeze for up to 1 month. (If you plan to use slices one at a time, place pieces of parchment between them so they don't stick.) To thaw, take the bread out of the freezer and let it come to room temperature on the countertop. Reheat in a 350°F oven until warmed through, about 10 minutes.
  9. Note: Active dry yeast may be used instead of instant/rapid-rise yeast, however, the dough will take longer to rise. To give active dry yeast a boost, you can dissolve it in the lukewarm water and let it sit until frothy, about 10 minutes. After that, add it to the flour and salt, and proceed with the recipe.
  10. Note: I use King Arthur flour, which is higher in protein than some other all-purpose flours. If using a flour with a lower protein content, such as Gold Medal, you will likely need to add a few more tablespoons of flour.

Nutrition Information

Powered by Edamam

  • Serving size: 1 slice
  • Calories: 100
  • Fat: 0 g
  • Saturated fat: 0 g
  • Carbohydrates: 21 g
  • Sugar: 0 g
  • Fiber: 1 g
  • Protein: 3 g
  • Sodium: 64 mg
  • Cholesterol: 0 mg

This website is written and produced for informational purposes only. I am not a certified nutritionist and the nutritional data on this site has not been evaluated or approved by a nutritionist or the Food and Drug Administration. Nutritional information is offered as a courtesy and should not be construed as a guarantee. The data is calculated through an online nutritional calculator, Edamam.com. Although I do my best to provide accurate nutritional information, these figures should be considered estimates only. Varying factors such as product types or brands purchased, natural fluctuations in fresh produce, and the way ingredients are processed change the effective nutritional information in any given recipe. Furthermore, different online calculators provide different results depending on their own nutrition fact sources and algorithms. To obtain the most accurate nutritional information in a given recipe, you should calculate the nutritional information with the actual ingredients used in your recipe, using your preferred nutrition calculator.

See more recipes:

Comments

  • Forgot the mention. I let it rise for the 2 hours already. I am at the 40 minute rerise stage and want to freeze the other 2/3rds.

  • Hi Jenn, I’m making this for the first time this evening. I wanted to freeze the other 2 doughs. Should I let them rise first before freezing? Thank you so much for the recipe. I will let you know how it turns out.

    • Hi Fran, You should put the other 2 pieces of dough into the freezer after the first rise but prior to the second rise. Hope that helps!

      • Question: if you half the recipe, I’m assuming you would then make it into just one loaf. Any idea how long to bake it for, since it will be bigger? Thanks.

        • — Melanie on November 26, 2022
        • Reply
        • Yes, I would bake one loaf with half the recipe. And the bake time will just be a few minutes longer. Hope you enjoy!

          • — Jenn on November 28, 2022
          • Reply
  • let me start by saying I have made this recipe probably a couple of dozen times now and its absolutely perfect and makes amazing loafs.

    occasionally I will roast some garlic and add that to the dough but even without its fantastic, I also cant begin to stress how easy this is from a bread recipe standpoint – you just have to get use to handling the sticky dough.

    I bought some bread bags from Amazon as these are perfect for gift baskets during the holidays.

  • Hi Jenn! Love your recipes! Am I able to bake all 3 loaves at once or do I need to bake individually?

    • Hi Cheri, you can bake all 3 at once but they’ll take a bit longer. I’d start checking them at about 35 minutes and use the color as a visual cue–you’re looking for a golden brown. Enjoy!

  • I’ve made this bread before-it is easy and delicious and I’m making it again today! I’m just curious…can this same recipe be used to shape the bread into a French baguette? Thanks for the advice! Love the new cookbook!

    • Glad you like it! Sure, you can shape this into a baguette. The bake time may be a little different, so keep a close eye on it. Please LMK how it turns out if you try it!

  • Yum! This was so yummy tonight served alongside Jenn’s broccoli cheese soup! I was a little worried because when I put 1/3 of the dough on the baking sheet it kind of just seemed like a sticky blob, but it cooked up beautifully! I’m pretty sure this will be requested by my family often.

  • Hi, I want to try this bread recipe. Can I use whole wheat flour instead?

    • Hi Florentina, I’ve only made this with all-purpose flour so I can’t confidently say how it will turn out with different kinds of flour. King Arthur has a variety of bread recipes that call for whole-grain flours if you want to check them out. And if you have any interest in buying a cookbook, this recipe was adapted from cookbook authors Jeff Hertzberg M.D. and Zoë François and they also have a book that focuses on whole grain bread recipes.

  • Perfect! Thank you. The bread is great. I also love having the extra dough in the fridge for my pizza loving family. I can get 2 large thin crust pizzas out of one-third of the dough. I did this over the weekend and they disappeared in no time.

  • I used active yeast and mixed it with lukewarm water as advised. my dough didn’t rise, so I went on Fleischmann’s website and it says to activate yeast you need to add sugar. is this the reason my dough didn’t rise?

    • Hi Barry, I don’t think sugar is necessary to activate the yeast. The dough should take longer to rise with active yeast. Did you give it some extra time? Was your yeast pretty old?

  • Can I divide the recipe by 3 and make just one loaf?

    • Yep 🙂

    • I’m dying to try this recipe ….can I substitute the yoghurt with buttermilk

      • Hi Vee, this doesn’t call for yogurt so I think you may be confusing it with another recipe. 🙂

  • My go-to bread recipe now! Perfect with soups, or as toast or garlic bread. Made 3 loaves at school for Chemistry class. All three were eaten up by the end of the day, along with a stick of butter.

  • Can you use bread machine yeast? I’ve only ever made bread with a bread machine, so only have that yeast on hand. If not, I’ll just buy rapid yeast.

    • Yes — bread machine yeast and instant/rapid-rise yeast are the same. Hope you enjoy!

  • Can you bake this in a dutch oven?

    • Sure, Amelia, that’s fine. Enjoy!

    • I’d like to bake all three loafs as one big loaf in the Dutch oven. How long do you think it would take ?

      • Hi Amanda, I’m not sure exactly how long one large big will take to bake, but I’d start checking at about 35 minutes. Please LMK how it turns out!

  • Hi Jenn!

    This is the first time that yeast bread has actually turned out for me!!! Thanks for the added tips and info.

    I do have one question for you. What is the importance of the steam? I would like to understand what the steam does for the bread.

    Thanks!!
    Kim

    • Glad your bread came out well! Here’s a piece that explains the purpose of the steam nicely. 🙂

  • What would I need to do to make a portion of this as dinner rolls – should I brush with oil/herbs, etc, and how long to bake. It’s just delicious bread just wanted to see how to do part of the dough as for bread rolls. Thank You so much.

    • Hi Marian, It should be fine to brush the dough with some oil and herbs. In terms of timing, it’s hard to say for sure as it depends on the size of the rolls, but I’d start checking them at 15 to 20 minutes. Please LMK how they turn out!

    • Can I brush the bread with rosemary garlic butter before or after it is baked

      • Hi Vee, I’d do it after you’ve baked the bread. Please LMK how it turns out!

  • My loaf was as good as or better than the artisan bread sold in a bakery. Made 2 loafs one day apart and my husband and I devoured them the same day. Very easy recipe. Thanx.

    • — Diane Wetherbee
    • Reply
  • Quick, easy, delicious! Used all-purpose King Arthur and did need a few extra tablespoons of water.

  • Love this recipe, simple and easy to make. It is on my list of favourites.

  • A second question for this and other breads. How do you know that a specific loaf is fully baked? I find it hard to judge by appearance alone and sometimes loaves that have been baked for a certain time seem to be under or over baked. Thanks so much.

    • Hi Stella, If you are concerned about the inside being fully baked, you can always check the internal temperature with a thermometer. You’re aiming for about 190°F. Hope that helps!

  • So no sugar is needed to active the yeast and no kneading is needed to activate the gluten?

    • No, not for this recipe. Hope you enjoy if you make it!

      • Hi..
        Is it ok to substitute the water with milk? Thank you.

        • Hi Ara, I think it should work. Please LMK how it turns out if you try it. 🙂

  • OMG!!! We can’t find good bread anywhere. I am not a great baker, but this bread is so easy and so tasty. Made the first loaf today and had to stop my husband for going back for his third piece. The rewards for such little effort are outstanding. Make this bread. This site is my go-to for the best recipes out there.

  • Ugh I forgot to put the dry yeast in the water ahead of time because I only had active yeast not quick. Will it ruin the dough?

    • It should be fine, Lisa – will just take a bit longer to rise.

  • SO EASY!! And delicious!!

  • This recipe turned out great. Instead of a baking sheet, I baked it on a pizza stone. The recipe was so good I ordered the Artisan Bread in 5 Minutes a Day cook book. I have tried several recipes from your website and cookbook and they all turned out great.

  • Thank you once again Jen / another great recipe. Made this tonight to go with beef barley soup. Great meal on a cold snowy day. I made all 3 loaves, cooled the remaining slices and froze for additional meals. So easy and so good. Please keep these recipes coming. 😊

  • My question may have been asked already, but asking again: is there a reason for using all purpose rather than bread flour?

    • Hi Barry, this recipe comes from a bread cookbook so I’m not sure what the rationale was for all purpose flour. If you’d prefer to use bread flour, that’s fine; you’ll need to increase the water by 1/3 cup to start and add more if needed. Hope you enjoy!

  • You are my go-to person when looking for recipes. I have been giving it a go with breadmaking and was skeptical about the no-knead bread recipes. BUT this one is so GOOD!! I did not change a thing. I wanted big loaves so put it in two bannetons but was a little too wet to get good lines. I did think the dough was a little too wet with 6 1/2 cups-845 grams of flour, next time I will add just a little more flour also a little salty so less salt.
    After the 2 hours in the bowl, I did let it rise again for almost 90 minutes in the bannetons covered.
    BUT THIS IS THE BEST BREAD.

    • I’ve just finished baking the third round of this delicious bread. So easy and tasty. My husband can’t get enough. I love it. Again, a hit in this family!!

  • I made this and will never buy bread again. I was sending to Spain to get bread cause there is no fresh bread in the country.

    • — Betty Planta-Lewis
    • Reply
  • When I broke my kneecap many years ago and was stuck in the house all winter in a plaster cast, I learned to make bread. Since then, I make bread for my family and friends. In my opinion, this Artisan Bread is the best I have ever made. It reminds me of the bread we got every day when we spent a month in France. Thanks for sharing your recipes.

    • — Shirley Limoges
    • Reply
  • Do I cover the remaining 2/3 of dough for the refrigerator or should I separate into 2 for the remaining 2 loaves and then refrigerate covered or uncovered. So looking forward to this for dinner tonight.

    • Hi Marian, the remaining dough should be covered and stored in a bowl. Hope you enjoyed last night’s loaf!

  • This is hands down, the easiest bread recipe out there that makes the most superb crusty artisan bread! Made as directed without any issues, my go to bread recipe from now on❤️

    • — Life of Fragrances
    • Reply
  • Perfection!

  • This bread was PERFECT! I have very picky eaters (ADULTS!!) in my family- this bread was such a hit with everyone, they were carrying on for days about it. I am making it again for my moms birthday dinner! Crispy outside, so soft and flavorful inside, and so EASY!! The best. 🤤

  • Love this bread!! So simple yet you can take it in so many different directions. Like add garlic salt in place of regular salt or add rosemary or dill. I’ve made it many times with different spices and always been pleased!!

    • — Carisa Goodell
    • Reply
  • Another winner. It was easy to make and the taste was wonderful. I used King Arthur’s Bread Flour instead of regular flour and it was very tasty. I must have done something wrong, because it stuck to the pan, but I figured it out and all was well.

  • Fantastic bread recipe! I’ve been making this bread at least a couple times a month for awhile now…it’s a must have for soup days! I usually have Gold Medal flour on hand and have not had to make adjustments to the recipe. The dough can be sticky, but I just liberally flour my hands and board and handle the dough lightly. No kneading! Sometimes I divide the dough in half for two larger loaves. It makes great toast and doesn’t last long! Thanks Jenn for another great recipe!

  • This bread is easy and fail safe. I’ve made it several times now, and my family loves it each time. I have substituted 1 cup of rye flour for all-purpose flour, and it still turns out delicious.

  • Without a doubt, one of the easiest and best bread recipes I have ever made! I started out halving the recipe for just my husband and myself, so we could have fresh baked bread a few times during the week. Now, I make the full recipe and can bake 3 loaves over the course of the 14-day window, because we like it that much. With the bigger loaves I can make grilled cheese sandwiches and croutons (Jenn has recipes for both), it is wonderful dipped in the sauce of her Beef Stew with Carrots and Potatoes, too, and I’ll make some garlic butter, spread it on one side of a slice, and toast it under the broiler – delicious. I have tried this recipe with another brand of flour when I could not find King Arthur, but I will stick with the King Arthur brand when I can find it.

  • I have two questions about this recipe:

    1. Can I use parchment paper to line the baking sheet? If the answer is yes, do I still need to dust with cornmeal? I had to throw out a Dutch oven after baking a no-knead bread in it, despite dusting with what I thought was an adequate coating of cornmeal.

    2. My gas oven has a proof cycle, which I haven’t tried yet. I checked the manual and only see “This feature maintains a warm oven for rising yeast leavened products before baking.” Do you think I can use that for dough resting step?

    • Hi Deb, yes, you can line the baking sheet with parchment paper. I’d still dust it with cornmeal for a little extra insurance. And I think the proof function on your oven should be fine for letting the dough rise. Hope that helps and that you enjoy!

  • This bread has become a staple in our house, it is so easy and delicious! I didn’t have much experience with yeasted breads before this and this recipe was a great introduction. Now I make it every time we make soup and eat the leftovers for breakfast! The bread stuck to my baking sheet even with the cornmeal once, so now I put a sheet of parchment paper down and then the cornmeal just to ensure no sticking. Thanks for such a great, easy recipe!

    • Gosh, first made this back when yeast was hard to find last spring. Needed bread to go with soup yesterday, so decided to bake this one again. Now I don’t know why I haven’t been making this weekly! Four ingredients, minimal effort and delicious bread. I feel so accomplished! Thanks, Jenn!

  • This recipe is amazing. I have found, however, that I need to add an additional 1/2 cup of water to get it sticky, though I’m not sure whether its the flour I used or the time of year. Now that I’ve discovered the “proof” setting on my oven, it’s even easier.

  • This is like magic bread! It works perfectly, as long as you follow all the directions. The second time I tried it, I forgot about the water at first, and it didn’t poof up as it should. I do tuck the edges around the bread under just a bit, very very carefully and gently, after it rises and before I put it into the oven, to help it’s height. And, I find that, after the wonderful freshness of the first day, it makes lovely toast for my breakfast. I received Jenn’s cookbook for a Christmas gift, and am always looking through it for ideas — it has a nice photo for every recipe, and I feel like I want to try almost every recipe in the book!

  • Not sure what went wrong. I have been baking bread for many years. A friend gave me a recipe (turns out it was this one). I made it yesterday. It was so loose that even after sitting to rise, I could not shape a loaf. So I added more flour. I use the spoon into the measuring cup and level method of measuring flour, and sometimes you do not get as much flour as if you scoop directly. After adding quite a lot more flour bit by bit, I thought I had something better. Let it rise, and shaped my loaves. They simply spread and rose very little. I always have fresh yeast. My friend told me to put it on parchment paper, which I use all the time. Was a bit worried about baking at 450, but I did it. Parchment paper burned, house filled with smoke, and the bottoms of the breads were burnt badly in 15 minutes. Also the water pan had burned dry. That being said, I did salvage it, as the outer crust was perfect, and what was left of the inner loaf, was quite nice. I checked the recipe about 6 times, figuring she gave me something wrong. But this morning, while searching for a recipe, to see what I did wrong, I happened upon this one, and lo and behold it is the exact recipe she gave me, minus the use of parchment paper. I will try it again, minus the parchment paper, and maybe figuring out the flour, and weighing it instead. This should be a good bread, judging by what I did get to eat.

    • Sorry you had challenges with this! What brand of flour did you use? I always have good luck with King Arthur flour. I hope you have better luck next time around!

  • I sooo love this recipe. As with other recipes I’ve used from Jen, it is tested and perfected so you want to follow each instruction. I left the loaves on the baking sheet a tad longer than suggested and my husband had to help me get them off. However they came off intact and scrumptious. I was skeptical of letting the dough in the refrigerator for up to 14 days but I tried it and it was perfect. I love your recipes, Jen. Gratefully.
    Gwen King

  • So easy and delicious!! Great for a bread making newbie. I make a loaf every weekend now! Also I’ve branched out to adding chunks of cheddar in the dough! Next I’m trying a bagel topper “everything bagel” and adding it to the dough. It works perfectly in my silicon loaf pan. Crispy on the outside and soft on the inside – like me sometimes! Thank you so very much for this recipe!

  • I love this bread!!! I have been making it for the last year because it’s so easy and my family loves it. It has been a perfect addition to so many of my dinners and totally wowed my family when I served it up warm with a side of olive oil and spices. I think my husband even said he felt like he was dining at a pricey restaurant hahaha… oh and my neighbors 4-year-old son loved it. It’s just so easy to put together and keeps for at least two weeks in the fridge. Thank you so much for this !!

  • THIS IS THE BEST BREAD RECIPE EVER!!!
    My family looks forward to our weekly loaves to go with various soups and and stews.
    Thank you Jenn!

  • I have not had to buy bread all quarantine thanks to this recipe and the challah recipe (also on here). I use one less teaspoon of salt and its the perfect saltiness for me. I found that my dough can spread and gets flat as it rests so I started resting it on a large a piece of parchment in a pot or big bowl and that helps it keep its shape. When it’s ready to bake, I lift it out by the parchment and bake it with the parchment on a baking sheet.

    I just made loaves of these for my girlfriends for our annual “favorite things” exchange and it was a big hit. I also made this with a teaspoon of “everything but the bagel” seasoning and it is becoming a favorite in our house with some Boursin cheese.

  • Absolutely love this recipe~!! Not only for the taste and simplicity, but the convenience. It’s great to be able to make delicious home made bread out of one batch so many times. Thanks for sharing.

  • Enjoyed this bread with two different soups this week. Used King Arthur flour and followed recipe as written. Baked three loaves a couple of days ago. I froze two loaves in an airtight bag. Second day, I warmed half (leftover) loaf in 350 oven for 5 minutes and it crisped the crust back up and tasted great. Notes: I was convinced my first batch of dough was too wet and threw it out. Decided to weigh my ingredients the second time, which I usually do when baking bread. It was still a wet dough and I regretted tossing the first batch! I used plenty of flour to get the dough into balls without incorporating more into the dough. Baked beautifully and is delicious!

Add a Comment

This site uses Akismet to reduce spam. Learn how your comment data is processed.