Flaky Buttermilk Biscuits


This post may contain affiliate links. Read my full disclosure policy.
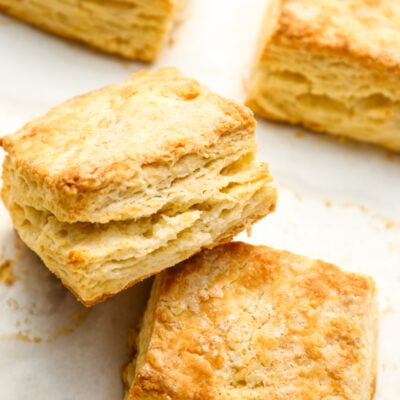
Learn how to make the best homemade buttermilk biscuits—tender, flaky, and golden brown, they come together quickly with simple ingredients and an easy technique.

Classic Southern buttermilk biscuits are prized for their light, melt-in-your-mouth texture, typically made with White Lily flour, a soft wheat variety loved by biscuit bakers. Since it’s not always easy to find outside the South, I use a simple mix of all-purpose flour and cornstarch to achieve the same delicate crumb.
These buttermilk biscuits bake up golden and crisp on the outside, soft and buttery on the inside—and they’re ready in just 30 minutes from start to finish. Instead of using a biscuit cutter, I cut them into easy squares, which eliminates scraps and extra steps. Whether shaped into squares or rounds, they’re foolproof, delicious, and perfect with everything from honey butter to hearty gravy.
For an even easier alternative, try my drop biscuits or Cheddar Bay Biscuits—both skip the rolling and cutting altogether. Just drop, bake, and enjoy!
“These are amazing. Came together quickly for breakfast. My husband took a bite and gave me a high five. They’ll be a staple around here.”
What You’ll Need To Make Homemade Buttermilk Biscuits

- All-purpose flour: Provides the structure for the biscuits; always use the spoon-and-level method when measuring to ensure accuracy.
- Cornstarch: Softens the dough’s proteins to produce a more tender biscuit.
- Baking powder and baking soda: Leavening agents that work together to create rise and fluffiness in the biscuits. Baking soda also reacts with the acid in buttermilk, aiding in leavening and improving color.
- Sugar: Adds a slight sweetness to balance the flavors and aids in browning.
- Cold butter: Provides fat which, when cut into the dry ingredients, creates flaky layers as it melts and steams during baking. The cold temperature is crucial for achieving the desired flakiness, so keep it in the fridge until you’re ready to use it.
- Buttermilk: Moistens the dough and also adds acidity that reacts with the baking soda for leavening. If you don’t want to buy a whole carton, see my instructions for how to make buttermilk using milk and lemon juice or vinegar.
- Jump to the printable recipe for precise measurements
Step-by-Step Instructions
Step 1: Mix the dry ingredients and butter. Combine the flour, cornstarch, baking powder, baking soda, sugar, and salt in a food processor and pulse briefly to combine. Add the cold chunks of butter and pulse until the mixture resembles coarse sand with a few pea-size clumps of butter intact.

Step 2: Add the buttermilk. Transfer the mixture to a bowl. Add the buttermilk and stir until the mixture comes together into a shaggy mass. Be careful not to overmix — overmixing can impact the tenderness and rise of the finished biscuits.


Step 3: Layer the dough for flakiness. Turn the dough out onto a lightly floured work surface, shape it into a loose ball, and then gently pat it into a rectangle about 3/4-inch thick. Cut the dough in thirds. Stack the pieces on top of one another and then pat it out into a rectangle about 3/4-inch thick again.


Step 4: Continue layering and cut into squares. Again, cut the dough into thirds and stack the pieces. Finally, pat the dough into a rectangle with a thickness of about 3/4-inch. This repetitive process creates layers in the dough, which makes for deliciously flaky biscuits. Cut the dough into 12 small squares (these biscuits are on the smaller side, so feel free to cut into 9 squares if you prefer larger biscuits). At this point, the unbaked biscuits can be frozen for up to 3 months.


Step 5: Bake the biscuits. Space them evenly apart on a parchment-lined baking sheet and bake for 13 to 15 minutes, until golden.


The biscuits are best served warm out of the oven (though a few minutes in the oven will revive slightly stale biscuits). If you’d like to freeze leftovers, let them cool completely, wrap tightly in plastic wrap, and freeze in an airtight container—when ready to eat, simply reheat in the oven until warmed through (no need to thaw them first).

What to Serve with Buttermilk Biscuits
Buttermilk biscuits are incredibly versatile, pairing perfectly with sweet and savory dishes alike. Whether you’re serving them for breakfast, dinner, or as a side, here are some delicious ways to enjoy them:
For Breakfast:
- Classic with Butter & Jam – Keep it simple with softened butter and your favorite jam, honey, or apple or pumpkin butter.
- Sausage Gravy – A Southern favorite, smothered biscuits with creamy sausage gravy make for the ultimate comfort breakfast.
- Eggs & Bacon – Serve biscuits alongside scrambled eggs, an omelette, crispy oven-fried bacon, or even as a sandwich with eggs and cheese.
For Dinner:
- Fried Chicken & Biscuits – A true Southern classic! Pair with crispy buttermilk fried chicken tenders for a comforting meal.
- Soup or Stew – Use biscuits to soak up hearty dishes like beef stew, gumbo, or chicken noodle soup.
- BBQ: Biscuits make a great side for pulled pork, baby back ribs, or smoked brisket – Biscuits make a great side for smoky barbecue meats, or even as a base for mini pulled pork sliders.
Video Tutorial
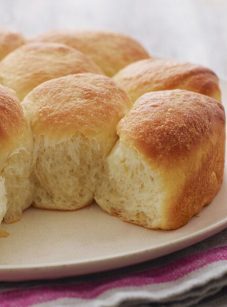
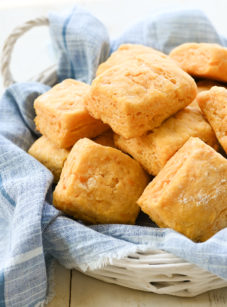
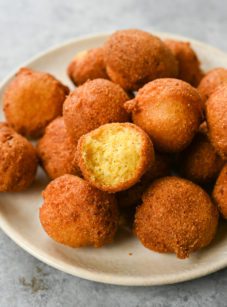
More Bread Basket Recipes You May Like

Buttermilk Biscuits
Ingredients
- 2 cups all purpose flour, spooned into measuring cup and leveled-off
- 3 tablespoons cornstarch
- 1 tablespoon baking powder
- ¼ teaspoon baking soda
- 1 tablespoon sugar
- 1¼ teaspoons salt
- 10 tablespoons cold unsalted butter, cut into ½-in (13-mm) chunks
- ¾ cup buttermilk, plus a bit more if necessary (see note)
Instructions
- Preheat the oven to 425ºF (220°C) and set an oven rack in the middle position. Line a 13 x 18-in (33 x 46-cm) baking sheet with parchment paper.
- In the bowl of a food processor, combine the flour, cornstarch, baking powder, baking soda, sugar and salt. Pulse a few times to mix. (Alternatively, combine the ingredients in a mixing bowl.)
- Add the butter and pulse until the mixture resembles coarse sand with a few pea-sized clumps of butter intact. (If making by hand, "cut" the butter into the dry ingredients with a pastry cutter, two knifes, or your fingertips.) Transfer the mixture to a mixing bowl.
- Add the buttermilk and stir with a spoon or rubber spatula until the dough comes together into a shaggy mass. If the dough seems too dry, add a few more tablespoons of buttermilk. Do not over-mix.
- Turn the dough out onto a lightly floured work surface. Dust the top of the dough with a bit more flour and bring together gently into a loose ball. Pat the dough into a rectangle about ¾-in (2-cm) thick.
- Using a sharp knife, cut the dough into thirds. Stack the pieces on top of one another and pat out into a rectangle about ¾-in (2-cm) thick again, flouring the surface lightly as needed to prevent the dough from sticking.
- Cut the dough into thirds again. Stack the pieces on top of one another and pat into a rectangle with a final thickness of about ¾ in (2-cm).
- Dust the blade of a sharp knife with flour and cut the dough into twelve even squares (they will seem small). Transfer the squares to the prepared baking sheet and bake for 13 to 15 minutes, until the biscuits are lightly golden on top and a rich, golden brown on the bottom. The biscuits are best served warm out of the oven (though a few minutes in the oven will revive slightly older biscuits).
Notes
- Check out an easy method for how to make buttermilk using milk and lemon juice or vinegar.
- Freezing Instructions: Before baking, the biscuits can be frozen for up to three months. Place the unbaked biscuits on a baking sheet and freeze until solid, then transfer them to a freezer-safe bag or container. When ready to bake, there's no need to thaw, but they may require a few extra minutes in the oven.
Nutrition Information
This website is written and produced for informational purposes only. I am not a certified nutritionist and the nutritional data on this site has not been evaluated or approved by a nutritionist or the Food and Drug Administration. Nutritional information is offered as a courtesy and should not be construed as a guarantee. The data is calculated through an online nutritional calculator, Edamam.com. Although I do my best to provide accurate nutritional information, these figures should be considered estimates only. Varying factors such as product types or brands purchased, natural fluctuations in fresh produce, and the way ingredients are processed change the effective nutritional information in any given recipe. Furthermore, different online calculators provide different results depending on their own nutrition fact sources and algorithms. To obtain the most accurate nutritional information in a given recipe, you should calculate the nutritional information with the actual ingredients used in your recipe, using your preferred nutrition calculator.
I made as you said in the recipe, delicious. But, next time I will just use 1tsp of salt and not 1-1/4.
My kids just told me, yummy with some meat this will be perfect….kkkkk
Thank you for sharing 🙂
PS.: I use regular flour and was good.
These were delicious.
Mine ended up being drop biscuits, as the dough was pretty wet so I couldn’t form the rectangle. I gave up, added a bit more flour and dropped them on the pan. Still, the family raved; I told them that’s what you get when you bake with love(for the family)…and a little anger and hate (for the wet dough)!
Hi Mo, Glad your family enjoyed! It takes a little practice working with the wet dough. The trick is to flour the dough, the countertop and your hands and handle it very lightly so your hands don’t get sticky. Next time, start with 1/2 cup buttermilk and add the additional 1/4 cup as necessary. But drop biscuits work too 🙂
Thanks for the tip, Jenn!
Can you make ahead of time and freeze?
Hi Amy, Yes you can make them ahead of time but do not bake them. Place the raw biscuits in the freezer and put them directly in the oven…they may take a few extra minutes. Hope you enjoy!
This looks yummy and easy to do. But I don’t have a food processor. How would I overcome that? Sorry if this question seems ignorant to you. I never do baking at all, have no common sense either.
Hi Yan, Not a silly question at all! If you don’t have a food processor, you can either make the biscuits by hand (using a pastry cutter to “cut” the butter and cream cheese into the dry ingredients, or your fingertips to “rub” them in) or in a mixer with a paddle attachment. Just be sure the butter is very cold.
Thank you so much! WIll definately try it. I bet my kids will love it!
I love these biscuits – they’re the only ones I’ve made that are easy and come out light and fluffy every time.
We were on vacation and the rental property didn’t have a food processor or pastry cutter so I ended up grating the butter and it worked out perfect!
Hi Jenn, I want to thank you for your recipe for these buttermilk biscuits! I made them to have with my dinner tonight and they are by far the best biscuits I have made. You are the first to suggest a way around unavailable White Lily flour. I only made 1 substitution; I used yogurt thinned with a little milk in place of the buttermilk. The technique of cutting and stacking worked like a charm. I don’t have a food processor so I did them by hand, but no problem. Excellent! These will be my go to recipe and I won’t be disappointed again! Thank you.
I have always had trouble getting my biscuits to rise high enough to suit some. This recipe makes sense, I cant wait to try it. Any you are right, who says biscuits have to be round. Thanks for sharing!
So if I DO have White Lily Flour, how, if at all, would the recipe be altered? (I’m fortunate enough to have a boyfriend who brings me back 20 lbs of White Lily every time he goes down south, so my baking has improved accordingly!)
Hi Sheryl, Lucky you! Be sure it is regular White Lily Flour (not self rising) and just omit the corn starch and use 2-1/4 cups.
I don’t know why I never thought about cutting and stacking instead of folding. That’s genius.
One question: can the unbaked biscuits be frozen and baked from the freezer, or have you tried that with this recipe?
Hi Christi, I think that should work just fine to freeze and bake later…they may need a few extra minutes in the oven.
Great recipe! These were great with beef stew and with any breakfast.
I had just returned from my home state of SC with a bag or two of white lily flour, when I went to Wegman’s in Binghamton NY and found to my surprise…white lily flour. Who knew? Check it out if you have a Wegman’s near you. Thanks for the recipe, a little different from how I make biscuits, but always ready to try something new.
When I commented before, I had not made these yet. I did have the white lily flour, but made it according to your directions. They were easy, and good and loved that I didn’t have to use a cutter, although I have a square cutter. I typically don’t add cream cheese to my biscuits. They were a hit, and I served them with your fried chicken recipe. Both are a winner!