22 Quick and Easy Recipes in 30 Minutes (or less) + 5 Chef Secrets To Make You A Better Cook!

Crusty Artisan Bread

Tested & Perfected Recipes

This post may contain affiliate links. Read my full disclosure policy.

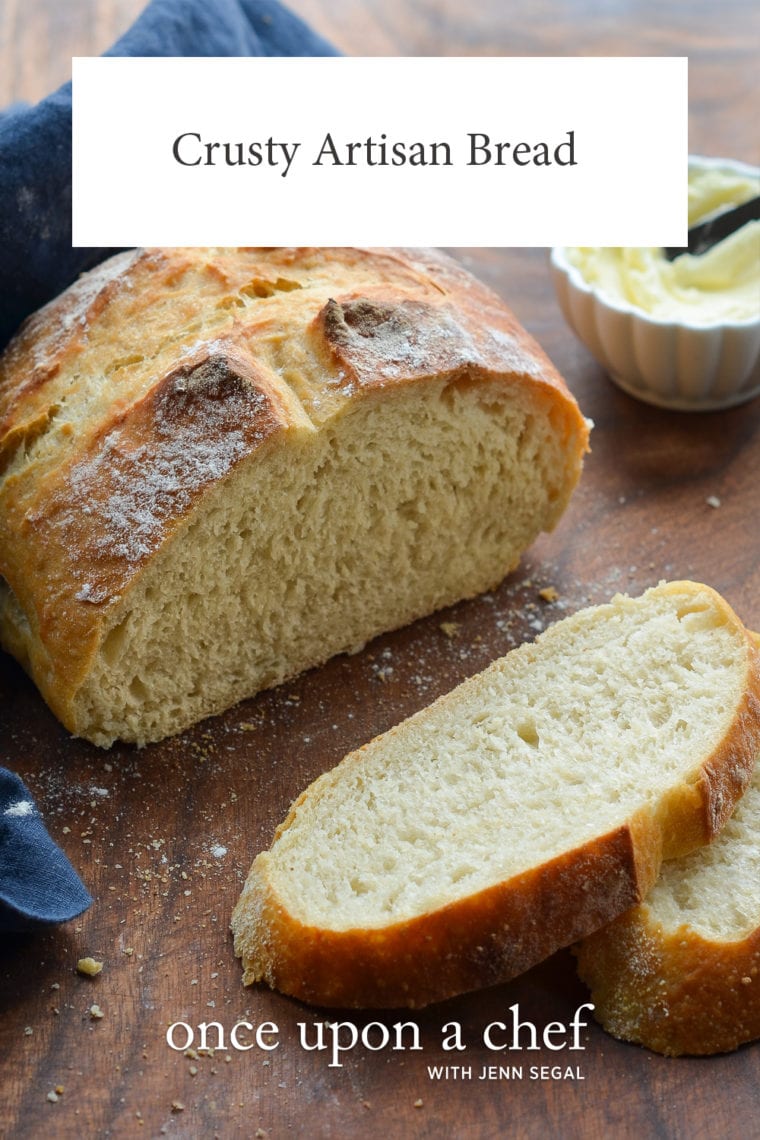
This crusty bread recipe is astonishingly easy — no kneading required — and makes three beautiful loaves, which you can bake as needed.

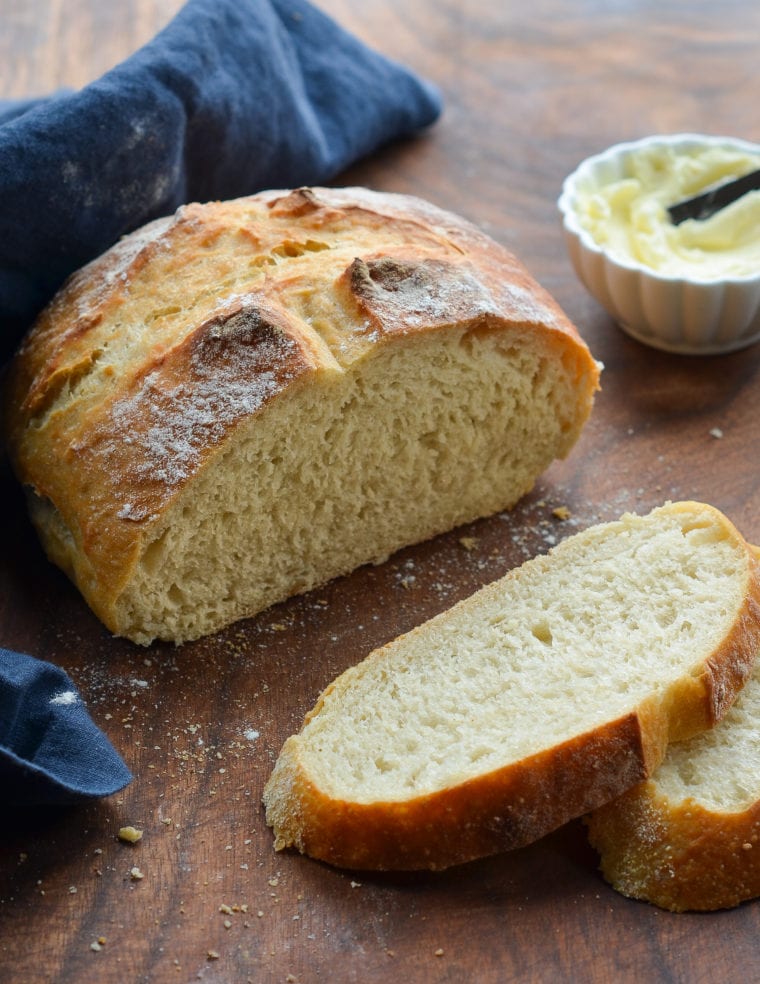
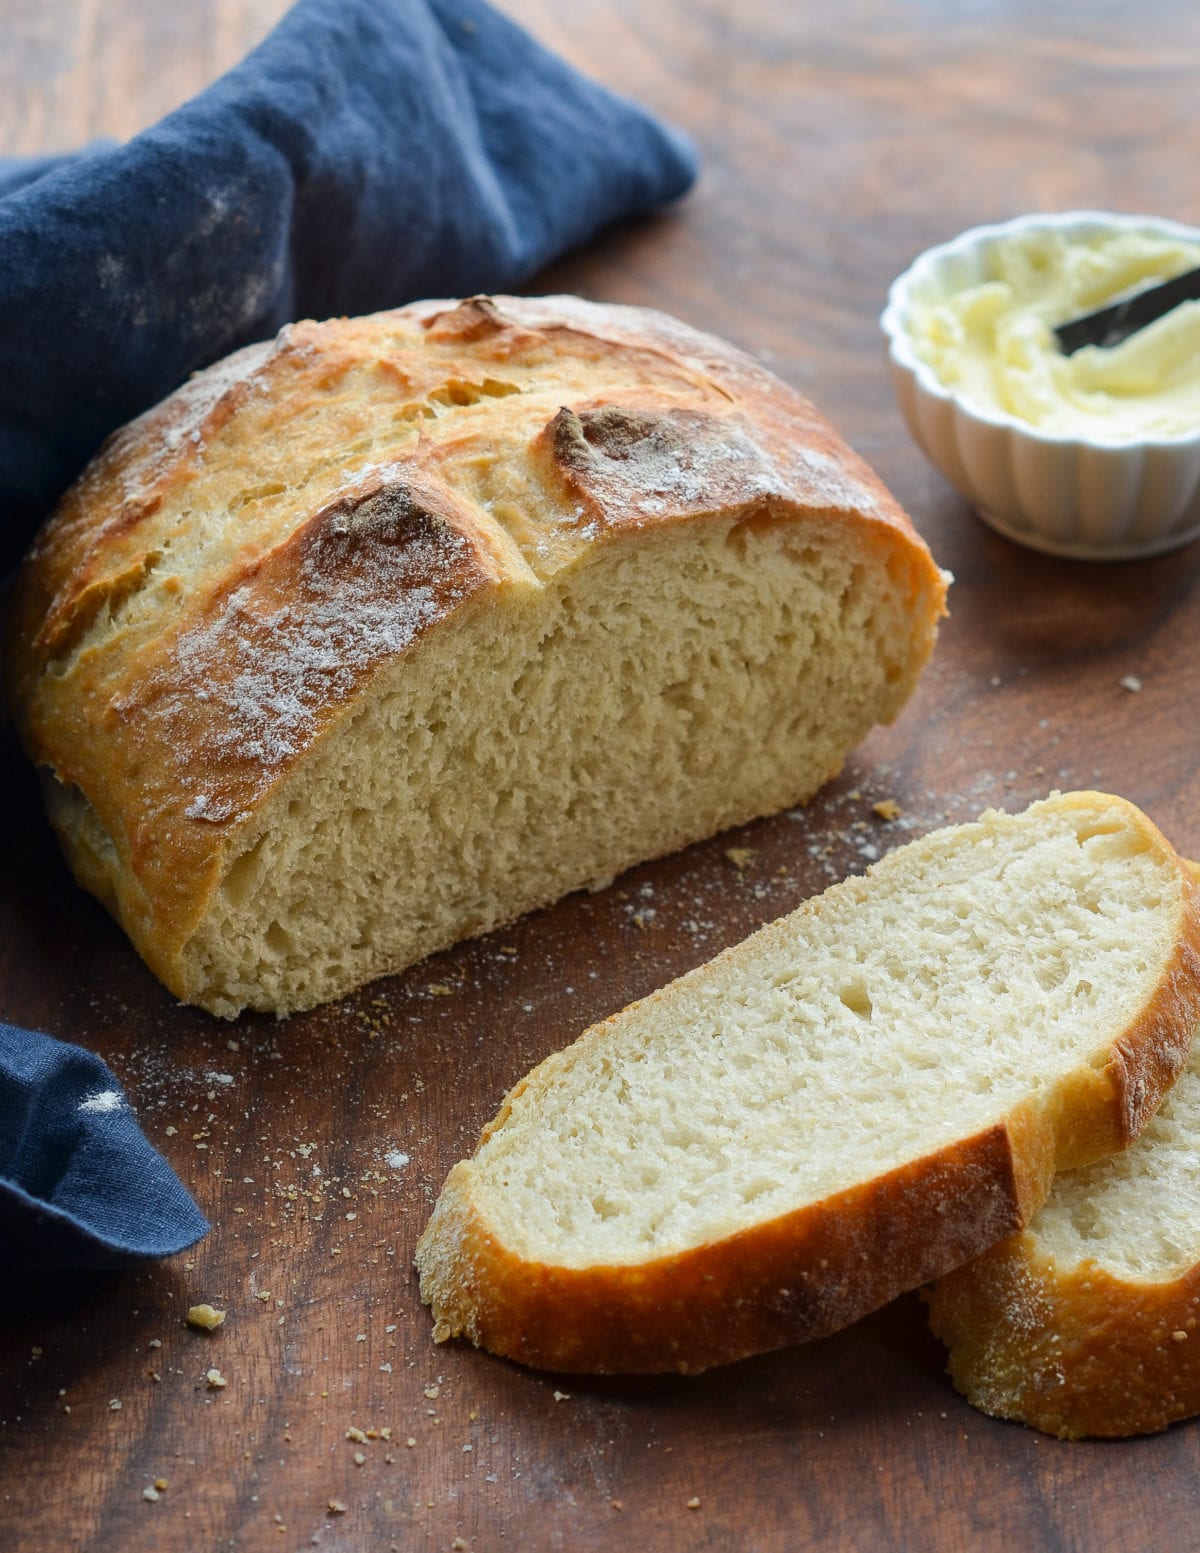
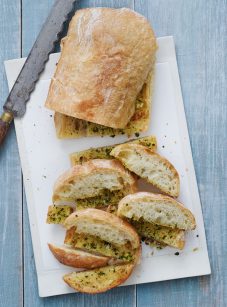
Partially-sliced loaf of crusty artisan bread.

This homemade artisan bread recipe is astonishingly easy, and it makes enough for three delicious loaves, which you can bake as needed. What’s more, the dough takes just five minutes to make, does not require kneading or any special equipment, and can rest in the fridge for up to two weeks (the flavor becomes more complex the longer it sits). The recipe is modestly adapted from one of my favorite baking books, Artisan Bread in 5 Minutes A Day by Jeff Hertzberg M.D. and Zoë François.

What You’ll Need To Make Crusty Artisan Bread
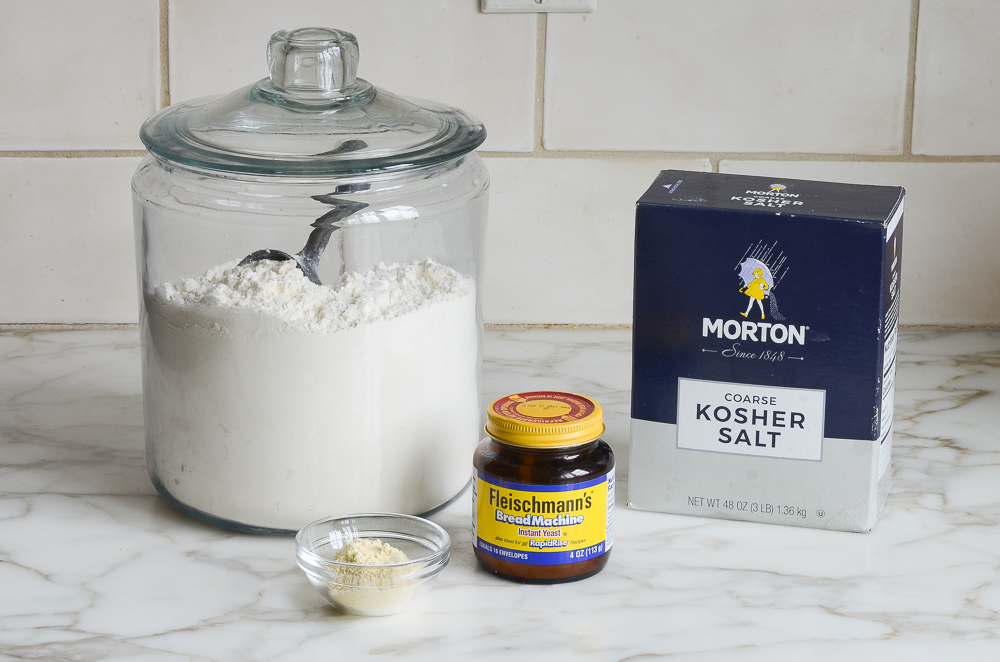
ingredients for homemade bread

This recipe has just four ingredients: all-purpose flour, instant yeast, kosher salt, and water. (The cornmeal is for dusting the pan.) As you can see, I use instant (or rapid-rise) yeast. Active dry yeast may be used instead of instant yeast, however, the dough will take longer to rise. To give active dry yeast a boost, you can dissolve it in the lukewarm water and let it sit until frothy, about 10 minutes. After that, add it to the flour and proceed with the recipe.

How To Make Crusty Artisan Bread

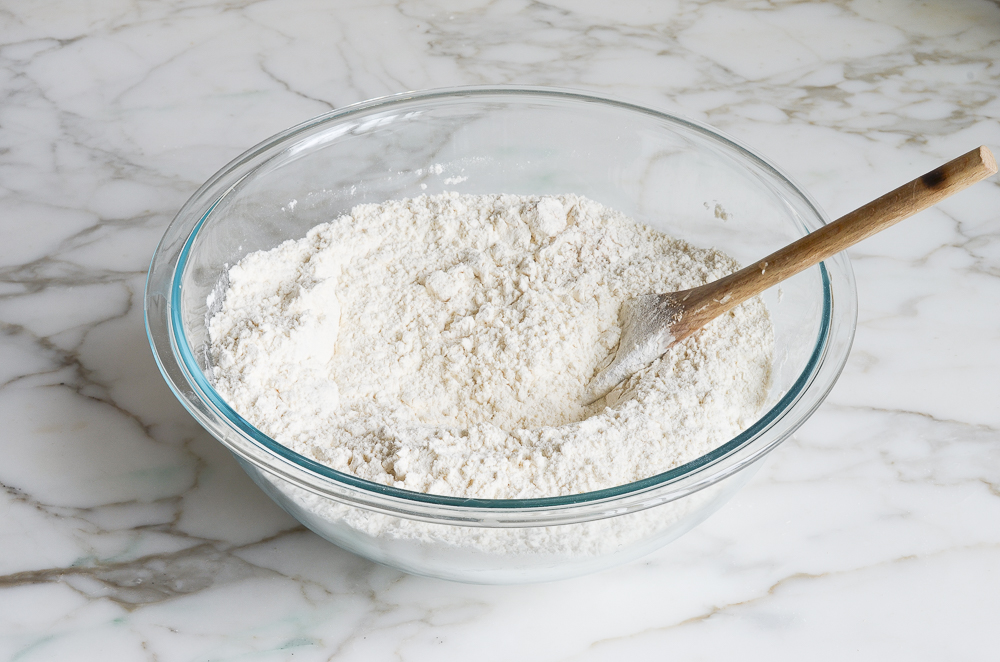
flour, yeast and salt in mixing bowl

In a very large (6-quart) bowl, combine the flour, salt, and yeast. Mix to combine.

mixed dry ingredients

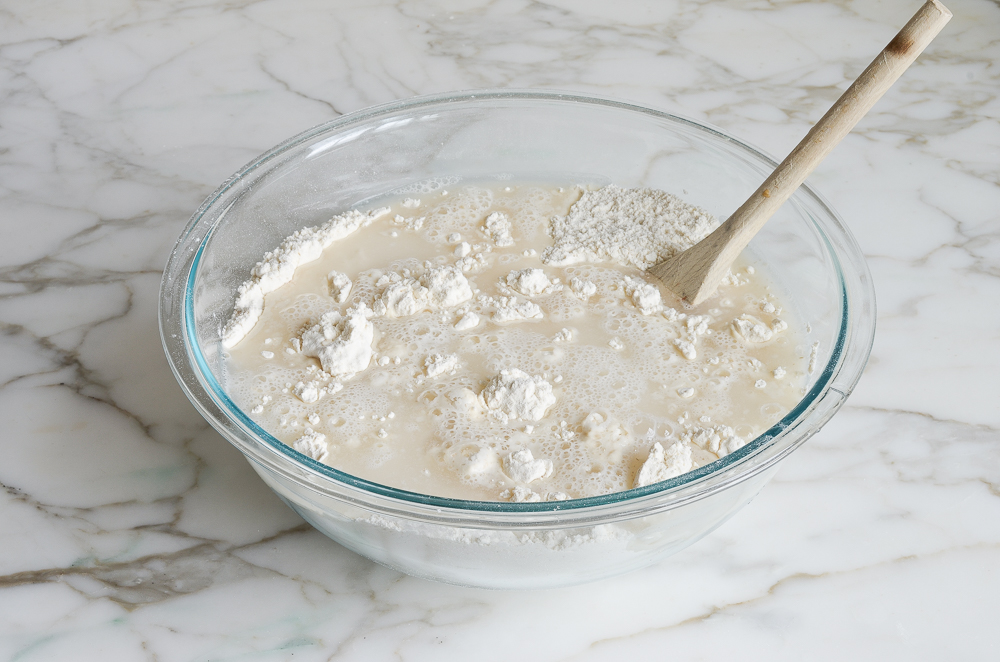
Add 3 cups of lukewarm water (no need to be exact but lukewarm is about 100°F).

Water in a bowl with dry ingredients.

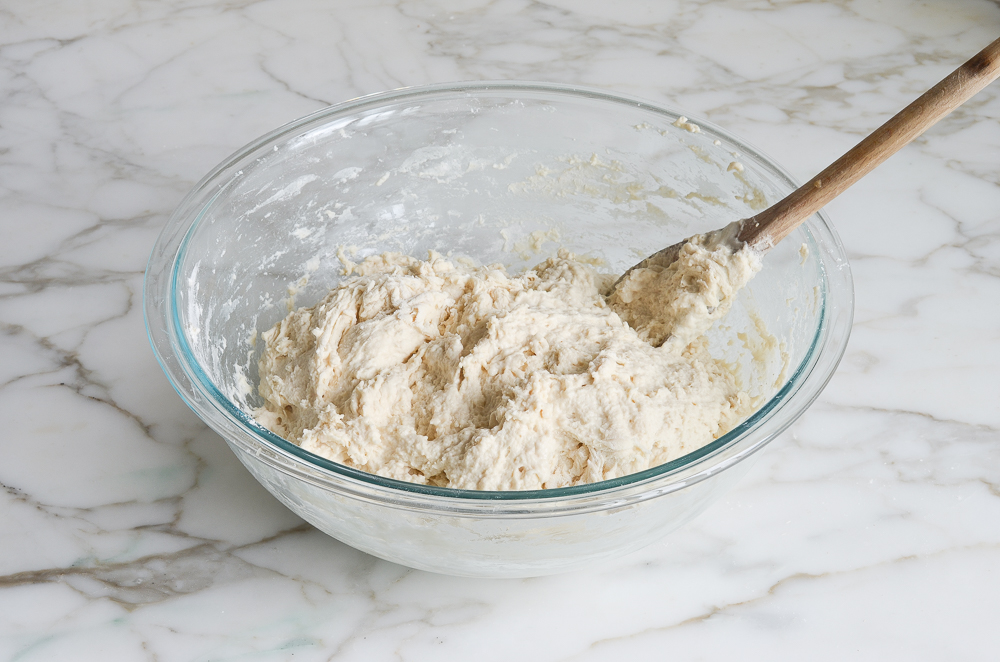
Stir with a wooden spoon until the mixture is uniformly moist, without any patches of flour.

Glass bowl of bread dough.

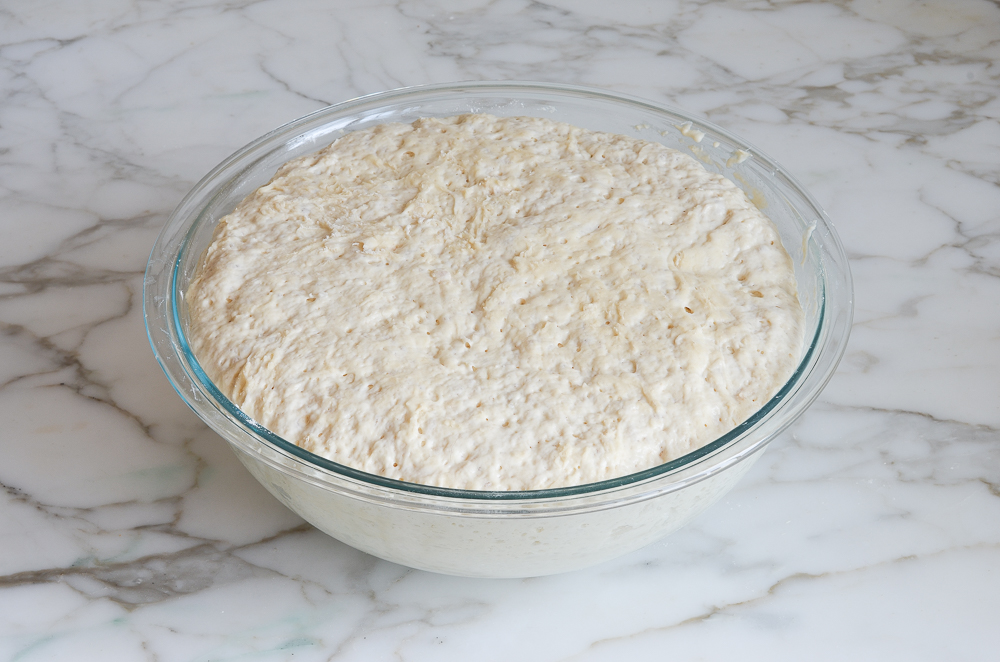
The dough should be sticky and conform to the shape of the bowl. If your dough is too dry, add a few tablespoons more warm water. If it’s too wet, add a few tablespoons of flour. Cover the bowl loosely with plastic wrap and let it sit on the counter in a warm spot for 2 hours. As you can see below, it will rise a lot!

dough after the first rise

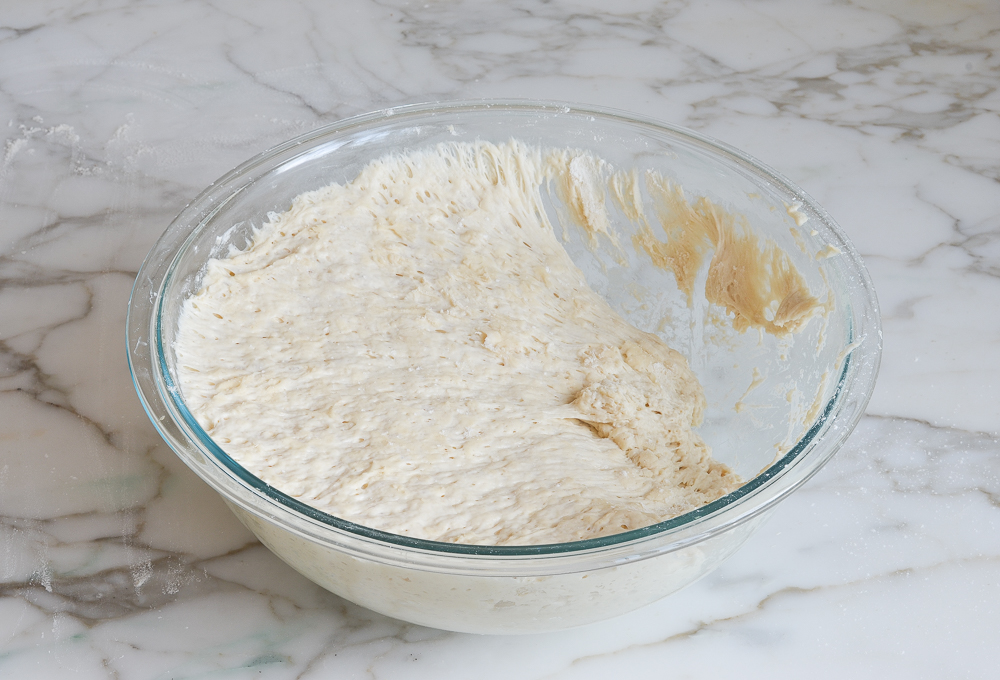
When you’re ready to bake a loaf, pull out one-third of the dough.

removing some of the bread dough from the bowl

Coat the outside lightly with flour (you don’t want to incorporate more flour into the dough, you just want to be able to handle it). Gently work the dough into a smooth ball, stretching the surface and tucking the ends underneath.

shaping the bread dough into a ball

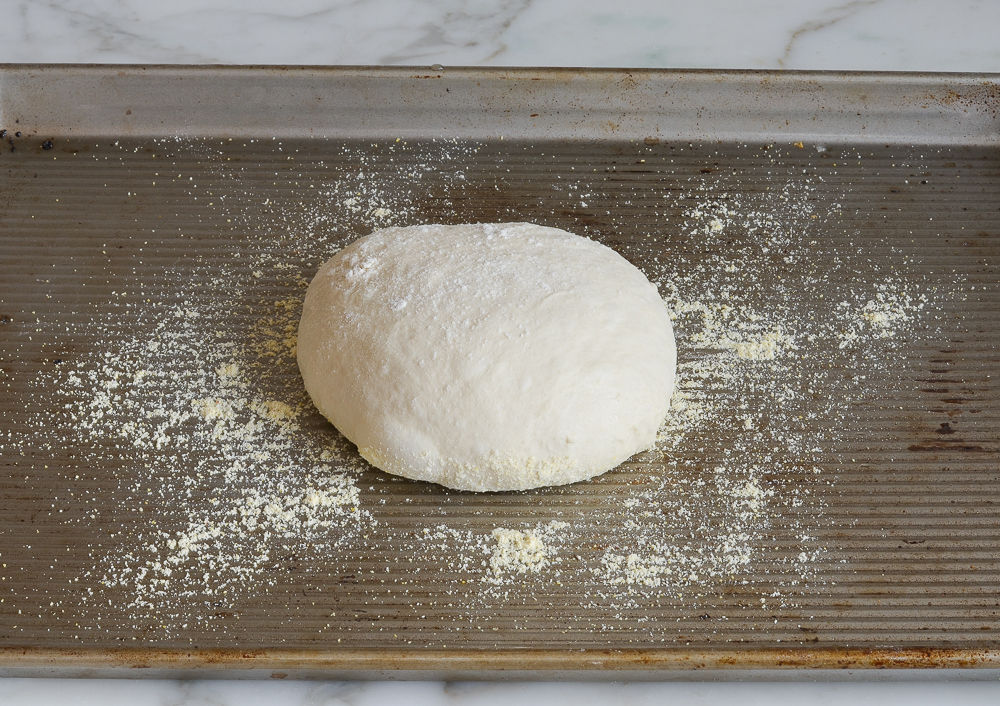
Put the dough ball onto a cornmeal-dusted baking sheet and let rest at room temperature, uncovered, for about 40 minutes. (If the dough has been refrigerated, allow it to rise for 60 minutes, or up to 90 minutes if you want a more open and airy crumb structure.) The dough will rise a bit. It may also spread/flatten a bit; that’s okay.

letting the bread dough rest on a baking sheet

The dough will rise a bit.

bread dough after second rise

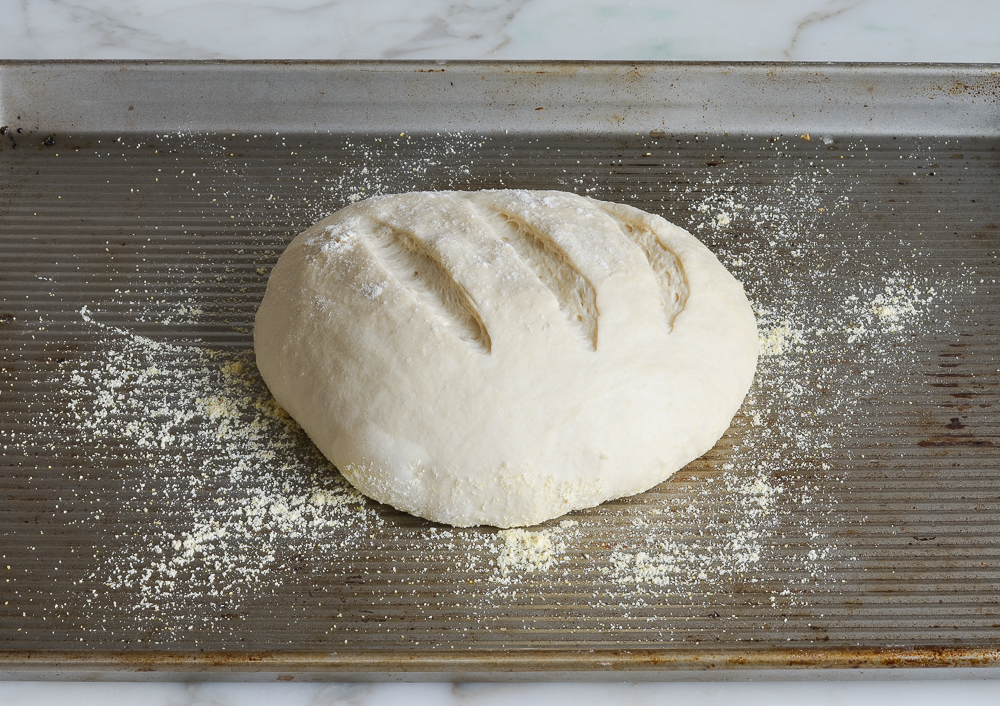
Generously dust the dough with flour. Using a sharp knife, make a few 1/2-inch-deep slashes in the dough — a scallop, cross, or tic tac toe pattern all look nice.

slashing the bread dough

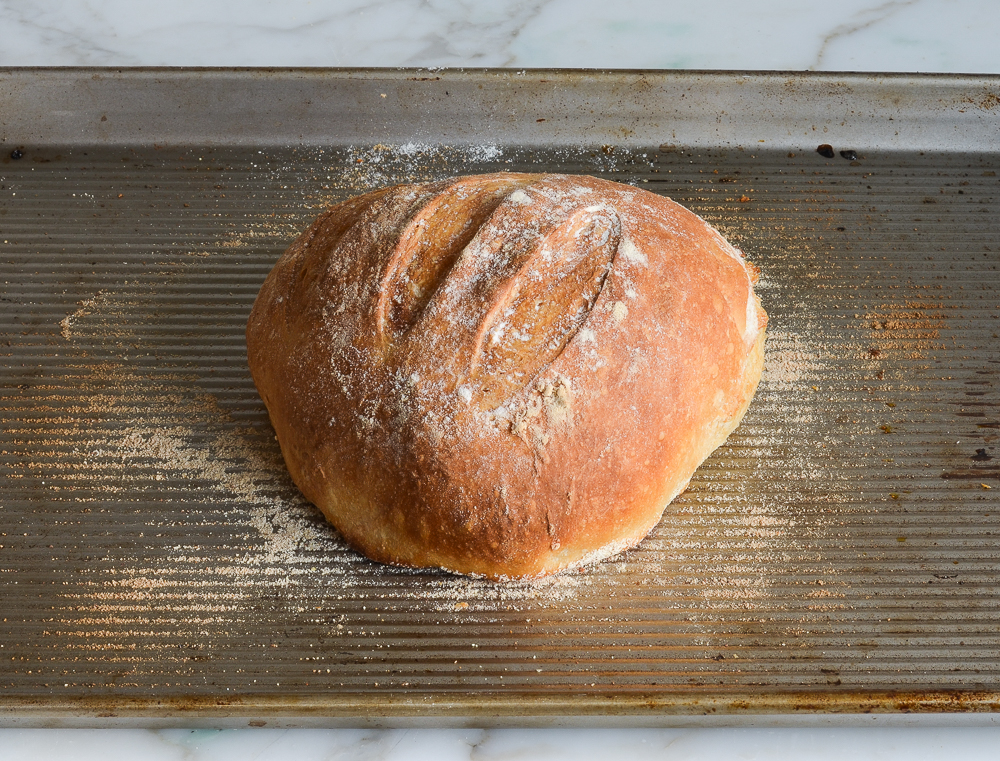
Set a metal pan on the bottom rack of a preheated 450°F-oven. Slide the baking sheet with the dough into the oven, and carefully fill the metal cake pan with one cup of hot tap water. This creates steam in the oven. (Try to do this quickly so as not to let heat out of the oven.) Bake until the loaf is golden brown, about 30 minutes. Cool completely on a wire rack.

Baked bread on a baking sheet.
This bread is best enjoyed fresh on the day it is made. Once sliced, place the loaf cut-side down on a cutting board or plate and leave it uncovered.

How To Freeze

The dough can be portioned into thirds and frozen in airtight plastic containers for up to 1 month. Defrost the dough in the refrigerator overnight, then shape, rest and bake as usual. The baked loaves can also be frozen whole or sliced. Wrap in a zip-top freezer bag and freeze for up to 1 month. To thaw, take the bread out of the freezer and let it come to room temperature, about 3 hours. Reheat in a 350°F oven until warmed through, about 10 minutes.

Partially-sliced loaf of crusty artisan bread.

You May Also Like

Crusty Artisan Bread

This crusty bread recipe is astonishingly easy — no kneading required — and makes three beautiful loaves, which you can bake as needed.

Servings: 3 loaves (about 10 slices per loaf)
Prep Time: 10 Minutes
Cook Time: 30 Minutes
Total Time: 40 Minutes, plus 2 hours and 40 minutes to rise

Ingredients

  • 6½ cups all-purpose flour, spooned into measuring cup and leveled-off (preferably King Arthur; see note)
  • 4 teaspoons kosher salt
  • 1½ tablespoons instant/rapid-rise yeast (see note)
  • 3 cups lukewarm water (no need to be exact but lukewarm is about 100°F)
  • Cornmeal, for dusting the pan

Instructions

  1. In a very large (6-quart) bowl, whisk together the flour, salt, and yeast. Add the water and stir with a wooden spoon until the mixture is uniformly moist, without any patches of flour. The dough should be sticky and conform to the shape of the bowl. If your dough is too dry, add a few tablespoons more warm water. If it's too wet, add a few tablespoons of flour. (See the step-by-step photos for guidance on what the dough should look like.) Cover the bowl loosely with plastic wrap and let it sit on the counter in a warm spot for 2 hours. If you plan to bake a loaf immediately, proceed to the next step. Otherwise, place the bowl of dough in the refrigerator to be used over the next 14 days. (Once refrigerated, the dough will shrink back a bit; that's okay. Do not punch down the dough at any point, and keep it loosely covered with plastic wrap.)
  2. Dust a sturdy baking sheet with cornmeal.
  3. Dust the surface of the dough and your hands lightly with flour. Pull out one-third of the dough and coat the outside lightly with flour (you don't want to incorporate more flour into the dough, you just want to be able to handle it). Gently work the dough into a smooth ball, stretching the surface and tucking the ends underneath, adding more flour as needed so it doesn't stick to your hands. (Don't overwork the dough; this process should only take about 30 seconds.) Put the dough ball onto the prepared baking sheet and let it rest at room temperature, uncovered, for about 40 minutes. (If the dough has been refrigerated, allow it to rise for 60 minutes, or up to 90 minutes if you want a more open and airy crumb structure.) The dough will rise a bit. It may also spread/flatten a bit; that's okay.
  4. Preheat the oven to 450°F. Set one rack in the lowest position of the oven and one rack in the middle position. Place a metal pan (any metal cake pan or broiler pan will work; just don't use glass) on the bottom rack. (You will fill this with water later to create steam in the oven).
  5. Generously dust the dough with flour. Using a sharp knife, make a few ½-inch-deep slashes in the dough -- a scallop, cross, or tic tac toe pattern all look nice.
  6. Slide the baking sheet with the dough into the oven, and carefully fill the metal cake pan with one cup of hot tap water. (Try to do this quickly so as not to let heat out of the oven.) Bake until the loaf is golden brown, about 30 minutes. Cool completely on a wire rack.
  7. This bread is best enjoyed fresh on the day it is made. Once sliced, place the loaf cut-side down on a cutting board or plate and leave it uncovered. (If it lasts beyond a day, I suggest slicing and freezing.)
  8. Freezer-Friendly Instructions The dough can be portioned into thirds and frozen in airtight plastic containers for up to 1 month. Defrost the dough in the refrigerator overnight, then shape, rest and bake as usual. The baked loaves can also be frozen whole or sliced: Wrap in a zip-top freezer bag and freeze for up to 1 month. (If you plan to use slices one at a time, place pieces of parchment between them so they don't stick.) To thaw, take the bread out of the freezer and let it come to room temperature on the countertop. Reheat in a 350°F oven until warmed through, about 10 minutes.
  9. Note: Active dry yeast may be used instead of instant/rapid-rise yeast, however, the dough will take longer to rise. To give active dry yeast a boost, you can dissolve it in the lukewarm water and let it sit until frothy, about 10 minutes. After that, add it to the flour and salt, and proceed with the recipe.
  10. Note: I use King Arthur flour, which is higher in protein than some other all-purpose flours. If using a flour with a lower protein content, such as Gold Medal, you will likely need to add a few more tablespoons of flour.

Nutrition Information

Powered by Edamam

  • Serving size: 1 slice
  • Calories: 100
  • Fat: 0 g
  • Saturated fat: 0 g
  • Carbohydrates: 21 g
  • Sugar: 0 g
  • Fiber: 1 g
  • Protein: 3 g
  • Sodium: 64 mg
  • Cholesterol: 0 mg

This website is written and produced for informational purposes only. I am not a certified nutritionist and the nutritional data on this site has not been evaluated or approved by a nutritionist or the Food and Drug Administration. Nutritional information is offered as a courtesy and should not be construed as a guarantee. The data is calculated through an online nutritional calculator, Edamam.com. Although I do my best to provide accurate nutritional information, these figures should be considered estimates only. Varying factors such as product types or brands purchased, natural fluctuations in fresh produce, and the way ingredients are processed change the effective nutritional information in any given recipe. Furthermore, different online calculators provide different results depending on their own nutrition fact sources and algorithms. To obtain the most accurate nutritional information in a given recipe, you should calculate the nutritional information with the actual ingredients used in your recipe, using your preferred nutrition calculator.

See more recipes:

Comments

  • Hi. I’d like to try this recipe (I have make NYTimes version) I appreciate your easy to follow directions. I’m wondering if your recipe is the same hydration as your inspiration recipe from hertzberg. I just ordered that on Amazon but might not arrive for a couple days. I’d like to keep the dough in the fridge and whip up a loaf each day. He said the hydration ratio was important.

    • — Linda Polster on November 27, 2022
    • Reply
    • Hi Linda, the hydration ratio is the same. Hope you enjoy the bread!

      • — Jenn on November 30, 2022
      • Reply
  • Hi – I am so disappointed because I must have done something wrong. The dough rose beautifully and looked like yours after 2 hours. When I tried to remove 1/3 and shape it into a smooth ball, it was so sticky, I could not shape it. I tried working in more flour, but I was trying to keep it to a minimum. I finally got it into a round, flat shape but it was not smooth. At this point, it probably has been over worked and even if it rises, will be as hard as a brick. What do you think I did wrong? When I removed a third of the dough after it had risen, the consistency was very webby.

    • — Sue on November 27, 2022
    • Reply
    • Hi Sue, this is a very sticky dough but I’m sorry you struggled with it. What brand of flour did you use? How did the bread come out?

      • — Jenn on November 29, 2022
      • Reply
      • Hi Jenn – I used King Arthur flour. The bread come out OK. It did not rise as much as yours but it was tasty. It was almost like a ciabatta.

        • — Sue on November 29, 2022
        • Reply
        • I’m guessing that you may just not have used enough flour. I wouldn’t be afraid to add a bit more.

          • — Jenn on December 1, 2022
          • Reply
  • I have been making this recipe for years. My quest was to get the best crusty crust. I finally arrived at baking it in a covered cast iron Dutch oven (not a glazed one…the old fashioned one). I preheat the Dutch oven in the oven for about 35-40 minutes while the dough is resting. I typically put the dough in a dough basket with a cloth liner, this helps to make the transfer of the dough to the hot pot easier. After transferring the dough, I use kitchen shears to make the cuts on the top, then cover with the lid and bake for 30 minutes. I remove the lid, turn on the convection fan, and cook for an additional 5-7 minutes. Remove from the pan and cool on a wire rack.

    • — Diane Decker on November 26, 2022
    • Reply
  • Easy and amazing – perfect! My family raves every time I make this. I also love that I can put some in the freezer for future use. Another hit, Jen!

    • — Sara Wade on November 17, 2022
    • Reply
  • The water evaporated on the baking sheet and my smoke alarm went off. Disappointed. Will look for different recipe.

    • — Kathleen Murphy on November 17, 2022
    • Reply
    • You aren’t supposed to use a baking sheet for the water – it needs to be a baking pan (for cakes) with higher edges.

      • — Sandra D on June 1, 2023
      • Reply
  • Love the look of this bread recipe but, is it possible to give the quantities in grams? Cups are so inexact

    • — James Cairns (In the UK) on November 16, 2022
    • Reply
    • Hi James, The great majority of my recipes (including this one) include conversions to metric/weight measurements. To view them, scroll down to the recipe, and immediately under the recipe title on the right side, you’ll see a little toggle. If you move it from “cup measures” to metric, you’ll see measurements that will work for you. Hope that helps!

      • — Jenn on November 16, 2022
      • Reply
    • We have a conversion chart that can be used when needed,many cookbooks have them in the back by the index.Sometimes it`s better to go by feel,to sticky? Add flour.To dry? Add water.

      • — lowandslow on November 26, 2022
      • Reply
  • Hi Jenn,
    I only have a 4 quart mixing bowl. Will I be able to use this one or do I need to cut the recipe in half.

    • — Sandy M on November 6, 2022
    • Reply
    • Hi Sandy, I’d recommend cutting the recipe in half. Hope you enjoy!

      • — Jenn on November 7, 2022
      • Reply
  • I’ve made this bread numerous times and it is over the top delicious! I actually made two of them last Thanksgiving, made bread cubes out of them, and used it in your stuffing recipe. My guests went nuts and made me promise to do it again this year. Is it possible to bake it in a cast iron Dutch oven? Thank you in advance for your answer. 😊

    • — Lori on October 10, 2022
    • Reply
    • So glad you like the bread! I’ve never made it in a Dutch oven, but a number of readers have commented that they have successfully.

      • — Jenn on October 11, 2022
      • Reply
  • Hi Jenn,
    I have a vigorous sourdough starter on my counter and wondering if I could swap some of it in, in lieu of the yeast? Part of the charm of your recipe is its ease and unfussiness so seems silly to complicate it. Just want to put my starter to use and all the sourdough recipes I’ve read literally involve an entire day of kneading and rising….
    Thanks!

    • — Adrienne on September 26, 2022
    • Reply
    • Hi Adrienne, Because I’ve never tried this with sourdough starter, I’d be hesitant to recommend it here — sorry!

      • — Jenn on September 27, 2022
      • Reply
  • Wonderful! Been giving loaves to friends and they can’t get enough. One recipient asked if I had a professional baker’s oven LOL! No, I actually use my large toaster oven and it comes out beautifully. I’ve a request for a boule with raisins, so that is my next project. I would attach a photo but I don’t do instagram. Thanks for a simple, chewy, soft, rustic recipe!

    • — Sue on September 12, 2022
    • Reply
  • I have coarse salt and Himalayan salt but not kosher salt. What would be a good substitute. Thanks. I love your site. Recipes are no fail and delicious. You are my go to

    • — Cindy on August 18, 2022
    • Reply
    • Either one is fine but I’d probably go with the Himilayan. Hope you enjoy the bread!

      • — Jenn on August 19, 2022
      • Reply
  • Jenn I have a question this is my second time making the recipe, it’s great . The bread has completely stuck to the pan even with cornmeal on two occasions. What did I do wrong? Thanks Emilie

    • — Emilie on July 30, 2022
    • Reply
    • Hi Emilie, Sorry you had a problem with the bread sticking! Next time you may want to try parchment paper or grease the baking sheet with nonstick cooking spray.

      • — Jenn on July 31, 2022
      • Reply
    • I use a silpat under mine and it works perfectly!

      • — Sara Wade on November 17, 2022
      • Reply
  • I love this recipe but when I freeze my extra loaves that have been cooked the crust is very flaky , it still tastes good but it doesn’t look nice

    • — Linda on July 9, 2022
    • Reply
    • What am I doing wrong? My cooked loaves are very crumbly after freezing.

      • — Linda on August 18, 2022
      • Reply
      • Hi Linda, you mentioned in your last comment that the crust is flaky after freezing. Is it just the crust you’re referring to here or is the interior of the bread as well?

        • — Jenn on August 18, 2022
        • Reply
  • Made for the first time this afternoon. Easy and delicious! Your recipes are awesome….they consistently turn out perfectly! Thanks so much.

    • — LSisson on May 26, 2022
    • Reply
  • Hi Jenn
    I have been making this wonderful bread for at least a year. The question I have is that over the past few months, the bread is not rising as much as it did in the past and the size of the loaves are a lot smaller. Same great taste but not so big. My other bread recipes have stayed the same so I can’t see a problem with my yeast. Do you have a test to see if yeast is still o.k.? Any helpful ideas on this ‘small’ problem?
    Thanks for every one of your recipes!
    Tannis

    • — Tannis on May 20, 2022
    • Reply
    • Hi Tannis, That’s so strange. I automatically assumed it was your yeast, but it confuses me that your other breads have been okay. Here’s some guidance on how to test your yeast. Please LMK if I can help in any other way.

      • — Jenn on May 20, 2022
      • Reply
    • Has your climate changed drastically over the past months? Perhaps your other breads have other leaveners, such as eggs or soda, whereas this recipe only relies on the yeast, which is more dependant on ambiant temperature and humidity. Just a few thoughts. Hope you figure it out soon!

      • — Emm on June 27, 2022
      • Reply
  • Can you use Almond flour instead to make it gluten free? Have made this bread numerous times and really enjoy eating it. Great recipe. Thank you

    • — Charles J Meyers on April 25, 2022
    • Reply
    • So glad you like it, Charles! I wouldn’t recommend almond flour here though — sorry!

      • — Jenn on April 25, 2022
      • Reply
      • Could you use gluten free 1:1 flour?

        • — Joani on November 26, 2022
        • Reply
        • Hi Joani, I haven’t made this with gluten-free flour so I can’t say for sure how it would turn out – I’m sorry! If you do happen to try it please LMK how it turns out!

          • — Jenn on November 27, 2022
          • Reply
  • This recipe is so good – I could just live on this bread! Thank you, thank you, thank you Jenn.

    • — Neena Monteiro
    • Reply
  • Believe the 5 star reviews. Just made this, blown away how good this is!!! Bakery quality artisan bread. LOOK NO FURTHER!

  • Hi Jenn..this is my 1st attempt to make bread. I made the 3 loaves for a Lenten soup/bread dinner. 31 attended and the response was extremely favorable. I did have trouble with the directions as my dough rose a good 2″ above the bowl. I put the dough into the refrig to stop the rise…then pulled out dough for 3 loaves. I baked the first 2 for 30 minutes and they were not golden but looking at the picture I thought it was okay. then I put in the last loaf and that one came out with more color so I put the first two back into the oven for 10 minutes. I might think all 3 loaves were more dense than yours, however, all went well and no one became sick nor complained.
    I want to make 2 copies for friends however the print is soooo small they would not be able to read the directions. Do you know how to use a larger font when printing?

    I have used so many of your recipes however my first for bread making. I did take a picture however I do not know Instagram. sorry.

    • — Dorothy Datemasch
    • Reply
    • Hi Dorothy, glad that the bread came out nicely despite some concerns when the dough was rising! When printing, I believe that if you want to make the text larger, you’d need to change a setting in your printing preferences (versus something on the website). You may be able to google it if it’s not clear when your print dialogue box pops up.

  • Thank you so much, since finding this recipe a week ago I’ve made 6 loaves. There’s nothing like the smell and taste of fresh homemade bread. The recipe is so simple and efficient.
    Tim. Z.

  • This recipe began my journey to bread making. I now believe anyone can make bread!! Super simple recipe. I’ve had dough that was too wet- too dry- once I even threw all the dry ingredients in a bowl and forgot to mix it before throwing water on top- pink blotches of Himalayan pink salt were non dispersed and glaring at me as I over mixed the dough in an attempt to mix it together last min- still good bread! I’ve added sliced garlic and rosemary to the dough which was lovely.. and we always have left overs and never slice and freeze. We just put it in a big zip lock bag and eat it for days.. I’ve thrown the whole loaf to reheat in the oven and it is just as good, it’s also great sliced in the toaster as well for morning toast.

    Thank you, thank you!

  • This recipe was easy and delicious. A keeper for sure. Thanks Jen you are wonderful to have this site.

  • I loved this recipe. So easy, so good. The crust was perfect when it came out of the oven but the next day, it had lost the crisp texture. I did put it in a plastic bag overnight. Could that have caused it, or is this normal. Thanks again.

    • Hi Bill, glad you like the bread! Putting the bread in a plastic bag would have caused it to lose its crisp texture. The next time you make this, leave any uneaten portion of the loaf cut side down on a cutting board or plate (uncovered). Hope that helps!

  • Hi Jenn,
    Thanks for sharing this wonderful recipe. I make it often. I have some bread flour that I’d like to use. Would bread flour work in this recipe? I don’t want to change the outcome because it has become one of our favorite breads.
    Shirley

    • — Shirley Limoges
    • Reply
    • Hi Shirley, So glad you like the bread! Yes, you can use bread flour but you’ll need to increase the water by 1/3 cup to start and add more if needed.

  • Made this yesterday and made one loaf (1/3 of batter) and enjoyed it toasted with a full Canadian breakfast this morning, yum yum! Very easy recipe and delicious. Thanks

  • Thank you for this recipe, Jenn! It’s perfect for the two of us. I did as you suggested, made 1 loaf, it came perfect and delicious. We had it with pasta tonight. I can’t wait to make another loaf!

    • Jenn, I have made this bread so many times and everyone loves it! What do you think about making small dinner rolls instead of larger loaves?

      • — Joan on February 26, 2023
      • Reply
      • Hi Joan, I think that should work; the cook time will be shorter.

        • — Jenn on February 27, 2023
        • Reply
  • Can rye or whole wheat flour be substituted and if so any modifications need to be done?

    • Hi Kc, I’ve only made this with all-purpose flour so I can’t confidently say how it will turn out with different kinds of flour. King Arthur has a variety of bread recipes that call for whole-grain flours if you want to check them out here. And if you have any interest in buying a cookbook, this recipe was adapted from cookbook authors Jeff Hertzberg M.D. and Zoë François and they also have a book that focuses on whole grain bread recipes.

    • Hi KC,
      I’ve experimented with different amounts of WW flour, and found that 2 cups is the most I can get away with and still keep the rise, texture and chewiness that we so love. That would be a good place to start.
      I wish you baking success!

      • — Sue on September 12, 2022
      • Reply
  • Hi there—can you add things to this bread without affecting how it comes out? I’m wondering about things like roasted garlic, sun-dried tomatoes, etc.—or any suggestions you might have, thank you 🙂

    • Hi Ali, I’ve never tried adding anything to the dough so I can’t say for sure, but a few readers have commented that they’ve added some extras like a bit of cheese or raisins successfully. Please LMK how it turns out if you try it!

  • This recipe is perfect as is! Thanks for a recipe i use over and over.

  • I am really looking forward to trying your bread. I am getting hungry just looking at the pictures. I was wondering if this recipe can be easily modified to make, say, an asiago or multi-seeded/multi-grain version? Thx

    • Hi Greg, I do think you modify it. You may want to get the cookbook, as they provide lots of variations and recipes. It’s one of my most-used books.

  • I have two questions . Can bread flour be used and if so any conversion? Also this is fabulous as written but I would like to take it a step further. Can I add slivered garlic or fresh rosemary and not change the texture? I did lightly oil the top with evoo and a few sesame seeds of one loaf and it was delicious. Just wondering what alterations can be made and still have it turn out perfect!

    • Hi Michelle, I think bread flour would work, but the bread will be a little chewier; just increase the water by 1/3 cup. And I do think you could add garlic and rosemary.

  • Great recipe and so simple to make. Thanks Jenn, we loved it 😋 and considering it was my first time baking bread, I’m super happy with the results. I knew Jenn’s recipe would be perfect, so I followed it and just reduced the amounts to make 2 loafs. I used Fleischmann’s active dry yeast and followed manufacture’s directions to proof yeast. As someone with severe allergy to sesame, I’m very limited which breads I can eat as most contain or may contain sesame 😢 Luckily we have Dimpflmeier breads in Ontario and this German bakery makes healthy breads without sesame. Baking my own bread is a great alternative and next time I plan to add caraway seeds.

  • This bread recipe is the only one I use. It’s fantastic. A couple of changes I’ve made over time : first, 3 cups of water is not enough. I find I am adding 4 to get a nice consistency. Then, I use a Dutch Oven to cook the bread – best bread I’ve ever made.

    • I’ve never baked bread before, but this recipe sounds easy to make. 3 questions :
      Do you cover the Dutch Oven?
      What size did you use &
      Do you still do the pan with water for steaming?
      Looking forward to your reply.

      • — miriam sulfaro
      • Reply
  • I’m in the middle of making my first loaf, bravo!

  • The bread is excellent and easy to make. Made this recipe and the french onion soup recipe today during the blizzard and they were both amazing. My family loved them – a perfect “cozy day” pairing.

  • Can I substitute a lesser amount of sea salt for the kosher salt? I am making your chili recipe today and would like to make the bread to serve with the chili.

    Thanks,
    Liz

    • Hi Elizabeth, the difference in salt won’t be significant, so you can stick to amount of salt that the recipe calls for but feel free to cut it back a touch if you’d like. Hope you enjoy!

      • Wow, really surprised as well as disappointed ( since I have your cookbooks ) that you’d say it’s okay to use the 4 teaspoons of whatever salt you want.

        Kosher Salt (with the exception of Morton that’s already overly salty due to anti caking additives ( Kosher Diamond Chrystal Salt being the most popular with pro bakers and home bakers) is not the same as table salt or finer grind sea salt, you have a subtle salty taste but no more than that with Kosher salt. I could not imagine trying to eat a nice warm slice or chunk of bread made with so much table or sea salt as that is all you’re family is going to taste. Also, for anyone who’s interested, if you find you’re not getting a very good rise even though your ingredients are fresh, make sure the salt and yeast are not touching each other in the bowl.

  • Sorry if this question has already been posted and answered but with nearly 600 comments for this recipe, it’s hard to know! Made this bread recently and it’s very good. The longer the dough stays in fridge the better the outcome. I would like to make these loaves a bit healthier. To what extent can I substitute some of the AP flour with whole wheat?

    • So glad you’ve enjoyed this! I’ve only made this with all-purpose flour so I can’t confidently say how it will turn out with different kinds of flour. King Arthur has a variety of bread recipes that call for whole-grain flours if you want to check them out here. And if you have any interest in buying a cookbook, this recipe was adapted from cookbook authors Jeff Hertzberg M.D. and Zoë François and they also have a book that focuses on whole grain bread recipes.

  • I love this recipe as written! I’ve made it many times and it makes a fabulous bread!

    Do you have any suggestions for adding whole grain flour to this dough? I was thinking about substituting 1 cup (or 1.5 cups) of the all purpose flour with 1 cup (or 1.5 cups) of whole wheat flour or white whole wheat flour. I’m open to adding another type of whole grain flour, if you think that would work better. With the addition of whole grain flour, I’m guessing the dough would need more hydration, but I’m not sure how much for this type of bread. Do you have any suggestions? Thanks very much.

    • Hi Pam, so glad you like this! I’ve only made this with all-purpose flour so I can’t confidently say how it will turn out with different kinds of flour. King Arthur has a variety of bread recipes that call for whole-grain flours if you want to check them out here. And if you have any interest in buying a cookbook, this recipe was adapted from cookbook authors Jeff Hertzberg M.D. and Zoë François and they also have a book that focuses on whole grain bread recipes.

  • Delicious. I see that you show 100 calories per serving but how many servings are in one loaf please?

    • Hi Marcie, I based the nutritional info on the assumption that each loaf will yield about 10 slices. (I’ve added that to the recipe.) Hope that helps!

  • So good, I’m having one for breakfast. Great results looks exactly as shown.

  • Jenn,
    Can I make this crusty artisan bread in a dutch oven? The size of mine is 2-quart.
    Eloise

    • Hi Eloise, It may fit but it could be a little tight. To remove any guesswork, you may want to stick with the baking sheet. Hope that helps!

  • This was the easiest bread I’ve made – results are crusty and flavorful as promised.
    Having remaining dough in fridge allowed for fresh baked bread 2 days later with little effort.
    (It did continue to rise under refrigeration – be sure to put it in a larger bowl.)

  • Does it make a difference if you use non-bleached flour vs. bleached flour?

  • Many thanks for this easy, delicious recipe, Jenn. Yours are never fails and always delicious.

    Request: the next time you make this recipe, would you mind please weighing the flour and letting us know how many grams you used? I’ve gotten out of the scoop-flour-to-measure routine and find it quite inaccurate – and I also lose count 😉 Weighing is much simpler for me.

    According to King Arthur’s weight chart (https://www.kingarthurbaking.com/learn/ingredient-weight-chart) 1 cup of their AP flour is 120 g, so that should mean the total weight is 780 g unless my calculator is messed up. Curious to know if that’s what you use.

    Thanks!

    • Hi, So glad you like the bread! The great majority of my recipes (including this one) include conversions to metric/weight measurements. To view them, scroll down to the recipe, and immediately under the recipe title on the right side, you’ll see a little toggle. If you move it from “cup measures” to metric, you’ll see measurements that will work for you. My conversions are slightly different from what you mentioned. I find that 1 cup of all-purpose flour weighs 130 grams so you’ll see that the recipe calls for a total of 845 grams of flour. Hope that helps!

  • I’ve now made this recipe twice…both times they came out great. Except…the top gets browned, tapping the breads sound hollow as they should, but the bottom of the loaves are still whitish. I didn’t have corn meal to put on the bottom of the baking sheet, so I used flour. Is this why they didn’t brown up? Other than that issue, this recipe is a keeper.

    • Hi, if you put flour on the pan, that is likely leading to some of the white color you see on the bottom of the bread. As long as it’s done on the inside and cooked to your liking, I wouldn’t worry about it.

  • The only no knead bread I make now.
    I’ve tried so many no knead breads using a dutch oven or a sheet pan and this is the only one that doesn’t give me that extremely hard bottom crust. I cut the recipe in half and it makes enough for the 2 of us. I put it on a mini sheet pan on parchment paper, because we do not like the crunchy corn meal. It always comes of delish!.
    Thank you so much for this recipe.

    • — Pumpkinpie101997
    • Reply
  • Again, my go-to recipe source is a winner. I made this bread today and it’s the best ever of what I’ve made. In my opinion, it’s better tasting and easier to make than the Dutch Oven bread I’ve been making.

  • Made this recipe and it is so easy and so good! Had a few questions but everything I needed to know was answered in replies to other peoples comments. I love this web site! Thanks Jenn!

  • I’ve made this bread a bunch of times, absolutely fantastic by the way, but I was wondering how I would make it if I wanted to bake it as 1 loaf in a Dutch oven ?

    • Hi Jaymie, Glad you like it! You can bake it in a Dutch oven just as the recipe indicates; I’d keep it covered for 20 minutes and then remove it for the last 10 minutes of baking. Hope that helps!

      • Hi Jenn, I am also wanting to use a dutch oven. Just wondering if I should still put a cake pan with water in it at the bottom of the oven or is it redundant because we are using a dutch oven (ie. the dutch oven would give the same effect)? Thanks so much!

        • Hi Cherice, If using a Dutch oven, I think you can get away without the water. Hope you enjoy!

  • Sorry, let me send this again!! Seems my other message disappeared. So I let the dough rise for the 2 hours, and now I split it in 3. Before freezing, do I let it rise for the other 40 minutes again? I’m making only one loaf this evening and freezing the other 2. Thank you so much.

Add a Comment

This site uses Akismet to reduce spam. Learn how your comment data is processed.